Your cart is currently empty!
Tag: soil
-

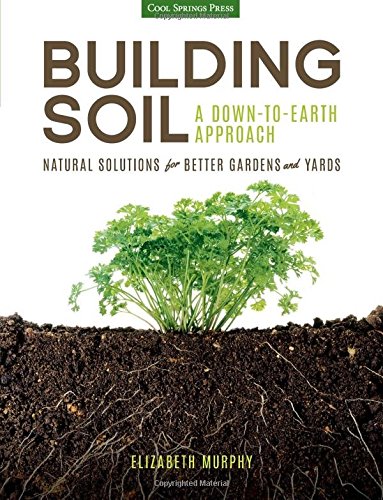
Building Soil: A Down-to-Earth Approach: Natural Solutions for Better Gardens & Yards
This is your down-to-earth, complete manual for achieving great gardening results with your own rich, organic soil! How do you recognize healthy soil? How much can your existing soil be improved? What are the best amendments to use for your soil? Let Building Soil answer your questions and be your guide on gardening from the…;
Cool Springs PressPrice:
$22.99$20.17 Free Shipping
This is your down-to-earth, complete manual for achieving great gardening results with your own rich, organic soil!
How do you recognize healthy soil? How much can your existing soil be improved? What are the best amendments to use for your soil? Let Building Soil answer your questions and be your guide on gardening from the ground up! Fertilizing, tilling, weed management, and irrigation all affect the quality of your soil. Using author Elizabeth Murphy’s detailed instructions, anyone can become a successful soil-based gardener, whether you want to start a garden from scratch or improve an existing garden.
If you want methods that won’t break your back, are good for the environment, and create high-yielding and beautiful gardens of all shapes and sizes, this is the book for you! Create classic landscape gardens, grow a high-yielding orchard, nurture naturally beautiful lawns, raise your household veggies, or run a profitable farm. A soil-based approach allows you to see not just the plants, but the living system that grows them. Soil-building practices promote more ecologically friendly gardening by reducing fertilizer and pesticide use, sequestering greenhouse gases, and increasing overall garden productivity.
Building Soil is a simple book full of practical, up-to-date information about building healthy soils. Simple methods perfect for the home gardener’s use put healthy, organic soil within everyone’s reach. You don’t need a degree in soil management to understand this book; you only need a yard or garden and the desire to improve it at the most basic level.
Full Customer Reviews:
-

Permaculture Paradise: Alex Ojeda’s Fertile Back Yard!
Take a tour with Alex as he shows you how his permaculture forest garden grows. Get more info at https://www.facebook.com/groups/376132752470842/ (Permaculture Jax) and www.starwalkerproject.com. -

TALKING TOOLS with Jonathan Dysinger of Farmer’s Friend LLC
Talking about tools with the creator of the Quick Cut Greens Harvester, Jonathan Dysinger.
SUB:http://bit.ly/2d7dQgdPOPULAR VIDEOS:http://bit.ly/2cmcFLe
↓↓↓↓↓↓↓↓↓ CLICK “SHOW MORE” FOR RESOURCES ↓↓↓↓↓↓↓↓↓↓Harvester here:
http://bit.ly/1W3nLGbCaterpillar Tunnel here:
http://bit.ly/2gItRNf1 Day Workshop:http://bit.ly/2cziu7v
Donate:http://theurbanfarmer.co/support/
My online course: www.profitableurbanfarming.com
My book: www.theurbanfarmer.coMusic by: David Cutter Music – www.davidcuttermusic.co.uk
facebook.com/GreenCityAcres
twitter.com/GreenCityAcres
___
FARM EQUIPMENT I USE:
Quick Cut Greens Harvester:http://bit.ly/1W3nLGb
Knife and Tool Sharpener:http://bit.ly/29DHlos
Jang Seeder:http://goo.gl/XGvJtl
Row Bags:http://goo.gl/eI1CLp
Insect Netting:http://goo.gl/rjyimK
The Coolbot:http://bit.ly/2cziu7v
___
CAMERA EQUIPMENT I USE:
Canon Rebel T6i:http://amzn.to/29JApHr
Canon wide angle lens 10-18mm:http://amzn.to/2a2t1pl
Shure Lens Hopper shotgun mic:http://amzn.to/29zpdMz
Joby Gorilla Pod (flexible tripod):http://amzn.to/29JBBu7
Go Pro action camera:http://amzn.to/29JBU8j
Phantom 4 Drone:http://amzn.to/29zqenG
iPad 4 for drone controller:http://amzn.to/29vwKdh -

How to Build a Fruit Tree Guild

A guild is a grouping of plants that supports a central element—such as a fruit tree—for maximum harvest and use of space. Learn more about this permaculture technique for creating a low-maintenance system that also improves biodiversity.
Posts may contain affiliate links, which allow me to earn a commission at no extra cost to you. This helps keep costs down so that I can continue providing high quality content to you for free. I appreciate your purchase through the links! (full disclosure)
Guilds are Interconnected Mini-Ecosystems
The use of guilds came about by observing how certain plants would naturally group themselves together in an unmanaged setting without human intervention, as if to demonstrate that their proximity to one another was mutually beneficial (like how birch trees and Douglas firs are interdependent). The concept of designing human-made guilds is relatively new, and many of the early experiments are still in progress.
Still, guilds provide a roadmap for developing interconnected ecosystems, which may reduce our workload and yield more harvests.
The goal of the guild is to underplant a central element, such as a fruit or nut tree, with plants that are highly useful, multifunctional, and that might naturally be found growing together.
For example, underplantings in a guild might include plants that fertilize, repel pests, attract beneficial insects, create mulch, and suppress grass.
The general idea is to take advantage of the benefits of plants to reduce cost, labor, and the need to import materials.
Now, to be certain, planting a tree guild will take more effort than simply planting the tree by itself, and it may also cost a bit more at the outset for the extra plants. However, in the long run, guilds will likely be more resilient and vigorous, even if solely from a biodiversity standpoint.
How you plant a guild will depend on your space, whether you have several acres or less than half an acre. On larger properties there may be space to build a large guild under an expansive, 70-foot tall nut tree, while on smaller properties the central element will likely be something smaller, such as a dwarf fruit tree or berry bush.
If you would like to build a guild, choose a central element that is appropriately sized for your property. Fruit and nut trees can be linked together in a grouping, underplanting them all with guilds. Toby Hemenway, author of Gaia’s Garden: A Guide to Home-Scale Permaculture, would call this a “superguild.” I can also be called a food forest.
I like to call it an orchard on steroids! Check out the 2-hour film The Permaculture Orchard: Beyond Organic for more inspiration.
This “superguild” could be created in the shape of a long hedgerow, which I discuss in how to plant a hedgerow.
Would you like to learn more about improving the biodiversity of your garden, reducing maintenance, and increasing yield using permaculture techniques?
You’ll find loads of information just like this in my book, The Suburban Micro-Farm.

The Apple Tree Guild Example
The most common example of a guild is that of the apple tree guild. With an apple tree as the central element, you can prevent grass from creeping under the tree, and repel wildlife, by planting a ring of daffodils and garlic chives at the drip line of the tree. Bee balm, dill, and fennel peppered underneath will attract pollinators.
Comfrey, dandelion, yarrow, and white clover will accumulate nutrients and fix nitrogen to fertilize the soil. The comfrey and nasturtiums will provide mulch or green manure. The bee balm, garlic chives, and yarrow will emit strong scents to repel pests. Because apple scab fungus is a common ailment of apple trees, the fennel and garlic chives will provide some anti-fungal properties.
See my articles about daffodils and yarrow to learn more about the “superpowers” of these plants!
Observe and Experiment
Now, for certain, the above is not a recipe, merely an example of how you can take advantage of nature’s gifts to create a mini-ecosystem that reduces your workload. Even if you were to follow a so-called recipe such as this one, your guild will likely need tweaking to accommodate the unique conditions of your site.
To see how a guild might need to be tweaked for your local conditions, read about my cherry tree guilds and how I dealt with a pest problem. Although I started out planting some often-recommended guild plants, in the end, my cherry tree guilds needed a little something extra that was unique to my situation.
Permaculture guilds are not exact recipes to follow. They are combinations of plants that people have tried and have observed growing together in natural ecosystems. For example, one day I was hiking in a local park and noticed wild geranium (Geranium maculatum) growing densely throughout the forest with wild ginger (Asarum canadense), so I planted the two together in a shaded pollinator garden where they have thrived.
However, just because these combinations were successful in one environment, doesn’t mean they’ll work in another, so a little experimentation is always in order.
The Beginner’s Guide to Guild-Making
Plant your tree in your selected spot. (For tips on planting fruit trees, see this article.)
Next, measure a circle around the fruit tree using sticks or flags to mark the mature width. This perimeter is called the drip line. The roots of the tree will eventually extend to this point, and perhaps even farther. Because of this, you will increase success by improving the health of the soil inside this circle.
Spread cardboard under the tree, overlapping the ends so the ground inside the drip line is thoroughly covered. Moistening the cardboard with water is beneficial. Cover the cardboard with 3 to 6 inches of compost soil, keeping the soil away from the trunk. Be sure that none of the edges of the cardboard are exposed.
For more tips on planning a fruit tree guild, see this article.
7 Types of Plants to Plant Under the Fruit Tree
Underplant the tree (inside the drip line) with herbaceous plants that:
- attract beneficial insects
- deter wildlife
- fertilize
- mulch
- produce nectar to attract pollinators
- repel pests
- suppress grass
That seems like a lot of plants to fit under one tree, but actually there are many plants that perform more than one function. I call them “super plants”. (They’re kind of like super heroes!) There are a lot of plants to choose from, but the following are some of my favorites:
a. Choose Daffodils or Garlic — They repel deer and other wildlife, repel fruit tree borers, and stop grass from creeping under the tree.
c. Choose Oregano or Chives — They are both aromatic pest confusers, which means that their strong scents will repel pests. They both can also take a little bit of foot traffic, which will be helpful during harvest time.
d. White Clover — It is an excellent source of nitrogen, an essential nutrient for healthy fruit production, and is also often used in orchards as a walkable ground cover. Here’s my source for white clover seeds.
Remember to try your own experiments. Do you have a favorite plant that attracts pollinators and beneficial insects? Give it a try!
Note: Be sure to only step inside the drip line when it’s absolutely necessary for harvesting or pruning. Otherwise, stay outside the drip line to reduce soil compaction.
Now, go forth and create some mini ecosystems (guilds) on your micro-farm!
Need more ideas for growing a permaculture garden?
The following articles will help you on your journey toward a vibrant and productive garden.
Learn more about permaculture in my article What is Permaculture?
Permaculture Homestead Design Tools:
- 3 Reasons to Hire a Permaculture Designer for Your Landscape
- 6 Maps to Draw for the Permaculture Designed Homestead
- Implementing Your Dreams on the Permaculture Homestead
Permaculture Deep Thoughts:
- Do You Make These 3 Permaculture Mistakes?
- How to Choose the Right Permaculture Class
- Why We Don’t Keep Chickens (Yet)
Permaculture Gardening Techniques:
- 10 Reasons to Plant a Hedgerow
- Benefits of the Edible Forest Garden
- Here’s a Quick Way to Terrace a Hill
- How to Kill Poison Ivy in 5 Steps
- The Circle Garden for Low-Maintenance Gardening
Growing Perennials Permaculture-Style:
- 4 Berry-Producing Shrubs that Fertilize, Too!
- 20 Perennial Crops for Wet Soil
- How to Grow and Use Currants
- How to Grow a Jelly Garden
- How to Grow Perennial Sunflowers for Mulch
Improving Soil:
Water Management:
- Contour Gardening to Minimize Irrigation & Maximize Yields
- Front Yard Rainwater Catchment
- What is a Swale & Why You Need One
- How to Construct a Swale in the Residential Landscape
The Power of Permaculture Herbs:
- 5 Weeds You Want in your Garden
- 6 Flowers to Grow in the Vegetable Garden
- 7 Reasons to Grow Calendula
- 7 Ways to Fertilize the Garden with Comfrey
- Does Comfrey Really Improve Soil?
- Grow Chives for the Best Strawberries
- When Weeds are Good
Have you experimented with fruit tree guilds? What has worked for you?

https://www.tenthacrefarm.com/2017/07/how-to-build-a-fruit-tree-guild/
On – 07 Jul, 2017 By Amy
-

IN FOCUS – 5 Earth Moving Tools Every Small Farmer Needs
SUB:http://bit.ly/2d7dQgdPOPULAR VIDEOS:http://bit.ly/2cmcFLe
↓↓↓↓↓↓↓↓↓ CLICK “SHOW MORE” FOR RESOURCES ↓↓↓↓↓↓↓↓↓↓1 Day Workshop
http://theurbanfarmer.co/product/profitable-urban-farming-1-day-online-workshop/Donate:
http://theurbanfarmer.co/support/My online course: www.profitableurbanfarming.com
My book:
www.theurbanfarmer.coTheme music composed by Curtis Stone and performed by Dylan Ranney.
facebook.com/GreenCityAcres
twitter.com/GreenCityAcres
_______________________
FARM EQUIPMENT I USE:
Quick Cut Greens Harvester:http://bit.ly/1W3nLGb
Knife and Tool Sharpener:http://bit.ly/29DHlos
Jang Seeder:http://goo.gl/XGvJtl
Row Bags:http://goo.gl/eI1CLp
Insect Netting:http://goo.gl/rjyimK
_______________________
CAMERA EQUIPMENT I USE:
Canon Rebel T6i:http://amzn.to/29JApHr
Canon wide angle lens 10-18mm:http://amzn.to/2a2t1pl
Shure Lens Hopper shotgun mic:http://amzn.to/29zpdMz
Joby Gorilla Pod (flexible tripod):http://amzn.to/29JBBu7
Go Pro action camera:http://amzn.to/29JBU8j
Phantom 4 Drone:http://amzn.to/29zqenG
iPad 4 for drone controller:http://amzn.to/29vwKdh -

Using Weeds to Read the Soil: Some Basic Concepts to Get Started
Using Weeds to Read the Soil: Some Basic Concepts to Get Started
April 14, 2017by Jonathon EngelsWeeds are becoming a more and more appreciated component of gardening. We have been reintroduced to eating the weeds, with things like dandelion leaves becoming a niche crop. Also, we are encouraging plants that, up until recently, were viewed as weeds (dynamic accumulators like comfrey and pioneering legumes) to revitalize our soils. And, many gardeners are once again celebrating weeds as a means of reading the soil.
Geoff Lawton says weeds are not the problem but rather symptoms of glitches within the soil. In other words, weeds have arrived because the soil has some sort of deficiency or condition that both allows them to thrive and prompts nature to repair systemic damage. Nature will move towards a permanent, stable system, and weeds are part of that process, especially in troubled landscapes.
With each problem, there are particular weeds that characteristically appear, and if we learn to read these weeds, we can assess unfamiliar landscapes and recognize the sources of troubles within our own systems. Then, we can begin to speed the soil’s recovery into something more stable, and in the meantime, we can cultivate appropriate plants to aid this process and provide production, as well as utilize weeds that are already present.
While each landscape, soil type, and climate has its own particular set of pioneering plants, there are some basic ideas that can help us begin to understand more how to use the weeds to read the soil. From there, we can research and make more practical and informed decisions as to how we might move our projects in positive directions.
The Root Systems
The root systems of weeds can tell us a great deal about soil conditions. For example, weeds that have deep taproots, such as dandelions and burdock, generally indicate soils that are compacted, preventing plants with lesser roots from taking hold. These taproots break up the soils and eventually, as they decompose, create pathways for water, nutrients, and weaker roots systems. On the other hand, weeds that have spreading, hairnet root systems or clumping grasses are likely there because soils are loose and erosive.
So, when there is an abundance of weeds, we can start by noticing their root systems as these might indicate soil conditions that we can either address with rehabilitative gardening techniques or by choosing appropriate plants to grow in the conditions. This can also lead us into identifying the weeds that are present and learning what other things they might be telling us.
The pH Balance
Just like crops, some weeds thrive in different levels of acidity and alkalinity. We wouldn’t plant blueberries in a soil that we know is alkaline because we recognize that blueberries are particular to acidic soils. Well, certain weeds—plantain, hawkweeds, sheep sorrel—could help to indicate more acidic areas, whereas others—goosefoot, true chamomile—signal the likelihood of alkaline soils.
A shrewd gardener would use these signals to help with choosing what crops he or she might try to cultivate in an area. If the soil is acidic, berries might be a great choice, but if the soil is alkaline, different cruciferous vegetables are likely a better option. Similarly, noting these bits of information can be guidance for what not to plant in an area, something that might prevent wasting time and resources.
The Soil Types/Conditions
The ability to recognize the weeds we are looking at can also give us an assessment of the type of soil it is growing in and the conditions of that soil. If it’s sandy, we might see sandbur, cornflower, or dog fennel, but a heavy clay soil is more likely to yield wild garlic, plantain, and creeping buttercup. Wet soils—cattails, sedge, marsh mallow—will have different weeds than dry soils—potato vine, Virginia pepperweed.
Again, this can aid cultivators greatly by knowing whether to plant crops that thrive in sandy soils over clays or wet soils over dry. Recognizing these needs before investing the time and money needed for a garden can mean the difference between low-maintenance success and hard-working struggle. Taking a moment to familiarize with the weeds common to a place is just a good idea.
The Nutrient Profile
When we stop looking at weeds as only pests and recognize they are plants, we realize that, like all plants, they have certain nutritional needs and outputs. The existence of certain weeds can provide clues to what the soil nutrients is like. Chicory, purslane, and lamb’s quarter (all edible) indicate rich soils, but sheep’s sorrel and broom sedge might mean the opposite. Thistle could mean deficiencies in iron and copper, or the growth of ferns and blade grasses will show up in places that have been burned, indicating a lack of available phosphorus.
Learning certain sure indicators of nutrient abundance or absence can lead growers as to which soil amendments they might need to make, as well as which crops—one’s that like similar nutrient profiles—they might want to plant. This could help in moving the soil slowly and deliberately back into a more balanced system with more biodiversity.
The Weed Community
In the end, it’s important to remember that no one weed necessarily provides all the information we need to assess soil, but using the community of weeds growing in an area will provide a more complete view of what the soil type and conditions are, as well as what sort of issues need to be addressed or considered in developing the land. Identifying the prominent plants in a space and where the meaning behind each weed overlaps could provide reasonably accurate results.
The unfortunate thing is that different climates and locations have different weeds and often different names for the same weeds, so this might mean buckling down for some research before being able to read the weeds well. Luckily, there are plenty of books to reference, as well as local experts and online sources. The point is that learning what weeds we are looking at and what they are saying is an effort most certainly worthwhile.
5 Books to Help Getting Started with Reading the Weeds:
•Weeds and Why They Grow by Jay L. McCaman
•Weeds and What They Tell Us by Ehrenfried E. Pfeiffer
•Weeds: Guardians of the Soil by Joseph A. Cocannouer
•Weeds: An Earth-Friendly Guide to Their Identification, Use and Control by John Walker
•Insect, Disease & Weed I.D. Guide: Find-It-Fast Organic Solution for Your Garden by Deborah L. Martin
Feature Header Image: Dandelions (Chris Alban Hansen)
https://permaculturenews.org/2017/04/14/using-weeds-read-soil-basic-concepts-get-started/
On – 14 Apr, 2017 By Jonathon Engels
-

How to grow Cauliflower, cruciferous

Cauliflower
Cauliflower is a cool-season crop and a offspring of the frequent cabbage. If you plant to effort rising cauliflower in the home garden, it require time after time cool temperatures with temperatures in the 60 s. The soil pH ought to be between 6.5 and 6.8.
It is best to create cauliflower from transplants quite than seeds. Transplant 2 to 4 weeks before the regular frost date in the spring, no earlier and not a great deal later.
Liberty the transplants 18 to 24 inches apart with 30 inches between rows. Use first course manure when transplanting.Plant fall cauliflower concerning the same time as go down cabbage. These are typically 6 to 8 weeks previous to the first fall rime and also require being later than the temperature is below 75 degrees F. If you actually want to try preliminary cauliflower from seeds, start the seeds 4 to 5 weeks before the plants are enviable. Plant the seeds in rows 3 to 6 inches separately and ¼ to ½ of an inch deep. They need 1 to 1.5 inches of water each week; with usual rainfall, this usually requires complement watering.
For most outstanding growth, side-dress the plants with a nitrogen manure. Note that the cauliflower will start out as a loose skull and it takes time for the head to form. Many variety take at least 75 to 85 days from transplant. If the cauliflower has a coarse look, it is too mature and be supposed to be tossed.Health benefits of cauliflower
1. Boost Your Brain Health
Cauliflower is a good cause of chorine, a B vitamin known for its role in brain growth. Choline intake through pregnancy “super-charged” the brain activity of animals in utero, representing that it may increase cognitive function, and get better learning and memory. It might even reduce age-related memory refuse and your brain’s susceptibility to toxin through childhood, as well as confer defense later in life.
2. Detoxification Support
Cauliflower helps your body’s aptitude to detoxify in various ways. It contain antioxidants that grasp up period 1 detoxification the length of with sulfur-containing nutrients vital for Phase 2 detox behavior. The glucosinolates in cauliflower also make active detoxification enzymes. Digestive Benefits
Cauliflower is a very important basis of food fiber for digestive health. But that’s not all. According to the World’s Healthiest Foods:“Researchers have determined that the sulforaphane made from a glucosinolates in cauliflower (glucoraphanin) can help defend the lining of your stomach. Sulforaphane provide you with this fitness benefit by prevent bacterial overgrowth of Helicobacter pylori in your stomach or too much cling by this bacterium to your stomach wall.”
Antioxidants and Phytonutrients Galore
consumption cauliflower is like charming the antioxidant and phytonutrient draw. It’s crowded with vitamin C, beta-carotene, Kaempferol, Quercetin, Rutin, cinnamon acid, and much more. Antioxidants are nature way of as long as your cells with sufficient protection alongside assault by hasty oxygen species (ROS).
As long as you have these vital micronutrients, your corpse will be able to oppose aging cause by your daily contact to pollutants, chronic stress, and more. If you don’t have an adequate provider of antioxidants to help hush up free radical. Then you can be at risk of oxidative stress, which lead to accelerated tissue and organ damage.
Cauliflower Is Only One Type of Cruciferous Veggie
If cauliflowers isn’t your favorite vegetable, don’t be anxious. You can get many of these same benefits by eating other members of the cruciferous vegetable family. Broccoli is one of them, but there are others too, including.The more vegetables you eat from this list the improved, as each offers sole and superb benefits to your health. For example, just one cup of kale contains over 10,000 IUs of vitamin A, the equal of over 200% of the daily value. Cabbage, in the meantime, is rich in vitamin K1 and B vitamins, which many are, absent in, and has been shown to help heal stomach ulcers and offers benefits to digestion. Additionally:
Pests/Diseases
• Cabbageworm: Nectar from dwarf zinnias lures ladybugs and other predators that help to protect cauliflower from cabbageworms.
• Cabbage root maggots
• Aphids
• Harlequin bugs
• Clubroot
• Black rothttp://rdspweb.com/cauliflower/
On – 30 Apr, 2017 By Ravi Dutt Sharma
-

Yard and Garden: Container Gardening | Iowa State University Extension and Outreach
AMES, Iowa – A traditional home garden is a popular way to grow vegetables, but it’s far from the only way. Growing vegetable plants in containers can also produce a bountiful crop, although care must be taken to ensure meaningful growth.
ISU Extension and Outreach horticulturists can help answer your questions about how to best handle container growing of vegetables. To have additional questions answered, contact the ISU Hortline at 515-294-3108 or [email protected].
I would like to grow vegetables in containers. Can I use garden soil or should I purchase a commercial potting mix?
Plants grown in containers require a well-drained growing medium. Garden soil alone is not a good growing medium. Garden soil compacts when placed in a container, resulting in poor water drainage and aeration. Soil also pulls away from the inside of the container when it dries, making it difficult to properly water plants. A homemade potting mix can be prepared using equal amounts (volumes) of garden soil, sphagnum peat moss, and perlite.
A commercial potting mix is often the best choice when gardening in containers. The quality of commercial potting mixes varies considerably. Poor quality potting mixes are often inexpensive, black, heavy, and don’t drain well. High quality commercial potting mixes are lightweight, well-drained, free of plant disease organisms and weed seeds, retain moisture and nutrients well, and don’t readily compact. Commercial potting mixes can be purchased at garden centers and many other retailers.

What type of container can be used to grow vegetables?
Containers may be plastic, clay, ceramic or wood. The container must be able hold an adequate amount of potting soil and have drainage holes in the bottom. Drill drainage holes in plastic and wooden containers, if no drainage holes are provided.
In regards to size, several leaf lettuce or spinach plants can be grown in a one gallon container. A single pepper or eggplant can be grown in a two gallon container, while a four gallon container would be necessary for a single tomato plant.
Which tomato varieties are best suited to containers?
Determinate tomato cultivars are best suited to growing in containers. Determinate tomatoes are small, compact plants. They grow to a certain height, then flower and set all their fruit within a short period of time. Indeterminate tomatoes are large, sprawling plants which get too large for most containers.
Suggested tomato cultivars for containers include ‘Bush Early Girl,’ ‘Better Bush,’ ‘Celebrity,’ ‘Patio Hybrid,’ ‘Patio Princess,’ Sweet ‘n Neat Scarlet’ (cherry), and ‘Sweet Zen’ (grape).
Can vine crops be grown in containers?
Most cucumbers, melons, and squashes are not well suited to containers as they are large, sprawling plants. However, bush-type cucumbers and summer squash can be grown in containers. Bush-type cucumber cultivars suitable for containers include ‘Spacemaster,’ ‘Salad Bush,’ ‘Pickle Bush,’ and ‘Patio Snacker.’ Bush-type summer squash, such as ‘Zucchini Elite,’ ‘Gold Rush,’ ‘Sunburst,’ and ‘Patio Star,’ can also be grown in containers.
https://www.extension.iastate.edu/article/yard-and-garden-container-gardening
On – 20 Apr, 2017 By Richard Jauron
-

Creating a Food Forest – Step by Step Guide – Permaculture Apprentice
One of my earliest memories of visiting my grandparents’ farm was playing on the dry stone wall, tossing stones around and just generally fooling around.
Then, looking down, I came across a small seedling sticking out the side of the wall, growing in nothing, with barely any soil between the stones.
Out of childish curiosity more than anything I decided to set it free from the heavy stones and leave it to grow on its own. That was 20 years ago…
 Today, that seedling is this strapping young fellow on the image left – European Ash tree.
He has survived the droughts, heavy snows, pouring rains and sub-zero temperatures all by himself, without anyone taking care of him.
As I sit under his shadow today and plan my food forest I’m curious to find out how trees flourish without human intervention.
How come wild apples, plums and cherries from the nearby forest do so well while the cherry tree I planted in my orchard five years ago has died miserably? To understand this I needed to return to the place where the seed of this Mountain Ash tree came from and revisit my teacher – the forest itself.
Forests are our teachers
Just by my house, some 50m away is an entrance to a forest. I visit there often, it makes me feel relaxed, I enjoy the serene sounds of nature, the falling leaves, birds and other critters. Most importantly, I go there to observe and learn.
You see, given enough time every ecosystem ends up like a forest. This is the end point of an ecological succession; a point where the ecosystem becomes stable or self-perpetuating as a climax community and, without any major disturbances, the forest will endure indefinitely.
This is exactly what you want your own food forest to be like. To achieve a low maintenance abundance of fruit, nuts, berries and herbs you’ll want to create a forest-like system where fertility comes from various sources, where you’re greatly aided by fungi, where wildlife is your primary pest control, where soil holds water like a sponge, and where you have a high diversity of plants.
You want a carefully designed and maintained ecosystem of useful plants and emulate conditions found in the forest.
However, the problem is often that you’ll find yourself starting out with a bare field, a blank canvas and the overall plan can feel a little overwhelming. Sometimes even reading books such as Edible Forest Gardens can make things harder rather than easier.
While creating my own food forest, I broke down the plan into smaller, manageable steps. I want to make as few mistakes as possible and to be honest, I don’t have time to make them.
Right, let’s dive in and see how this process can help you go from that bare field to a fully-functioning ecosystem inspired by forests.
1. What do you want from your food forest?
First you have to be clear about the ultimate goals of your project.
Why is this important?
You see, with a clear goal, everything becomes easier, you know where best to place your efforts and, most importantly, what are the priorities, what to focus on and what to postpone for the time being.
You have to think are you doing this because of: 1. being more self-reliant, 2. making an income, 3. producing healthy food 4. educating others 5. having a fun project for all the family
As you can see, each of these will require different considerations for your precious time and money. For example, if your goal is to create an income from your food forest, you’ll want to focus on researching which tree crops sell well locally and then think about how to grow them in the most efficient manner.
On the other hand, if you just want to be more self-reliant, you’ll want to think about how to create a diverse food forest with as many fruits, nuts and herbs as possible to fulfill your needs and stop being dependent on the grocery store.
Don’t overdo the thinking at the outset, but just be clear what you want from the beginning.
2. Explore, Sit Quietly and Observe, Analyse
- Explore your local forest so you’ll have an idea what will grow best in your area
Start with taking casual walks in your local forest. When designing a food forest you want to learn from the local ecosystem and try to emulate it. This is why such observations are important, this is how you discover what plants will grow best in our area.
You’ll want to look around and identify the plants that are thriving. As Mark Shepard would say: identify the perennial plants, observe how they grow in relation to one another, and take a note of the species. Later on, you can use that list to find commercial productive variants of the wild plants that you can grow in your food forest.
This step is crucial, because if you want to create an edible landscape that requires less work and maintenance, you need to grow species that are well adapted to your area, i.e. species that are volunteering to grow around your site.
If you have nature as your ally and use the natural tendencies of the native vegetation, then you’ll be doing considerably less hard work. This is one of the fundamental permaculture principles of working with nature rather than against it.
For example, when I walked in my forest I saw elderberries, hazels, hawthorns, lindens, cherries, apples, junipers, and the list goes on. So, guess what I’ll be growing in my food forest?
I’d also be taking seeds from those naturalized species and using them as rootstock for my plants. But that’s a lesson in itself, so be sure to read my post on growing trees from seeds.
- Sit quietly and observe your site
Next, sit at the future site of your food forest, no matter if it’s 5 or 50 min, just sit there quietly. Brew yourself some coffee or tea and just be mindful of what is happening around you. Immerse yourself and study the wildlife, feel the breeze, listen to the sounds of the natural world around you. You can learn a great deal simply by sitting quietly.
One of my best ideas, and one that saved me a lot of time, came when I just sat down and observed my site. For years, I tried to get a wild hedge under control and year after year I was cutting it, but it kept on re-sprouting. This mindless management involved a great deal of work, as I always found myself battling against the hedge’s natural inclinations.
It wasn’t until one day, when I was sitting quietly looking down at the hedge, that I came up with an easy solution to the problem. I asked myself a simple question: How can I let nature do the work for me? As I observed the hedge more thoughtfully, I realized that some of the species growing there were actually useful, while with others, I had even planned to grow them there anyway.
If I just gave a head start to species I want there, they would eventually overgrow the ‘non-useful’ ones, and I wouldn’t need to mindlessly cut down everything each year. Sometimes we are just too much in working mode to come up with solutions that are actually a whole lot easier. Having the time to observe, think and ask the right questions helps us save money, time and unnecessary labor.
These moments of mindfulness help put things into perspective and reveal a wealth of important information about the site itself.
- Do a site survey and make a basic map
It’s time to put on your permaculturist explorers’ hat and take notes about your site. You’ll want to ‘read the landscape’ and note down everything you can decipher about your water situation, climate, soil, slope, aspect, wildlife…
The landscape you see around you and its resulting ecosystems are formed from the interaction of climate, landform, soils and living things. Therefore, to better understand your site, you should analyze these elements, or parts of them, one by one…
At this point, you want to be actively involved and walk the site, conduct surveys and look at different natural processes. You can use modern technology (smartphones and desktop computers) to help you understand the weather patterns, terrain shape and water movement across the land.
You also want to get your hands dirty and investigate your soil’s texture, structure and biological activity. You can also perform some lab tests on your soil and experiment with some basic tests yourself. There are many things to explore. Help yourself and download my checklist below.
Download your free site survey checklist HERE!Based on the information you’ve collected, make a rudimentary hand-drawn map or use Google Earth as a base layer and annotate the printout with your notes. You can even make multiple thematic maps for each of the landscape components you’ve analyzed.
From the map, it should be visible where the site potentials lay, and what you’ll need to design for.
3. Design – Create a layout and choose the plants
- Choose a general layout – orchard, woodland, savannah
There are four basic layouts that determine the final look of the food forest: In their book, Edible Forest Gardens, Dave Jacke and Eric Toensmeier suggest more options but I’ll round it down to the basics:
- Savanna type systems – alley cropping and silvopastoral system – examples: Mark Shepard/Grant Schultz
- Orchards – woodlands with regularly spaced trees – examples: Permaculture Orchard, David Holmgren
- Mid – to late succession woodland – this is what we are trying to emulate – examples: Robert Hart, Martin Crawford
- Closed canopy forest – end point of a succession – these are mature forests – example: “Your local forest”
Which layout suits you best depends on your goals and your site’s characteristics (climate, terrain, biome, etc.). Different systems require a different design approach, management, and maintenance….
Savanna-type or agroforestry systems are based on a keyline design and are much better suited for commercial fruit, nut and herb production. Usually implemented on a broadacre scale, this is a layout with equidistant rows that enables efficient machine harvesting.
The woodlands we call orchards are more of a hybrid system that you can use for both commercial production and home use. The layout also has equidistant rows, but permaculture orchards are usually implemented on a relatively smaller scale.
Mid- to late succession woodlands offer the opportunity for the most varied, interesting, complex, and productive patterns of trees shrubs and herbs. Although primarily geared towards home food production, you can implement this layout on your suburban backyard but also scale up to a farm scale.
Wondering how to start planning the layout. Download this free step-by-step guide and find out how to design a permaculture orchard?- Start by outlaying your infrastructure first
Start your design with the scale of permanence in mind and plan your water, access and structures first. It’s best to begin with these essentials because they will be the most permanent elements of you food forest.
This includes thinking about the most suitable places for your water tanks, irrigation lines and other water elements, as well as planning for the locations of access points, different buildings and fences.
Water planning comes first, as water is the number one priority for any permaculture system. The water systems that you develop in this stage will become permanent land features that other infrastructure components will follow.
Immediately after designing the water systems, consider where to put your roads and paths. Their placement will define your movement around your food forest for many years to come, so think long and hard about their potential locations. Once they’re in, it’s hard to rearrange them.
The pattern of the fencing will generally follow that of access, and you’ll be able to subdivide your food forest into different growing zones. By doing so, you’ll be able to manage and protect them separately if necessary. Finally, consider where to put different buildings, if any…
Good infrastructure design is essential in order to minimise maintenance, maximize productivity, and provide a habitat for beneficial animals.
- Make a list master list of plants you wish to grow
Make a master list of plants – your desired species and others necessary to fulfil a certain purpose in your food forest. Think about ecological functions needed throughout the garden such as food production, the gathering and retention of specific nutrients, beneficial insect nectar plants, and ground cover for weed control.
Create a spreadsheet with each of these categories, do the research and list all the plants you want. Now, if there is a desired species that simply won’t work on your site, you can always find an ecological equivalent, i.e. an ecologically similar species that fills a similar community niche in comparable habitats.
For this you can use climate-analogous species. Based on the climate classification of your site, you can find almost identical climates across the globe, and then, by researching plants in those areas, find all kinds of interesting species you didn’t know you could grow.
However, growing plant species that aren’t native to your bioregion can be working against the natural tendencies of your site. You can make things easier on yourself and only focus your attention on what’s proven to work. Here’s what I mean…
Based on the inspection of your local forest in step 1, you’ll have an idea what species grow best in your area. These native and naturalized species are part of the already functioning and thriving ecosystem. All you need to do now is imitate that ecosystem on your site but use the more productive variants of these species.
Be sure to include these plants in your master list!
- Create guilds from your master list of plants
This is the very core of forest gardening. You want to create effective polycultures that share the resources and mutually support themselves. But how can you choose the right combination of plants? Here are just a few of the recommendations from Edible Forest Gardens.
You can do your guild build based on what you know or guess about plants, their species niche, and how they interact. In this way you can also create novel plant combinations through your experiments.
You can create a random mixture. A lot of people will just select a group of interesting plants and throw them together and see what happens. However, while it is sporadically ok to do so to spice things up, if the whole garden is like this, it will probably result in failure.
You can also try to emulate a habitat and use a model ecosystem as a template for design, incorporating species directly from the model habitat. This model habitat could be your local forest.
This is, of course, the easiest way to win. Here, you’re not inventing anything new, rather you’re copying what already works in nature. All you need to do is observe how the native plants grow in relation to one another and imitate that in your food forest.
If you’re not sure where to start, Download my free PDF with 5 Temperate Climate Guild examples you can recreate in your food forest.- Do a patch design – define your planting areas and plant spacing
Design your patches one by one, a patch could be a row, a contour or a grouping of plants in one area. However you decide to tackle the patch design, the most important aspect is deciding on the planting distance.
If you followed the design process and started your design by choosing the overall layout, you should already have an idea on the distances between the patches. Now let’s look at how to space the plants within the patch itself.
The easiest way to determine this spacing is by using the ‘crown touching rule’ and placing the individual trees a crown’s diameter apart. For this, you’ll have to find the information on the size of the individual mature trees’ crowns and use that as your guide.
Usually, the biggest mistake people make is overly-dense spacing where tree crowns are interlocking. This is OK when you’re planting a screen or hedge, but otherwise this will put stress on the plants and limit their growth.
In his book, Creating Forest Gardens, Martin Crawford recommends adding 30-50% more distance around each woody plant if you want more sunlight for understory plants. Also, you want to plant wider than ‘crown touching’ distance when soil conditions are limiting, in order to reduce competition between plants for limited resources.
4. Prepare the site
- Adapt your site if necessary
If you’re not starting from scratch with a bare field, the chances are there is something already growing there and you’ll need to adapt your site accordingly. This means clearing unwanted vegetation and leaving whatever you find useful. You can use any available biomass for mulch, compost, wood chips, firewood, mushroom inoculation….
For example, I will be leaving some naturalised plums and using a wood chipper to create some mulch from the trees and branches I don’t need, plus I’ll be using the wood for my hugel beds.
- Shape the earth to your advantage and optimize water retention
After you cleared the vegetation, you can start the earthworks for optimizing water retention on your site. This involves shaping the earth in a way that promotes water infiltration, distribution and storage.
Effectively, what you want is to do first is to slow, spread, and sink the water as it falls from the sky into the soil. The soil is the cheapest place to store water, and it’s the largest storage resource available on most sites. To do this, you can use two very famous techniques: keyline plowing/subsoiling and swales on the contour.
Following this, you want to have a way to capture as much water as reasonably possible and store it for dry periods. You can do this by digging ponds that will store the water and diversion drains that will collect and distribute that water when necessary across the site.
Whether you’re going to use one or both of these strategies depends on your site conditions: climate, terrain, soil, your context…I think one question on everybody’s mind is whether or not to swale it. For assistance, I would encourage you to look at this cheat sheet by Ben Falk if you’re in two minds about doing swales on your site.
- Set up infrastructure and put down irrigation, pathways and fencing
Following the earthworks, begin with the most difficult, important or permanent elements of the food forest.
Start by putting down pathways throughout your site, they are important as they define your different growing zones and protect them from the compaction. You want to minimize compaction in the areas you’ll be planting soon after and having clearly defined pathways keeps you on track (pun intended).
A well built pathway can also act as a hard surface runoff and collect the water that you can then connect with your other water elements you built in the previous step. Integrate rather than segregate!
Fencing the site is the next important thing. I can’t recommend building a main perimeter fence and enclosing your whole site strongly enough. Importantly, there are security issues and protecting from theft or trespassing and, moreover, I hear a lot of people regretting not doing this type of a fence first in order to ensure that their trees get protection from wildlife.
You don’t want those deer, coyotes, kangaroos, sheep or rabbits nibbling on your seedlings.
Finally, if necessary, put down irrigation and install water tanks – you simply can’t overdo it when it comes to making sure there is enough water during the months of drought.
- Build up your soil and improve the soil structure
It will come as a surprise to many, but improving the soil first rather that planting straight away saves time. This is because waiting for a year and simply conditioning the soil during that time and then planting in year two yields better results than planting immediately.
For improving the soil in this transitional period prior to planting, you can add soil amendments such as compost, compost tea, fertilizers or use cover crops, all with the goal of improving the fertility of the soil so that your plants get a decent head start. However, there is a caveat to this soil building…
Ideally, food forest soils contain a fungal presence ten times higher than that of bacteria. So you should aim to recreate those conditions.
In the beginning, you’ll be probably starting out from a bare field and you want to continually nudge your soil towards fungi domination. You can do this by inoculating the soil with fungi or cover cropping with green manure crops – Michael from the Holistic Orchard recommends red or crimson clover in preference as these two nitrogen-fixing legumes have a stronger affinity for mycorrhizal fungi. Finally, you want to spread woody mulch everywhere to feed the fungi in the soil.
For more info about improving the soil in your food forest read my Definitive Guide to Building Deep Rich Soils by Imitating Nature.
5. Source the plants and start planting
- Start a nursery or buy plants – your choice
Now that all the preparation work is complete, you can start planting. You basically have two options depending on the budget: grow your own trees (and shrubs of course) or acquire young ones.
If you’re on a tight budget, I would suggest growing most of your trees yourself. Actually, regardless of your budget, you shouldn’t stray from learning how to grow your own trees. This is one of the most important skills you can have as a permaculturist, and the chances are that sometimes the type of the trees you’ll need won’t be even available to buy.
Growing your own trees is like printing your own money. It’s actually quite simple and you don’t even need that much space. You can read all about it in my post on ‘How to set up a Small Permaculture Nursery and Grow 1000s of Trees by yourself’ and start your nursery today.
Another option is to buy young trees from nurseries. However, the trees will be more expensive, already grafted and probably already one or two years old. If you have the budget and don’t have time to grow your own trees or to wait, this is the way to get an instant orchard without the hassle of setting up a nursery.
- Phase your project and plant in stages
Planting a food forest can take place in stages or all at once. However, being honest, you’re unlikely to do it all in one go. More realistically, you’ll be planting your food forest in stages and over the course of several years. As long as you already know the outline of your rows or patches, you’ll know where to plant. After this, it’s only a matter of slowly filling the space with plants.
The establishment in stages normally involves planting hedges and/or canopy trees in the first year or two, then later shrubs and a ground cover layer. Here is a recommendation from Martin Crawford’s Creating a forest Garden book:
Windbreak/hedges and edges>>Canopy layer including N fixers>>Shrub layer including N fixers>>Perennial/ground cover layer>>annuals, biennial and climbers.
Depending on your layout, you can also add annual veggie production to this. At least in the beginning, there will be a lot of light and space available for you to use to grow your beyond organic vegetables.
- Finally, put your plants in the ground
I won’t go into detail on how you should be planting, for step-by-step details watch the Permaculture Orchard documentary where Stephan explains how to plant a tree in great details.
In short, just make sure you dig a large enough planting hole, spread the roots and sprinkle in mycorrhizal inoculant or dip the roots in a mycorrhizal root dip if required, then refill the hole with the soil you took out.
In almost every instance, you should use sheet mulch after planting to control the weeds. Unless the soil is very poor, do not add extra materials to it. Most importantly, don’t forget to mulch with the right type of material, since you’ll be growing woody perennials you’ll have to feed the soil biology (fungi) with woody mulch.
Conclusion
Creating a food forest is a multi-stage process and you don’t have to go through all the steps outlined above in the exact order. The idea behind this post is to give you a framework for planning and planting your first trees. Aftercare and maintenance will be a subject for another post.
There are four main books I would recommend if you’re serious about starting a food forest: Edible Forest Gardens, Creating a Forest Garden, Holistic Orchard and Teaming with Microbes – there is plenty of invaluable advice to be found in each.
So, where are you in the whole process of creating a food forest?
Let me know in the comments section below!
https://permacultureapprentice.com/creating-a-food-forest-step-by-step-guide/
On – 05 May, 2017 By papprentice
-

Tips for Terrific Tomatoes, from Soil Prep to Staking
Plump, sun-ripened tomatoes are indisputably the crown jewel of home vegetable gardens, and a successful tomato crop means giving them the best start possible. As with everything, getting the most out of your tomatoes is all about preparation.
Joining us again to talk tomatoes and more is the Organic Gardener Jeanne Nolan.
Not sure how to start your garden? With help from Jeanne Nolan and her team, we will guide you through the process from selecting a site for your garden to staking crops and everything in between.
 Strategies for Container Gardening
If you’re one of the many Chicagoans living in an apartment or condo with limited outdoor space, growing your own food can seem like a challenge – but, Jeanne Nolan says, anything you can grow in the ground can be grown in a container with just a few adjustments.
Ask Jeanne Nolan and The Organic Gardener crew.
http://chicagotonight.wttw.com/2017/05/25/tips-terrific-tomatoes-soil-prep-staking
On – 25 May, 2017 By Erica Gunderson
-

Arid land to a fertile Eden: permaculture lessons from Portugal
The land undulates upwards into gentle hills, cradling nooks of fertile terraces growing sweetcorn, sunflowers and tomatoes, before rolling down into tranquil lakes. It looks like a natural Edenic paradise on earth. But 20 years ago this land was arid and barren, and farming was a struggle.
The land is called Tamera, the name given to these 330 acres in southern Portugal by a community of 30 people who moved here from Germany in 1995. Today, 200 people from all over the world live here. Through simple practices of digging swales (ditches) and creating water retention spaces, Tamera’s ecology experts have transformed an area on the brink of desertification – and say they can do the same anywhere in the world.
The community wanted to be more sustainable and grow more of their own food, rather than importing it, and it was clear that water would be central to being able to live autonomously on the land.
“When I came to Tamera in 2006, trees were dying and wells were drying out,” says Bernd Mueller, director of Tamera’s Global Ecology Institute and one of the engineers behind the transformation.
At that time, in the summer months, Tamera looked like a desert with hardly any vegetation. In the winter months, however, there was heavy rainfall and flooding. Mueller and his co-engineer Thomas Lüdert realised that most of the water was running off the soil and causing damage to infrastructure, rather than soaking into the earth.
“It rushed down to the rivers causing erosion and other damaging side effects,” says Mueller. The project’s goal, then, was to retain all the rainwater that falls on the land, to refill the groundwater which was getting lower each year, and to provide flowing spring water.They started from the top of the hills, hit hardest by erosion and overgrazing. “The wind and the water eroded all the fine earth that should serve as a sponge for the rainwater,” says Mueller. “We started to manipulate the situation so these places retain the rainwater falling on them. Then you start to build structures like swales, which fill with rainwater and slowly filter into the earth.”
The lakes were dug out and formed without any concrete seal at the bottom so water can seep into the earth. “There’s a principle in permaculture called the triple S – slow, spread and sink,” says Mueller. “When you have flowing rainwater, something in your ecosystem is wrong. You have to slow it down, spread it over the land and let it sink.”
Transformation of the landscape began in August 2007, and by February 2008 a new spring had appeared at the edge of Tamera’s boundary. “I was surprised. I didn’t expect that to happen so fast,” says Mueller. “We suddenly had a creek going through the valley, and that brought more lush vegetation and animals; wildlife responds immediately to constant access to water.”
The Tamera case study has been presented to the EU and at the UN’s Cop22 in Marrakech by the Global Ecovillage Network. “For us it was important from the beginning to change the situation in Tamera, but do it in a way that it will be a model for the rest of the world,” says Mueller, who has travelled most continents to consult on water projects. “When you scale the ecological problems down to principles, it’s all due to the same mistakes. In all the cases I have seen all over the world, the key to ecosystem restoration is rainwater and vegetation management.”
Mueller has consulted on water management in Israel and Palestine, Turkey, Jordan, Kenya, Togo, Brazil, Bolivia, Colombia, and has shown how the Tamera model can be used in development and humanitarian settings.
After the earthquake in Haiti in 2010, Mueller worked with NGO Cafod on a project at the Carradeux camp for internally displaced people (pdf), providing sanitation, drinking water and waste management. Recommendations for the camp included harvesting rainwater from roofs, providing alternative fuels to wood to prevent deforestation, and installing composting toilets.
“I’m happy to support [Tamera] because they’ve got a different way of doing things,” says Geoff O’Donoghue, Cafod’s operations director who worked with Mueller on the Haiti project. He says that the Tamera approach helps in humanitarian settings because they have an awareness of the bigger picture. “There’s so much you can do which isn’t more expensive, but requires a front-loading of knowledge and design.”
After the consultation in Haiti, the Blueprint Alliance was set up for organisations to share sustainable solutions in humanitarian emergencies.
Mueller also worked with a local government in Kitui, Kenya (pdf). “I witnessed how in a short time a supportive local government could make a programme prompting swale building on a large scale,” he says. “In three months, I couldn’t recognise the land. It was a relatively small amount of money that was invested there. After three years every farmer could see the effectiveness of it.”
So could this approach be used somewhere experiencing extreme drought or even famine, such as South Sudan? The country has similar ecological conditions to Kenya, says Mueller, where he has seen how effective it can be. Mueller is now focusing on showing Tamera’s new water paradigm (pdf) to governments, the UN and NGOs, and supporting community-based projects.
“The ecological knowledge is there and its effectiveness can be proved in so many cases,” he says. “The problem lies in political strategies and social habits.”
On – 01 Jul, 2017 By Anna Leach
-

How Soil Type Affects Land Values
A farm’s greatest asset is its land. If you’re considering buying land with an ag land loan, looking into the land’s soil type is an important step in determining the worth of the property. It’s also an indicator of how much work the soil will need in order to provide a nutrient-rich environment for crops.
Soil classification is based on the texture and size of the particles in the soil, as well as on the mineral and nutrient content. The six most common soil types are loamy, sandy, peaty, silty, chalky, and clay. Each of these base soil types become naturally combined in varying ratios to produce entirely new and unique soils in each state.
Every part of the country has one, or a mixture, of the six main soil types. And just like each state has an official flower or bird, they also designate a state soil. Florida’s official soil is called “Myakka.” It originates from marine deposits and is a key component of Floridian flatwoods.
There are a variety of tools for assessing a farmland’s soil type. Chuck Cruse, AgAmerica’s Regional Account Manager for Florida, highly recommends heading to the USDA’s Natural Resources and Conservation Services (NRCS) web page. This tool allows users to create a map of their land or land that they are considering for purchase. The process takes the user through four basic steps: (1. Define your land area of interest; (2. Gain detailed descriptions of the soils in that area; (3. Access and save soil data and crop suitability data with the Soil Data Explorer; and (4. Order a free instant printable report, which creates a complete picture of the quality of a specified piece of land, including yield potential. The NCRS database currently contains data for 95% of the nation’s counties and anticipates having 100% in the near future.
Different crops prefer different soils, so determining the soil’s compatibility with certain crops is a key concern for the region’s ag Extension office. Extension agents are familiar with the area while possessing access to an array of useful data when it comes to soil quality and which land offers the best yield, and for which crops.
The USDA also collects data on what’s known as “prime farmland designations,” which are based on physical and morphological (organic) characteristics such as the depth of the water table in relation to the root zone, potential moisture holding capacity, the degree of salinity, permeability, frequency of flooding, soil temperature, erosion potential, and soil acidity.
Data about a farm’s soil type is used to help create the land appraisal. Appraisals are a common part of securing a land loan and are a complex equation involving a variety of factors with soil quality being only one of them.
Land appraisers develop economic assessments of agricultural acreage using soil samples. To determine the property’s value, they’ll review past yield records, look at existing irrigation and/or potential for new irrigation, and examine border features to assess how these might impact soil productivity.
While the southeastern region of the U.S. has a wide array of soil types, there is a very unique and valuable soil type found prominently in Florida — muck soil. Otherwise known as “black gold,” muck is a highly fertile soil that has amendments and nutritional value present without having to fertilize or irrigate heavily. The value of a parcel that contains muck soil fluctuates based on the depth of the muck, which can range from 12 inches to 30 feet deep in some areas. The deeper the muck, the more valuable the property is. However, there are only small areas of muck located in the state of Florida, the largest mass of it bedding in Palm Beach County around the bank of Lake Okeechobee.
“Muck is where sugarcane is primarily grown,” Cruse says, “because it takes very a minimal amount of work to grow it. You can get three to four cuttings off one planting of sugarcane, depending on the variety. When the farmer rotates the cane with sweet corn or other vegetables, it helps recycle those amendments back into the soil naturally. Once they’re done growing the cover crop, they’ll go in and till that crop, putting the nutrients and supplements back into the soil that’s then used to grow another crop of cane that will last another three to four years.”
Many farmers are finding innovative techniques to duplicate this scarce “black gold.” For instance, there are some sugarcane growers that are farming the cane on what is considered sand land. While the soil is entirely different than the muck, they’re bringing in mud and peat substitutes from the mills to replicate the nutrient-rich muck soil.
“These folks have the opportunity to bring some, what they call, ‘mill mud’ back to their properties to put the amendments back into the sand soil,” Cruse explains. “This gives them the properties and nutritional products that mimic the muck soil and grow better crops, even though they don’t have any depth of muck on the sand land. These farmers are putting anywhere from 12 to 24 inches of mill mud on top of the sand to help get the crop’s roots to be hardier, stronger, and to produce a better crop.”
http://www.growingproduce.com/vegetables/how-soil-type-affects-land-values/
On – 17 Nov, 2016 By Phoebe Moll
-

Permaculture Puts Organic Gardening on Autopilot
BY: TIM O’NEAL
Organic food and farming have seen a huge increase over the past ten years, and for good reason. Farming and gardening techniques that use fewer harmful, synthetic fertilizers and pesticides are better for the environment and better for human health. Permaculture methods of growing food reach far beyond these benefits. Growing food organically is just the starting point.
According to a report from 2014 by Stephen Daniells titled US organic food market to grow 14% from 2013-18, 81% of American families reported buying organic food at least sometimes. For many people, the barriers to buying organic food are accessibility and cost. Growing organic produce at home overcomes both of those issues. Permaculture practices are a great way to achieve the best results.
What is Permaculture
Permaculture (permanent + agriculture) was developed in the late 1970s by Bill Mollison and David Holmgren. It’s a set of principles and techniques for food production at any scale that focuses on mimicking natural systems, instead of competing against them. It puts humans into the system as engaged participants, departing from the conventional agricultural approach of conquering nature. The principles can be applied to container gardens on apartment balconies, large scale agricultural operations, and anything in between.
Practitioners of permaculture believe that it is more than a set of gardening techniques. It is the simplest and most direct way we can repair many of the global problems we face today – environmental destruction, poverty and food scarcity, water shortages, among others.
Co-founder, Bill Mollison, says, ““The greatest change we need to make is from consumption to production, even if on a small scale, in our own gardens. If only 10% of us do this, there is enough for everyone. Hence the futility of revolutionaries who have no gardens, who depend on the very system they attack, and who produce words and bullets, not food and shelter.”
From Permaculture: A Designer’s Manual, there are three core tenets:
Care for the earth: Provision for all life systems to continue and multiply. This is the first principle, because without a healthy earth, humans cannot flourish.
Care for the people: Provision for people to access those resources necessary for their existence.
Return of surplus: Reinvesting surpluses back into the system to provide for the first two ethics. This includes returning waste back into the system to recycle into usefulness. The third ethic is sometimes referred to as Fair Share to reflect that each of us should take no more than what we need before we reinvest the surplus.As stated in the third tenet, one central element of permaculture is to return waste back into the system as a benefit. The most direct way to do this is to compost garden and food waste onsite to add nutrients and organic material to the soil. If done well, this can eliminate the need for fertilizers.
There is also a strong emphasis on providing habitat for pollinators, other beneficial insects, and birds. The idea is to mimic a forest setting, or some other mature ecosystem, where pests and diseases are kept in balance by a harmonious relationship among organisms up and down the food chain. With this approach, there’s no need for chemical pest control.
Permaculture concepts can be applied beyond a single garden or farm to include a neighborhood, village, or an entire city. A permaculture system is designed for resiliency. This means that if one element fails the rest of the parts can fill in to keep the overall system intact. A society designed around permaculture principles is built to withstand destructive forces.
While it is a relatively new approach to food production, permaculture relies on concepts from traditional approaches to agriculture. There are methods from all over the world that have been highly productive and sustainable over long periods of time. The revolution of industrial agriculture has worked to eliminate many of these techniques. Permaculture incorporates them back into the modern system to ensure resiliency.
Achieving a productive garden using organic practices is an important goal, for the health of both humans and the environment. Permaculture provides a tested, ethical method for achieving that goal. It also assures us that the benefits of growing healthy food for ourselves isn’t limited to the space of our gardens.
As Bill Mollison says, “If we do not get our cities, homes, and gardens in order, so that they feed and shelter us, we must lay waste to all other natural systems. Thus, truly responsible conservationists have gardens.”
For a great introduction to some permaculture ideas, check out this video by Toby Hemenway.
https://thehomestead.guru/permaculture/
On – 21 Mar, 2017 By The Plaid Zebra
-

Fertilizing Corn In The Home Garden: An Organic Approach
As garden crops go, corn is among the heaviest feeders. To support tall growth and good ear formation, corn crops often need supplemental additions of nitrogen; there’s typically not enough of this nutrient available in garden soils to support such a large-statured crop. Fertilizing corn in the home garden is an essential summer chore, if you want a hearty crop of plump ears.
When To Fertilize Corn In The Summer
Test your garden soil every few years to ensure its pH is at the correct level to support the growth of most common garden crops, including corn. The best pH for most vegetables is between 6.0 and 6.5, and ensuring your soil’s pH fits in this range improves the availability of most nutrients to your corn plants.
That said, even when the soil’s pH is in the suitable range, supplemental nitrogen fertilizer is often necessary when growing corn. Adding yearly additions of well-composted manures and using legume cover crops will add a good bit of nitrogen to the soil, but when your corn plants reach two feet tall, it’s time for fertilizing corn in the home garden.
Organic Products For Fertilizing Corn
If you want to avoid using chemical-based fertilizers in your veggie patch, you’ll need to turn to organic nitrogen fertilizers to give your corn plants a boost. The following sources of nitrogen are plant- or animal-based and require soil microbes to break them down into a form of nitrogen the plants can use. Thankfully, upon adding one of these fertilizers to the corn patch, all the necessary soil microbes work very quickly to break down these products and release the nitrogen to your growing corn plants.
- Alfalfa meal: Made from dried alfalfa plants, this plant-based fertilizer is about 4 percent nitrogen. It’s often used as an animal feed supplement, too, and it promotes a balance of healthy soil microbes.
- Cottonseed meal: A coarsely granulated product made from the hulls of cottonseeds, cottonseed meal is about 6 percent nitrogen. Once in the soil, it rapidly breaks down and provides a burst of nitrogen to plants within a few days of application.
- Blood meal: Derived from dried blood from slaughterhouses, blood meal contains about 12 percent nitrogen. It acts quickly in the soil and begins to provide nitrogen to plants almost immediately.
- Feather meal: Another animal byproduct from slaughterhouses, feather meal contains approximately 14 percent nitrogen. It’s inexpensive, though it takes a bit longer for the microbes to mineralize than some of the other organic nitrogen sources discussed here.
- Soybean meal: With a nitrogen content of about 7 percent, soybean meal is another option for fertilizing corn in the home garden.
- Fish fertilizers: Liquid fish fertilizers as well as granular fish-based fertilizers are good nitrogen sources for the corn patch. Though they can smell bad, fish-based fertilizers are mineralized by soil microbes very rapidly. Depending on the formulation, they can contain between 5 percent and 10 percent nitrogen.
How To Fertilize Corn
Adding nitrogen to your corn plants is as simple as side-dressing the rows at the recommended application rate shown on the product’s label when the plants are approximately two feet tall. Lightly scratch it into the soil’s surface so the soil microbes can quickly access it, and then water it in.
A word of caution: it is possible, of course, to overfertilize corn plants. Do not add any more fertilizer than recommended on the label. A single application is all that’s necessary, except in the case of extreme nitrogen deficiencies. Conduct a soil test every few years to ensure all essential plant nutrients are in the proper balance.
http://www.hobbyfarms.com/fertilizing-corn-home-garden-organic/
On – 22 Jun, 2017 By Jessica Walliser
-

Vegetables – Grow top-quality carrots

Carrots are important root crops in commercial and home gardens for vegetable production. Here are some pointers for cultivating them.
Carrots (Daucus carota) are members of the Apaceae family and are grown for the edible root, which can be eaten raw or cooked. They are rich in carotene (vitamin A). Carrots grow well in cool conditions, as long as there is enough moisture, and they are fairly resistant to cold and frost.
SOIL
Carrots need deep, well-drained sandy loam to sandy soil, and the texture is very important because it affects how smooth and well-shaped the roots will be. Avoid heavy, compact soil which will discourage growth. Soils high in fresh organic matter can result in hairy, forked and malformed roots, and stony soil can also produce poor root shapes. The optimum pH (H20) is between 6,0 and 6,5.
TEMPERATURE
Carrots are cool-weather plants, but growth slows down if the temperature drops below 10ºC.
Although not usually sensitive to frost, severe frosty spells can damage the leaves. Roots can be damaged if the soil temperature drops below 0°C, especially if the plants were irrigated the preceding afternoon.
The temperature and soil moisture influence the colour, shape and quality of carrots. Growth is optimal at 18 – 23°C, although some cultivars can withstand a great deal of heat. High temperatures (above 29°C) affect emergence and quality negatively, causing poor colour and thicker centres.CROP ROTATION
Rotating crops helps to improve the quality of the soil and keep down soil-borne pests. Carrots make good crop rotation partners for cabbage, lettuce, pumpkin and tomatoes. If rotated with leguminous crops, such as peas and beans, they improve the soil’s nutrient levels.
CULTIVARS
Try these varieties:
Kuroda, which offers an excellent yield and has a good shape. It’s 11 – 15cm long and has a thin kernel. Can be produced in warmer seasons.
Cape Market is cylindrical, 12 – 17cm long and produced in warmer seasons.
Scarlet Nantes, Flacoro, Fancy and Duke are good choices for autumn planting.PREPARING THE SOIL
Loosen the soil thoroughly by ploughing (or using a fork, hand hoe or spade) to a depth of 300 – 400mm to allow for good root aeration, root penetration and drainage. Crush all clods with a rake or cultivator to obtain a deep, fine tilth. Remove stones because they can cause poorly shaped carrots. It would be even better to build and prepare a raised bed. Remove all weeds before sowing because carrot seedlings are very fine and cannot compete with weeds.
SPACING
Allow 25 – 35cm between rows. Thin out at one to two weeks after emergence, when the carrot seedlings are about 4cm high, and again one to two weeks later. This should result in a spacing of 4 – 5cm within the row (80 – 120 roots/m²). Do not thin out later than four weeks after emergence. If the crop is not thinned out, the carrots will be small and malformed. Thinning should take place in the afternoon, and when soil is moist.
APPLYING FERTILISER
Broadcast about 1 000kg/ha (100g/m2) of a fertiliser mixture such as 2:3:4 (30)+Zn or 1 100kg/ha (110g/m2) of 2:3:2 (22)+Zn just before planting and work it into the top 10cm of soil.
Apply a top dressing of 10g LAN per metre of row at three weeks and again at six weeks after emergence. Sprinkle on both sides of the row, 2 – 10cm from the plants (do not sprinkle on the plants). It would be a good idea to remove all the weeds before applying LAN in order to avoid their competing with the carrots for fertiliser. Work into the top 2cm of the soil, using a flat-tined fork. Water well. In areas known to have a boron deficiency, apply 10 – 20kg/ha borax after planting.
Do not use manure and compost for carrots, because they can cause malformation of the roots and decrease the marketable yield. If manure needs to be dug in, do so with the crop preceding carrots (see crop rotation).HOW TO SOW
Rake the soil surface to a fine-tilth seedbed before sowing the small carrot seeds directly in the soil – carrots cannot be transplanted.
Put the seeds in the palm of one hand, take a substantial pinch with the fingers of the other hand and rub between finger and thumb as you move your hand forwards and backwards along shallow (1,5cm deep) furrows, until the desired sowing rate is achieved. Another method is to mix one teaspoon of seed with 10 teaspoons of sand and then sow it. Seeding requires some experience and practice.
After sowing, cover seed with fine soil to ensure better germination. In the warmer months, mulch the rows with dry grass to keep the soil cool and moist, as this will assist germination. Remove the mulch after the seedlings have emerged. (If it is kept on too long, the seedlings will become leggy and the sun will burn them easily.) Emergence may take 7 – 14 days depending on the cultivar, the weather, soil type and season important You will need 3 – 4kg seed. For smaller plots, allow 1g (1 teaspoon) per 2m of row.
IRRIGATION
Keep the soil moist after sowing the seeds to ensure good germination. Water carrots regularly throughout the growing season, but take care not to water too much. As a general rule, carrots need about 30mm of water per week. Water every five days if the weather is warm and dry.
MANAGING THE CROP
Start off with a weed-free plot so that the carrots do not have to compete with them for nutrients and water. Then weed carrots regularly to keep them free of weeds. If you see any weeds appear, remove them immediately. Being weed-free has a substantial effect on the yield – and your profits. Be particularly careful to remove perennial weeds because they can grow between the roots and will result in poor-quality carrots.
HARVESTING
Carrots grow for 10 – 12 weeks from emergence to harvesting, depending on the cultivar and the temperature. In small gardens, harvest them as soon as they reach a diameter of 20mm but are still young and tender. Make sure the soil is wet when you harvest carrots, to make them easier to remove, either pulling out by hand or first loosening them carefully with a fork (start 15cm away from the base of the plants) and then pulling them out.
Harvest carrots when they are fully mature as this increases their shelf-life. Do not harvest early in the morning if the soil is cold, as this may cause the roots to crack horizontally. Do not leave carrots in the sun after harvesting – take them to a shady place as soon as possible.
STORAGE
Most horticultural crops are perishable and can only be stored for a few days. It is best to harvest carrots as needed for consumption or selling. Remove the leaves before storing, to extend shelf life.
Fresh carrots, harvested when mature, will keep for up to five days at room temperature (20°C), and for 7 – 21 days in a refrigerator.
WHEN TO SOW
The following sowing times are recommended for the different countries.
South Africa
Highveld: August to mid-March.
Middleveld (temperate climate zones): August to mid-April. In very warm areas, August to September and February to March.
Limpopo and Lowveld: February to April and July to August.
Free State and Northern Cape: August to October and end of January to March.
Kwazulu-Natal (midlands and coastal region): August to April.
Eastern Cape: July to April, but NOT in mid-summer in very warm areas. In very cold areas, August to April.
Western Cape: August to end of March.Zambia
Eastern province, and Sesheke and Shangombo districts: March to July.
Northern, Luapula, Copperbelt, Northwestern, and parts of Central Provinces: March to July.
Sandveld plateau of Central, Eastern, Lusaka and Southern provinces: March to July.Zimbabwe
Mashonaland East, Central and West: February to September.
Mashonaland west(Kadoma) and Midlands(Kwekwe, Gweru, Gokwe): February to September
Masvingo: February to SeptemberMalawi
Whole country: whole year
Botswana
Southern region: February to Septmenber
Gabarone regione: March to September
Central region: March to August
North east region: March to August
Ngamiland region: April to AugistDisease control recommendations
- Rotate crops.
- Plant in well-drained soil.
- Water early so that leaves can dry before nightfall.
- Do not over-irrigate.
- Burn diseased plants.
- Fertilise plants well.
- Control weeds in and around fields.
- Remove all plant residues from the field after harvesting.
REMEMBER: There are no registered disease-control chemicals for carrots.
On – 17 Aug, 2017 By Digital team
-

5 Keys To Growing Cucumbers – Grow A Banner Crop This Year For Pickles And More!
Growing Cucumbers! When it comes to backyard gardens, cucumbers are right up there with tomatoes as one of the most popular home-grown vegetables.
It’s not hard to figure out why. Is there anything better than a fresh cucumber sprinkled with a little bit of salt? And beyond that delicious fresh taste, they are, of course, prized for making pickles. In our house, pickles rule! (See our Pickle Recipe Page)
Whether its making a quick batch of our overnight garlic pickles, or canning bread and butter, dill or hot pepper-garlic pickles, we simply love them!
But to make a lot of pickles, you have to grow a big crop of cucumbers. I have to say, it took us several years to really perfect the art of growing a banner crop. We thought we would share 5 of our biggest tips we’ve found to help grow that perfect crop.
5 Keys To Successfully Growing Cucumbers
#1 Plant In A Sunny Location
At the top of the list, sunshine. Cucumbers need the sun, and a lot of it! Locate your crop in an area that receives at least 8 hours of sunlight a day. Much like pumpkins, gourds and zucchini – cucumbers rely heavily on the photosynthesis process to grow the strong vines needed to producing heavy fruiting. No sun, no photosynthesis.
Locating your crop in the sun also allows leaves and vines to dry off from early morning dew. This is a huge help in controlling mildew and blight. Avoiding both of those issues are big to keeping your crop healthy.
#2 Provide Rich, Fertile, Well Drained Soil
Cucumbers love rich, fertile, well-drained soil. The more you nutrition you can provide at planting time, the better. We add a few shovelfuls of compost, and a quarter cup of worm castings to each planting hill or container. It creates a rich soil for the young seeds or transplants to get off to a great start. The worm castings / compost combo has made a huge difference in the health and productivity of our plants!
When planting directly into the soil, we plant in slightly tapered hills about 18″ in diameter, 3″ to 4″ high. This helps keep the plant stems out of sitting water during heavy rains or watering.
We prefer planting transplants over seeds. The added growth and strength help give them a better chance to avoid dreaded cucumber beetle attacks. If you are planting transplants, use two plants per hill. If you seed, plant 3 and thin to 2.
Cucumbers, especially bush-style varieties, can be planted in containers as well. Again, be sure start off with a rich, well-drained soil mix to give plants the nutrition they need. Use only one plant per container to avoid draining the soil too quickly of nutrients. Product Link: Worm Castings
#3 Be Careful What You Plant Nearby
What you plant around your cucumbers can play an important role in their productivity. One thing to avoid for sure is planting cucumber crops near potatoes.
Potatoes release a substance in the soil that greatly hinders the growth of cucumbers. Radishes, on the other hand are great, as they help to repel harmful insects like cucumber beetles and aphids that attack tender cucumber plants. It is also easy to sow a few inexpensive radish seeds around plants. They germinate fast and really do help stave away the beetles.
Nasturtiums and Alyssum are also excellent to plant right alongside your growing cucumbers.
The nasturtiums will help repel and deter a whole host of nuisance insects, while the alyssum acts as a sacrificial plant to beetles, keeping them away off of your cucumbers.
One final note on where you plant. Be sure to practice crop rotation. You can keep soil-borne disease at bay by rotating your crops each year to a new location. Wait at least three years before planting them back in the same location. This allows the soil to recover, minimizes disease, and reduces the possibility for infestation.
#4 Provide Support
If you are planting a vining variety of cucumber, be sure to provide support in the way of a trellis, fence, or rope or wire. A folded piece of metal fencing will work great in open garden settings. By providing a place for the vines and cucumbers to grow, it keeps the plants and fruit off the ground and less susceptible to mold, blight and disease. It also helps support them during winds and heavy storms.
Compact, bush varieties can usually be grown without support, but even with these varieties, a little help in holding them up goes a long way. Seed Links : For canning we grow Boston Pickling and National Pickling. For fresh eating : Straight 8,.
#5 Harvest Regularly
Once cucumber plants begin to produce, you need to pick regularly to keep them producing well. If left on the vine too long, cukes get woody, full of seeds, and bitter. In addition, the plants will put their energy towards making the existing fruit larger, and not producing new blooms. Check plants daily, cukes can go from 2″ inches to 12″ in a day or two!
There you have it! Five of our favorite tips for growing cucumbers successfully. We hope you enjoyed this week’s gardening article. If you would like to receive our DIY, Gardening and Recipe articles each week, you can sign up to follow the blog via email in the right hand column above, “Like” us on Facebook, or follow us on Twitter. This article may contain affiliate links.
https://oldworldgardenfarms.com/2017/04/06/growing-cucumbers/
On – 06 Apr, 2017 By oldworldgardenfarms
-

6 Ways to Increase Food Production in Your Organic Vegetable Garden
Please note that affiliate links are present in this post, which means if you click on a link a buy something, I’ll get like 4 cents for it at no extra cost to you. All recommendations are humbly my own.
-
1. Prepare Your Soil Using a No-Till Method
-

No-Till gardening requires nothing more than reliable tools and good old-fashioned hard labor. Good for you and your garden. - It’s a harsh fact that machines are destroying our soil! When we mechanically till our gardens, our soil’s complex structure gets broken up into tiny particles. Air pockets created by earthworms and arthropods diminish. Colonies of beneficial bacteria and strands of fungal hyphae break apart. When these tiny pieces all settle, they become extremely compacted, leading to poor drainage – the totally opposite effect we hoped tilling would have!
- There’s a common misconception that we must till our soil every spring to aerate, so “roots can breathe” and “water can drain more efficiently,” but the fact is: Tilling does NOT accomplish this. There many other ways we can prepare our gardens that are not only healthier for our soil, but also require much less money and equipment – my preferred method is Double Digging.
Related Enough: Epic Spring Planting Series: My Best Tips for Planting with Seeds
I first learned about double digging from John Jeavons, founder of Ecology Action and the Grow Biointensive farming method, and author of How to Grow More Vegetables, when he presented at the MOSES Organic Farming Conference in 2015. The Double Dig Method entails digging two layers of soil with a shovel using nothing but old-fashioned manual labor. Using the least amount of effort possible, the digger is to “twist” the soil in patches while amending it using organic fertilizers and compost. Watch this instructional YouTube video on double digging (note that there is a second part you’ll need to watch).
Side note, I have a 2-part Soil Building Series: Increasing the Biodiversity of Your Soil Food Web, Part 1 and Part 2. To really get to know your soils on a deeper level, and to learn how to care for them compassionately, I invite you to read those posts!
The benefits of double digging are endless. There’s no intense breaking up of the soil structure. There’s no mass killing of valuable microorganisms, so plants are naturally healthier. All of your earthworms, spiders, centipedes and other beneficial bugs will be left in tact. Your plants’ root systems will grow deeper and stronger. And what’s fascinating is, once you build your soil fertility with organic matter your soil will hold more water, reducing the need to water as often. All of this means MORE FOOD!

Worms are so incredibly important for our gardens and when we are gentle with our soils, we preserve them and their delicate work. Totally Related: 7 Best Organic Soil Amendments for Your Garden
amzn_assoc_placement = “adunit0”; amzn_assoc_search_bar = “true”; amzn_assoc_tracking_id = “heirloomsoul-20”; amzn_assoc_ad_mode = “manual”; amzn_assoc_ad_type = “smart”; amzn_assoc_marketplace = “amazon”; amzn_assoc_region = “US”; amzn_assoc_title = “Stuff We Love for Soil Prep”; amzn_assoc_linkid = “5784ba14ef33b867e91e1877f5f21b5c”; amzn_assoc_asins = “B010CXJ0L4,B00AE12V5M,B00OHSFEG6,B010CRGKAE”;
-
2. Improve Your Soil Biodiversity with Homemade Compost
- If you know anything about compost, let it be this: Not all compost is created equal! The nutrient content of the compost you are using depends on what it is made out of. Did you acquire it from your municipality, in which case it could be mostly decomposed grass and tree trimmings, potentially laden with herbicides? Or did you make it yourself, in which case it is probably a richer concoction of grass and leaves from your yard, kitchen scraps of fruits, herbs, veggies and egg shells, and all kinds of organic matter from your own garden?
You see where I’m going with this. Compost is a great way to feed your garden and introduce more biodiversity into the soil, ideally at the end of the season or during soil preparation.

Homemade compost is the BEST compost – and it doesn’t have to be hard! The best compost to use is your own because you control what goes in it. All of the different types of organic matter we throw into our compost support different types of microbes, and this vastly increases the biodiversity and the nutrient content of our end product. A more biodiverse compost pile means a more biodiverse garden.
Some of us don’t have room to make compost. If you’re one of these people, getting compost from your municipality is fine – usually it’s free, and everyone loves free!
-
3. Stop Stepping on Your Soil
- This might sound obvious, but I’m adding it in here and for good reason: I’ve worked with a ton of people who stepped all over their garden beds until they worked with me. Soil compaction is one reason, while the breakage of tender plant roots is another, but the main reason why you should never, ever step on your soil is because your weight crushes and suffocates your microbes. Healthy soil food web = More nutrients in your veggies!
By now you’re going, Really? For the third time? Microorganisms, microbes or whatever the heck those things are she’s talking about?
The books below changed my life as a gardener and will also help you understand microbes, and your garden, like you never have before:
amzn_assoc_placement = “adunit0”; amzn_assoc_search_bar = “true”; amzn_assoc_tracking_id = “heirloomsoul-20”; amzn_assoc_ad_mode = “manual”; amzn_assoc_ad_type = “smart”; amzn_assoc_marketplace = “amazon”; amzn_assoc_region = “US”; amzn_assoc_title = “”; amzn_assoc_linkid = “be1d2f3f6543bfbef748e4958a695d08”; amzn_assoc_asins = “1604697296,1604691131,1580085792,1603580298”;
I use “microorganisms,” “microbes,” “soil biodiversity,” “microbial life,” and “Soil Food Web” interchangeably throughout my posts, but I mean generally the same thing when I talk about how important they are – “they” being a collection of bacteria, protozoa, nematodes, algae and fungi, billions of which can be found in one tablespoon of your soil. Caring for these living creatures is the most important aspect of growing food.
So, a solution to stop stepping on your soil. You need clearly marked, delineated pathways throughout your garden. And once you’ve developed this pathway system, it needs to always stay that way. My favorite and easiest to use path materials are straw, wood chips and stepping stones.

Pathways are the best way to keep yourself, and everyone else, from stepping on your soil. 4. Mulch, Mulch, Mulch
It is so, absolutely important for you to mulch your vegetable garden. Not only does mulch keep weeds down and prevent moisture from evaporating quicker, mulch materials also break down over time and add valuable organic matter to your soil, and provide food sources for your soil food web. Most importantly though, mulch provides a thick, protective layer for your microbes against the harsh outdoor elements.

Spring bulbs loving life in a bed of nitrogen-rich leaf mulch. Though a full-sun space is a blessing and ever-desirable in organic gardening, it can have a detrimental effect on the top few inches of soil by completely drying it out. The top four inches of soil is where most of our microbial life is contained, and the hot sun will crisp and evaporate the little guys right up without a protective layer! Rain can also have undesirable effects – microbes are so tiny that raindrops falling on them has a similar effect not unlike our stepping all over them. The way we can protect our microbes from the natural elements is by using mulch.
Related Enough: Gardening Myths We’re Officially Breaking, or Why You DON’T Need Raised Beds and Fertilizers

The sun is incredibly powerful and will dry your garden right up if you don’t cover it with mulch. There are lots of different options for mulch, but here, I will highlight the simplest mulching solutions…
- – Straw is an economical option because not only is it initially cheap to buy, but you can also use it for your pathways. It is good to use around baby seedlings because it will help prevent birds from nibbling at them, and it will partially break down over winter so it may be incorporated into your soil during preparation in spring. Be sure to get “straw” and not “hay,” where seed heads are present.
- – Decomposed leaves, or leaf mulch, is an attractive mulching option and adds a good amount of nitrogen to the soil as it breaks down and becomes incorporated into the garden bed. Earthworms love it. If you have a lot of trees on your property, you could create a compost pile of leaves and make your own leaf mulch, otherwise it comes bagged at most landscape suppliers. Be aware that if you do not buy certified organic leaf mulch, the mulch you do buy could have residual pesticides – not great for us or our microbial friends.
- – Living mulch is a way of mulching by growing groundcover plants with shallow root systems in between vegetable plants, not unlike cover cropping. Growing living mulches takes a little more maintenance and technique (you must know what plants are acceptable to grow for living mulch and when to plant them), but anyone can do it! Living mulch is so great because it’s very cheap and easy to do (all you need are seeds), it adds lots of color and texture to your garden, and the added root system provides tons of extra food for microbes. Great options for living mulch are sweet alyssum, creeping thyme, creeping jenny, and arugula.
Totally Related: How to Cover Crop Your Vegetable Garden in 4 Steps
5. Get Your Fencing Right

Ok so this is kind of a joke… but not really. I’ve worked with people who put so much time and money into their fence but it wasn’t done properly so they might as well just had an adorable blue gate instead! My adoration for bunnies, squirrels, deer, and especially groundhogs, has waned since I became a vegetable gardener. When you grow food, animal families seem to multiply out of nowhere, and they all have this perfectly-timed instinct that tells them exactly when to nosh your harvest just hours before you can get to it. PESTS!
Totally Related: Battling Garden Pests: The Organic Pest Control of Mindfulness and Compassion
The only way for us to keep pests out of our garden is by building a strong fencing system. I will always say that with fencing materials and construction techniques, the higher quality your materials are, the better results you will have in creating an animal barrier. There will also be less upkeep with damage from storms and weight on it from heavy snow and ice.
There are some basic dimensional fencing details to know, based on what type of animal you need to keep out…
- – Bunnies – The openings in your fencing material should be no larger than 1”x2”, and I think this is a good rule for all garden fencing no matter the pest. Baby bunnies have the ability to get through 2”x2”, and they are everywhere. If you have a gate within your garden fence, be aware of the threshold gap at the bottom of it – the gap should be no more than ½” – a commonly overlooked detail! If you don’t have deer, a 3-foot tall fence is good enough to keep bunnies out. Keep in mind though that you can’t grow tall crops on such a short fence, so sometimes its nice to go vertical anyway.
- – Deer – Your deer fencing should be at least 6 feet tall, preferably 8 feet. It sounds hulking and fortress-like, but it’s actually nice to have fencing this tall because then you can grow pole beans, peas, cucumbers, squash and vining flowers on it. Deer have a tendency to eat plants through the mesh fencing, so you may need to attach a screen or a similar very fine mesh to keep their snouts out. Trick is to avoid attaching this screen too high, otherwise it will block sunlight.
- – Groundhogs/Gophers – These are burrowing animals, living up to 18” underground in large nests connected by a network of underground pathways. They’re incredibly smart. You’ll need to dig a deep trench (ideally 18”) and extend your METAL mesh fencing down that far to keep them out. Groundhogs are not typical in suburban backyards or city yards, but if you’re out in the country, or live near open fields of any kind, you absolutely need to protect your garden from groundhogs or all will be lost. I’ve learned this the hard way.
- – Chipmunks & Squirrels – Just forget it! No matter of fencing, unless you completely cover the top of your garden, will keep them out. If squirrels are taking bites out of your tomatoes, chances are they are sucking the juice out because they’re thirsty. Try leaving shallow dishes of water out for them to drink. I swear it works!

Ever see a squirrel drink? Now you have. They get thirsty, too! 6. Assess Your Tree Canopy
Trees grow fast. Sometimes just a few years after setting up your garden your trees can grow so much that new branches block primetime sunlight.

Trees cast much more shade than you would think, causing leggy, unproductive growth in your garden. If you notice your plants are stunted but you think you’re doing everything else right, I encourage you to spend some time in your yard one day and assess the sunlight in your garden. The Solar Pathfinder is an amazing tool I’ve used in countless gardens to determine sun exposure – it might be worth the price if your garden is large enough, creates revenue, or if you could split the cost of it with other gardeners.
Look up and see if any trees might be blocking the sun pattern. If they are your own trees, and are small enough, go ahead and trim them back with tall tree loppers. If the branches are larger and too high, consider calling a local landscaper or arborist for their tree trimming rates – it is probably worth the cost. You’d be surprised at just how one really tall branch can make hours of a difference in your garden! Visit this post for a blurb on how to determine the hours of sun exposure in your garden.
amzn_assoc_placement = “adunit0”; amzn_assoc_search_bar = “true”; amzn_assoc_tracking_id = “heirloomsoul-20”; amzn_assoc_ad_mode = “manual”; amzn_assoc_ad_type = “smart”; amzn_assoc_marketplace = “amazon”; amzn_assoc_region = “US”; amzn_assoc_title = “Products Mentioned in This Post”; amzn_assoc_linkid = “be1d2f3f6543bfbef748e4958a695d08”; amzn_assoc_asins = “B00AR0RMBI,B009378AG2,B00F0MB40S,B00NGYMVYK”;


http://heirloomsoul.com/6-ways-to-improve-your-existing-garden-tips-from-an-edibles-expert/
On – 09 Apr, 2017 By Fran
-
-

How to Prevent Late Blight in Your Garden
How to Prevent Late Blight in Your Garden
by | Gardening |
3 years ago I had big plans. I spent hours planting over 300 tomato seeds. I watered, I turned, I transplanted. I spent a week digging 300 holes and putting them into the ground.
I spent even more hours pinching off suckers and winding twine around the plants to tie them to their stakes. They were growing, heavy with green fruits and so close to turning red.
Aren’t they beautiful?

That’s when I found it. It started as black spots on the leaves and fuzzy white growth on the underside. We’d fought bacterial spot before. Early blight even. But this was different. I walked the garden and found more plants along the row- with blackened stems and even some of the fruits had a bruised look about it.
I knew what it was, but I snapped some pictures and sent them to my husband and sat down to Google. And my heart sank.
Late Blight.
I was devastated. We dug up all the plants we could find with signs. We started spraying the remaining tomatoes with an organic copper fungicide. But one by one my plants fell. Over the course of a month every. single. plant. was infected. We were lucky to get a few early tomatoes first, but all hopes of canned sauce were gone.
I wouldn’t wish that on any gardener! So what can you do to prevent late blight from destroying your garden? First let’s talk about what it is and how to spot it.

Signs of Late Blight
Late blight is not like other diseases that strike your garden. Most will cause a reduction of harvest, but not affect the entire crop. Late Blight, however, will take down the entire plant- and it is highly contagious and spreads easy. This means one plant will most likely turn to 2, which turns to 3, and so on and so on.
Technically speaking, Late blight is a fungus, Phytophthora infestans, to be exact. It spreads easily on the wind through spores and can travel quite a ways to settle on your plants. It affects both tomatoes and potates (Irish potato famine!). So be on the lookout on both crops.
Plants should be destroyed to that no infected plant matter remains in your garden, on your soil, or in your compost heap. We bagged ours up in trash bags. The good news is that late blight won’t live in your soil or on your tomato cages…but make sure you get all roots, stems, leaves, and potatoes out of the ground.
- Cooler, wetter weather will spread the disease quickly. It provides optimum conditions for blight to spread.
- The leaves are the first infected- usually lower on the plants. You will see blackened areas over the leaves. One of the easily identifiable signs is the white, fuzzy, fungal growth on the underside of these leaves.
- Stems will also start to blacked in random spots- usually at a joint.
- Fruits are usually the last to show signs- green fruits will get a browning tinge in areas and turn completely brown/black as it progresses.

How to Prevent Late Blight in Your Garden
That’s the way it is with most things, right? It is better to prevent late blight than to try and treat and save an infected area. So how can you prevent late blight?
Plant blight-resistant varieties. There are a few heirloom tomatoes that seem to have some natural resistance as well as some hybrids that can fight late blight.
Pay attention to proper spacing. I think one of the reasons my plants were so hard it was that I planted them too close together in order to fit them all in, that put together with a wet and cool June, gave me the perfect recipe for blight. Proper spacing will allow your tomatoes to dry faster and allow more air circulation.
Water the roots, not the leaves. This should be a rule for all plants. Wet conditions can breed a lot of disease- so keep the water on the ground and not on the leaves.
Learn how to build a PVC Drip Irrigation System for your garden with Online Gardening School- this system is the perfect way to water tomatoes and will keep your plants healthier! For a limited time The Free Range Life Readers can get this course for 50% off! Click here to get started!
Practice good crop rotation so that your tomatoes and potatoes are not planted in the same soil year after year. This will reduce the risk of plant matter accidentally being left from previous years- which may have spores still living on them.
Solarize your soil prior to planting.
Use organic sprays BEFORE you see signs of blight. Serenade is a biological fungicide that can help prevent late blight- along with organic copper fungicide. Spray to prevent, not treat.
What to do if Late Blight Strikes
In all my years gardening in East Tennessee, I never saw late blight. Now, living in Western North Carolina, it seems that it’s not a matter of if, but when we will see late blight. We live in an area that has a lot of commercial tomato farms- we live less than a mile from about 3 fields! So spores are on the wind- and without a hot dry summer- we fight the battle every year.
If you find yourself with infected plants, here’s what you should do.- Pull up infected plants immediately. The entire plant. Bag it up and set it out for the trash pick up.
- If you aren’t already spray products like Serenade or an organic copper fungicide on the remaining plants.
- Contact your local extension agent to report the infection. Remember late blight is extremely contagious and if you allow it to go rampant in your garden you are risking infecting your neighbor’s gardens as well.
- Don’t give up. Believe me, I know how devastating it is to loose you garden to a disease like this. Don’t give up. Rebound quickly and plant something in it’s place. A nice fall crop of brassicas or greens, beans, or other veggies that are good for the season.
- Plan ahead for next year. Prepare your soil ahead of time and plant a good variety of plants- including early varieties that you can harvest before any chance of late blight occurs.
The year we pulled up all of our plants, we also brought in a few hundred pounds of green tomatoes to attempt to ripen in our basement. Most of them succumbed to late blight and rotted before they ripened. And even though it was devastating, we continue to plan tomatoes every year- we just have to be extra careful and use as many prevention techniques as possible. Have you dealt with late blight in your garden? Let me know your experience with it in the comments!
http://thefreerangelife.com/prevent-late-blight/
On – 27 Feb, 2017 By Sarah


