Your cart is currently empty!
Category: Wood Heat
Wood Heat
-

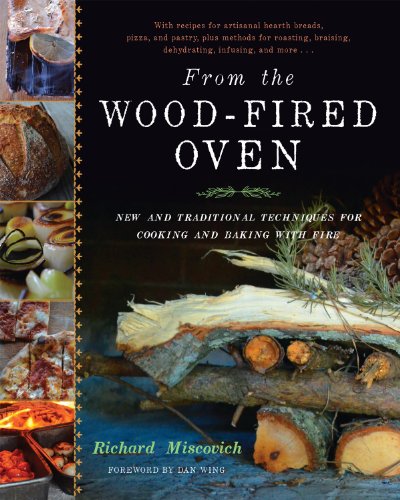
From the Wood-Fired Oven: New and Traditional Techniques for Cooking and Baking with Fire
In the past twenty years, interest in wood-fired ovens has increased dramatically in the United States and abroad, but most books focus on how to bake bread or pizza in an oven. From the Wood-Fired Oven offers many more techniques for home and artisan bakers―from baking bread and making pizza to recipes on how to…;
Chelsea Green PublishingPrice:
$44.95$34.43 Free Shipping
In the past twenty years, interest in wood-fired ovens has increased dramatically in the United States and abroad, but most books focus on how to bake bread or pizza in an oven. From the Wood-Fired Oven offers many more techniques for home and artisan bakers―from baking bread and making pizza to recipes on how to get as much use as possible out of a single oven firing, from the first live-fire roasting to drying wood for the next fire.
From the Wood-Fired Oven offers a new take on traditional techniques for professional bakers, but is simple enough to inspire any nonprofessional baking enthusiast. Leading baker and instructor Richard Miscovich wants people to use their ovens to fulfill the goal of maximum heat utilization. Readers will find methods and techniques for cooking and baking in a wood-fired oven in the order of the appropriate temperature window. What comes first―pizza, or pastry? Roasted vegetables or a braised pork loin? Clarified butter or beef jerky? In addition to an extensive section of delicious formulas for many types of bread, readers will find chapters on:
• Making pizza and other live-fire flatbreads;
• Roasting fish and meats;
• Grilling, steaming, braising, and frying;
• Baking pastry and other recipes beyond breads;
• Rendering animal fats and clarifying butter;
• Food dehydration and infusing oils;
• And myriad other ways to use the oven’s residual heat.Appendices include oven-design recommendations, a sample oven temperature log, Richard’s baker’s percentages, proper care of a sourdough starter, and more. . . .
From the Wood Fired Oven is more than a cookbook; it reminds the reader of how a wood-fired oven (and fire, by extension) draws people together and bestows a sense of comfort and fellowship, very real human needs, especially in uncertain times. Indeed, cooking and baking from a wood-fired oven is a basic part of a resilient lifestyle, and a perfect example of valuable traditional skills being put to use in modern times.
Ships from Vermont
Full Customer Reviews:
-

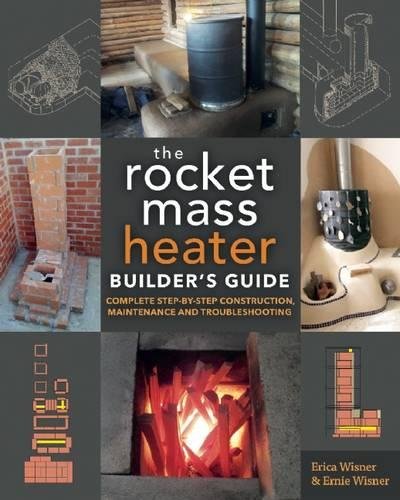
The Rocket Mass Heater Builder’s Guide: Complete Step-by-Step Construction, Maintenance and Troubleshooting
Heating with wood is often considered a natural and economical alternative to electricity or fossil fuels. However, even with a fairly new and efficient woodstove, many cords of wood are required for burning over the course of a single winter, and incomplete combustion can contribute to poor air quality. A rocket mass heater is an…;
New Society PublishersPrice:
$39.95$28.73 Free Shipping
Heating with wood is often considered a natural and economical alternative to electricity or fossil fuels. However, even with a fairly new and efficient woodstove, many cords of wood are required for burning over the course of a single winter, and incomplete combustion can contribute to poor air quality. A rocket mass heater is an earthen masonry heating system which provides clean, safe, and efficient warmth for your home, all while using 70 to 90 percent less fuel than a traditional woodstove.
These unique and beautiful installations provide luxurious comfort year round. In cold weather a few hours of clean, hot burning can provide twenty or more hours of steady warmth, while the unit’s large thermal mass acts as a heat sink, cooling your home on sizzling summer days. Packed with hard-to-find information, The Rocket Mass Heater Builder’s Guide includes:
Comprehensive design, construction, and installation instructions combined with detailed maintenance and troubleshooting advice
Brick-by-brick layouts, diagrams, and architectural plans augmented with detailed parts drawings and photographs for clarity
Relevant and up-to-date code information and standards to help you navigate the approval process with local building departments
Earthen masonry heating systems are well-suited for natural and conventional builders alike. A super-efficient, wood-burning, rocket mass heater can help you dramatically reduce your energy costs while enhancing the beauty, value, and comfort of your home.
Erica Wisner and Ernie Wisner have built over seven hundred super-efficient, clean-burning masonry stoves. They are dedicated to the search for sustainable solutions and the hands-on teaching of creative, ecological, and practical skills.
The Rocket Mass Heater Builder s Guide Complete Step By Step Construction Maintenance and Troubleshooting
Full Customer Reviews:
-

Taking a Pass on Gas – Wood Preferred | Two Ice Floes
Taking a Pass on Gas – Wood Preferred
By
High Desert Homesteading
We recently bought a 22 year old house that had a massive rock gas fireplace. Not only was it useless for producing heat (being mostly decorative) it burned a fossil fuel controlled by a public utility. We much prefer a real fire, not to mention we have years of standing firewood on our property.
While a real wood fireplace/stove was on our prerequisite list for our new home, this house had pretty much everything else. Since the existing fireplace was very large and constructed of solid moss rock, we assumed it must have been a real fireplace at one time and later converted to a gas fired insert by a previous owner.
Forgive the quality of some of the photos. This was an exhausting process for an old guy, so I took photos with whatever device I had handy at the time.


The first part of this article will cover the three D’s: Discovery, Disappointment and Demolition.
While I personally installed a wood boiler and two wood stoves at the old homestead, I had no experience with a major conversion. The first stop was to a local home and hearth type store to get an idea of what we were dealing with and the options for wood inserts…assuming we could use the existing moss rock structure.
We were told it was essential to determine if the structure was originally a wood burner or built for the gas insert – because if it was originally built for gas – you CAN NOT convert it to wood. I thought the “you CAN NOT convert” statement was just a sales line since most home and hearth stores make the majority of their profit on installation work – not the stove they sell you.
However, the first step was knowing for sure if this was an old wood burner or someone actually went to all the labor and expense to build this massive moss rock structure for an older gas insert (older meaning it looked as much like a real wood fire as a politician’s smile).
The house has a large wooden chase on the roof that could have easily accommodated a masonry or insulated pipe chimney. Since the gas insert was nicely mortared into the rock structure, I choose the roof as a starting point to see if looking inside the chase would provide any real clues as to the gas/wood question.
Having fallen off a 2-story roof about a decade ago, I was really hoping to avoid a similar fate this time. However, since there were no active thunderstorms with high gusts of wind (the cause of my previous fall) I cautiously made the climb and pulled the lid from the chase. This provided my first dash of disappointment. There was no indication of a previous masonry chimney and the existing hole for the gas exhaust pipe indicated a larger, insulated double-walled exhaust pipe sometimes used for a wood burning fireplace was never there.
Not one to easily give up hope until (all) the facts prove otherwise, I knew the house had been re-roofed a couple of times during its life. It was possible that all evidence of a wood burner was removed when the gas insert was installed and the house re-shingled. The only way to know for certain was to get a look inside the moss rock structure to see if it contained an old firebox/masonry structure or if it was constructed of wood framing.
As you can see from the photo below, this was not going to be easy because the installation of the suspected gas insert was done well – the insert frame was completely mortared into the structure. I needed to get a look inside while causing a minimum amount of damage in case we decided to forget this project and stick with the gas insert.

Fortunately I have a 15’ long, USB powered borescope. Essentially this is a camera lens placed at the end of a long flexible tube that can be plugged into you phone with an adapter or directly into your computer/laptop/tablet. These can be purchased for less than $20 on eBay. I removed the glass front of the gas insert and drilled a small hole into the top of the firebox in a location that could be easily patched. I then fired up the borescope on my tablet and went in.
Disappointment was only seconds away. While certainly not providing a 4K, HD image, the borescope clearly showed what I most definitely did not want to see: Wood studs and insulation – everywhere. This left no doubt that our massive moss rock structure was, in fact, originally built for the gas fireplace insert – first wood framed, then sheetrocked and finally stone faced and mortared.
No worries – I just have to figure out the process of converting the existing structure to a wood burner. There has to be a way.
My initial disappointment grew as I spent night after night researching every possible avenue trying to find a reliable source that explains how to convert the gas fireplace into a wood burning one. The bottom line is you can’t! Even with a zero-clearance wood burning insert, one which doesn’t require a heavy masonry chimney, the heat generated by the actual wood burning insert itself is too extreme. It is against every building code in the US to do this and is a major fire hazard.
That left only two choices: Rip out the entire moss rock structure and start over, or leave it in place and place a wood stove in front of it. Either way, I (finally) agreed with my wife that with all the other projects that needed to be done, I would, for once, not do this myself. This was to be the first major project I would let a contractor complete. That was until the bids came in. The going rate for removing the moss rock structure, putting the rocks back on the wall and installing the wood burning stove we wanted was over $8500. Way out of our budget. Not going to happen.
After a week of staring at the structure, “Laying Hands” upon it (just trying to get a feel for how many tons of rock/mortar would have to be removed) my wife and I agreed if we wanted a wood stove and wanted it done right, like most everything else we would have to do it ourselves.
Removing the gas insert was not too difficult. Simply remove the mortar around the trim, disconnect the gas line and electrical connections, ‘saws-all’ the sheet metal firebox enough to bend it in, remove some screws and it pulled right out. Just cap off the gas line (I planned to leave it stubbed out on the hearth for possible future use), put some wire nuts on the bare electrical wires (I will re-route it to be used for future use powering a blower unit) and we were ready for the next step.
Now the real fun began. As you can tell from the photos, the moss rocks in question are not pebbles. Some are 2-3 sq. feet and 4”-6” thick. It was time for a serious tool and a lot of manual labor. We decided that I would perform the highly skilled and technical job of operating the small jack/jill hammer and my wife would carry the stones outside as I popped them off. It seemed a fair division of labor in my book.
Popping the stones off was fairly easy. Just place the chisel bit at a 45 degree angle where the stone meets the mortar and pull the trigger. I had to chisel several spots on some stones, but they all popped off without a lot of effort. And, yes, I did actually help my wife carry out the larger ones.
Once all the stones were gone, that left what proved to be a tougher job, removing the 3-4” layer of wired in mortar that covered the structure. I don’t want to indicate that my wife gets upset when a big mess is being made, but I put in ear plugs for this procedure – and it wasn’t to protect me from the sound of the demolition hammer.
After most of the mortar had been removed, it was time to deal with the wood mantle. The mantle consisted of a bunch of laminated pine 2x6s. It measured 5.5” thick, 18” deep and 8’ long – basically solid pine. During construction they framed and dry-walled the area, then hoisted the mantle into place and angle-screwed it top and bottom into every stud. Then the mortar and moss rocks were added, locking the mantle into place.


At this point the only thing left to do was remove all the screws and figure out how my wife could support the 100-150 lb mantle as I removed the last few screws – assuming the weight didn’t just suddenly snap off the screws and allow the mantle to drop uncontrollably.
Fortunately I maintain a miniature hardware store in the shop. I grabbed some pulleys, rope and 4 self-drilling lag bolts (I love those things). Lagging the pulley contraption at the top of the structure and into the sides of the mantle did the trick. As the screws were removed down the line, the pulleys took the weight. Removing the last screw allowed the mantle to gently detach from the wall without breaking any toes, or worse – creating a big mess.
After the mantle was down and dragged out the back door (where it still sits at the time of this writing) it was fairly easy with the help of a saws-all to cut out the framing/drywall in large sections. Done! That left us with bare studs on the back wall and part of the ceiling and a hearth only half covered in flagstone.
Our initial thought was to re-use the moss rock on the back wall. However, since neither my wife nor I are spring chickens, the thought of mixing literally a ton of mortar and lifting all the rocks back up to the top of the wall was less than appetizing. We discussed numerous design ideas (using lighter materials) and came up with something we both liked.
If you are curious about the vertical silver tube mounted between the studs in the photo above, you will have to return for Part Two of this article, which will begin to cover the rebuild process.
Below is an image mock-up I did prior to the rebuild of what we were shooting for.
High Desert Homesteading

http://twoicefloes.com/taking-a-pass-on-gas-wood-preferred/
On – 28 Oct, 2017 By Cognitive Dissonance


