Your cart is currently empty!
Tag: Construction
-

Building an Energy Efficient Straw Bale Home: Design criteria for Inglewood straw bale
This article first appeared in The Owner Builder 196 August/September 2016. www.theownerbuilder.com.au
By Brian Hodge
As we embark on our 20th owner-built home, I reflect back over the progress since purchasing property last year.
We were surprised the property didn’t have power, sewer, or water but discovered it actually had sewer connection just over the back fence. We were somewhat pleased when we received the quote for electricity connection of $5,050. Mind you, that did not include the connection of the power to our meter box.
Having mentioned the meter box, I am flooded with the memory of its incorrect positioning in my unavoidable absence and the challenges that we were faced with as a consequence (see TOB 195 June/July 2016). But who can complain. The end result was that we have revisited the design and now have a better one that is more interesting. And who can forget the bonus sewer connection at the back of the block, which will save us around $10,000 that we would have spent for a septic system.
A place to run courses
When we first went looking for land our primary motivation was to get a low cost piece of land on which we could run the practical part of our owner-builder straw bale building workshops. This was a precursor to being willing to sell the straw bale house in Ladys Pass. To be a straw bale building consultant with nowhere to do courses and nothing to show people was not an option and the solution had to make financial sense.
Consequently, I did an internet search for ‘land under $50,000 Victoria.’ The result was land in Loch Sport, which was too small and, from previous experience, has too many mosquitoes, and land in Inglewood, Victoria. Inglewood is in central Victoria about 35 minutes north of Bendigo with a population of a bit over 1,000. It was established in 1859 and is still a great place to find gold. It has a good supermarket, hospital, permanent doctor, pharmacy and most important, a couple of good old fashioned pubs for great meals. It is also the town where my youngest son, his wife and two of my grandchildren are located. However, the criteria were primarily price and size.
There was an 8000m2 block for around $45,000 near a light industrial area, a 2000m2 for $70,000 or a 1000m2 for $35,000. We put in an offer of $33,000 on the last block, which was accepted.
Position, position…
The only issue, which was a big one, was its orientation. It is only 20 metres wide and faces north-west. In order to control heat input and get some passive solar benefit in the design, we had to design a house that is twisted on the property. This option consumes a lot of land, which was complicated by our need for wide eaves for a straw bale house. Regulations stipulate that living area windows must have a minimum of 1000mm of clear sky from the boundary, which meant that we had to be set in from the side boundary a minimum of 1900mm to allow for the 900mm eaves. We also needed truck access to the backyard to take deliveries of bales etc. for workshops, further restricting our build space.
We finally settled on the concept of building a U shaped house with a central courtyard as this would enable us to get passive solar benefit in the master bedroom and living area. Not a huge amount, but enough to make a difference. It also provided us with a outdoor private area, which is important to us as we have lived on country properties for the past 12 years.
Energy rating
I had our energy assessors check to see what difference this adjusted orientation would make on stage one of the construction, as opposed to building parallel to the front boundary. We were surprised that the energy rating actually went up from 5.4 stars to 6.3 stars even though there is only one window that faces north.
As we are building in central Victoria, the energy rating is primarily directed toward the energy required for winter heating. However, we get some really nasty weather in summer with temperatures reaching high 30s and even mid 40s. Consequently the design criteria also included resistance to summer heat. The central courtyard faces due west, however it has a deep verandah to protect smallish windows from the afternoon heat from the west, and the windows facing east are limited.
One of the big concerns for restricting heat input in summer is to avoid doors that open directly into the house from the north, as it is the north wind that brings high temperatures to the area. I have therefore included a good size entry on the northern end of the house with the external door facing east, which will dramatically reduce the impact of those hot northerly winds.
Airflow manipulation
The cooler summer breezes often come from the south-east, so we have included casement windows on the south-eastern boundary to funnel those cool breezes through the house. The benefit of correctly hinged casement windows is that they tend to trap the breeze and funnel it into the house rather than simply working with straight airflow. When you are trying to get cool air into your home it is best to open the windward windows fully but close the windows on the opposite side of the house to 50%, as this creates a vacuum resulting in greater airflow.
As this is a residential block I expect that airflow will be a bit of a challenge as we have boundary fences which will restrict it. I have also incorporated a flat ceiling in part of the house in order to accommodate ducting for an air circulation pump to force the early morning cool air through the house if the temperature in the house is higher than the temperature outside. Our previous straw bale house in Ladys Pass had the same issue, which was overcome using an evaporative cooler as an air circulation pump. The cooling function of the unit was hardly ever used, and would not have been missed, so I am planning on simply fitting an air pump this time.
The master bedroom window faces north onto the central courtyard, however the window is not within the shadow of the verandah roof so we will get good passive solar benefit in winter. It also means that we have a private outlook, and with Molly, our big guard dog, we are assured of security! (Molly is a miniature Maltese Shiatsu)
As this is house number 20 for us personally, it was difficult to find something a bit different to do, so we eventually settled on a curved roof with a curved ceiling. This will be achieved by building box trusses on site. It is a very cost effective method of roof construction and I am looking forward to trying it out, as I have never done it before.
With all the design, engineering and building permit issues behind us it is now time to get to work and build it. I am going to take my time and enjoy the process as I suspect this will be the last home that I build, although many people scoff at this idea, thinking that I am either crazy for building so many or that I am addicted to the process. Personally I am not sure, but I am going to enjoy this project as if it is my last.
Brian Hodge is the director of Anvill Straw Bale Building Consultants. He has nearly 40 years experience in the building trade, and now consults predominantly on straw bale construction. Brian is the author of ‘Building your straw bale home’ and will be blogging about his build. Anvill Straw Bale Building Consultants: Whether you are building a mansion or to a strict budget, we are here to help. www.straw-bale-houses.com
On – 23 Apr, 2017 By Cherie Peacock
-

Straw Bale Construction: A Sustainable and Renewable Building Material
In this modern day we primarily construct buildings with materials that retain a single life use, meaning at the end of its course the material remains unusable and/or un-recycled. Examples of said materials are concrete, various metals and asphalt. If you look back far enough before the industrial revolution, you would find houses with walls built out from straw bales. Though straw today is used as a biofuel, animal feed and confectioning various objects, it can also be used as a very ecological and effective construction material.
While straw has been used to create housing in Africa since the Paleolithic Era, it’s seeing a modern renaissance with the rise in popularity of straw bale construction. This affordable and sustainable means of building is being discovered by modern builders and homeowners across the globe, with some standout landmarks assisting its rise to prominence.
But what exactly is straw bale construction and do the advantages outweigh the disadvantages of this age-old building method?
History of straw bale construction

The history of straw bail construction has a strong foundation in the 1700’s, but dates much further back in Africa during the Paleolithic era (Old Stone Age). Germany and France in the 1700’s used straw as a means of constructing various buildings that can even still be visited today. A century ago in Nebraska, the rapid evolution of farming equipment pushed the use of straw construction for building houses, churches and even museums. Today there are a modest amount of architects that specialize in straw bale construction homes, pushing the boundaries of what can be accomplished with the material. Notably, a Swiss architect named Werner Schmidt has been capable of building modern multi-story houses over 2700sq.ft (250sq.m).Straw bale construction is a relatively sustainable construction method, with straw being a renewable material that is readily available. After the edible part of grains have been harvested, their stalks are disposed of by farmers and in many areas, they are burned. Transforming them into straw bales gives them a new life and reduces the air pollution which results from burning.
Straw bales also have high insulation qualities, keeping the building warm in winter and cool in summer, with R-values between 40 and 60 when built correctly. It is also relatively cheap, made from an agricultural by-product. But it’s important to keep in mind that the cost of straw bales differs depending on when they are harvested and how far they need to be transported. If they need to be stored for lengthy periods or transported long distances, then the costs escalate accordingly.
Another advantage of straw bale construction is that it is a relatively easy method for novice builders, meaning that it can be utilized by owner-builders without extensive experience or volunteer crews. This also reduces the labor costs involved in building which can be substantial in many parts of the developed world.
Straw bales take little energy to manufacture, with the bailing process and transportation the only additional energy required (other than the sun used to grow the plants). When compared to other insulating material such as fiberglass, the energy-intensity to produce the material is significantly reduced. They are also 100% biodegradable and can easily be plowed back into the earth if they are no longer needed.
Straw bales construction also has some favorable aesthetic qualities, creating thick walls which allow for window seats and shelves, as well as lending itself to numerous architectural styles.
How to build with straw

The methods of building a straw house is very different to that of our own. From the bottom up, a foundation the width of a bale must be poured in place to support the straw walls. When straw is baled, you obtain rectangles of varied dimensions between 36”x18”x14” (915x455x355mm) to 48”x24”x16” (1220x610x410mm). These rectangles are stacked like lego blocks up to the desired height, and wood rods are inserted at each 5 to 6 layers of straw in order to anchor each bale together. Because straw is an organic material containing air, the exterior and interior finishes must also be composed of 100% organic materials to allow the walls to perspire. This said material is typically a concoction of clay, sand and straw. By adding water to all these materials, you create a mud-like mix that is easily manipulatable and smooth when dry. The roof itself can be a typical roof truss construction; because of the the structural integrity and high stability of the straw walls, the roof can simply rest on and be anchored to the walls.Advantages of building with straw

There are many advantages to building with straw: the low environmental impact of the materials are obviously a major assets, but studies also show the energy efficiency of the straw bales exceeds that of modern construction. Because its high thermal of R1.5/Inch (25mm), it effectively retains the interior temperatures in even the coldest of climates. Another major benefit is that straw and clay are abundant materials, making them readily available at low costs. Because the construction process with these materials is quite primitive, there is little need for modern construction tools therefore making it easily done by almost anyone. Though straw might be a highly combustible material on its own, a study has shown a straw wall with clay finishing on both sides retains a fire separation of 90 minutes, which greatly exceeds that of typical residential construction. Finally, at the end of the building’s life, the materials can be fully recycled back into the environment with little to no impact.Disadvantages of straw buildings
Similar to many other building materials, straw bales can be susceptible to rot if they are not kept dry, which is one of their biggest problems. You need to ensure that moisture cannot enter the bales from the roof and in areas of high humidity or rainfall, this may not be practical. If they are exposed to water, compressed straw bales may expand as they absorb the moisture, resulting in further cracking and greater infiltration of water as a result.
If mold becomes an issue, it may release toxic spores into the wall cavity and surrounding air, and the internal temperatures can rise as the straw bales decompose. Rats and mice can also be a problem during construction as they like to burrow in the bales, and care should be taken to ensure they are evicted before sealing.
Building with straw bales can also be challenging when it comes to obtaining building permits or insurance coverage, as they are not a conventional building material or part of all local building codes. You may have to be more persistent in having your plans approved, but local architects or engineers with experience in using natural materials may be able to assist in this.
Because of the thickness of straw bale walls, you should also keep in mind that more of your building area is being taken up with wall space and you should design your plans accordingly.
Justin Langlois is a former Build Abroad volunteer who found his passion through his travels. As a Canadian Architectural Technologist, he plans on becoming an architect and directing his career towards that of the development sector. On his spare time, he enjoys traveling, following adventures, volunteering and playing music.
https://www.buildabroad.org/2017/02/07/straw-bale-construction/
On – 07 Feb, 2017 By Chad Johnson
-

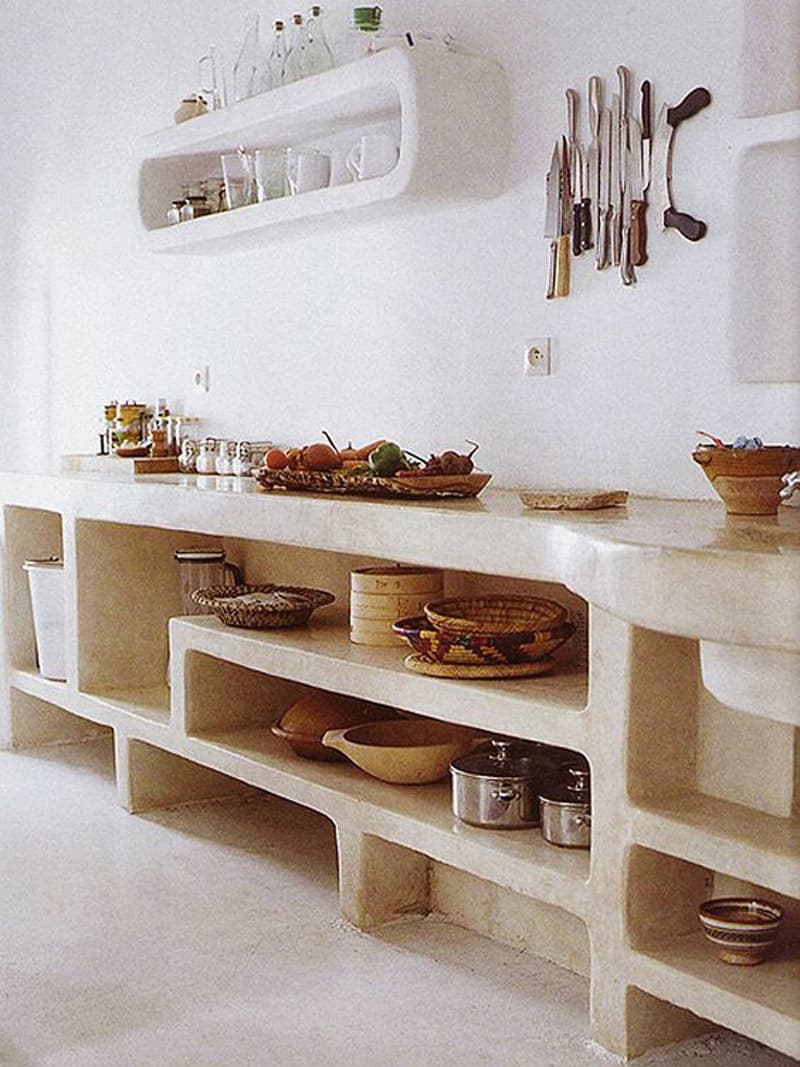
A Straw Bale House Is Eco Friendly And Cost-Effective
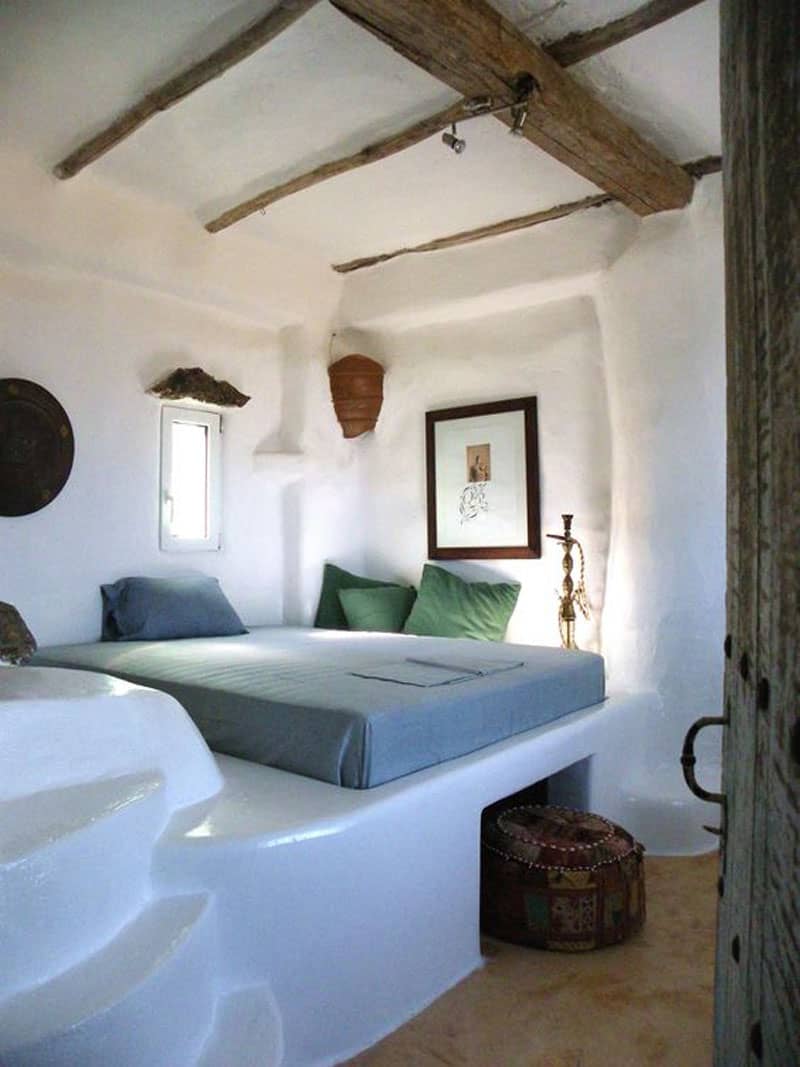
A straw bale house is an eco-friendly building you will fall in love with. Light, sustainable, resistant and featuring a rustic flavor, the construction has gained admirers on the market lately. The building method uses bales of straw – usually wheat, rice, rye and oats straw – as structural elements, building insulation, or both. As a result, the costs involved are not extremely high. Moreover, the straw bale house is also very viable. If you plan to do so, here are a list of advantages and disadvantages. The benefits: high insulation, easy availability, costs. The flaws: the building is susceptible to rot and you will not obtain insurance coverage easily. However, remember that these constructions bring the natural roots to present. As a result, you will pamper your senses in tranquility and equilibrium. And you will feel a strong connection with the exterior. Besides good looks, you will also discover inspiring designs for bathrooms, bedrooms and living rooms in the gallery below. Explore it and let us know if you enjoyed these homes!

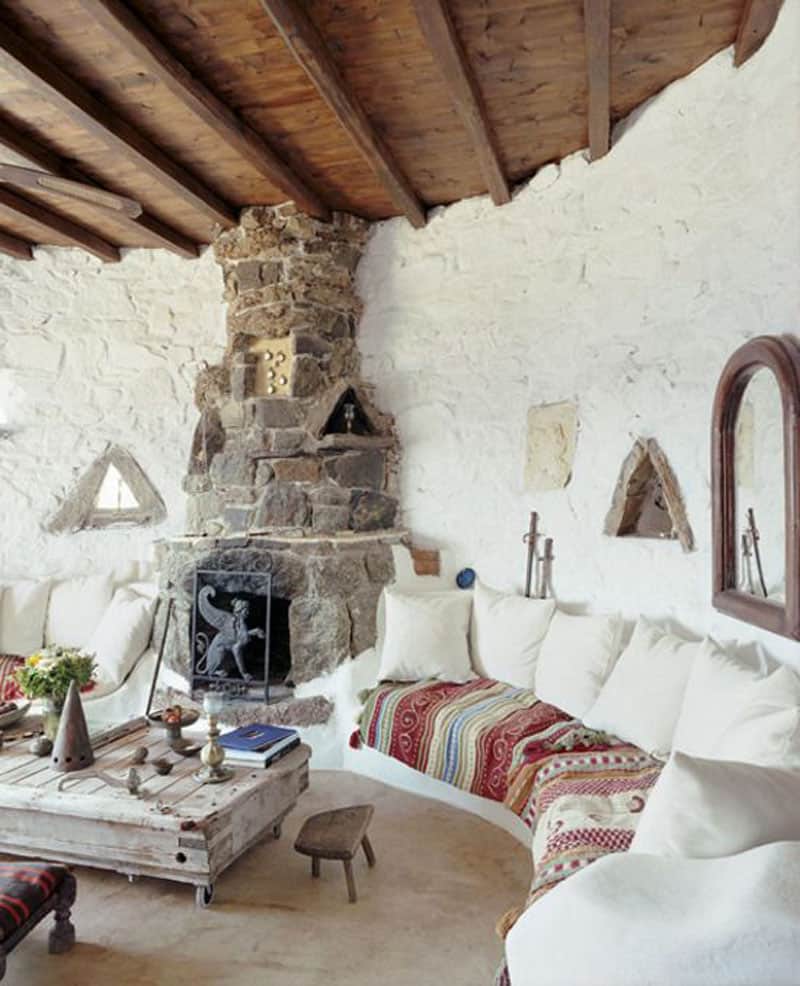
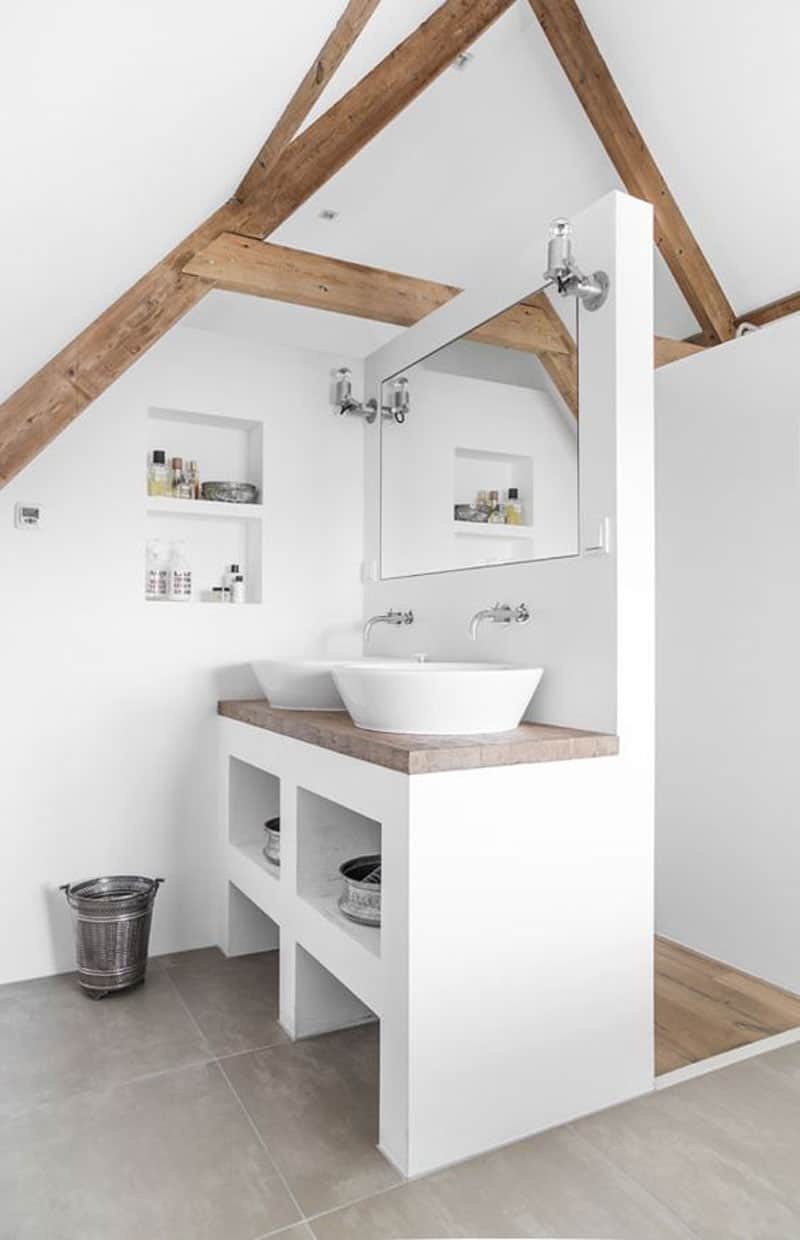
Exposed beams
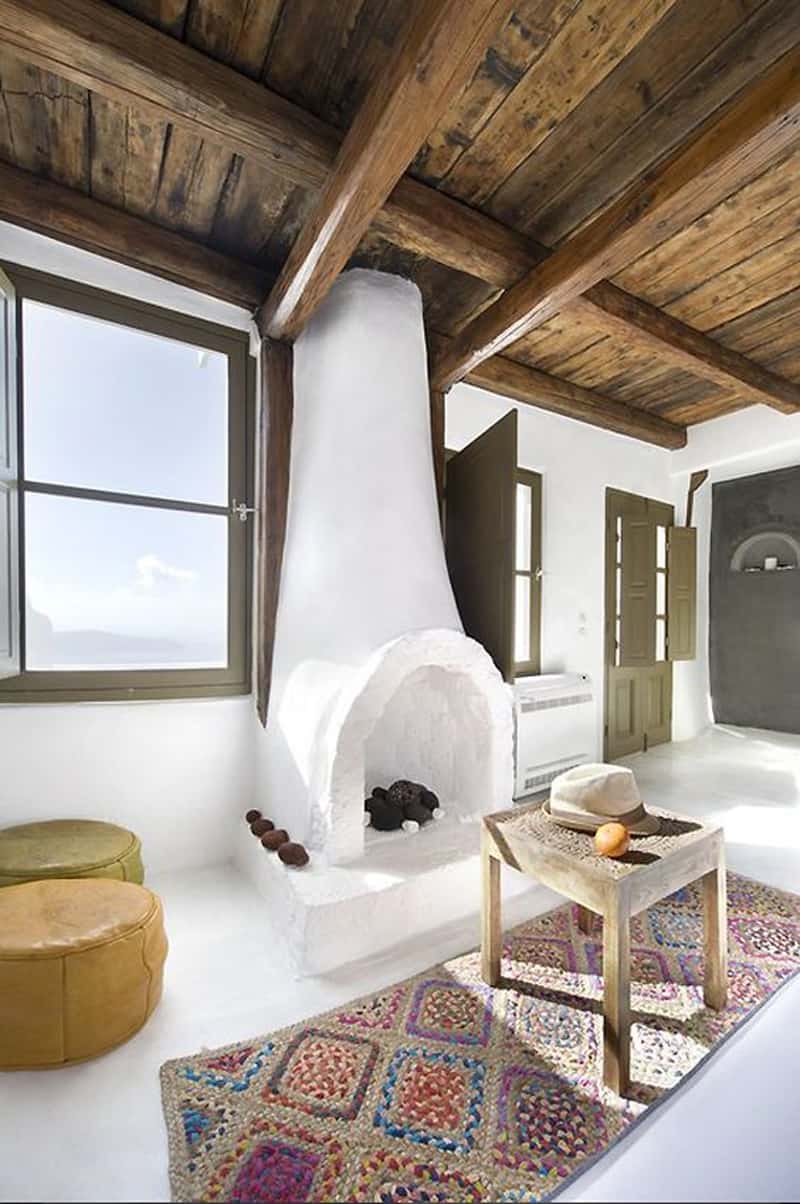
It goes without saying that rustic elements fit into a straw bale house. The home above features large rooms with high ceilings – two elements that allow you to decorate with altitude. As you can easily notice, oversized vases, tall sculptures and a generous chandelier integrate amazingly here. Also, a tall fireplace, in one of the corners warms the interior. But, the most striking ‘ingredient’ in this composition is the ceiling. The beams give strength, while also an infusion of spontaneity to the room.
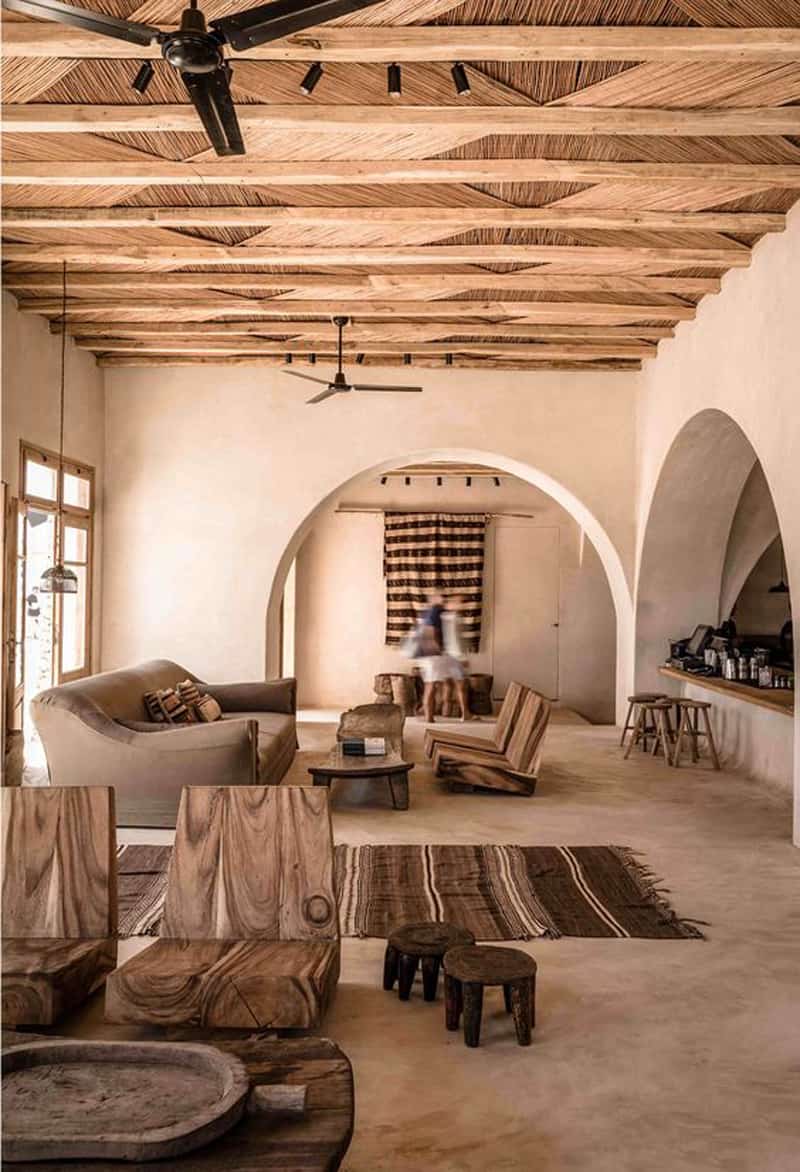
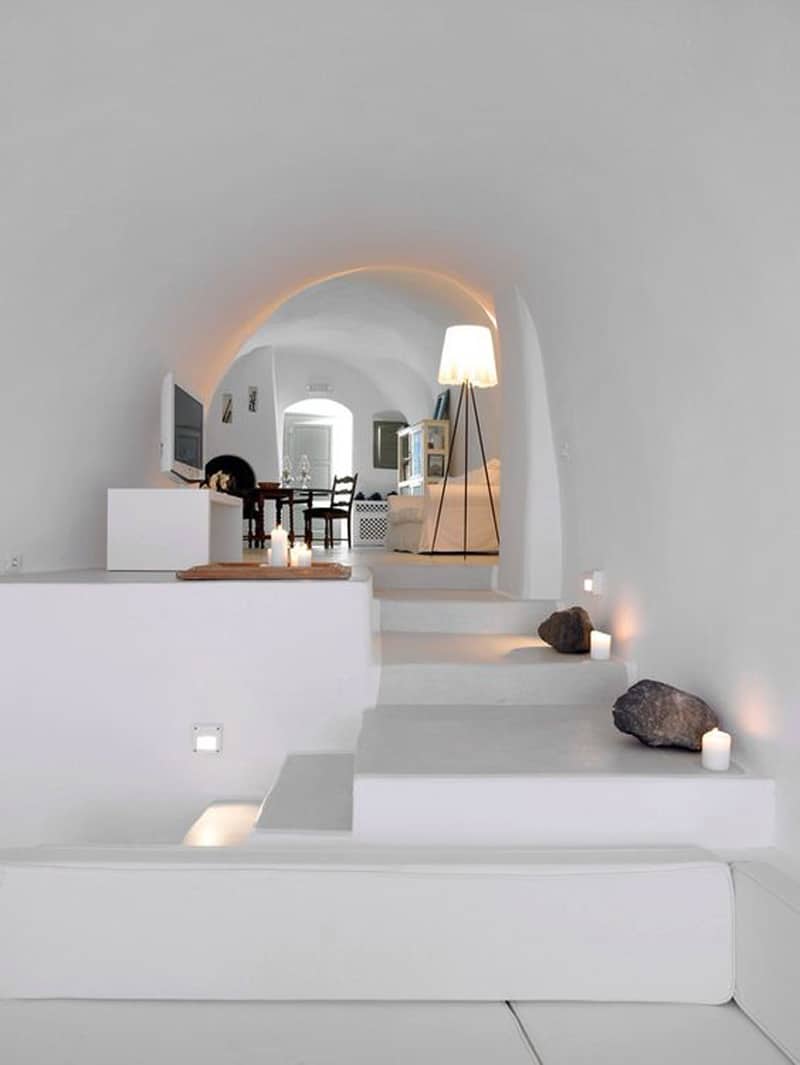
The Arch Living Room
The elegant arch is the first thing you notice in a room that has it. Appreciated for its support in architecture, it is now reconsidered as a decorative add-on. The living room above features tall arches that give the space a very elevated look. Their raw simplicity goes beautifully with the furniture and the decorations. Made of poorly finished wood, the items create a natural environment where the inhabitants feel free and relaxed.
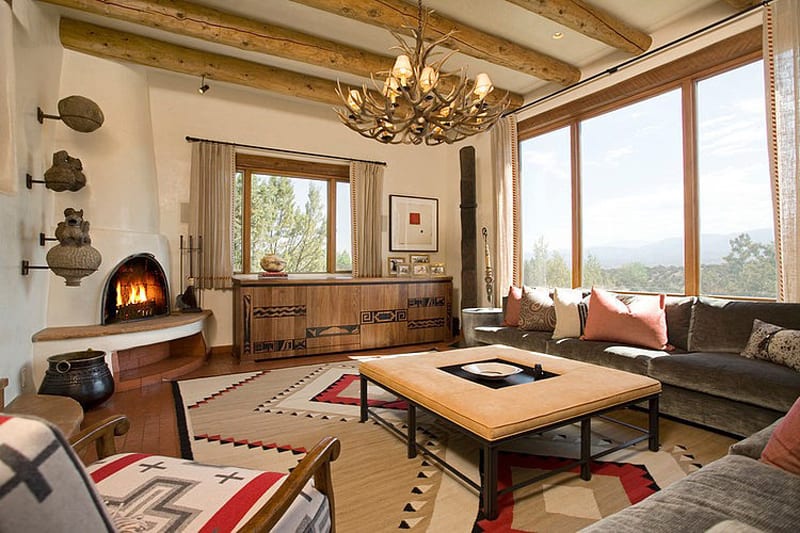
The warmth of the chalet
I believe every escape has its own essences and innards. The ones delivered by a mountain chalet are freedom, naturalness, coziness and relief. This living room connected to rustic flavors brings exactly the same. Just imagine cuddling in your beloved arms in this sofa, by the window. Its position offers you the possibility to admire the landscape in the same time. I like the way geometry animates the interior. The cabinet features traditional prints, the carpet similar motifs and the tapestry of the armchairs a complementary pattern.
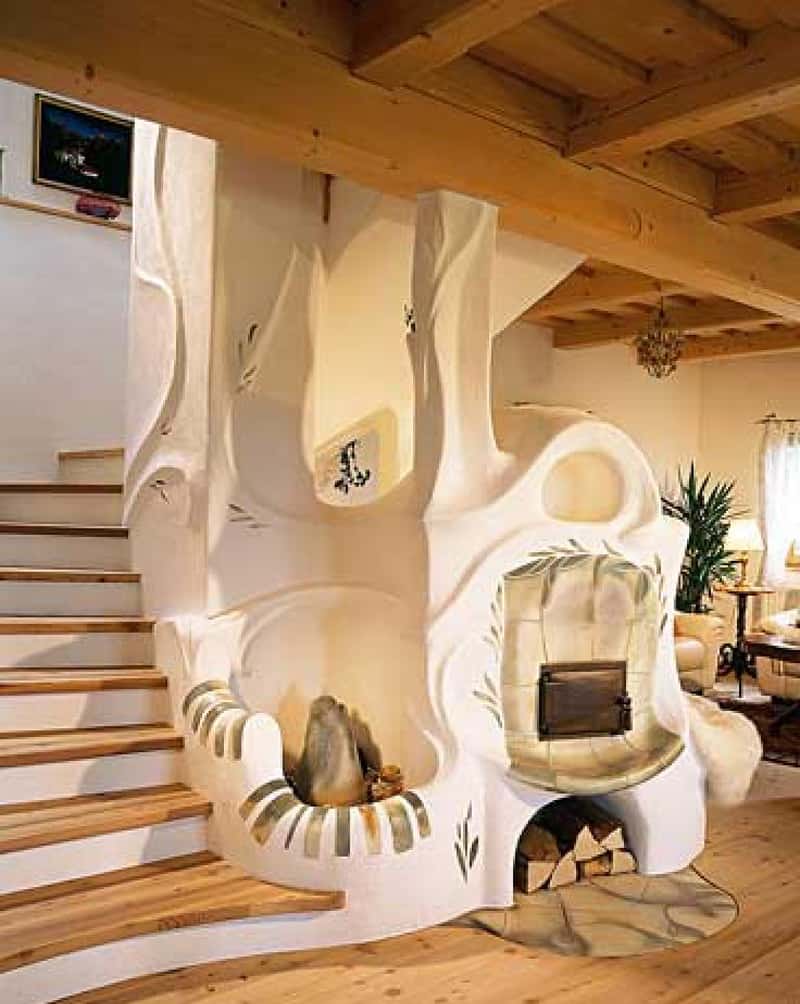


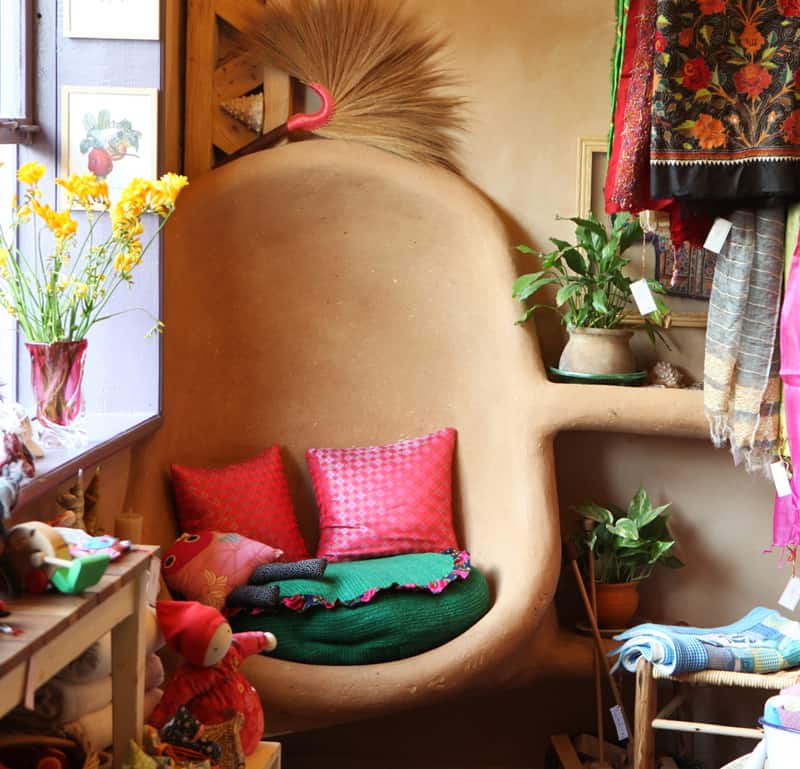
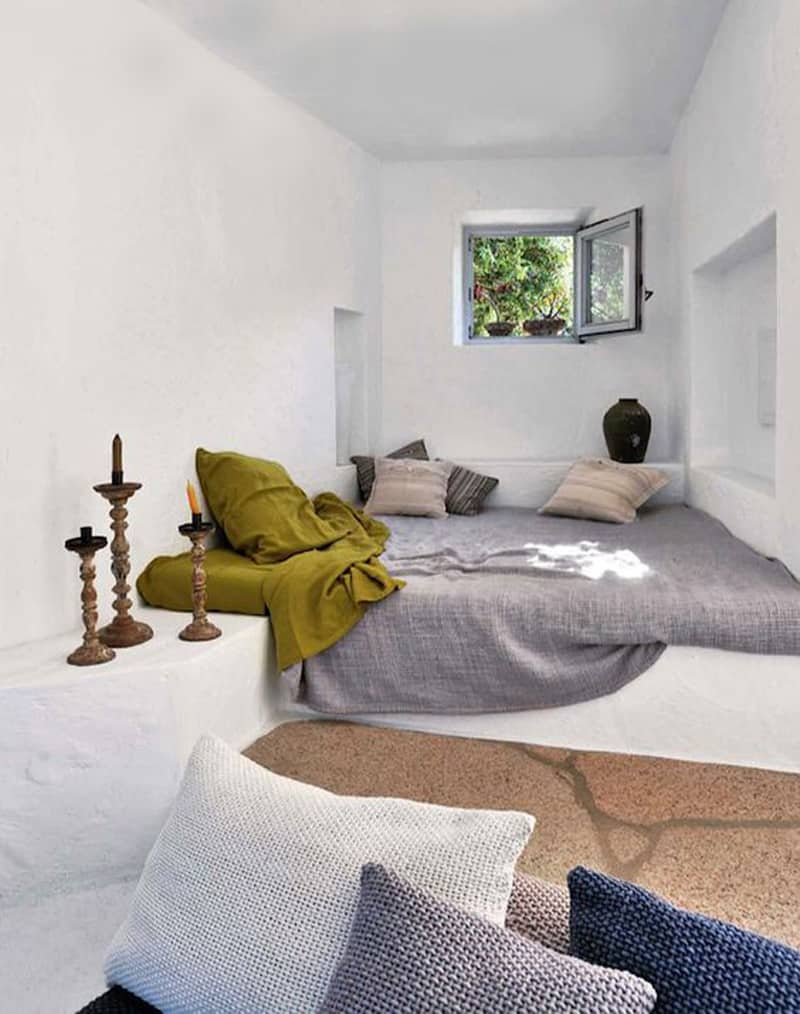
A domestic crib featuring a lovely bench, three niches and a vintage stove. It reminds me of vernacular interiors.
Reading by the window? Yes, absolutely! A bunch of pillows and a blanket make the seating wonderful!
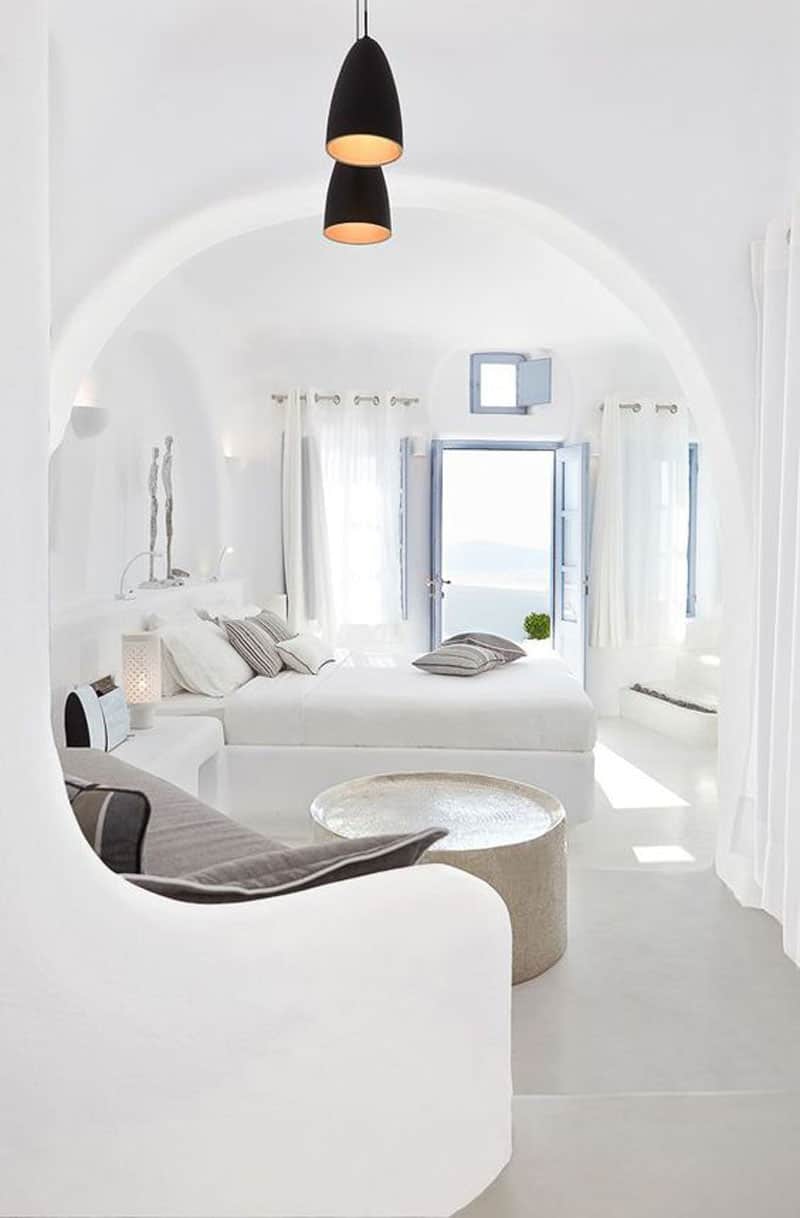
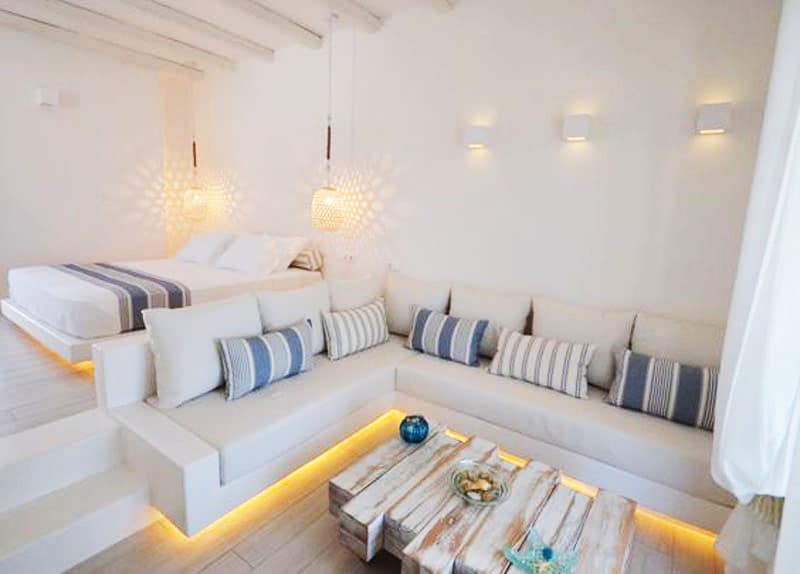
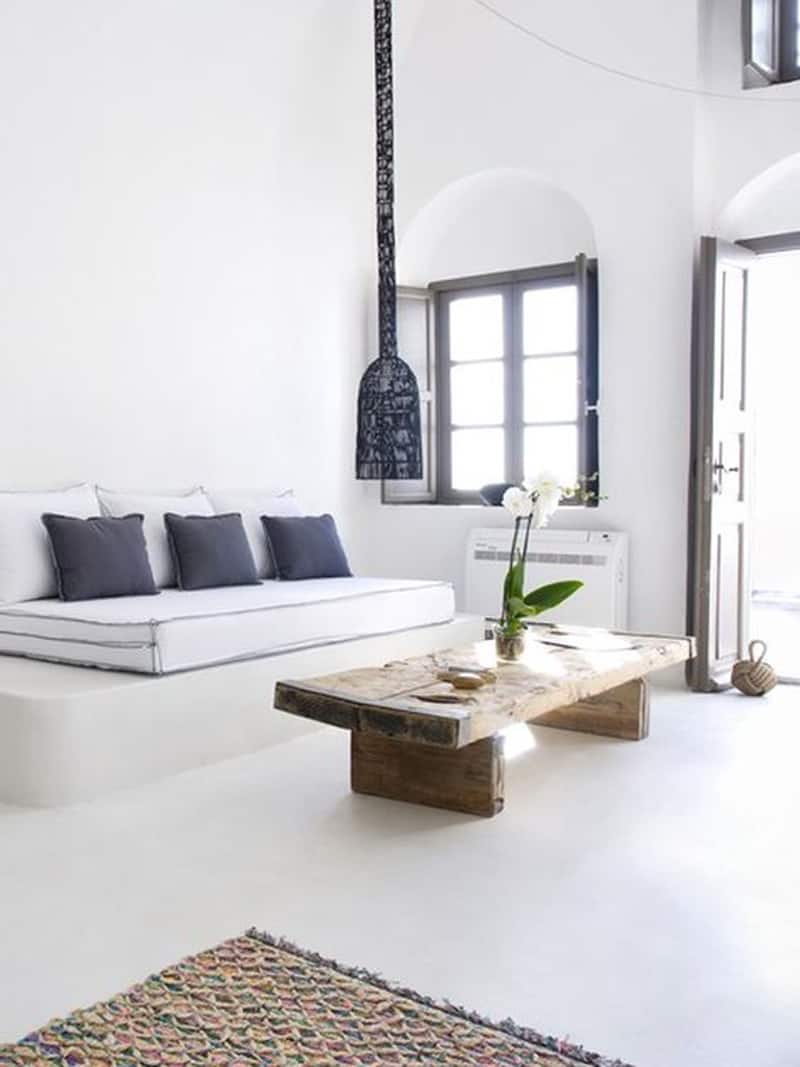
White extravaganza
A straw bale house can also feature clean white interiors. It is not necessary to turn everything in clay and wood. Paint the room with white or creamy ivory and you will experience a luminous environment all the time. I love the fluidity of the room above, and the diaphanous curtains that add elegance to the room. Also, the items of furniture integrate very well in this décor. Add some sparks of blue and you will have the marine freshness in your crib.


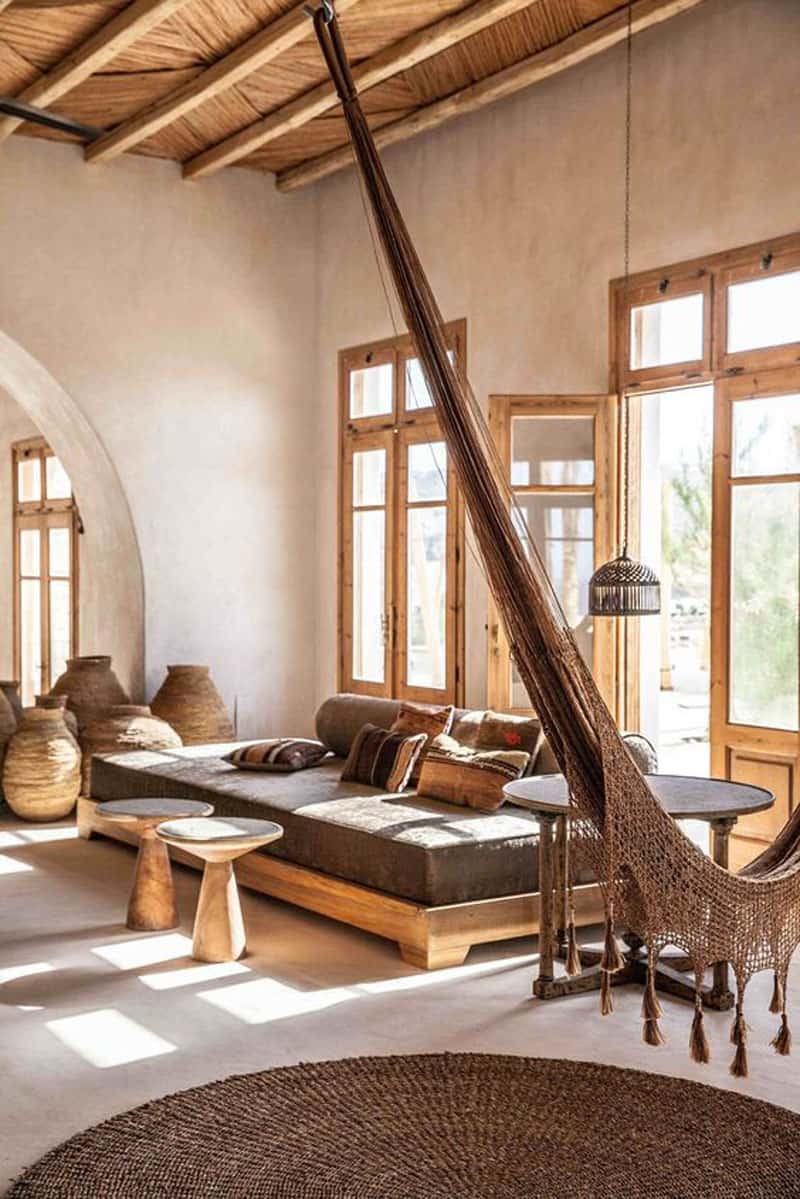
A hammock in your living room? Why not!


I have never imagined that a bunch of spots under the sofa can produce such a beautiful effect!
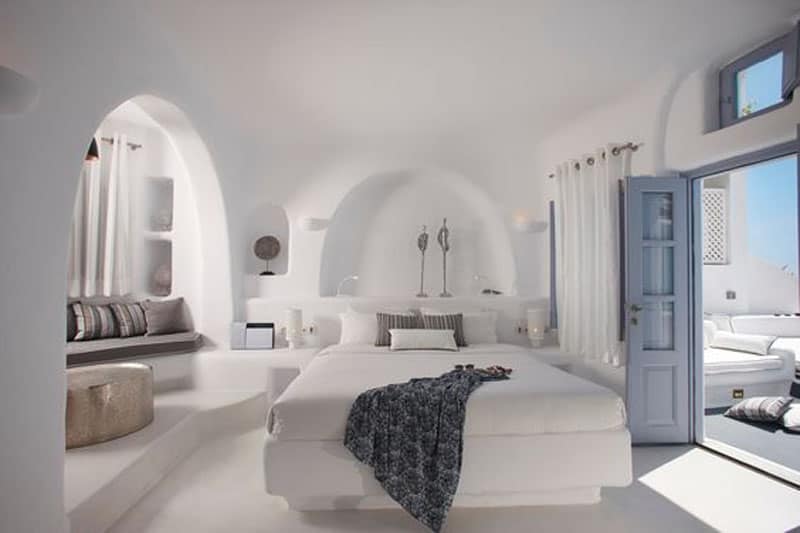
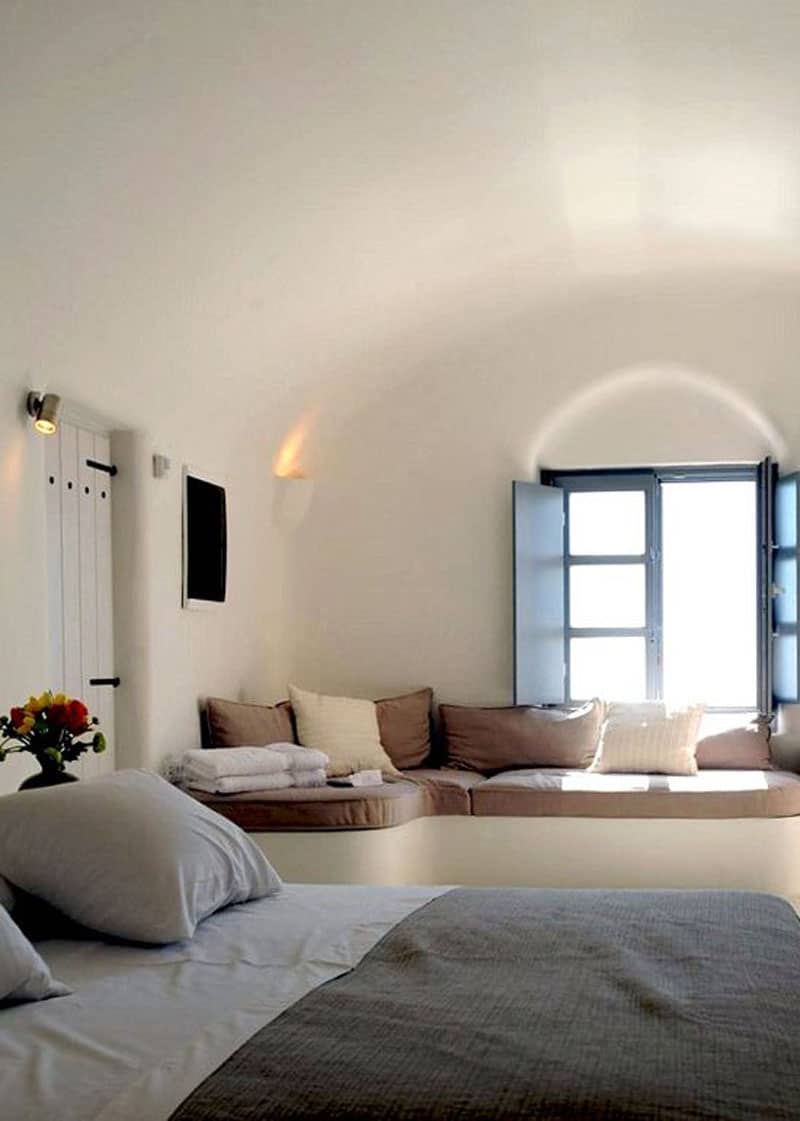
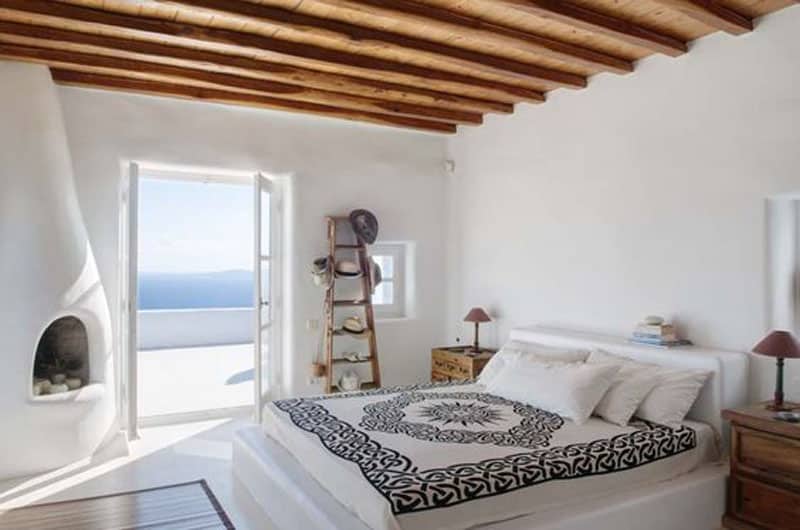
The simplicity of this bedroom is absolutely overwhelming.

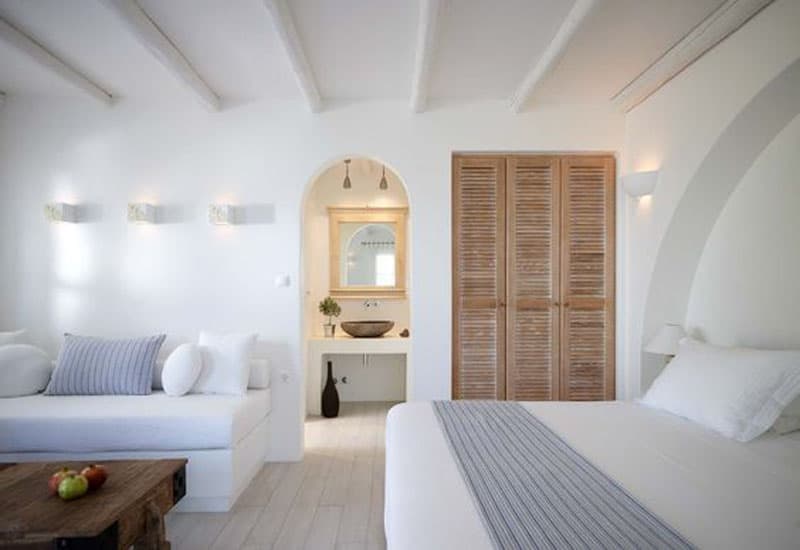
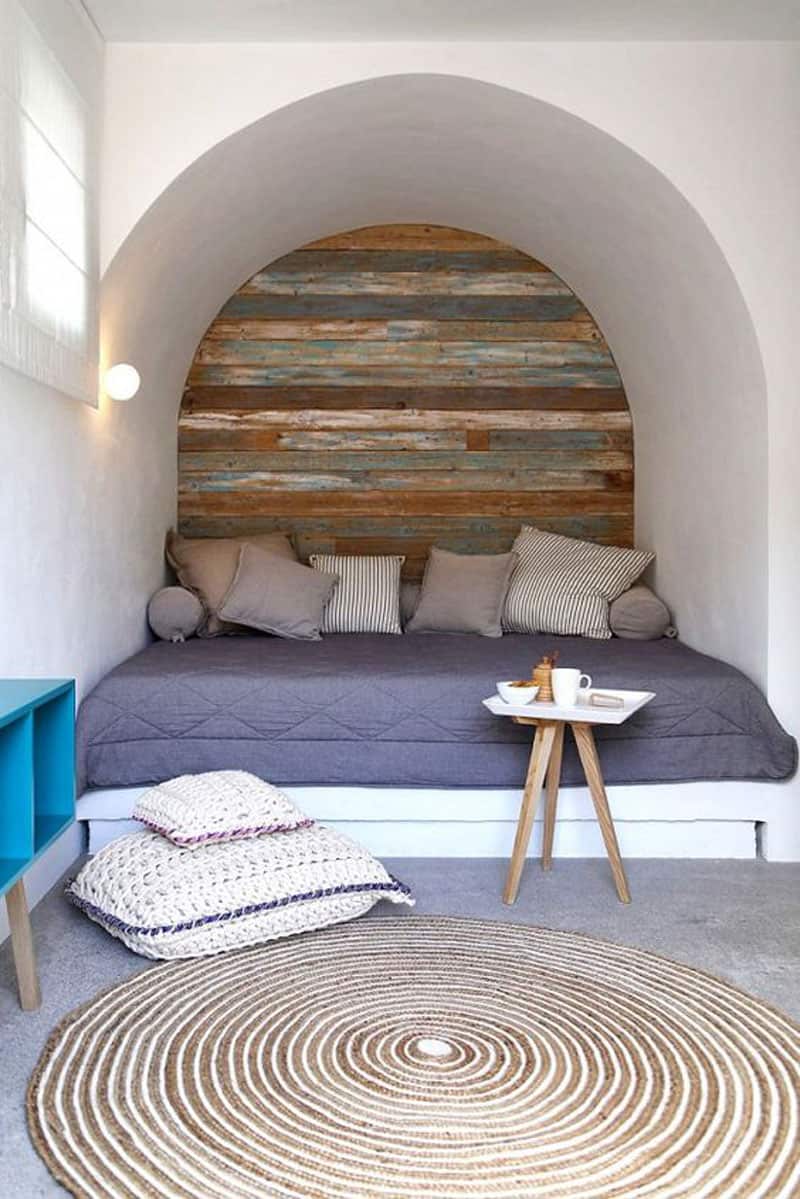
Explore a collection of bedrooms with natural looks
The feeling I am looking for in my sleeping room is that of a sweet escape. You have to relax, but also to experience the comfy touch of pampering. Featuring light colors, large beds and interesting light effects, the examples in this gallery contain inspiring tricks. Have a look and relax a little!

Influenced by the sea, this bedroom features white and blue in a fresh mix.


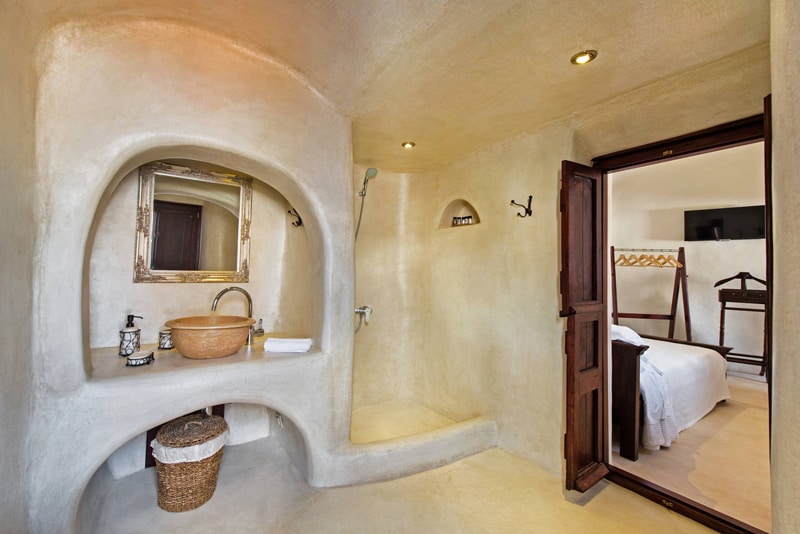
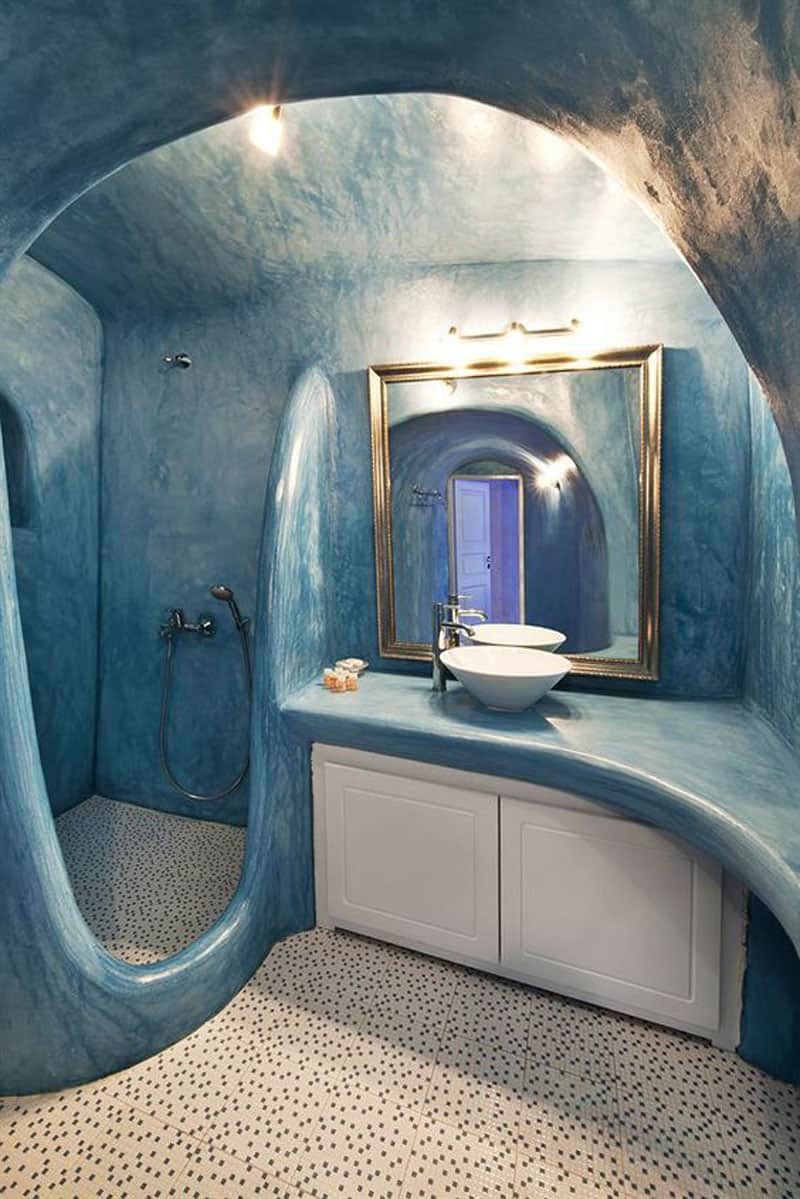
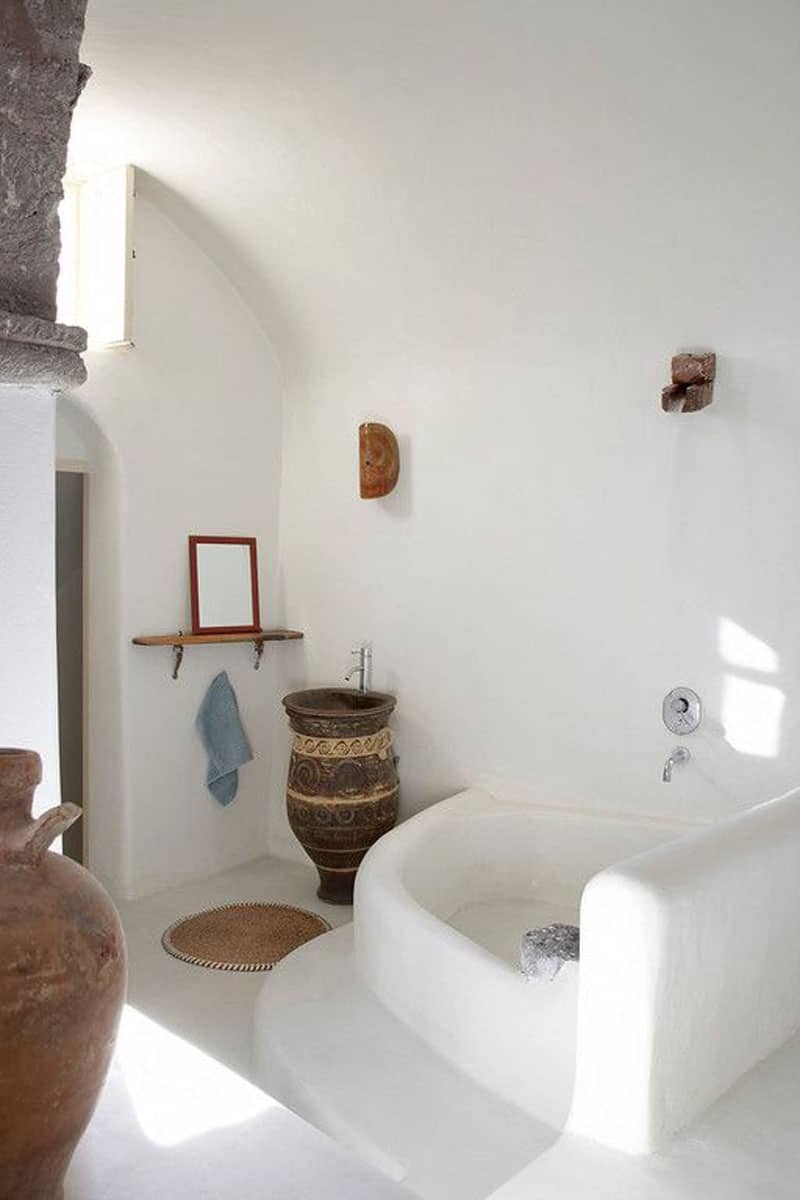
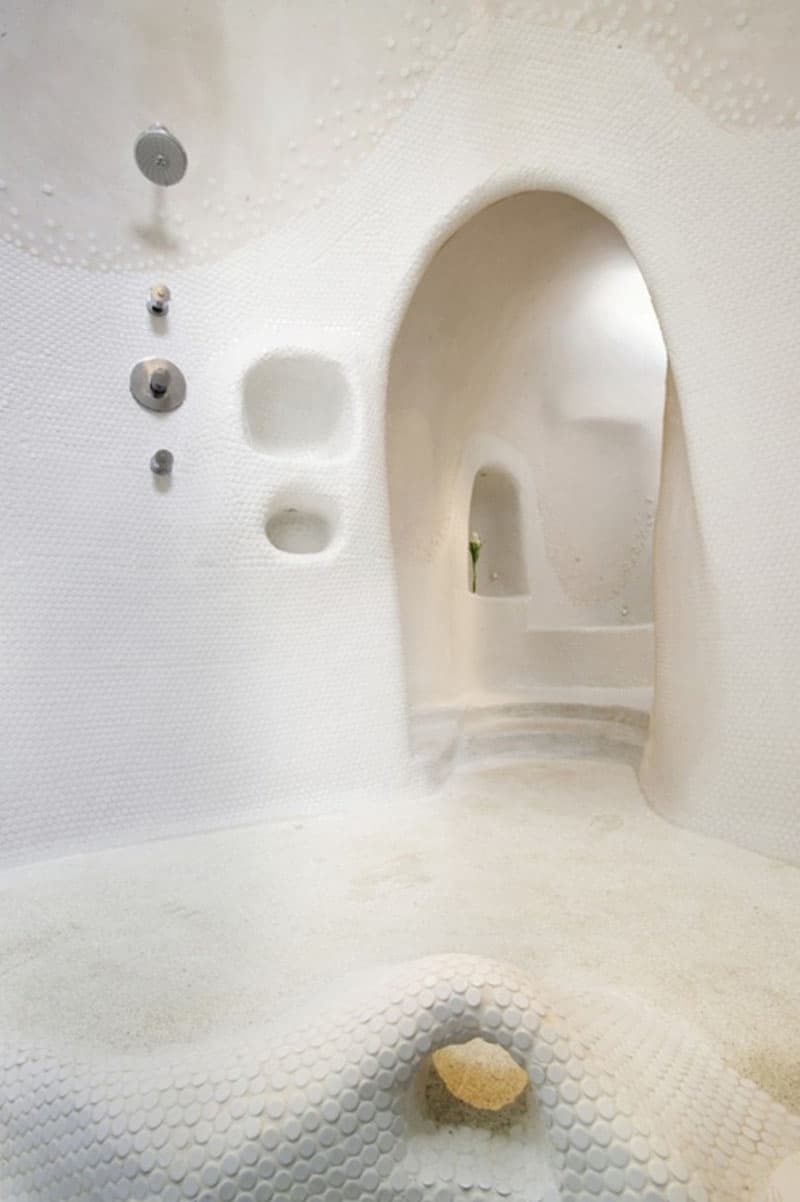
How to design your bathroom in a straw bale house?
Featuring curved walls, the bathrooms invite you in a domestic sanctuary. Soft corners, elegant niches, sculptures, vintage frames and lighting spots are the ingredients we should rely on. White is the common option, but look how beautiful they are painted in blue! Also, cane decorations or small items of furniture work fine in these decors.


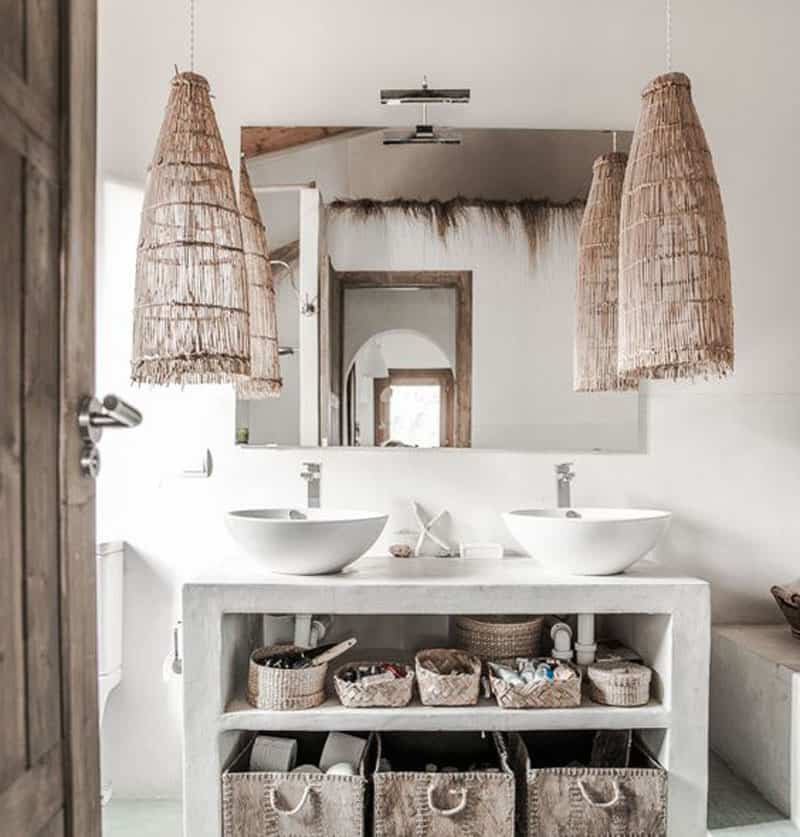
Storing smartly saves time and energy. Put some baskets and boxes under the sink and you will access all you need in a second.
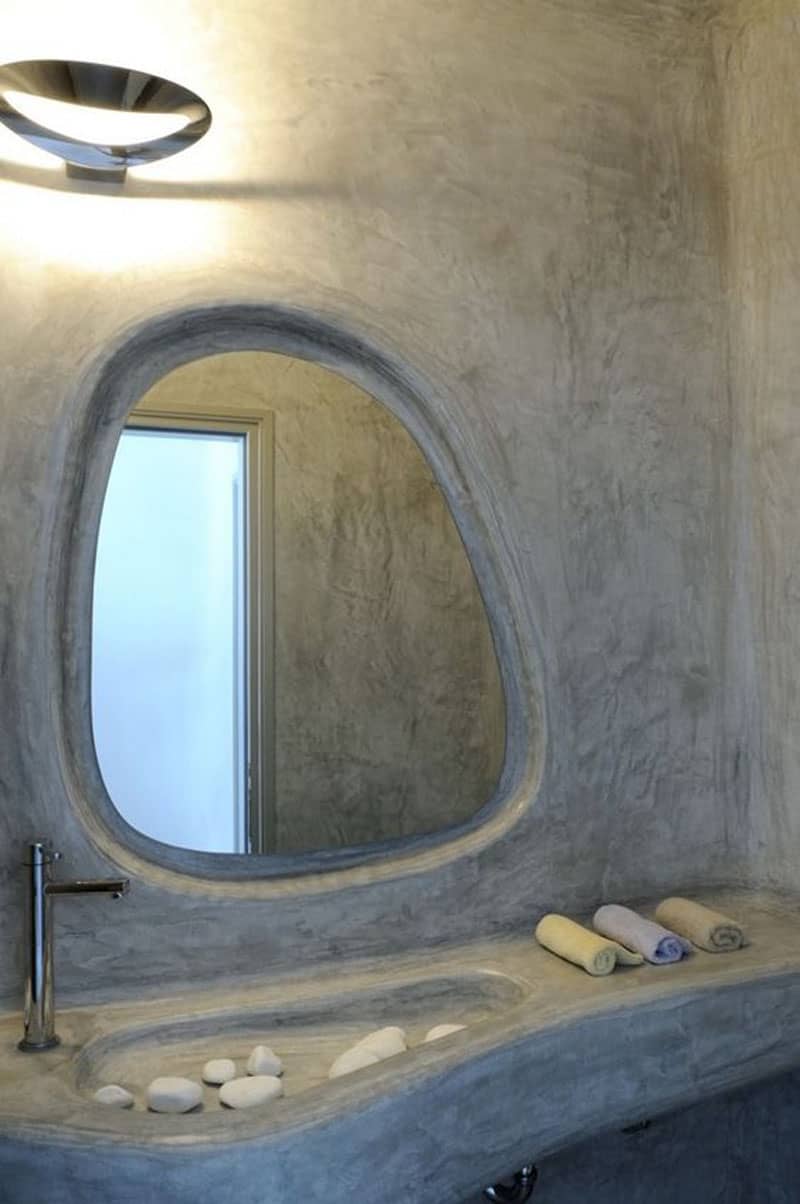
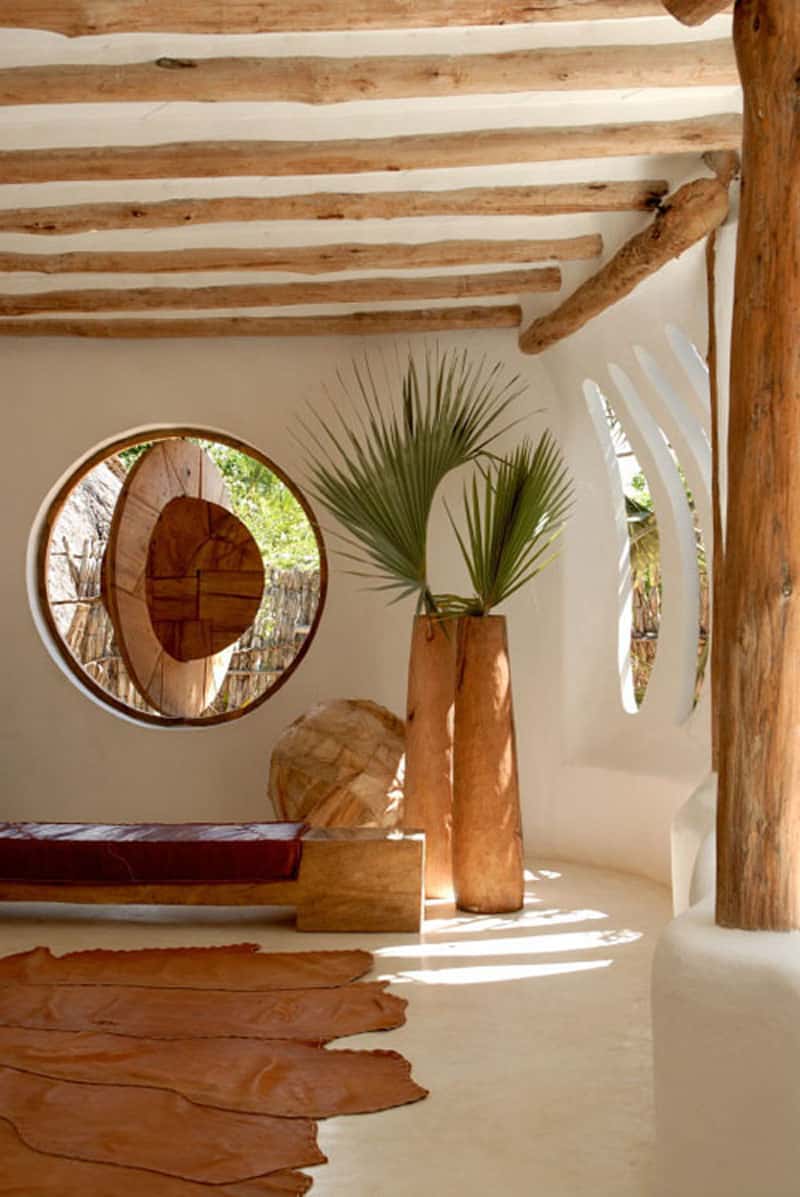
An organic design following the curves of dunes and paired with white soft stones. As you can see, the composition is complete — the cohesion you feel when different elements blend with each other.
Comments
comments
http://www.designrulz.com/design/2017/01/straw-bale-house/
On – 23 Jan, 2017 By
-

Building an Off-Grid Tiny House? DIY Network Wants to Film You
Building an Off-Grid Tiny House? DIY Network Wants to Film You.

The DIY Network is looking for intrepid homebuilders who are in the planning stages of building an off-grid tiny house. The homes can run the gamut from traditional wood frame to straw bale, Earthship, yurt or even shipping container homes. The best thing? They’ll pay you for your time.
The DIY Network profiles a wide range of builders and homeowners.
The show, “Building Off the Grid”, finished its first season last year and is looking to cast for the show’s second season. The show has featured log hunting cabins in Alaska, a yurt in Montana, and a (larger) dream home near Yellowstone. The show will pay the homeowners $10,000 upon completion of the project.
“Building Off the Grid” will feature any type of home including log, mud or even yurts.
To be considered for the show, you must be ready to build and not already in the process of building. In addition, the home must be built on the land where it will ultimately exist. No off-site homes such as park models will be part of the show. The show will not only document the building of a home, but also off-grid capabilities including solar and wind power, septic, wells and the challenges and benefits of more remote living.
The entire building process will be documented for the show.
DIY Network’s other tiny house programming includes “Tiny House, Big Living” and the 2016 Tiny House Jamboree feature which showed a quick shot of Tiny House Blog founder, Kent Griswold. DIYNetwork.com offers videos, home improvement advice, step-by-step instructions, message boards, blogs and more. For more information and to be considered for “Building Off the Grid”, contact Megan Littlefield with Warms Springs Productions.
The show requires that all homes be built on-site.
http://tinyhouseblog.com/announcement/building-off-grid-tiny-house-diy-network-wants-film/
On – 13 Mar, 2017 By Christina Nellemann
-

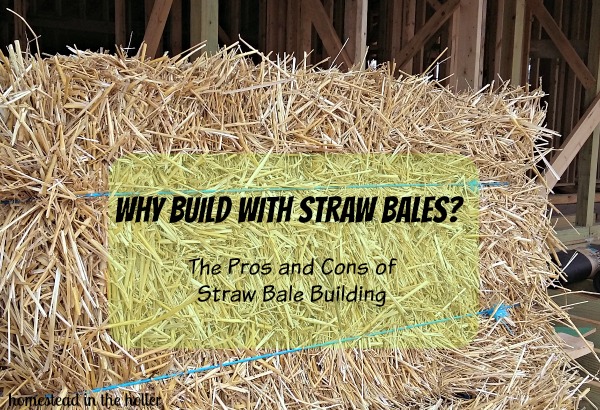
Why Build With Straw Bales?
Why Build With Straw Bales?
TravisStraw Bale Building
If you are a regular reader, you already know we are in the middle of building a straw bale insulated home. I often meet people who assume I am therefore some sort of straw bale evangelist. This always strikes me as odd because I can’t really understand why I would want to push my building choices on someone else. As an adult, I feel perfectly able to consider the options and weigh which ones fit our desires and needs. Therefore, I feel most adults are likewise capable of the same.
So, if you have to ask why you would build a straw bale home, please don’t build one! If you think straw bale homes mean rodents, rotting straw, fire or other similar disasters, please insulate with something that you are comfortable with. Rest assured that we don’t care and certainly won’t judge your choice harshly!
That said, if you *are* interested in straw bale, let’s consider why you might do it:
-
Chemicals – some people are extremely sensitive to chemicals that are often used in common building materials. Think of the glues in plywood or OSB. Those are often harmful whether you are sensitive or not. Think of some of the flame retardants used in things like insulation. If you choose the right bales, you can be assured that at least those aren’t introducing more chemical outgassing into your dwelling.
-
Insulation – straw bales provide an insulation value of somewhere between R40 and R50, depending on the bales and installation. This would be an expensive level to reach with typical pink fiberglass insulation.
-
Difficulty – straw bales are relatively easy to install, leading to a good opportunity to do it yourself. Keep in mind that it is very labor intensive though, so if you don’t have help or lots of time, it could end up being the wrong choice.
-
Fire – straw bales properly installed in a coating of plaster have been shown to be extremely fire resistant. In fact, in lab testing, it was found to be far superior to standard wood frame construction.
-
Rodents/Pests – straw bales turn out to be relatively pest resistant, owing to two details of a typical installation. First, both sides are covered in wire and plaster, making a solid surface (actually 1+ inches of rock in the case of lime plaster) that prevents entry of any rodents. Second, the bales are installed very, very tightly. This leads to very little space within the wall for a rodent to even move about. In fact, the stud cavities in traditional wood-frame construction leaves much more open space for a rodent.
-
Embodied energy – this isn’t something that you often hear discussed, but consider the energy used in creating the pink fiberglass insulation in a typical wall. Quite a bit of energy is required to make, package, and transport such a product. Compare that to straw that is typically locally sourced and is grown using solar energy. There is the energy used for planting, harvesting, etc, but it is still much lower than the typical insulation product at a building center.
-
Mildew/mold/rot/etc – mold is a topic that often comes up with straw building discussions. Yes, if the wall cavity is continually kept damp, mold will be present. However, this isn’t unique to straw building by any means. Consider what moisture in a normal wood-framed wall does. It isn’t pleasant either. So, yes, mold is absolutely an issue, but that is true of any building form. Just be sure to consider flashing, overhangs, and plaster types and thicknesses. All these things work together to prevent mold/moisture issues.
-
Big Bad Wolf – this just has to be addressed because it is almost always the first response when people hear about a straw bale project. Apparently the three little pigs story has really ruined straw’s image as a building material! There are numerous techniques for building straw buildings, so all can’t be covered here. Instead, let’s address the form we have chosen for our project. First, the actual support comes from good old wood. We use a form of post and beam framing, which provides larger openings than standard stud framing to stuff the straw into. So, even without the straw, the building is structurally sound. Second, the bales are pressure fit into the walls, making them quite secure. Third, the bales are then covered with welded wire, tying everything together and providing good sheer strength. At this point, there really is no great worry of “blowing the house down”. Finally, three coats of plaster are applied inside and out. We have chosen lime plaster, so the end result is over 1 inch of limestone coating over the bales. Suddenly, wood framing and vinyl siding is sounding rather inadequate.

All that said, straw bale building is no panacea. It has drawbacks just like any other system:
-
Space – The walls take a lot of space as a typical bale is 18″ wide. That level of insulation takes space! Keep that in mind when designing rooms.
-
Labor – Straw bales take a lot of labor to handle. They are bulky and need to be stacked and stacked again during the process. Installing them means notching and re-tying. Plastering is hard work and usually 3 coats are required.
-
Mess – Straw bales are messy to work with. When they are handled, they leave a big mess. When they are notched and re-tied, they leave a bigger mess still.
-
Unusual – Straw bale construction is not very common, so finding skilled labor to help is unlikely. There is plenty of education available online and in books and videos, but it requires time to learn. Please do consume such material though as there are a few mistakes that can be made that could turn a project bad.
So, don’t look to me to push straw bale building on you. You need to choose what fits your needs. If you choose conventional wood framing and are content with that, wonderful! If you want something more unusual, great. Look at all the options — straw, cord wood, cob, etc. Above all, have fun and build something beautiful that makes you happy! Happy building!

http://www.homesteadintheholler.com/blog/why-build-with-straw-bales/
On – 27 May, 2017 By Travis
-
-

This ready-made tiny home can be shipped to any destination
There are those who work for months or even years to create a beautiful tiny home out of nothing, but if you don’t have time for all that, now you can order your own ready-made Mobile Home. The compact structure, designed by Ruzanna Andressa Oganesya, is built on a moving platform and can be transported virtually anywhere. Those looking to go off grid hassle free can order it to be delivered to their desired location, ready to use as a serene mountain retreat or even as an urban home addition.

The Mobile Home is a prefab modular construction that is wide enough to fit on a freight-liner truck bed, making delivery ultra-convenient. The home is compact, approximately 150 square feet, and comes with all of the basic necessities, including a selection of furnishings. The compact house is a unique shape, almost completely covered in glass panels. Adding to its charm is a lovely open-air deck that leads into the interior.Related: Inhabitat spends the night in a Harvard-designed tiny cabin in the woods

On the interior, a mezzanine floorplan allows for optimal use of space. The bedroom hovers over the living space connected by an open staircase. Along with the glass walls, a skylight floods the home with natural light. Strategically located just over the bed, it allows residents to enjoy a bit of stargazing as they nod off to sleep.http://inhabitat.com/this-ready-made-tiny-home-can-be-shipped-to-any-destination/
On – 28 Mar, 2017 By Nicole Jewell
-

A Life Without Bills: Middle-Aged Couple Builds $30,000 Off-Grid Cob Home
A Life Without Bills: Middle-Aged Couple Builds $30,000 Off-Grid Cob Home
Written by: Tricia Drevets How-To Print This Article
If you are intrigued by off-the-grid living but are put off by the expense of building your own self-sufficient house, you need to take a look at a couple’s home in Bisbee, Ariz. They built their 600-square-foot abode for only about $30,000.
Today, they are debt free and pay no bills for water, heat, trash pick-up or electricity, and they are gaining expertise as gardeners. Their only regular bills are for Internet service and property taxes.
Karen and Bill, who were both in their 50s when they began building their home in the fall of 2010 and moved in about 18 months later, did all the work themselves. They were profiled on the YouTube “Life Inside A Box” channel.
“We are loving it every day,” Karen says. “It was a lot of hard work, but we chose to do it.”
A video tour begins outside the front door where Karen and Bob explain that the home is made of cob and straw. They have experimented with different forms of plaster over the straw to help defend the home against Arizona’s unrelenting sunshine.
The Pocket-Sized Backup Battery That Can Jump-Start Your Car!
“We used the basic principles of solar design,” says Bob, “with south- and southeast-facing windows.”
As they enter the home, Karen is quick to mention that everything in their home — except for the new energy-efficient refrigerator they purchased to fit in with their solar system — is either used, gifted or repurposed in some way.
“We made a real effort to recycle as much as we could,” says Karen, pointing out salvaged tin, wood, sinks and furniture pieces in the colorful, inviting home.
The open floor plan and the home’s high slanted roof offer a feeling of spaciousness. The bathroom is the only separate room, with the bedroom partitioned from the main room. A small curtained area is the storage room. “We are minimalists,” Bob says. “We don’t have a lot of stuff.”
Outside, the couple displays their solar system, which, along with their septic system, comprised the major costs for the home. Six main solar panels are nearby. Another four smaller ones power the well. The slanted roof off the back of the house captures rainwater to help irrigate garden beds, trees and plants.
Also on the property are two trailer homes that friends gave to the couple and that Bob later refurbished for their use. One is a warm weather guesthouse, and the other serves as Bob’s workshop. He built a structure to connect to that trailer, which he calls his “man cave” and which also serves as a cold weather guest room.
In the workshop, Bob says he tries out other alternative home concepts, such as crushed paper walls, that he did not get to incorporate into his home.
Raised garden beds, many of which have shades to protect plants from the Arizona sun, are also on the property. Bob and Karen admit they are still learning about gardening, but they are eager to add more homegrown food to their lifestyle.
When asked for advice for others who are considering building an off-the-grid home, Karen and Bob both are quick to stress simplicity.
“Don’t overreach,” Karen emphasizes. “Make a simple plan and then stick with the plan.”
Bob says that he and his wife were motivated by the idea of having a debt-free lifestyle. “We did everything out of money saved, and then we sold half of our 60 acres when we needed more money. … Many people aim too high, and end up getting divorced or having a house that is simply too big to maintain.”
Both Bob and Karen stress that you can always add on another room or another building later if you have the need.
“You will find that you can live in a small space very nicely,” Karen adds.
Would you want to build or live in a cob house? Share your thoughts in the section below:
Discover The Secret To Saving Thousands At The Grocery Store. Read More Here.
On – By Tricia Drevets
-

Hobbit Homes Are Real, and Here’s How You Can Obtain One of Your Own!

Hobbit Homes Are Real, and Here’s How You Can Obtain One of Your Own!
00residential structural engineer, structural engineering, SustainabilityTags: building a dome home, dome home builders, dome home floor plans
Customized home designs are gaining swift popularity as of recent years, and for good reasons: their flexibility and, most beneficially, their sustainability! People are becoming more aware of climate change than ever before, after all, and its visible effects on the weather throughout the world prompts most to take action however they can. For most people, this means modifying their homes to be more environmentally friendly.
If you’re a Lord of the Rings fan, you’re probably intimately familiar with the concept and design of “hobbit homes.” If you also care about going green, you’ll be happy to know these homes can and do exist in the real world, and can even be commissioned and built for your own living needs! Interested? In this blog article, we’ll go over just what it takes to have your own hobbit home.
How Do Hobbit Homes Work?
If you aren’t familiar with this home design concept, we want to take the time to explain just what a hobbit home is. Building a hobbit home is very similar to building a dome home, particularly in terms of shape. Hobbit homes are typically nestled into hills, identifiable by the door placed into the hillside and the pathway leading up to it. These homes come in all sizes, meaning you can have a hobbit home of your own with as much space as you could possibly need.
What Are the Benefits of a Hobbit Home?
The best and most noteworthy feature of the hobbit home, much like dome home floor plans, is its versatility—both before and after building. Not only can you customize your hobbit home exactly to your liking, but once the construction is done, you have further options! Is your home growing too small? You can simply add onto it by requesting more “modules,” or home sections to be further implemented into the hillside. Modules come with all sorts of functions, from rooms to fully usable garages. Furthermore, you can even put the roof of your home to functional use! The grassy layout of the roof of a typical hobbit home makes a wonderful base for a garden, allowing you to grow flowers, vegetables or anything else you choose!
Even if you don’t want to plant anything on your roof, the grass up top will come in handy in case of rain and other weather events. Because of the vegetation up top, you don’t have to worry nearly as much about water damage to your home. Dome home builders ensure your home will be able to withstand the weather since the grass can easily absorb the rain’s moisture. It will then photosynthesize, giving back to the planet and reducing your need to worry about water conservation and home-owning disasters.
Does the idea of a hobbit home interest you? If so, B.E. Structural can help put you on the path to obtaining one of your own! Be sure to get in touch with us and we’ll help you every step of the way, from blueprints to dome home floor plans to location.
https://www.bestructural.com/hobbit-homes-real-heres-can-obtain-one/
On – 17 Jan, 2017 By
-

6 Ways to Increase Food Production in Your Organic Vegetable Garden
Please note that affiliate links are present in this post, which means if you click on a link a buy something, I’ll get like 4 cents for it at no extra cost to you. All recommendations are humbly my own.
-
1. Prepare Your Soil Using a No-Till Method
-

No-Till gardening requires nothing more than reliable tools and good old-fashioned hard labor. Good for you and your garden. - It’s a harsh fact that machines are destroying our soil! When we mechanically till our gardens, our soil’s complex structure gets broken up into tiny particles. Air pockets created by earthworms and arthropods diminish. Colonies of beneficial bacteria and strands of fungal hyphae break apart. When these tiny pieces all settle, they become extremely compacted, leading to poor drainage – the totally opposite effect we hoped tilling would have!
- There’s a common misconception that we must till our soil every spring to aerate, so “roots can breathe” and “water can drain more efficiently,” but the fact is: Tilling does NOT accomplish this. There many other ways we can prepare our gardens that are not only healthier for our soil, but also require much less money and equipment – my preferred method is Double Digging.
Related Enough: Epic Spring Planting Series: My Best Tips for Planting with Seeds
I first learned about double digging from John Jeavons, founder of Ecology Action and the Grow Biointensive farming method, and author of How to Grow More Vegetables, when he presented at the MOSES Organic Farming Conference in 2015. The Double Dig Method entails digging two layers of soil with a shovel using nothing but old-fashioned manual labor. Using the least amount of effort possible, the digger is to “twist” the soil in patches while amending it using organic fertilizers and compost. Watch this instructional YouTube video on double digging (note that there is a second part you’ll need to watch).
Side note, I have a 2-part Soil Building Series: Increasing the Biodiversity of Your Soil Food Web, Part 1 and Part 2. To really get to know your soils on a deeper level, and to learn how to care for them compassionately, I invite you to read those posts!
The benefits of double digging are endless. There’s no intense breaking up of the soil structure. There’s no mass killing of valuable microorganisms, so plants are naturally healthier. All of your earthworms, spiders, centipedes and other beneficial bugs will be left in tact. Your plants’ root systems will grow deeper and stronger. And what’s fascinating is, once you build your soil fertility with organic matter your soil will hold more water, reducing the need to water as often. All of this means MORE FOOD!

Worms are so incredibly important for our gardens and when we are gentle with our soils, we preserve them and their delicate work. Totally Related: 7 Best Organic Soil Amendments for Your Garden
amzn_assoc_placement = “adunit0”; amzn_assoc_search_bar = “true”; amzn_assoc_tracking_id = “heirloomsoul-20”; amzn_assoc_ad_mode = “manual”; amzn_assoc_ad_type = “smart”; amzn_assoc_marketplace = “amazon”; amzn_assoc_region = “US”; amzn_assoc_title = “Stuff We Love for Soil Prep”; amzn_assoc_linkid = “5784ba14ef33b867e91e1877f5f21b5c”; amzn_assoc_asins = “B010CXJ0L4,B00AE12V5M,B00OHSFEG6,B010CRGKAE”;
-
2. Improve Your Soil Biodiversity with Homemade Compost
- If you know anything about compost, let it be this: Not all compost is created equal! The nutrient content of the compost you are using depends on what it is made out of. Did you acquire it from your municipality, in which case it could be mostly decomposed grass and tree trimmings, potentially laden with herbicides? Or did you make it yourself, in which case it is probably a richer concoction of grass and leaves from your yard, kitchen scraps of fruits, herbs, veggies and egg shells, and all kinds of organic matter from your own garden?
You see where I’m going with this. Compost is a great way to feed your garden and introduce more biodiversity into the soil, ideally at the end of the season or during soil preparation.

Homemade compost is the BEST compost – and it doesn’t have to be hard! The best compost to use is your own because you control what goes in it. All of the different types of organic matter we throw into our compost support different types of microbes, and this vastly increases the biodiversity and the nutrient content of our end product. A more biodiverse compost pile means a more biodiverse garden.
Some of us don’t have room to make compost. If you’re one of these people, getting compost from your municipality is fine – usually it’s free, and everyone loves free!
-
3. Stop Stepping on Your Soil
- This might sound obvious, but I’m adding it in here and for good reason: I’ve worked with a ton of people who stepped all over their garden beds until they worked with me. Soil compaction is one reason, while the breakage of tender plant roots is another, but the main reason why you should never, ever step on your soil is because your weight crushes and suffocates your microbes. Healthy soil food web = More nutrients in your veggies!
By now you’re going, Really? For the third time? Microorganisms, microbes or whatever the heck those things are she’s talking about?
The books below changed my life as a gardener and will also help you understand microbes, and your garden, like you never have before:
amzn_assoc_placement = “adunit0”; amzn_assoc_search_bar = “true”; amzn_assoc_tracking_id = “heirloomsoul-20”; amzn_assoc_ad_mode = “manual”; amzn_assoc_ad_type = “smart”; amzn_assoc_marketplace = “amazon”; amzn_assoc_region = “US”; amzn_assoc_title = “”; amzn_assoc_linkid = “be1d2f3f6543bfbef748e4958a695d08”; amzn_assoc_asins = “1604697296,1604691131,1580085792,1603580298”;
I use “microorganisms,” “microbes,” “soil biodiversity,” “microbial life,” and “Soil Food Web” interchangeably throughout my posts, but I mean generally the same thing when I talk about how important they are – “they” being a collection of bacteria, protozoa, nematodes, algae and fungi, billions of which can be found in one tablespoon of your soil. Caring for these living creatures is the most important aspect of growing food.
So, a solution to stop stepping on your soil. You need clearly marked, delineated pathways throughout your garden. And once you’ve developed this pathway system, it needs to always stay that way. My favorite and easiest to use path materials are straw, wood chips and stepping stones.

Pathways are the best way to keep yourself, and everyone else, from stepping on your soil. 4. Mulch, Mulch, Mulch
It is so, absolutely important for you to mulch your vegetable garden. Not only does mulch keep weeds down and prevent moisture from evaporating quicker, mulch materials also break down over time and add valuable organic matter to your soil, and provide food sources for your soil food web. Most importantly though, mulch provides a thick, protective layer for your microbes against the harsh outdoor elements.

Spring bulbs loving life in a bed of nitrogen-rich leaf mulch. Though a full-sun space is a blessing and ever-desirable in organic gardening, it can have a detrimental effect on the top few inches of soil by completely drying it out. The top four inches of soil is where most of our microbial life is contained, and the hot sun will crisp and evaporate the little guys right up without a protective layer! Rain can also have undesirable effects – microbes are so tiny that raindrops falling on them has a similar effect not unlike our stepping all over them. The way we can protect our microbes from the natural elements is by using mulch.
Related Enough: Gardening Myths We’re Officially Breaking, or Why You DON’T Need Raised Beds and Fertilizers

The sun is incredibly powerful and will dry your garden right up if you don’t cover it with mulch. There are lots of different options for mulch, but here, I will highlight the simplest mulching solutions…
- – Straw is an economical option because not only is it initially cheap to buy, but you can also use it for your pathways. It is good to use around baby seedlings because it will help prevent birds from nibbling at them, and it will partially break down over winter so it may be incorporated into your soil during preparation in spring. Be sure to get “straw” and not “hay,” where seed heads are present.
- – Decomposed leaves, or leaf mulch, is an attractive mulching option and adds a good amount of nitrogen to the soil as it breaks down and becomes incorporated into the garden bed. Earthworms love it. If you have a lot of trees on your property, you could create a compost pile of leaves and make your own leaf mulch, otherwise it comes bagged at most landscape suppliers. Be aware that if you do not buy certified organic leaf mulch, the mulch you do buy could have residual pesticides – not great for us or our microbial friends.
- – Living mulch is a way of mulching by growing groundcover plants with shallow root systems in between vegetable plants, not unlike cover cropping. Growing living mulches takes a little more maintenance and technique (you must know what plants are acceptable to grow for living mulch and when to plant them), but anyone can do it! Living mulch is so great because it’s very cheap and easy to do (all you need are seeds), it adds lots of color and texture to your garden, and the added root system provides tons of extra food for microbes. Great options for living mulch are sweet alyssum, creeping thyme, creeping jenny, and arugula.
Totally Related: How to Cover Crop Your Vegetable Garden in 4 Steps
5. Get Your Fencing Right

Ok so this is kind of a joke… but not really. I’ve worked with people who put so much time and money into their fence but it wasn’t done properly so they might as well just had an adorable blue gate instead! My adoration for bunnies, squirrels, deer, and especially groundhogs, has waned since I became a vegetable gardener. When you grow food, animal families seem to multiply out of nowhere, and they all have this perfectly-timed instinct that tells them exactly when to nosh your harvest just hours before you can get to it. PESTS!
Totally Related: Battling Garden Pests: The Organic Pest Control of Mindfulness and Compassion
The only way for us to keep pests out of our garden is by building a strong fencing system. I will always say that with fencing materials and construction techniques, the higher quality your materials are, the better results you will have in creating an animal barrier. There will also be less upkeep with damage from storms and weight on it from heavy snow and ice.
There are some basic dimensional fencing details to know, based on what type of animal you need to keep out…
- – Bunnies – The openings in your fencing material should be no larger than 1”x2”, and I think this is a good rule for all garden fencing no matter the pest. Baby bunnies have the ability to get through 2”x2”, and they are everywhere. If you have a gate within your garden fence, be aware of the threshold gap at the bottom of it – the gap should be no more than ½” – a commonly overlooked detail! If you don’t have deer, a 3-foot tall fence is good enough to keep bunnies out. Keep in mind though that you can’t grow tall crops on such a short fence, so sometimes its nice to go vertical anyway.
- – Deer – Your deer fencing should be at least 6 feet tall, preferably 8 feet. It sounds hulking and fortress-like, but it’s actually nice to have fencing this tall because then you can grow pole beans, peas, cucumbers, squash and vining flowers on it. Deer have a tendency to eat plants through the mesh fencing, so you may need to attach a screen or a similar very fine mesh to keep their snouts out. Trick is to avoid attaching this screen too high, otherwise it will block sunlight.
- – Groundhogs/Gophers – These are burrowing animals, living up to 18” underground in large nests connected by a network of underground pathways. They’re incredibly smart. You’ll need to dig a deep trench (ideally 18”) and extend your METAL mesh fencing down that far to keep them out. Groundhogs are not typical in suburban backyards or city yards, but if you’re out in the country, or live near open fields of any kind, you absolutely need to protect your garden from groundhogs or all will be lost. I’ve learned this the hard way.
- – Chipmunks & Squirrels – Just forget it! No matter of fencing, unless you completely cover the top of your garden, will keep them out. If squirrels are taking bites out of your tomatoes, chances are they are sucking the juice out because they’re thirsty. Try leaving shallow dishes of water out for them to drink. I swear it works!

Ever see a squirrel drink? Now you have. They get thirsty, too! 6. Assess Your Tree Canopy
Trees grow fast. Sometimes just a few years after setting up your garden your trees can grow so much that new branches block primetime sunlight.

Trees cast much more shade than you would think, causing leggy, unproductive growth in your garden. If you notice your plants are stunted but you think you’re doing everything else right, I encourage you to spend some time in your yard one day and assess the sunlight in your garden. The Solar Pathfinder is an amazing tool I’ve used in countless gardens to determine sun exposure – it might be worth the price if your garden is large enough, creates revenue, or if you could split the cost of it with other gardeners.
Look up and see if any trees might be blocking the sun pattern. If they are your own trees, and are small enough, go ahead and trim them back with tall tree loppers. If the branches are larger and too high, consider calling a local landscaper or arborist for their tree trimming rates – it is probably worth the cost. You’d be surprised at just how one really tall branch can make hours of a difference in your garden! Visit this post for a blurb on how to determine the hours of sun exposure in your garden.
amzn_assoc_placement = “adunit0”; amzn_assoc_search_bar = “true”; amzn_assoc_tracking_id = “heirloomsoul-20”; amzn_assoc_ad_mode = “manual”; amzn_assoc_ad_type = “smart”; amzn_assoc_marketplace = “amazon”; amzn_assoc_region = “US”; amzn_assoc_title = “Products Mentioned in This Post”; amzn_assoc_linkid = “be1d2f3f6543bfbef748e4958a695d08”; amzn_assoc_asins = “B00AR0RMBI,B009378AG2,B00F0MB40S,B00NGYMVYK”;


http://heirloomsoul.com/6-ways-to-improve-your-existing-garden-tips-from-an-edibles-expert/
On – 09 Apr, 2017 By Fran
-


