Your cart is currently empty!
Category: Food & Food Storage
Food & Food Storage
-

The Urban Homesteading Cookbook: Forage, Farm, Ferment and Feast for a Better World
With food culture in the midst of a do-it-yourself renaissance, urbanites everywhere are relishing craft beers, foraged ingredients, sustainable seafoods, ethically raised meats and homemade condiments and charcuterie. Inspired by the delicious creativity of local artisans, chefs, brewmasters and mixologists, Michelle Nelson began urban homesteading in her downtown apartment. Armed with a passion for food…;

Douglas & McIntyrePrice:
$22.95$20.60 Free Shipping
With food culture in the midst of a do-it-yourself renaissance, urbanites everywhere are relishing craft beers, foraged ingredients, sustainable seafoods, ethically raised meats and homemade condiments and charcuterie. Inspired by the delicious creativity of local artisans, chefs, brewmasters and mixologists, Michelle Nelson began urban homesteading in her downtown apartment. Armed with a passion for food and farming, and a PhD in conservation biology and sustainable agriculture, she shares her hard-won knowledge and recipes with readers interested in collecting, growing and preserving sustainable food—even when living in an apartment or condo.In The Urban Homesteading Cookbook, Nelson explores the worlds of foraging wild urban edibles, eating invasive species, keeping micro-livestock, bees and crickets, growing perennial vegetables in pots, small-space aquaponics, preserving meats and produce, making cheese and slow-fermenting sourdough, beer, vinegar, kombucha, kefir and pickles. Nelson fervently believes that by taking more control of our own food we will become better empowered to understand our relationships with the environment, and embrace sustainable lifestyles and communities.
With 70 fabulous recipes, including sesame panko-crusted invasive bullfrog legs, seaweed kimchi, rabbit pate with wild chanterelles, roasted Japanese knotweed panna cotta and dark and stormy chocolate cupcakes with cricket flour— this exciting new book is sure to inspire readers to embark on their own urban homesteading adventures.
Generously illustrated with gorgeous colour photography and complete with useful how-to chapters, The Urban Homesteading Cookbook is an invaluable guide for all those seeking ethical and sustainable urban food sources and strategies.
Full Customer Reviews:
-

How To Make Cold Brew Coffee | Homesteading 101
Learn how to make cold brew coffee and you will never have to drop two dollars per cup of coffee again. Find out how to make cold brew coffee easily with this straightforward guide!
How To Make Cold Brew Coffee Easy And Pocket-Friendly
Learning how to make cold brew coffee is a recent hobby I got into. I was intrigued by this latest trend in making coffee, a craze even got coffee shops bought into. You see, coffee has some dirty little secrets, but they’re all coming out in the open now. Apparently, cold brew coffee is 67% less acidic than hot brewed coffee, and less acidic means better tasting. Best of all, it’s easy to make, you’ll laugh at yourself for buying expensive coffee when you can make a better cup at home. So let’s save the chitchat for later and learn how to make cold brew coffee now!
https://www.instagram.com/p/xmXbbKNder/
Let’s Get Started!
What You Need:
- Bottled water
- Ground coffee
- French press
How To Make Cold Brew Coffee

Before we get into to cold brewing coffee, you have to understand that this isn’t simply making coffee cold by putting ice cubes or putting it in the refrigerator. This is a process where no heat is applied, and you will find out more about it as you read on.Step 1. Ratio

First is to put coffee into the French press. Next is to pour bottled water at room temperature over the coffee grinds gently. If you have really good tap water at home you can also use that. Make sure you get all the grounds nice and wet.Step 2. Mix

Now, get a large spoon and use the edge of the handle to poke around the container or the French press. This will allow all the coffee grinds to absorb water.You’ve probably heard other coffee makers before suggest putting the mixture in the refrigerator. Well, I say don’t, but simply cover the mixture in your press with the cap or press and leave it at a room temperature. If it gets too cold it won’t dissolve enough of the coffee and will have a weak flavor.
Step 3. Press
The next thing we do is to wait for 12 to 13 hours. Perhaps you can work this out overnight so you can enjoy it in the morning. Steeping coffee in the water this long will allow the coffee flavors to dissolve in cold water naturally. So after 12 hours, you simply plunge the press gently to separate the steeped liquid from the coffee grinds.
There are a couple of things you would want to learn more about cold brew coffee. One, is you’re going to get a bit more caffeine than you would normally get in a regular brewed coffee. Heating, as you know, applies a change in temperature which changes the taste and takes out most of the natural flavor. Two, it leaves off the acidity that comes when heat is applied to coffee. This cold brewing process, therefore, makes coffee easier on the stomach.
Step 4. Store

You wouldn’t want to store the cold brew coffee in the French press. What you need to do is to get a separate container with a cover and empty the cold brew coffee into the container. This time, you may keep and store the finished cold brew coffee in the fridge, and you may store it for as long as two weeks. You can also make many of your favorite coffee recipes with it.Step 5. Enjoy!

You will see that your cold brew coffee is nice and thick, and full of flavor. Pour yourself a cup, store the rest in the fridge, and experience a smoother, less bitter, better-tasting and -smelling coffee. You can also enjoy a huge amount of caffeine, but without the acidic stomach. You can still add a bit of sugar or milk, or enjoy it as is!Follow the easy step-by-step guide on how to make cold brew coffee in this video:
Now you know how to make cold brew coffee the coffee shop way. If you’re the can’t-live-without-coffee type, you’ll love this brewed coffee version better. Learn how to make cold brew coffee and you’ll be enjoying the best kind of coffee anytime, at an outrageously low price!
How did you find this how-to guide? Will you give this guide on how to make cold brew coffee a try? Tell us all about it in your comments!

https://homesteading.com/how-to-make-cold-brew-coffee/
On – 06 Oct, 2017 By Eva Lynn
-

10 Crazy, Unordinary Uses For Oatmeal That Make Homesteading Easier – Total Survival
Image source: Pixabay.com
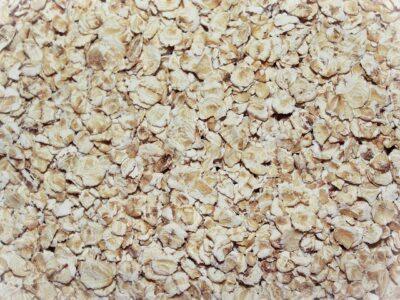
There is nothing like eating a bowl of oatmeal on a winter morning to warm you and fuel you for the day. In fact, a container of old-fashioned or whole oats is probably a staple on your pantry shelf all year long.
However, did you know you could use oatmeal for a wide variety of other uses than just for eating? Here are 10 uses for oatmeal you may not have tried. (Please note that these uses are intended for whole oats and not for instant oatmeal, which usually has added flavors and sugars.)
1. Absorb odors.
Oatmeal can neutralize unwanted odors in your home as well as baking soda can. Place a bowl of oats in the fridge or sprinkle some in your teenager’s smelly sneakers overnight.
Learn Unordinary Uses For Everything In “The Big Book Of Off The Grid Secrets”!
You even can add some oatmeal to your kitty litter box.
2. Clean cast iron.
Use oatmeal to help remove grease and stubborn small food particles from your cast iron pots and pans. Simply sprinkle about two tablespoons of oats in the pan. Then add a little water and scrub with a stiff brush or a dishcloth. Rinse well and dry.
3. Thicken soups and stews.
Skip the extra flour or cream and try adding oats to thicken your next batch of soup. Add the oats, one tablespoon at a time, until your each your desired consistency. In addition to a creamier, thicker texture, you will add healthy fiber to your meal.
4. Replace flour.
You can use oats as a substitute for flour in baking recipes for breads, cookies and pancakes. You’ll have twice the fiber but far fewer calories. (Measurements may vary. Quaker Oats has a helpful substation chart here.)
5. Soothe minor burns and skin irritations.
Image source: Pixabay.com
Oatmeal can come to the rescue for pain relief from sunburn, poison oak, poison ivy and other minor burns. Mix a half cup of oatmeal and a quarter cup of water and let it sit in the bowl for about 60 seconds. Then gently apply the paste on the burn for about five minutes.
6. Clean oil spills.
You can absorb oil spills in your garage or in your kitchen with plain oatmeal. Sprinkle enough oats over the affected area to cover the oil completely. Let it sit for 30 minutes and then sweep away the mess.
7. Remove sap from skin.
Oatmeal works wonders at removing sticky tree sap from your skin. Just rub some oatmeal into your sticky hands before washing them with soap and water. Oatmeal works as an abrasive, helping to remove the sap as you wash. Plus, it is gentle on your skin.
8. Make a dry shampoo.
Make a DIY dry shampoo that is inexpensive and gentle on your hair. Massage one tablespoon of ground oats into your scalp. Let them sit for about five minutes before brushing them out.
9. Soothe your dog’s irritated skin.
Is your dog itchy? Try massaging some dry oats into his coat to soothe irritated skin. Let the oats sit for about five minutes and then brush the oats out.
You also can grind oats into a fine powder and add them to your dog’s bathwater. (This works well for humans too!)
10. Make modeling clay.
There is something just so soothing about working with clay. Now you can make your own fresh-smelling modeling clay with oatmeal. Combine one cup of rolled oats, two-thirds cup of all-purpose flour and one-half cup of water. You will create a substance that stays moist for hours but will harden overnight.
So now, you have 10 good reasons to stock up on oatmeal the next time you see it on sale.
What uses would you add to our list? Share your tips in the section below:
Discover The Secret To Saving Thousands At The Grocery Store. Read More Here.
This Article Was Originally Posted On offthegridnews.com Read the Original Article here
(Visited 23 times, 1 visits today)http://totalsurvival.net/10-crazy-unordinary-uses-for-oatmeal-that-make-homesteading-easier/
On – 12 Oct, 2017 By Lousmcleod
-

Food Storage for Self-Sufficiency and Survival: The Essential Guide for Family Preparedness
Be Well Prepared and Well Fed!With all the uncertainty in the world today, there is peace in preparing. In an emergency, you don’t want to depend on a grocery store or government agency to feed your family. Storing food assures your family’s self-sufficiency year-round and benefits your budget when you plan correctly.This in-depth, nuts-and-bolts guide…;

Living Ready MagazinePrice:
$17.99$17.18 Free Shipping
Be Well Prepared and Well Fed!
With all the uncertainty in the world today, there is peace in preparing. In an emergency, you don’t want to depend on a grocery store or government agency to feed your family. Storing food assures your family’s self-sufficiency year-round and benefits your budget when you plan correctly.
This in-depth, nuts-and-bolts guide to storing food teaches you a variety of food storage methods that you can customize to meet your family’s unique circumstances including family size, tastes, ages, health concerns, income, and living conditions. This is not a generic manual on stocking dehydrated meals that have ten-year shelf lives. It’s the guide to storing foods your family loves so you can eat well no matter what challenges life throws at you.
Inside you’ll find:
- Food-storage options for 72-hour emergency kits, short-term emergencies and long-term survival.
- Food-storage planning methods that incorporate the foods and meals your family loves.
- Tips for how to maintain balance and variety in your food storage.
- Budget-friendly ways to purchase food for storage.
- Easy and practical ideas for cooking with food in storage so nothing expires or goes to waste.
- Organization and storage methods for easy food store maintenance.
- Water storage and purification methods.
- Canning, freezing and dehydrating methods to preserve food you produce at home.
Storing food gives you the freedom to stretch your income in tight-budget months, pack quick meals for short-notice trips, and create healthy meals without constantly going to the grocery store. Plus your stored food is available if you do experience an emergency power outage, natural disaster, long-term illness or job loss. Let this guide help you start building your self-sufficiency and food storage today.
Living Ready
Full Customer Reviews:
-
![Easy Crockpot Applesauce Recipe [With Canning Instructions] | Hillsborough Homesteading](https://bhf1.b-cdn.net/wp-content/uploads/2018/08/crockapplesauce.jpg)
Easy Crockpot Applesauce Recipe [With Canning Instructions] | Hillsborough Homesteading
Disclosure: Some of the links below are affiliate links, meaning, at no additional cost to you, I will earn a commission if you click through and make a purchase.

This easy, two-part recipe for applesauce is one of my favorites for Fall. Apples are incredibly abundant in the Fall and can be collected at a Pick-Your-Own, a local farmer’s market, or, if you’re lucky, your own backyard tree. Our orchard is still coming along, so this year we had to get our apples from a local Farmer’s Market.

I love this recipe because it’s easy, healthy, tasty, and makes for a quick dessert that tastes naughty for you, but really isn’t! Apples are high in fiber, Vitamin C, and antioxidants. They are high in natural sugars, but the fiber in them keep your blood sugar from spiking.
In fact, I used this recipe, minus the sugar and cinnamon, to make a large batch of applesauce/homemade baby food for the little one and froze it into ice cubes.
You can make your applesauce following the same recipe in a saucepan on the stove if you’re short on time. However using the crockpot is much easier and you don’t have to worry about watching it to make sure it doesn’t burn. You’ll also make your house smell amazing! Win-win!
For free canning printables, check out my post here. No sign up required! I’ve created two quick reference sheets that list out the most common canning goods (salsas, tomatoes, fruit, etc) and the canning times for both Pints and Quarts, boiling water canning and pressure canning. Take a look and share with as many people as you’d like!
For more great Fall-time Apple recipes, check out Herbal Academy’s Harvest Time Apple Recipes.

To make this recipe, simply peel, core and roughly chop your apples. Save yourself some time and buy an apple peeler/corer. I love this one because it’s manual. You don’t need electricity to use it. If you’re off-grid or simply don’t want to “plug in”, these are a great tool.
Throw your apples and cinnamon stick into a crockpot (or saucepan) and let cook until soft and mushy. Honestly, you could stop here and pour these delicious apple chunks over vanilla ice cream and call it done!

To turn your chunks into sauce, you can use a potato masher for chunkier sauce (easier for babies to scoop up onto a spoon), or run your chunks through a food processor or blender for smoother sauce.

Stir in the lemon juice (and sugar or honey if you choose) and scoop your new applesauce into clean canning jars leaving about 1/2 inch headspace. Remove the bubbles, secure the lids and process in a boiling water bath for 20 minutes.

Voila! You have a delicious, homemade snack or dessert on hand you can feel good about giving to your family.
#mc_embed_signup{background:#fff; clear:left; font:14px Helvetica,Arial,sans-serif; width:100%;} /* Add your own MailChimp form style overrides in your site stylesheet or in this style block. We recommend moving this block and the preceding CSS link to the HEAD of your HTML file. */

Prep Time 30minutes Cook Time 4-5hours Servings pintsIngredients- 6 lbs apples
- 1 stick cinnamon or use ground cinnamon to taste
- 1 1/2-2 cups water
- 1/2 cup sugar or honey (optional)
- 2 Tbsp lemon juice (for canning)
Prep Time 30minutes Cook Time 4-5hours Servings pintsIngredients- 6 lbs apples
- 1 stick cinnamon or use ground cinnamon to taste
- 1 1/2-2 cups water
- 1/2 cup sugar or honey (optional)
- 2 Tbsp lemon juice (for canning)
InstructionsMake Your Applesauce-
Peel, core, and roughly chop your apples.
-
Throw apples, cinnamon and sugar (or honey) into a saucepan or crockpot.
-
For saucepan cooking, simmer until apple chunks simply fall apart. Blend and add back to saucepan for another 10-15 minutes.
-
For crockpot cooking, cook on low for 8-10 hours, or high for 4-5 hours.
-
If you like thin applesauce, run your apples through a food processor. For chunkier applesauce, a potato masher works just fine.
Canning-
Add your lemon juice to your applesauce.
-
Sterilize your jars according to your normal practice.
-
Add your applesauce to your jars, leaving 1/2 inch of headspace and removing any bubbles. (This recipe will fill roughly 4 pint jars.)
-
Secure lids.
-
Process in a hot water bath for 20 minutes for pints and half pints, 25 minutes for quarts.
Share this RecipeRelated
http://hillsborough-homesteading.com/recipe/crockpot-applesauce-canning/
On – 03 Oct, 2017 By Lauren Dibble
-

Meals, Meal Planning and homesteading food.

Meals, Meal Planning and homesteading food.
Blog, Homesteading control, dinners, family, feeding, homestead, homesteading, kids, meal planning, meals, meat, month of meals, of 6, people, portion0
Today is a workday and I am a bookkeeper. I spend most of my time on a computer when I am not homesteading. So, for a lot of you yesterday was your Monday. For me it was a homesteading day and I cooked about 3 lbs. of sweet potatoes that I purchased from the local farmer. (I told you about in a earlier blog.) They were probably some of the best tasting sweet potatoes I have ever had! I also worked on my affiliate sites, and social media. And I have some telecommunications clients I freelance for and I worked on that as well.
The other thing I did yesterday that falls into our Homesteading in Place structure, is that I went grocery shopping. Right now, we feed six people every day. Monday – Friday the kids have breakfast and lunch at school and that relieves three of the mouths part-time. I pack my lunch for work 4 days a week, my oldest daughter works, has an internship and goes to college (She is 17 years old). She takes care of her own schedule and either packs her food or purchases something in town with her own money. My ex-husband also lives with us and he is at home full-time so he eats his meals at the house.
The breakdown for meals is as follows for my family.

Breakfast Lunch Dinner Total per week Me 7 7 7 21 Daughter 1 7 7 7 21 Son 1 2 2 7 11 Daughter 2 2 2 7 11 Son 2 2 2 7 11 Ex-Husband 7 7 7 21 If you would like to see where I got recomindations on how much per week you can click HERE
Let us look at dinner. Really, I plan those meals. Everyone eats dinner. That is seven meals per person per week.
If each person is supposed to consume 8 oz. of meat in a meal then I have to plan for and buy 84 lbs. of meat a month. That is really a lot when you look at it that way. If you are homesteading and you have cows, or you hunt and you have deer in the freezer this helps mitigate this cost. However, I do not have either at the moment. My homesteading and growing / canning garden vegetables will help us in providing nutritious meals to my family.You can go about meal planning several ways. Whether you are homesteading or not, you should plan your meals. This will save you time and energy each month and if you have kids you will not have to hear the dreaded, “What’s for dinner?” each night. It helps with cost versus price of each thing that you consume and have to buy.

The other way I cut cost is portion control. I make everyone’s plates at my home for dinner. Now I know that not all people agree with this. Some think that I am still waiting on my children and ex-husband. Honestly, this is not the case. I make the plates from the smallest eater to the largest and not the other way around. My 9-year-old will eat a lot less than his dad or 17-year-old brother.
I look at it as a math problem. If I have, eight portions of food cooked for dinner and I am feeding six people. How many can I really feed? Well, surprisingly the 9-year-old will eat about ½ a portion, my 13-year-old will eat about ¾ a portion, my 17-year-old son will eat 1 ½ portion, my 17-year-old daughter will eat 1, I will eat 1 and my ex will eat up to 2. This is if they were left to their own devices.
(.5+.75+1.5+1+1+2= 13.5)When I portion control everything, the problem becomes simpler.
(.5+.5+1+1+1+1=5)Then if anyone is still hungry, they are welcome to finish what is left. But this way I have ensured that everyone has received enough protein to fuel his or her bodies.
Remember the end goal is to save as much as you can, without sacrificing health and wellness.What kind of diet do you eat?
Well, we eat all things and try to have as balanced of a diet as possible. That being said we also lean toward a high protein low carb diet. And we are doing our best to ease into a diabetic friendly diet because both my ex and I have diabetes in our family.
We are big meat eaters, however each month we try to have a few meals without meat. The downside is that normally those meals are high in carbs. I am posting our last 30 days of meals below. If you have any questions on this meal plan please feel free to ask questions and leave your comments below.
Sunday Monday Tues Wed Thurs Friday Sat 4-Sep 5-Sep 6-Sep 7-Sep 8-Sep 9-Sep Breakfast Lunch Snack Dinner BURRITOES STOGANOFF W/ ROLLS CHICKEN /W POTATOES HAMBURGER HELPER-TURKEY CHICKEN PASTA BROCCOLI STEAK & BEAN BURRITO BOWL 10-Sep 11-Sep 12-Sep 13-Sep 14-Sep 15-Sep 16-Sep Breakfast Lunch Snack Dinner PORK CARNITAS MEAT LOAF SWAII CHILLI PORK CHOPS RANCH BURGERS & FRIES PIZZA 17-Sep 18-Sep 19-Sep 20-Sep 21-Sep 22-Sep 23-Sep Breakfast Lunch Snack Dinner SALMON BURGERS POTATO SOUP SPAGHETTI POT ROAST SAULSBURRY STEAKS FRIED CHICKEN /W MASHED POTATOES RIBS/ HAMBURGERS/ HOTDOGS 24-Sep 25-Sep 26-Sep 27-Sep 28-Sep 29-Sep 30-Sep Breakfast Lunch Snack Dinner LEFT OVER BBQ STUFFED BELL PEPERS COUNTRY FRIED STEAK CORN BEEF SLOPPY JOE LASAGNA CHICKEN POT PIE 1-Oct 2-Oct 3-Oct 4-Oct 5-Oct 6-Oct 7-Oct Breakfast Lunch Snack Dinner PARMISAN CHICKEN W/ PASTA & RED SAUCE ONE POT CHEESEBURGER CASSEROLLE PULLED PORK CREAM OF MUSHROOM CHICKEN BURRITOES HAMBURGERS & FRIES BREAKFAST The meals in Blue are cooked in the crock pot to give us a break from the kitchen.
The meal in orange is my son’s birthday and a speacial event.
I will be posting my recipies as I have time. I will also be making youtube videos on my two favorite ways to store food, canning and my vacume sealer!
And as always thank you for reading and being a part of our homestead! ?
** Here is my challenge to you. For the next 30 days wright down what you have for dinner each day and how many people eat. That way when it is time to sit down and make your meal plan you will have dinner ideas, and a jumpstart on the foods you enjoy! ?
https://www.homesteadinginplace.com/meals-meal-planning-and-homesteading-food/
On – 20 Oct, 2017 By Stephanie S.