Tag: growing

  • Beautiful 1-Acre Small Scale Permaculture Farm – Limestone Permaculture Farm

    Beautiful 1-Acre Small Scale Permaculture Farm – Limestone Permaculture Farm


    A tour of Limestone Permaculture Farm in New South Wales, Australia. Brett Cooper manages the 1-acre property as a productive farm helping to feed around 50 families. The tour includes a look at the orchard, caravan farm gate, chicken and duck areas, and shade house, and Brett talks about what brought him and his family to this complete change of lifestyle – in which they are thriving.

    Website: http://happenfilms.com
    Facebook: https://www.facebook.com/happenfilms
    Twitter: http://twitter.com/happenfilms
    Instagram: http://instagram.com/jordosmond

    Limestone Permaculture Farm: http://www.limestonepermaculture.com

    Music by Craig Kemp

  • Permaculture Fruit Forest of Incredible Abundance in Ireland! (Part 1)

    Permaculture Fruit Forest of Incredible Abundance in Ireland! (Part 1)


    Fig, Apple, Peach, Plum, Cherry, Pear, Nectarine. Grape, Jostaberry, Redcurrant, Rhubarb, Blackcurrant, Blueberry, Raspberry, Rubus, Blackberry…all growing together in the west of Ireland!
    Bealtaine Cottage on FB… https://www.facebook.com/GoddessGardens/
    Bealtaine Cottage website… https://bealtainecottage.com/
    Bealtaine Cottage on Twitter… https://twitter.com/PermaGoddess

  • TALKING TOOLS with Jonathan Dysinger of Farmer’s Friend LLC

    TALKING TOOLS with Jonathan Dysinger of Farmer’s Friend LLC


    Talking about tools with the creator of the Quick Cut Greens Harvester, Jonathan Dysinger.
    SUB:http://bit.ly/2d7dQgdPOPULAR VIDEOS:http://bit.ly/2cmcFLe
    ↓↓↓↓↓↓↓↓↓ CLICK “SHOW MORE” FOR RESOURCES ↓↓↓↓↓↓↓↓↓↓

    Harvester here:
    http://bit.ly/1W3nLGb

    Caterpillar Tunnel here:
    http://bit.ly/2gItRNf

    1 Day Workshop:http://bit.ly/2cziu7v
    Donate:http://theurbanfarmer.co/support/
    My online course: www.profitableurbanfarming.com
    My book: www.theurbanfarmer.co

    Music by: David Cutter Music – www.davidcuttermusic.co.uk

    facebook.com/GreenCityAcres
    twitter.com/GreenCityAcres
    ___
    FARM EQUIPMENT I USE:
    Quick Cut Greens Harvester:http://bit.ly/1W3nLGb
    Knife and Tool Sharpener:http://bit.ly/29DHlos
    Jang Seeder:http://goo.gl/XGvJtl
    Row Bags:http://goo.gl/eI1CLp
    Insect Netting:http://goo.gl/rjyimK
    The Coolbot:http://bit.ly/2cziu7v
    ___
    CAMERA EQUIPMENT I USE:
    Canon Rebel T6i:http://amzn.to/29JApHr
    Canon wide angle lens 10-18mm:http://amzn.to/2a2t1pl
    Shure Lens Hopper shotgun mic:http://amzn.to/29zpdMz
    Joby Gorilla Pod (flexible tripod):http://amzn.to/29JBBu7
    Go Pro action camera:http://amzn.to/29JBU8j
    Phantom 4 Drone:http://amzn.to/29zqenG
    iPad 4 for drone controller:http://amzn.to/29vwKdh

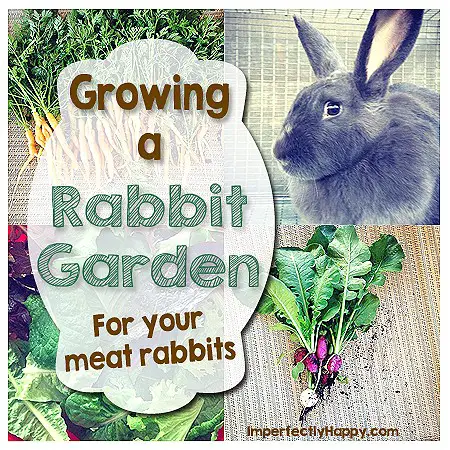
  • Grow Food for your Meat Rabbits

    Grow Food for your Meat Rabbits

    Grow Food for your Meat Rabbits

    These days people are raising a number of livestock animals to provide meat for their family. One of those small animals that seems to be growing in popularity is the rabbit. While most of their diet consists nutrient dense pellets, they should be given a variety of fresh vegetables. This article was designed to introduce the readers to valuable information on planting and growing a garden full of the vegetables that are especially beneficial to rabbits.

    Grow Food for your Meat Rabbits

    The article is from Imperfectly Happy Homesteading. The author was looking to share their experience of raising rabbits as livestock in order to help others to do the same. All of the information that is included in the article was added in order to make it easy more beneficial for the reader.

    Benefits of reading the Grow Food for your Meat Rabbits

    Learn several valuable tips on how to select which types of vegetables for feeding rabbits.
    The article describes in detail what variety of vegetables that are designed provide rabbits that right amount of nutrients.

    The information is presented in a way that makes it really easy to read and to understand.

    Click here to read about:

    http://imperfectlyhappy.com/growing-a-rabbit-garden/ 

  • How to Permaculture Refugee Camps

    How to Permaculture Refugee Camps


    How to Permaculture Refugee Camps

    Malcolm Johnstone
    Thursday, 9th March 2017

    How permaculture principles and design can be applied to refugee camps to make them more sustainable and liveable.

    Temporary IDP camps (internally displaced camps) built for those in Iraq, as well as many other conflict situations, are often more permanent than initially planned.

    Camps built in a few weeks for an influx of people are, years later, small towns with shops, schools and bustling social activity. These towns however, are not sustainable due to the lack of an industrial or agricultural base. Simply, they don’t create any internal value to trade with outside. Instead they rely on external inputs – government salaries for a lucky few – but more often, food vouchers, goods and cash from humanitarian organizations.

    Aspects of permaculture can improve the sustainability of these camps and have positive effects on food security, nutrition, livelihoods and self-esteem.

    Given that the camps are usually planned quickly in accordance with long-established planning guidelines, the usual starting point for implementing ideas from permaculture is in an existing camp, rather than in the spatial planning phase. (Though, permaculture has a lot to say about spatial design). That said, there are many permaculture aspects that can be implemented at the household plot level and in the water reticulation system that have excellent impacts.

    WASH, or Water, Sanitation and Hygiene, in the humanitarian sector has the most promise from a permaculture perspective. Innovations in this area have the potential to assist in the production of food, help protect shelters through establishing wind-breaks, beautify a neighbourhood, employ people and increase the skills, social interaction and self-esteem of camp residents. Here is how to get there:

    Food

    Thinking in zones is a design technique in permaculture that helps reduce the effort required to make a system work. The zones are determined by the place where most of the activity happens – usually the home – and the availability of water – which could be from the roof of the house, or another location.

    The inner zone is a great place to grow herbs and vegetables for use in the kitchen. These kitchen gardens require a relatively high amount of water, so should be placed near to both the kitchen and a water source. In camp settings there is often enough space around a shelter or tent for a small and productive kitchen garden.

    Slightly further away, in zone 2, fruit trees might be planted, as they require less water. Raising chickens might be considered here to keep the weeds down, fertilize the soil and provide eggs and meat.

    Taking advantage of paths that are travelled often is a useful innovation of permaculture systems. If people are already moving in a direction, why not plant something along the way that they can tend or pick? In a camp situation if water must be carried some of it could be used to water plants on route. If the chickens are on a convenient path then kitchen scraps can easily be fed to them.

    Protecting shelters

    The borders of the camp, or along the sides of streets are good places to run drains, and to grow trees as windbreaks. Exposure to the wind and sun reduces the life of an emergency tent and protection from these elements makes a camp a more pleasant place to live. Fast growing trees can be planted at the outset of camp construction.

    Employment

    Permaculture relies a lot on manual labour so is suited to camps where labour is one of few assets people have. Setting up systems of water reticulation and planting trees can often be supported financially by humanitarian organizations. The systems can then be maintained by camp residents.

    Skills, Social interaction and Self-esteem

    Boredom in IDP and refugee camps is a real issue for residents. Learning skills and undertaking activities can be a way to achieve various aims at personal and community levels. The process of planning, digging, planting and tending can be therapeutic, can deliver new knowledge and can integrate a community together.

    Beauty

    Stark rows of tents, often in remote locations, provide uninspiring views for camp residents every day. Permaculture, with its focus on gardening, can assist with beautifying an environment with plants. Living fencing can replace fences, and if planted in a zigzag can provide plenty of ecological niches to support other types of plants and animals.

    It’s never too early to start thinking from a permaculture perspective. Humanitarian organizations in Iraq should start now!

    Useful links

    How permaculture can respond to refugee camps

    Building resilience after earthquakes

    Creating community through language

    PM-ad-for-online-articles_0.jpg

    https://www.permaculture.co.uk/readers-solutions/how-permaculture-refugee-camps

    On – 09 Mar, 2017 By

  • How to Build a Fruit Tree Guild

    How to Build a Fruit Tree Guild

    A guild is a grouping of plants that supports a central element—such as a fruit tree—for maximum harvest and use of space. Learn more about this permaculture technique for creating a low-maintenance system that also improves biodiversity.

    A guild is a grouping of plants that supports a central element—such as a fruit tree—for maximum harvest and use of space. Learn more about this permaculture technique for creating a low-maintenance system that also improves biodiversity.

    Posts may contain affiliate links, which allow me to earn a commission at no extra cost to you. This helps keep costs down so that I can continue providing high quality content to you for free. I appreciate your purchase through the links! (full disclosure)

    Guilds are Interconnected Mini-Ecosystems

    The use of guilds came about by observing how certain plants would naturally group themselves together in an unmanaged setting without human intervention, as if to demonstrate that their proximity to one another was mutually beneficial (like how birch trees and Douglas firs are interdependent). The concept of designing human-made guilds is relatively new, and many of the early experiments are still in progress.

    Still, guilds provide a roadmap for developing interconnected ecosystems, which may reduce our workload and yield more harvests.

    The goal of the guild is to underplant a central element, such as a fruit or nut tree, with plants that are highly useful, multifunctional, and that might naturally be found growing together.

    For example, underplantings in a guild might include plants that fertilize, repel pests, attract beneficial insects, create mulch, and suppress grass.

    The general idea is to take advantage of the benefits of plants to reduce cost, labor, and the need to import materials.

    Now, to be certain, planting a tree guild will take more effort than simply planting the tree by itself, and it may also cost a bit more at the outset for the extra plants. However, in the long run, guilds will likely be more resilient and vigorous, even if solely from a biodiversity standpoint.

    How you plant a guild will depend on your space, whether you have several acres or less than half an acre. On larger properties there may be space to build a large guild under an expansive, 70-foot tall nut tree, while on smaller properties the central element will likely be something smaller, such as a dwarf fruit tree or berry bush.

    If you would like to build a guild, choose a central element that is appropriately sized for your property. Fruit and nut trees can be linked together in a grouping, underplanting them all with guilds. Toby Hemenway, author of Gaia’s Garden: A Guide to Home-Scale Permaculture, would call this a “superguild.” I can also be called a food forest.

    I like to call it an orchard on steroids! Check out the 2-hour film The Permaculture Orchard: Beyond Organic for more inspiration.

    This “superguild” could be created in the shape of a long hedgerow, which I discuss in how to plant a hedgerow.

    Would you like to learn more about improving the biodiversity of your garden, reducing maintenance, and increasing yield using permaculture techniques?

    You’ll find loads of information just like this in my book, The Suburban Micro-Farm.


    The Suburban Micro-Farm Book

    The Apple Tree Guild Example

    The most common example of a guild is that of the apple tree guild. With an apple tree as the central element, you can prevent grass from creeping under the tree, and repel wildlife, by planting a ring of daffodils and garlic chives at the drip line of the tree. Bee balm, dill, and fennel peppered underneath will attract pollinators.

    Comfrey, dandelion, yarrow, and white clover will accumulate nutrients and fix nitrogen to fertilize the soil. The comfrey and nasturtiums will provide mulch or green manure. The bee balm, garlic chives, and yarrow will emit strong scents to repel pests. Because apple scab fungus is a common ailment of apple trees, the fennel and garlic chives will provide some anti-fungal properties.

    See my articles about daffodils and yarrow to learn more about the “superpowers” of these plants!

    Observe and Experiment

    Now, for certain, the above is not a recipe, merely an example of how you can take advantage of nature’s gifts to create a mini-ecosystem that reduces your workload. Even if you were to follow a so-called recipe such as this one, your guild will likely need tweaking to accommodate the unique conditions of your site.

    To see how a guild might need to be tweaked for your local conditions, read about my cherry tree guilds and how I dealt with a pest problem. Although I started out planting some often-recommended guild plants, in the end, my cherry tree guilds needed a little something extra that was unique to my situation.

    Permaculture guilds are not exact recipes to follow. They are combinations of plants that people have tried and have observed growing together in natural ecosystems. For example, one day I was hiking in a local park and noticed wild geranium (Geranium maculatum) growing densely throughout the forest with wild ginger (Asarum canadense), so I planted the two together in a shaded pollinator garden where they have thrived.

    However, just because these combinations were successful in one environment, doesn’t mean they’ll work in another, so a little experimentation is always in order.

    The Beginner’s Guide to Guild-Making

    Plant your tree in your selected spot. (For tips on planting fruit trees, see this article.)

    Next, measure a circle around the fruit tree using sticks or flags to mark the mature width. This perimeter is called the drip line. The roots of the tree will eventually extend to this point, and perhaps even farther. Because of this, you will increase success by improving the health of the soil inside this circle.

    Spread cardboard under the tree, overlapping the ends so the ground inside the drip line is thoroughly covered. Moistening the cardboard with water is beneficial. Cover the cardboard with 3 to 6 inches of compost soil, keeping the soil away from the trunk. Be sure that none of the edges of the cardboard are exposed.

    For more tips on planning a fruit tree guild, see this article.

    7 Types of Plants to Plant Under the Fruit Tree

    Underplant the tree (inside the drip line) with herbaceous plants that:

    1. attract beneficial insects
    2. deter wildlife
    3. fertilize
    4. mulch
    5. produce nectar to attract pollinators
    6. repel pests
    7. suppress grass

    That seems like a lot of plants to fit under one tree, but actually there are many plants that perform more than one function. I call them “super plants”. (They’re kind of like super heroes!) There are a lot of plants to choose from, but the following are some of my favorites:

    a. Choose Daffodils or Garlic — They repel deer and other wildlife, repel fruit tree borers, and stop grass from creeping under the tree.

    c. Choose Oregano or Chives — They are both aromatic pest confusers, which means that their strong scents will repel pests. They both can also take a little bit of foot traffic, which will be helpful during harvest time.

    d. White Clover — It is an excellent source of nitrogen, an essential nutrient for healthy fruit production, and is also often used in orchards as a walkable ground cover. Here’s my source for white clover seeds.

    Remember to try your own experiments. Do you have a favorite plant that attracts pollinators and beneficial insects? Give it a try!

    Note: Be sure to only step inside the drip line when it’s absolutely necessary for harvesting or pruning. Otherwise, stay outside the drip line to reduce soil compaction.

    Now, go forth and create some mini ecosystems (guilds) on your micro-farm!

    Need more ideas for growing a permaculture garden?

    The following articles will help you on your journey toward a vibrant and productive garden.

    Learn more about permaculture in my article What is Permaculture?

    Permaculture Homestead Design Tools:

    Permaculture Deep Thoughts:

    Permaculture Gardening Techniques:

    Growing Perennials Permaculture-Style:

    Improving Soil:

    Water Management:

    The Power of Permaculture Herbs:

    Have you experimented with fruit tree guilds? What has worked for you?

    A guild is a grouping of plants that supports a central element—such as a fruit tree—for maximum harvest and use of space. Learn more about this permaculture technique for creating a low-maintenance system that also improves biodiversity.

    https://www.tenthacrefarm.com/2017/07/how-to-build-a-fruit-tree-guild/

    On – 07 Jul, 2017 By Amy

  • Create a Food Forest for Low-Maintenance, Edible Rewards

    Create a Food Forest for Low-Maintenance, Edible Rewards

    Create a Food Forest for Low-Maintenance, Edible Rewards: A food forest, or edible forest garden, is a food production strategy that mimics a woodland ecosystem. Find out how to create a low-maintenance, perennial, permaculture garden with edible rewards!

    A food forest, or edible forest garden, is a food production strategy that mimics a woodland ecosystem. Find out how to create a low-maintenance, perennial, permaculture garden with edible rewards!

    Posts may contain affiliate links, which allow me to earn a commission at no extra cost to you. This helps keep costs down so that I can continue providing high quality content to you for free. I appreciate your purchase through the links! (full disclosure)

    What is a Food Forest?

    A food forest mimics a forest edge, planted with edible plants. Picture all of the vertical layers of a forest growing together: Tall trees, small trees, shrubs, herbs, and ground covers. Tall, canopy trees grow inward from the edge, with smaller trees peeking out from underneath the tall trees to catch some of the sun’s rays. Stepping farther out into the sunshine are shrubs, with herbs, flowers, and ground covers blanketing the sunniest edge.

    A typical forest edge can look a little busy, sometimes with vines growing up the trees and even mushrooms growing under the tallest trees in the shade. All of these layers of the forest are stacked together, each situated for sufficient sun exposure, and intertwined to produce a vibrant, productive, low-maintenance, and relatively self-maintaining ecosystem.

    In a healthy forest setting, humans aren’t needed for weeding or fertilizing.

    An example food forest might include chestnut trees as a tall canopy tree layer, with apple trees below them as an understory tree layer, followed by currant bushes, a host of edible herbs and mushrooms grown underneath, and perhaps even grapevines that use the apple trees as trellises.

    Swap out my selections above for your favorite nut trees, fruit trees, berry bushes, and herbs to make your own system!

    Create a Food Forest for Low-Maintenance, Edible Rewards

    Photo Credit: ideath Flickr

    History of the Food Forest

    Managing forests for their edible benefits to humans is an ancient practice, with evidence and existing food forests having been found in Africa, Asia, and the Americas. As the New World was colonized, many of the first colonists and anthropologists didn’t know that they were looking at managed systems. To them, the forests in front of them looked like untouched forest.

    What we realize now, of course, is that these early, native hunter-gatherer societies didn’t wander around aimlessly in search of food. They knew which areas produced which desirable foods (or medicines) and at which time of year, and it informed their movement. As they moved through forest and prairies areas, they would encourage edible plant species by cutting back the growth around them and giving them the space to grow abundantly and reproduce.

    It was an early form of forest gardening.

    They wouldn’t have spent a ton of time or effort, and it wouldn’t look pristinely weeded, but the desired plants would certainly be given an advantage over other plants.

    Geoff Lawton found a 2,000 year old food forest in Morrocco. 800 people farm the desert oasis that includes, among other edible plants, date palms, bananas, olives, figs, pomegranate, guava, citrus, and mulberry. He also found a 300 year old food forest in Vietnam that has been cultivated by the same family for 28 generations.

    With these ancient stories in mind, we can create vibrantly abundant and healthy edible perennial gardens that require a lot less maintenance and that can become a legacy into the future. This is the inspiration behind the modern food production strategy called a food forest.

    Would you like to learn more about using permaculture techniques to improve the biodiversity of your garden, reduce maintenance, and increase yield?

    You’ll find loads of information just like this in my book, The Suburban Micro-Farm.


    The Benefits of an Edible Perennial Forest Garden

    Perennial gardens don’t disturb the soil regularly like annual gardens do, but rather, they continually enrich soil with organic matter as leaves fall and plants die back for the winter. The food forest model can help to restore land, biodiversity, and habitat while creating an edible yield.

    A forest is one of earth’s most stable ecosystems, and if we can mimic this ecosystem as a food production strategy, we get all of the ecological benefits of a forest PLUS food.

    Create a Food Forest for Low-Maintenance, Edible Rewards: A food forest, or edible forest garden, is a food production strategy that mimics a woodland ecosystem. Find out how to create a low-maintenance, perennial, permaculture garden with edible rewards!

    Food Forests vs. Orchards

    Imagine planting a 0.10-acre site with about 30 apple trees to create a mini orchard. For the home gardener, this would obviously yield a lot of apples! But a single-species orchard can be a tough space to manage, as it is a monoculture of sorts and could attract pests and diseases that discover the smorgasbord of their favorite food. This would require you to spend time and money on pest/disease treatment.

    The standard apple orchard arrangement also doesn’t take advantage of the vertical space above and below the trees. There is a single harvest opportunity of apples, and if it’s wiped out by disease or pest, there would be no reward for your efforts.

    The single species—all needing the same nutrients in the soil—would, over time, deplete the soil and need imported fertilizer.

    If we take the same site of the apple orchard and plant it with a food forest, we might be able to triple the yield in the same amount of space.

    How would that work?

    Imagine the northern edge (if you’re in the northern hemisphere) of the orchard being planted with a row of tall nut trees. Instead of rows of all apple trees, we could alternate apple trees with plum trees and cherry trees, for example, or whichever fruit trees would be appropriate to the climate. If it were a commercial area, we would also choose fruit crops that have high economic value. In the rows with the fruit trees, we could plant some nut- or berry-yielding bushes.

    Underneath and between all the trees and shrubs we could seed a variety of herbs and flowers that help to add nutrients to the soil (fertilizer and soil building), attract beneficial insects (pest prevention), attract pollinators (for better fruit set), and add potential harvests in the form of cut flowers and culinary or medicinal herbs.

    Some of my favorite understory herbs are yarrow, calendula, chives, comfrey, and daffodils. I like to seed the whole area with clovers.

    I call this an orchard on steroids!

    Because we’ve created a biodiverse ecosystem instead of a monoculture, we’ve lessened the threat of pests, reduced the need for fertilizer, lowered the amount of maintenance required, and hopefully, increased and diversified the yield. This diversity encourages more stability in the system.

    In the backyard, this is great news, because few households will be able to use 30 bushels of apples! It would be nice to have a diversity of edible products.

    If you’re growing apples or any other fruit for commercial purposes, you’ll find excellent examples of successful food forest commercial operations by Mark Shepard of the 106-acre New Forest Farm in his book Restoration Agriculture and by Stefan Sobkowiak, who shares his experience of transforming a conventional apple orchard in the feature-length educational film Permaculture Orchard.

    https://www.tenthacrefarm.com/2017/07/create-a-food-forest-for-low-maintenance-edible-rewards/

    On – 28 Jul, 2017 By Amy

  • Vegetable troubleshooting workshop prepares you for spring

    Vegetable troubleshooting workshop prepares you for spring

    Vegetable troubleshooting workshop prepares you for spring

    Apr 10, 2017 | Lawn & Garden

    BOULDER COUNTY –Pursuing the dream of the perfect vegetable garden is a Don Quixote-esque exercise in Colorado. If the heat doesn’t crisp your crops, an unseasonable snow squall freezes them; hail, micro-bursts, and gale force winds are common. Yet still, we persist in unvanquished hope that the garden will be effortless this year.

    Mother Nature always brings us back to earth. Insects and diseases that overwinter in fallen leaves or garden detritus return each season, rising from the debris to feast on our vegetables.  Like a zombie horde they munch through the vegetables like a buffet of brains.

    Gardening through the challenges is just how we roll, but if you’re looking to increase your success, the best advice is: know your enemy. Colorado State University Extension is helping you do that with its Vegetable Troubleshooting Workshop, Friday and Saturday, May 12 and 13, 9 a.m. to 4:30 p.m. at the Best Western Plus Plaza Convention Center, 1900 Ken Pratt Blvd., in Longmont (https://2017-vegetable-garden-troubleshooting.eventbrite.com). The two-day workshop is designed to cover all of the thugs, bugs, and disorderly conduct that can occur in the vegetable patch.

    Understanding your soil is the foundation of successful gardening, and Dr. Jean Reeder, retired soil researcher, kicks off the workshop with Soil Savvy, a look at the most fundamental component of a healthy garden. This class discusses how to interpret the data provided by a soil test, and how to incorporate knowledge of basic soil properties into management practices.

    Reeder then dives into fertilizers and amendments, demystifying the differences between organic amendments and organic fertilizers, organic and inorganic fertilizers, and mulches and cover crops. She’ll discuss the different types of amendments and fertilizers available, criteria for evaluating the quality of an amendment, and determining whether or not plants would benefit them.

    IF YOU GO:
    WHAT: Vegetable Troubleshooting Workshop
    WHEN: Friday and Saturday, May 12 and 13, 9 a.m. to
    4:30 p.m. (single-day purchase not available).
    WHERE: Best Western Plus Plaza Convention Center, 1900 Ken Pratt Blvd., Longmont.
    TICKETS: $75 plus EventBrite service fees, available at
    https://2017-vegetable-garden-troubleshooting.eventbrite.com.
    Weeds, diseases, and operator errors that seem to spring out of nowhere are topics covered by Dr. Tamla Blunt, Director of CSU’s Plant Diagnostic Clinic in Ft. Collins. Where weeds come from and what they want, plus which ones are common and controllable are discussed, before Blunt talks about spores, molds, fungus, bacteria, and viruses.

    She’ll also discuss problems caused by non-living factors, called abiotic disorders, some of the most elusive problems to track down. Like Goldilocks, sometimes the plant’s worst enemy is that it’s too hot or too cold, when it wants it to be just right. Environmental, nutritional, or operator error all play into whether plants thrive or die.

    Rounding out the discussion of thugs is myself, talking about insects, both pest and beneficial. Not everyone enjoys a bit of protein in their salad that comes with six legs, but not every bug is an enemy. Learn which ones are munching marauders and which ones are the good guys, and how to control – or encourage – them.

    We won’t send you off on a low note, though, so stay until the end when we discuss Post Harvest Handling of your bounty. Get tips for treating your produce to the care it deserves after it’s plucked from the vine.

    Do you have a passion for potatoes and an interest in research? CSU Extension is looking for participants to trial potatoes in their home garden. Participants must be willing to grow two types of potatoes, 10 plants of each type for a total of 20 plants and fill out a form on growing, cooking, and eating the potatoes. For details or to sign up, e-mail [email protected].

    http://athomecolorado.com/2017/04/10/vegetable-troubleshooting-workshop-prepares-spring/

    On – 10 Apr, 2017 By crandalla

  • What Ya Growing? – Idaho

    What Ya Growing? – Idaho

    This entry is in the series What Ya Growing?


    Stopping by Idaho to see what these wonderful folks are growing.

  • Sweet corn is an easy crop for home gardens. Here’s how to plant it

    Sweet corn is an easy crop for home gardens. Here’s how to plant it

    One of life’s great treats is biting into corn that was cooked just minutes after it was harvested from your home garden. If you’ve never had the experience of eating fresh sweet corn right out of your yard, now is the time to plant it.  Sweet corn is not one of the more commonly planted home garden vegetables, and there are reasons for this.

    Although it rarely grows as high as an elephant’s eye, corn plants are fairly large, and they occupy a substantial amount of space in the garden. As a result, many vegetable gardeners don’t plant corn, especially if they have a small garden.

    Each plant produces about two ears of corn, so overall production in the space is not as high as it would be for other popular vegetables, such as tomatoes, squash, snap beans or trellised cucumbers. But if you have the space, growing sweet corn is not that much of a challenge, and the results are delicious.

    Types to grow

    Many early summer vegetables produce over a period of weeks or even months. Corn, on the other hand, is harvested over a relatively short period of time as all of the ears ripen at about the same time. You can get around this by planting cultivars that ripen at different times.

    Recommended sweet corn cultivars grouped by how long to harvest include:

    Early-maturing: Seneca Horizon

    Mid-season: Bonanza, Merit and Funks Sweet G90 (bi-color)

    Late-maturing: Silver Queen (white), NK199, Iochief (AAS), Gold Queen and Golden Cross Bantam.

    Or, you can plant the same cultivar in succession. Plant seeds in one area and then plant seeds in another area two or three weeks later.


    There also are extra sweet corn cultivars. They contain more sugar than normal sweet corn and are able to hold their sugar levels longer after harvest. Based on the genetics involved, they are grouped into two categories: supersweet and sugary enhanced. Recommended supersweet types (which must be isolated from cross pollination with ordinary sweet corn or sugary enhanced) include How Sweet It Is (AAS), Honey-N-Pearl (AAS), XTender 378, 372, 270 BC, Passion, Accelerator, Summer Sweet #8101W, Summer Sweet #7210Y, #8102 BC, Pegasus and Ice Queen.

    Recommended sugary enhanced types include Honey Select (AAS), Avalon, Miracle, Argent, Incredible, Bodacious, Precious Gem BC, Ambrosia BC, Sweet Chorus BC, Temptation BC, White Out, Lancelot BC, Silver King and Sweet Ice. (AAS is All-America Selection Winner.)

    Planting

    Planting corn early — now through mid-April — reduces problems with corn earworms, the leading insect pest of corn in the home garden. When planted this month, corn typically does not require any pesticide sprays.

    Although sweet corn does require room, in a 4-by-8-foot raised bed you can grow two rows of corn with the plants in each row spaced 10 inches apart. That’s 20 plants. If they each produce two ears, you have a generous harvest of 40 ears of corn.


    Prepare the ground for planting by first removing any weeds or unwanted vegetation. Turn the soil to a depth of a shovel blade (about 8 inches), apply a 2-3 inch layer of compost or composted manure and a general-purpose fertilizer following package directions, and thoroughly mix everything together.

    When planting sweet corn, plant two or three seeds every 10 inches in the row, burying them about one-half to 1 inch deep, and water in thoroughly. After the seeds germinate and the plants are 3 to 4 inches tall, thin to one plant per 10 inches.

    Sidedress sweet corn plants with a nitrogen containing fertilizer (ammonium nitrate, calcium nitrate, ammonium sulfate) when the plants are about 16 inches high and again when the plants are about 36 inches high. Corn benefits from generous fertilization.

    Pollination issues

    Many of the commonly grown vegetables are self-pollinating (tomatoes) or rely on insects for crosspollination (cucumbers), but corn is wind pollinated. The male flowers that shed the pollen are located at the top of the plant in the tassel. The female flowers are arranged in rows along the cob enclosed by the shucks. A silk is connected to each of the female flowers, and the other ends of the silks hang outside the shuck. At least one pollen grain must land on each silk to pollinate a female flower, which produces one kernel of corn.


    Each kernel of corn is the result of a separate act of pollination. So, it is important to plant corn properly to make sure the wind deposits the pollen on the silks.

    For that reason, we plant sweet corn in a block planting of several short rows side by side rather than one or two long rows. By planting in blocks, you allow the pollen to move from one plant to another more surely no matter which way the wind is blowing. Ears that are poorly filled with kernels of corn are generally the result of poor pollination.

    Some gardeners take this farther and do hand pollination. This only is practical in the small plantings done in backyard gardens. When the tassels at the top of the plants begin to shed the yellow, powdery pollen, tassels are cut and shaken over the silks.

    Harvest and use

    The best time to harvest sweet corn is in the early morning while the temperature is low. To determine when regular sweet corn is ready to harvest, first check the silks to see if they have begun to dry and turn brown. Then feel the ear. It should feel firm and full.

    Peel back a shuck enough to puncture a few kernels on the ears with your thumbnail. When sweet corn is at its highest quality, the juice from the kernels will be milky white and runny. It is not ready when the juice is clear and watery, and corn is over mature and starchy when the juice inside the kernels is thick and dough-like.


    Corn usually matures 18 to 24 days after the tassels appear or 15-20 days after the first silks appear. Watch the corn closely because the quality changes fast with the normal sweet varieties. Refrigerate or cook immediately after harvesting.

    Dan Gill is a horticulturist with the LSU AgCenter.

    http://www.nola.com/homegarden/index.ssf/2017/03/sweet_corn_is_an_easy_crop_for.html

    On – 25 Mar, 2017 By Dan Gill

  • Growing Shiitake Mushrooms

    Growing Shiitake Mushrooms

    We got involved with Shiitake Mushrooms through our Agricultural Cooperative Extension Agency. (This is a great resource for any farmer. Make it a point at least to visit your local office and see the different programs they have going on for the farmer.) Back in 2003, our local office started helping traditional tobacco farmers transition into some other type of crop. They proposed growing both edible and medicinal Mushrooms.


    By growing both, a farmer has two ways to sell mushrooms. You can grow edible mushrooms and sell to farmers markets, restaurants and health food stores. With medicinal mushrooms, you can pursue the herbal stores and sometimes you can reach out to acupuncturists’ offices. A diversified farm would do both!

    Dr. Omoanghe Isikhuemhen of North Carolina A&T State University led the program. They proposed this deal: the school would provide the enough organic mushroom spore to inoculate 25 logs (3-4 ft. long x 4-8 in. diameter) in exchange for data collected by the farmer on how well the mushrooms produced. The farmer had to agree to keep approximately 200-250 logs for research.

    The farmer would be given bags of spore with batch numbers only. When giving their data information, the farmer would refer to the batch number. This was, and is ongoing, research to see which strains of shiitake do best in which areas of North Carolina.

    Alan and I signed up right away. That is how The Mushroom Hut @ Fox Farms was born! This was our first experience of Non-Traditional Forest Products (NTFP).

    We always stress, when starting out on a new venture, to start out small and don’t invest a lot into the project until you see it will work for you. Everything sounds good on paper!

    After signing up for the program, we were shown how to inoculate our log and how to care for it while waiting for the harvest—and that would be a very long wait. It can take from 6-12 months for the first fruiting after inoculation (most often 12 months).

    Now we’ll show you how to get started.

    Equipment And Supplies

    • Drill
    • Drill bit
    • Food-Grade Wax
    • Brush/Dauber (to apply the melted wax)
    • Spawn
    • Logs
    • Containers for soaking

    You can order most of these supplies from major mushroom spawn and equipment suppliers (examples: Field and Forest, Fungi Perfecti).

    Assuming you already have a drill, total cost for all these supplies will be around $100.

    Then, you have to scare up a log. If you have trees on your property, you can cut your own as a last resort. You may contact local loggers regarding logs that are too small for lumber—sometimes they’re sold for firewood. Or you can go into the woods and find a candidate that’s already on the ground.

    Location For Your Log Yard

    Find an area suitable for the production of the Shiitake. An area that is naturally shaded by trees is an ideal area for your log yard. If you are going to force fruiting, you will need access to water so this will be a consideration when deciding where to put your logs.


    Best Trees For Mushroom Cultivation

    Red and White Oaks and Sweetgums are the best trees for mushroom cultivation. These trees will produce longer than other trees due to their high wood density and strong bark.

    Here at the farm we have also used Maple, Beech, Ash, Cherry and Birch. Ash takes longer to produce fruit. The others are good producers, but the bark doesn’t hold up long. Experiment to see what works for you and keep records (a regular calendar is great to write your notes on.) Make sure your tree’s bark is in good condition before you decide to use it.

    When To Cut Down Trees For Mushroom Cultivation

    The trees should be cut in late fall to late winter (Early Spring only if sap is not up). Be careful not to scuff up the bark. Ragged bark can allow other fungi to invade the bark.

    Also, this will allow moisture loss and could slow down fruiting or keep it from fruiting at all.

    The Proper Size Of Logs For Mushroom Cultivation

    Use logs 3-4 ft. long and 3-8 in. in diameter. Keep in mind you will be moving the logs around. After cutting the logs, if you are not going to use them for a few weeks, make sure they don’t dry out.

    Keep them out of direct sunlight, watered if it is unusually dry, or loosely covered if it is too rainy. Make sure there is air circulation.

    When To Inoculate


    Here in Western North Carolina, we start in March and complete by late April. Contact your local agricultural extension office for suggestions about timing in your area.

    Ideally, you’ll use the trees as soon as possible after cutting. Production will be much better if moisture content is high. If you order your spawn before you are ready to use it, you can store it in the bottom of your refrigerator.

    The Inoculation Process


    Set up a work station for each task:

    1. Find a location that will be suitable for an electric drill (if you’re in a remote area make sure you have extra batteries).
    2. Space the holes 6-8 in. apart in rows along the length with 2-4 in. between rows. The holes should be placed in a staggered diamond pattern. (Closer spacings increase the rate of colonization and more rapid production but the spawn won’t go as far). Use your own judgement.
    3. Using your thumb inoculator, punch it down into the bag of spawn until the inoculator is full then, put it over the hole in the log and using your thumb press a couple of times to release the spawn into the hole. Make sure the drilled hole is completely full of the spawn.
    4. Now comes the waxing. You can have the wax slowly melting (on low) while you are doing steps one and two—a slow cooker on low will work. Make sure the wax never gets too hot. Use a natural bristle brush or wax dauber to apply the wax completely covering the spawn/hole. air bubbles. Go over it a couple of times if you need to.

    Stacking Your Logs

    After you have finished inoculating your logs it is time to stack your logs and wait for fruiting. Fruiting time can be anywhere from 6-12 months from time of inoculation. There are three methods of stacking:

    • Low stack: this method is simple. All it involves is leaving your logs on the ground. However, it’s best to lay the logs on top of a pallet or cinderblocks to keep ground fungi from invading the logs.
    • Crib style: stacking logs on top of each other, with horizontal layers of logs laid perpendicular to each other.
    • Lean-to: lean logs up against a fencing, rail or wire.

    During this time, make sure the bark/logs do not dry out. If it is unusually dry, you can use an overhead sprinkling system, watering hose, or soak the logs in a container. If soaking in a container, soak between 24-78 hours. This can also  be done to force fruiting.

    Know your water source! Do not use water from a creek, branch or river that has horses upstream of your mushrooms. E-coli has been found in water from this type of source. Test or filter your water to make sure it is reasonably clean.

    Harvesting Your Mushroom Logs

    Logs can fruit anywhere from 6-12 months from inoculation, due to reasons like the moisture content in logs, strain of mushroom, air temp, humidity, rainfall and light.

    When you see the logs begin to fruit, you can help the fruiting by watering or soaking. It can take about three days for the mushroom to be large enough for harvest. Look under the cap of the mushroom for bugs/snails and brush off with a brush, baster, or plain paper towel.

    Collect the mushrooms in box, basket, or stainless steel container. Store them in refrigerator or cool area immediately to preserve their freshness.

    Treating The Logs After Harvest

    Put the logs in a designated area where you will know these logs have fruited. Keep notes on a calendar as to when you have a fruiting so you can keep up with forcing of these logs.

    Only force logs every 6-10 weeks. If these logs have not started to fruit again, you can put them in containers to soak and force another fruiting. After soaking, you can shock the log with a rubber mallet. To do this, just strike the ends of the logs several times. This helps to stimulate the mycelium.

    Preventing Pests And Insects

    Try to keep leaves raked away from your log stacks. This is a good hiding place for snails and other bugs that love to eat on the mushroom.

    You can put out snail baits (saucers of beer) for the snails to drown in. Otherwise you have to pick most of the other bugs off the mushrooms as being picked. There are beetles that like to eat into the wax/spawn. Squirrels may be a problem in some places.

    Whatever your reason for growing shiitakes—food, fun or profit—here’s hoping your fungi fantasies are fulfilled!

    Susan Tipton-Fox, along with husband Alan Fox, continues the farming and preserving practices passed down to her by her family. She runs on-farm workshops and overnights in Yancey County, North Carolina. Follow her on Facebook: The Mushroom Hut @ Fox Farms.

    https://www.niftyhomestead.com/blog/growing-shiitake-mushrooms/

    On – 13 Jun, 2017 By Nifty Homestead Community Submission

  • Tips for Terrific Tomatoes, from Soil Prep to Staking

    Tips for Terrific Tomatoes, from Soil Prep to Staking

    Plump, sun-ripened tomatoes are indisputably the crown jewel of home vegetable gardens, and a successful tomato crop means giving them the best start possible. As with everything, getting the most out of your tomatoes is all about preparation.

    Joining us again to talk tomatoes and more is the Organic Gardener Jeanne Nolan.


    How to Start a Garden

    Not sure how to start your garden? With help from Jeanne Nolan and her team, we will guide you through the process from selecting a site for your garden to staking crops and everything in between.


    Strategies for Container Gardening

    If you’re one of the many Chicagoans living in an apartment or condo with limited outdoor space, growing your own food can seem like a challenge – but, Jeanne Nolan says, anything you can grow in the ground can be grown in a container with just a few adjustments.


    Ask Jeanne Nolan and The Organic Gardener crew.


    http://chicagotonight.wttw.com/2017/05/25/tips-terrific-tomatoes-soil-prep-staking

    On – 25 May, 2017 By Erica Gunderson

  • How Soil Type Affects Land Values

    How Soil Type Affects Land Values

    A farm’s greatest asset is its land. If you’re considering buying land with an ag land loan, looking into the land’s soil type is an important step in determining the worth of the property. It’s also an indicator of how much work the soil will need in order to provide a nutrient-rich environment for crops.

    Soil classification is based on the texture and size of the particles in the soil, as well as on the mineral and nutrient content. The six most common soil types are loamy, sandy, peaty, silty, chalky, and clay. Each of these base soil types become naturally combined in varying ratios to produce entirely new and unique soils in each state.

    Every part of the country has one, or a mixture, of the six main soil types. And just like each state has an official flower or bird, they also designate a state soil. Florida’s official soil is called “Myakka.” It originates from marine deposits and is a key component of Floridian flatwoods.

    There are a variety of tools for assessing a farmland’s soil type. Chuck Cruse, AgAmerica’s Regional Account Manager for Florida, highly recommends heading to the USDA’s Natural Resources and Conservation Services (NRCS) web page. This tool allows users to create a map of their land or land that they are considering for purchase. The process takes the user through four basic steps: (1. Define your land area of interest; (2. Gain detailed descriptions of the soils in that area; (3. Access and save soil data and crop suitability data with the Soil Data Explorer; and (4. Order a free instant printable report, which creates a complete picture of the quality of a specified piece of land, including yield potential. The NCRS database currently contains data for 95% of the nation’s counties and anticipates having 100% in the near future.

    Different crops prefer different soils, so determining the soil’s compatibility with certain crops is a key concern for the region’s ag Extension office. Extension agents are familiar with the area while possessing access to an array of useful data when it comes to soil quality and which land offers the best yield, and for which crops.

    The USDA also collects data on what’s known as “prime farmland designations,” which are based on physical and morphological (organic) characteristics such as the depth of the water table in relation to the root zone, potential moisture holding capacity, the degree of salinity, permeability, frequency of flooding, soil temperature, erosion potential, and soil acidity.

    Data about a farm’s soil type is used to help create the land appraisal. Appraisals are a common part of securing a land loan and are a complex equation involving a variety of factors with soil quality being only one of them.

    Land appraisers develop economic assessments of agricultural acreage using soil samples. To determine the property’s value, they’ll review past yield records, look at existing irrigation and/or potential for new irrigation, and examine border features to assess how these might impact soil productivity.

    While the southeastern region of the U.S. has a wide array of soil types, there is a very unique and valuable soil type found prominently in Florida — muck soil. Otherwise known as “black gold,” muck is a highly fertile soil that has amendments and nutritional value present without having to fertilize or irrigate heavily. The value of a parcel that contains muck soil fluctuates based on the depth of the muck, which can range from 12 inches to 30 feet deep in some areas. The deeper the muck, the more valuable the property is. However, there are only small areas of muck located in the state of Florida, the largest mass of it bedding in Palm Beach County around the bank of Lake Okeechobee.

    “Muck is where sugarcane is primarily grown,” Cruse says, “because it takes very a minimal amount of work to grow it. You can get three to four cuttings off one planting of sugarcane, depending on the variety. When the farmer rotates the cane with sweet corn or other vegetables, it helps recycle those amendments back into the soil naturally. Once they’re done growing the cover crop, they’ll go in and till that crop, putting the nutrients and supplements back into the soil that’s then used to grow another crop of cane that will last another three to four years.”

    Many farmers are finding innovative techniques to duplicate this scarce “black gold.” For instance, there are some sugarcane growers that are farming the cane on what is considered sand land. While the soil is entirely different than the muck, they’re bringing in mud and peat substitutes from the mills to replicate the nutrient-rich muck soil.

    “These folks have the opportunity to bring some, what they call, ‘mill mud’ back to their properties to put the amendments back into the sand soil,” Cruse explains. “This gives them the properties and nutritional products that mimic the muck soil and grow better crops, even though they don’t have any depth of muck on the sand land. These farmers are putting anywhere from 12 to 24 inches of mill mud on top of the sand to help get the crop’s roots to be hardier, stronger, and to produce a better crop.”

    http://www.growingproduce.com/vegetables/how-soil-type-affects-land-values/

    On – 17 Nov, 2016 By Phoebe Moll

  • Planning for summer food – MY FRENCH COUNTRY HOME

    Planning for summer food – MY FRENCH COUNTRY HOME

    planning for summer food

    Apr 11, 2017

    planning for summer food

    fresh vegetables at market


    We’re not in the summer yet, not by a long way, but the spring does seem to be in a hurry to move forward here.  Consequently I’m having to decide very quickly what to plant in our kitchen garden this year.  Since I created the no-dig beds a couple of months ago, I haven’t had time to plant anything, and the only plant showing is the  rhubarb that just refuses to give up.

    We don’t have a big kitchen garden, it’s as much about looking pretty as producing food.  But the few crops that we manage to harvest have to be ideal for summer eating and entertaining.

    That’s why this year I shall be growing a lot of basil for making delicious pesto sauce for our pasta;

    bowl of pesto sauce

    plenty of tomatoes, zucchini and aubergine or eggplant for our stuffed vegetables

    and hopefully this year some coco de Paimpol, or white beans which are quite divine as a summer salad.  They can actually be bought all year around as dry beans, and the recipe below can be adapted to using dry beans in case you don’t have the possibility or indeed the wish to grow them yourself.

    coco de paimpol beans in salad

    To make a salad of Coco beans for four people as a main dish or for eight people as a small appetiser with a glass of rosé before the meal, you will need:

    350 g / fresh white beans preferably the variety Cocos de Paimpol

    one onion with a clove inserted for cooking

    one finely chopped onion (I prefer to use a violet onion)

    sprig of thyme

    3 large spoons of olive oil

    2 spoons of balsamic vinegar

    Cover the freshly shelled beans with cold water, and drop the onion with the clove and the sprig of thyme into the water  Bring to the boil and simmer for about 25 minutes or until the beans are just tender.

    Strain, rinse in cold water and leave to cool.   Chop the violet onion finely, and prepare the vinaigrette then pour the beans into a deep salad bowl and add the onion and vinaigrette with a little chopped chives or basil to taste.  Some people like to add some small cherry tomatoes cut in half, but the beans are delicious without.

    All this beautiful food was prepared and shot at the Château de Moissac, photos by Franck Schmitt for the book My Stylish French Girlfriends.


          •

    http://sharonsantoni.com/2017/04/31027/

    On – 11 Apr, 2017 By

  • Vegetables – Grow top-quality carrots

    Vegetables – Grow top-quality carrots

    Carrots are important root crops in commercial and home gardens for vegetable production. Here are some pointers for cultivating them.

    Carrots (Daucus carota) are members of the Apaceae family and are grown for the edible root, which can be eaten raw or cooked. They are rich in carotene (vitamin A). Carrots grow well in cool conditions, as long as there is enough moisture, and they are fairly resistant to cold and frost.

    SOIL

    Carrots need deep, well-drained sandy loam to sandy soil, and the texture is very important because it affects how smooth and well-shaped the roots will be. Avoid heavy, compact soil which will discourage growth. Soils high in fresh organic matter can result in hairy, forked and malformed roots, and stony soil can also produce poor root shapes. The optimum pH (H20) is between 6,0 and 6,5.

    TEMPERATURE

    Carrots are cool-weather plants, but growth slows down if the temperature drops below 10ºC.
    Although not usually sensitive to frost, severe frosty spells can damage the leaves. Roots can be damaged if the soil temperature drops below 0°C, especially if the plants were irrigated the preceding afternoon.
    The temperature and soil moisture influence the colour, shape and quality of carrots. Growth is optimal at 18 – 23°C, although some cultivars can withstand a great deal of heat. High temperatures (above 29°C) affect emergence and quality negatively, causing poor colour and thicker centres.

    CROP ROTATION

    Rotating crops helps to improve the quality of the soil and keep down soil-borne pests. Carrots make good crop rotation partners for cabbage, lettuce, pumpkin and tomatoes. If rotated with leguminous crops, such as peas and beans, they improve the soil’s nutrient levels.

    CULTIVARS

    Try these varieties:
    Kuroda, which offers an excellent yield and has a good shape. It’s 11 – 15cm long and has a thin kernel. Can be produced in warmer seasons.
    Cape Market is cylindrical, 12 – 17cm long and produced in warmer seasons.
    Scarlet Nantes, Flacoro, Fancy and Duke are good choices for autumn planting.

    PREPARING THE SOIL

    Loosen the soil thoroughly by ploughing (or using a fork, hand hoe or spade) to a depth of 300 – 400mm to allow for good root aeration, root penetration and drainage. Crush all clods with a rake or cultivator to obtain a deep, fine tilth. Remove stones because they can cause poorly shaped carrots. It would be even better to build and prepare a raised bed. Remove all weeds before sowing because carrot seedlings are very fine and cannot compete with weeds.

    SPACING

    Allow 25 – 35cm between rows. Thin out at one to two weeks after emergence, when the carrot seedlings are about 4cm high, and again one to two weeks later. This should result in a spacing of 4 – 5cm within the row (80 – 120 roots/m²). Do not thin out later than four weeks after emergence. If the crop is not thinned out, the carrots will be small and malformed. Thinning should take place in the afternoon, and when soil is moist.

    APPLYING FERTILISER

    Broadcast about 1 000kg/ha (100g/m2) of a fertiliser mixture such as 2:3:4 (30)+Zn or 1 100kg/ha (110g/m2) of 2:3:2 (22)+Zn just before planting and work it into the top 10cm of soil.

    Apply a top dressing of 10g LAN per metre of row at three weeks and again at six weeks after emergence. Sprinkle on both sides of the row, 2 – 10cm from the plants (do not sprinkle on the plants). It would be a good idea to remove all the weeds before applying LAN in order to avoid their competing with the carrots for fertiliser. Work into the top 2cm of the soil, using a flat-tined fork. Water well. In areas known to have a boron deficiency, apply 10 – 20kg/ha borax after planting.
    Do not use manure and compost for carrots, because they can cause malformation of the roots and decrease the marketable yield. If manure needs to be dug in, do so with the crop preceding carrots (see crop rotation).

    HOW TO SOW

    Rake the soil surface to a fine-tilth seedbed before sowing the small carrot seeds directly in the soil – carrots cannot be transplanted.

    Put the seeds in the palm of one hand, take a substantial pinch with the fingers of the other hand and rub between finger and thumb as you move your hand forwards and backwards along shallow (1,5cm deep) furrows, until the desired sowing rate is achieved. Another method is to mix one teaspoon of seed with 10 teaspoons of sand and then sow it. Seeding requires some experience and practice.

    After sowing, cover seed with fine soil to ensure better germination. In the warmer months, mulch the rows with dry grass to keep the soil cool and moist, as this will assist germination. Remove the mulch after the seedlings have emerged. (If it is kept on too long, the seedlings will become leggy and the sun will burn them easily.) Emergence may take 7 – 14 days depending on the cultivar, the weather, soil type and season important You will need 3 – 4kg seed. For smaller plots, allow 1g (1 teaspoon) per 2m of row.

    IRRIGATION

    Keep the soil moist after sowing the seeds to ensure good germination. Water carrots regularly throughout the growing season, but take care not to water too much. As a general rule, carrots need about 30mm of water per week. Water every five days if the weather is warm and dry.

    MANAGING THE CROP

    Start off with a weed-free plot so that the carrots do not have to compete with them for nutrients and water. Then weed carrots regularly to keep them free of weeds. If you see any weeds appear, remove them immediately. Being weed-free has a substantial effect on the yield – and your profits. Be particularly careful to remove perennial weeds because they can grow between the roots and will result in poor-quality carrots.

    HARVESTING

    Carrots grow for 10 – 12 weeks from emergence to harvesting, depending on the cultivar and the temperature. In small gardens, harvest them as soon as they reach a diameter of 20mm but are still young and tender. Make sure the soil is wet when you harvest carrots, to make them easier to remove, either pulling out by hand or first loosening them carefully with a fork (start 15cm away from the base of the plants) and then pulling them out.

    Harvest carrots when they are fully mature as this increases their shelf-life. Do not harvest early in the morning if the soil is cold, as this may cause the roots to crack horizontally. Do not leave carrots in the sun after harvesting – take them to a shady place as soon as possible.

    STORAGE

    Most horticultural crops are perishable and can only be stored for a few days. It is best to harvest carrots as needed for consumption or selling. Remove the leaves before storing, to extend shelf life.

    Fresh carrots, harvested when mature, will keep for up to five days at room temperature (20°C), and for 7 – 21 days in a refrigerator.

    WHEN TO SOW

    The following sowing times are recommended for the different countries.

    South Africa

    Highveld: August to mid-March.
    Middleveld (temperate climate zones): August to mid-April. In very warm areas, August to September and February to March.
    Limpopo and Lowveld: February to April and July to August.
    Free State and Northern Cape: August to October and end of January to March.
    Kwazulu-Natal (midlands and coastal region): August to April.
    Eastern Cape: July to April, but NOT in mid-summer in very warm areas. In very cold areas, August to April.
    Western Cape: August to end of March.

    Zambia

    Eastern province, and Sesheke and Shangombo districts: March to July.
    Northern, Luapula, Copperbelt, Northwestern, and parts of Central Provinces:  March to July.
    Sandveld plateau of Central, Eastern, Lusaka and Southern provinces: March to July.

    Zimbabwe

    Mashonaland East, Central and West: February to September.
    Mashonaland west(Kadoma) and Midlands(Kwekwe, Gweru, Gokwe): February to September
    Masvingo: February to September

    Malawi

    Whole country: whole year

    Botswana

    Southern region: February to Septmenber
    Gabarone regione: March to September
    Central region: March to August
    North east region: March to August
    Ngamiland region: April to Augist

    Disease control recommendations

    • Rotate crops.
    • Plant in well-drained soil.
    • Water early so that leaves can dry before nightfall.
    • Do not over-irrigate.
    • Burn diseased plants.
    • Fertilise plants well.
    • Control weeds in and around fields.
    • Remove all plant residues from the field after harvesting.

    REMEMBER: There are no registered disease-control chemicals for carrots.

    On – 17 Aug, 2017 By Digital team

  • The Easy Way to Grow Loads of Potatoes: In a Trash Can

    The Easy Way to Grow Loads of Potatoes: In a Trash Can

    potatos trash canPotatoes are one excellent staple crop to grow in the home garden, but isn’t there a lot of digging and back pain involved?

    Not necessarily! You can grow loads of russets, reds, golds, and even sweet potatoes in a trash can or bucket with minimal work, space, and effort.

    It’s common to get up to 25 pounds of potatoes using this method, and it’s really simple too! This takes container gardening to another level.

    The perfect bucket for growing any type of potato will have some sort of drainage holes drilled into the bottom–or, you can even cut the entire bottom out. That way, instead of dumping the bucket out to harvest your potatoes, you can just lift it up and they’ll fall out.

    A metal or dark-colored can is preferred, to retain warmth and keep sunlight away from the root zone.

    The how-to is slightly different for sweet potatoes and regular potatoes, so I’ll talk about regular potatoes first:


    Basically, any organic potato you’ve already got will work perfectly as a seed potato. Ideally, they’ll be a bit past their prime for eating, and will have some eyes starting to form.

    Don’t cut the potatoes up to look for seeds inside, because you won’t find any! (I once met someone who did this; you’re not alone.)

    Instead, cut them into quarters, ideally with at least one “eye” on each piece. Allow these to dry out on the counter for a day or two before planting them.

    These potato pieces will be planted cut-side down into your trash can or bucket, and each one will start growing into a new plant.

    If you’re growing sweet potatoes, you can buy some organic ones at the grocery store to start your plants with–maybe just one or two.

    sweet potato slipsThis time, you’ll want to begin by doing that toothpick-balancing trick that you probably did as a science project in grade school.

    Spear the sweet potato around the middle with four toothpicks, and balance it in a glass or jar of water. The sweet potato should be at least halfway submerged. You’ll want to add more water every few days to maintain this level.

    Eventually, your potato will sprout stems and leaves, and these are called “slips”.

    You’ll cut off these slips with a small sliver of the potato attached, and plant the slips into your trash can or bucket.

    How to plant your potato “seeds” and/or “slips”:

    Fill your trash can or bucket with about 8-12 inches of compost, and add in your seeds or slips. For white potatoes, bury the seeds with about an inch of compost. For the slips, plant them sideways about an inch down, leaving a few leaves and an inch or so of stem exposed.

    As the plants grow, add more compost. You’ll want to keep burying the new growth until only a few leaves remain exposed, about 4-5 inches of compost for every 7-10 inches of growth.

    Burying the stems forces plants to generate new root growth (in other words, potatoes!).

    Keep them well-watered, and be patient. The whole process will take about four months.

    When your trash can is full to the brim, simply continue to water it. The plants will eventually start to flower, and soon after, the whole plant will start to wilt, yellow, and die back.

    Stop watering them at this point. This allows your potatoes to mature, which will take about two weeks until they’re ready to harvest.

    trash can potatos

    With sweet potatoes, you’ll want to harvest them as soon as the leaves wilt and blacken from frost.

    Then you’ll need to let the sweet potatoes cure for two weeks or more, in a dark, cool, dry place. This will ensure their sweet flavor, and allows them to be stored at room temperature for up to a year!

    Incidentally, sweet potato greens are also edible and delicious when prepared like cooked spinach. They’re also pretty in urban landscapes!

    Growing potatoes in this way can be a excellent supplement to your food bill, and a great DIY skill to learn.

    https://thehomestead.guru/grow-potatoes-trash-can/

    On – 05 May, 2017 By Krystal Trammell

Malcare WordPress Security