Your cart is currently empty!
Author: Barakah Farm Staff
-

8 mistakes that can put someone off buying your farm
 © ING Image
Farmers who are selling up can’t do anything to alter their geographical location, average land values or the political climate of agriculture. But they can pave the way to a smoother sale by avoiding common mistakes that put prospective buyers off. We ask eight agents what the common errors are. 1. Not formalising agreements Chris Templar, associate at Bletsoes in Stratford-upon-Avon, says that failing to formalise agreements with anyone who rents land can be a big own goal. Time and again, deals […]
This article is for subscribers.
To continue reading subscribe today…http://www.fwi.co.uk/business/8-mistakes-that-can-put-someone-off-buying-your-farm.htm
On – 17 Mar, 2017 By ben pike
-

Growing Shiitake Mushrooms
We got involved with Shiitake Mushrooms through our Agricultural Cooperative Extension Agency. (This is a great resource for any farmer. Make it a point at least to visit your local office and see the different programs they have going on for the farmer.) Back in 2003, our local office started helping traditional tobacco farmers transition into some other type of crop. They proposed growing both edible and medicinal Mushrooms.
By growing both, a farmer has two ways to sell mushrooms. You can grow edible mushrooms and sell to farmers markets, restaurants and health food stores. With medicinal mushrooms, you can pursue the herbal stores and sometimes you can reach out to acupuncturists’ offices. A diversified farm would do both!
Dr. Omoanghe Isikhuemhen of North Carolina A&T State University led the program. They proposed this deal: the school would provide the enough organic mushroom spore to inoculate 25 logs (3-4 ft. long x 4-8 in. diameter) in exchange for data collected by the farmer on how well the mushrooms produced. The farmer had to agree to keep approximately 200-250 logs for research.
The farmer would be given bags of spore with batch numbers only. When giving their data information, the farmer would refer to the batch number. This was, and is ongoing, research to see which strains of shiitake do best in which areas of North Carolina.
Alan and I signed up right away. That is how The Mushroom Hut @ Fox Farms was born! This was our first experience of Non-Traditional Forest Products (NTFP).
We always stress, when starting out on a new venture, to start out small and don’t invest a lot into the project until you see it will work for you. Everything sounds good on paper!
After signing up for the program, we were shown how to inoculate our log and how to care for it while waiting for the harvest—and that would be a very long wait. It can take from 6-12 months for the first fruiting after inoculation (most often 12 months).
Now we’ll show you how to get started.
Equipment And Supplies
- Drill
- Drill bit
- Food-Grade Wax
- Brush/Dauber (to apply the melted wax)
- Spawn
- Logs
- Containers for soaking
You can order most of these supplies from major mushroom spawn and equipment suppliers (examples: Field and Forest, Fungi Perfecti).
Assuming you already have a drill, total cost for all these supplies will be around $100.
Then, you have to scare up a log. If you have trees on your property, you can cut your own as a last resort. You may contact local loggers regarding logs that are too small for lumber—sometimes they’re sold for firewood. Or you can go into the woods and find a candidate that’s already on the ground.
Location For Your Log Yard
Find an area suitable for the production of the Shiitake. An area that is naturally shaded by trees is an ideal area for your log yard. If you are going to force fruiting, you will need access to water so this will be a consideration when deciding where to put your logs.
Best Trees For Mushroom Cultivation
Red and White Oaks and Sweetgums are the best trees for mushroom cultivation. These trees will produce longer than other trees due to their high wood density and strong bark.
Here at the farm we have also used Maple, Beech, Ash, Cherry and Birch. Ash takes longer to produce fruit. The others are good producers, but the bark doesn’t hold up long. Experiment to see what works for you and keep records (a regular calendar is great to write your notes on.) Make sure your tree’s bark is in good condition before you decide to use it.
When To Cut Down Trees For Mushroom Cultivation
The trees should be cut in late fall to late winter (Early Spring only if sap is not up). Be careful not to scuff up the bark. Ragged bark can allow other fungi to invade the bark.
Also, this will allow moisture loss and could slow down fruiting or keep it from fruiting at all.
The Proper Size Of Logs For Mushroom Cultivation
Use logs 3-4 ft. long and 3-8 in. in diameter. Keep in mind you will be moving the logs around. After cutting the logs, if you are not going to use them for a few weeks, make sure they don’t dry out.
Keep them out of direct sunlight, watered if it is unusually dry, or loosely covered if it is too rainy. Make sure there is air circulation.
When To Inoculate
Here in Western North Carolina, we start in March and complete by late April. Contact your local agricultural extension office for suggestions about timing in your area.
Ideally, you’ll use the trees as soon as possible after cutting. Production will be much better if moisture content is high. If you order your spawn before you are ready to use it, you can store it in the bottom of your refrigerator.
The Inoculation Process
Set up a work station for each task:
- Find a location that will be suitable for an electric drill (if you’re in a remote area make sure you have extra batteries).
- Space the holes 6-8 in. apart in rows along the length with 2-4 in. between rows. The holes should be placed in a staggered diamond pattern. (Closer spacings increase the rate of colonization and more rapid production but the spawn won’t go as far). Use your own judgement.
- Using your thumb inoculator, punch it down into the bag of spawn until the inoculator is full then, put it over the hole in the log and using your thumb press a couple of times to release the spawn into the hole. Make sure the drilled hole is completely full of the spawn.
- Now comes the waxing. You can have the wax slowly melting (on low) while you are doing steps one and two—a slow cooker on low will work. Make sure the wax never gets too hot. Use a natural bristle brush or wax dauber to apply the wax completely covering the spawn/hole. air bubbles. Go over it a couple of times if you need to.
Stacking Your Logs
After you have finished inoculating your logs it is time to stack your logs and wait for fruiting. Fruiting time can be anywhere from 6-12 months from time of inoculation. There are three methods of stacking:
- Low stack: this method is simple. All it involves is leaving your logs on the ground. However, it’s best to lay the logs on top of a pallet or cinderblocks to keep ground fungi from invading the logs.
- Crib style: stacking logs on top of each other, with horizontal layers of logs laid perpendicular to each other.
- Lean-to: lean logs up against a fencing, rail or wire.
During this time, make sure the bark/logs do not dry out. If it is unusually dry, you can use an overhead sprinkling system, watering hose, or soak the logs in a container. If soaking in a container, soak between 24-78 hours. This can also be done to force fruiting.
Know your water source! Do not use water from a creek, branch or river that has horses upstream of your mushrooms. E-coli has been found in water from this type of source. Test or filter your water to make sure it is reasonably clean.
Harvesting Your Mushroom Logs
Logs can fruit anywhere from 6-12 months from inoculation, due to reasons like the moisture content in logs, strain of mushroom, air temp, humidity, rainfall and light.
When you see the logs begin to fruit, you can help the fruiting by watering or soaking. It can take about three days for the mushroom to be large enough for harvest. Look under the cap of the mushroom for bugs/snails and brush off with a brush, baster, or plain paper towel.
Collect the mushrooms in box, basket, or stainless steel container. Store them in refrigerator or cool area immediately to preserve their freshness.
Treating The Logs After Harvest
Put the logs in a designated area where you will know these logs have fruited. Keep notes on a calendar as to when you have a fruiting so you can keep up with forcing of these logs.
Only force logs every 6-10 weeks. If these logs have not started to fruit again, you can put them in containers to soak and force another fruiting. After soaking, you can shock the log with a rubber mallet. To do this, just strike the ends of the logs several times. This helps to stimulate the mycelium.
Preventing Pests And Insects
Try to keep leaves raked away from your log stacks. This is a good hiding place for snails and other bugs that love to eat on the mushroom.
You can put out snail baits (saucers of beer) for the snails to drown in. Otherwise you have to pick most of the other bugs off the mushrooms as being picked. There are beetles that like to eat into the wax/spawn. Squirrels may be a problem in some places.
Whatever your reason for growing shiitakes—food, fun or profit—here’s hoping your fungi fantasies are fulfilled!
Susan Tipton-Fox, along with husband Alan Fox, continues the farming and preserving practices passed down to her by her family. She runs on-farm workshops and overnights in Yancey County, North Carolina. Follow her on Facebook: The Mushroom Hut @ Fox Farms.
https://www.niftyhomestead.com/blog/growing-shiitake-mushrooms/
On – 13 Jun, 2017 By Nifty Homestead Community Submission
-

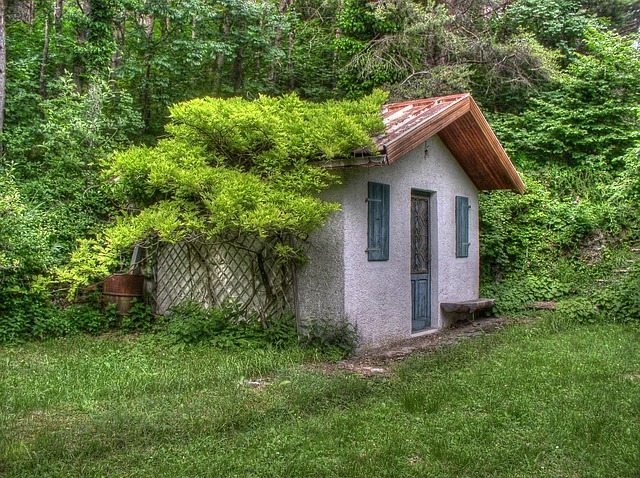
8 Subterranean Homes That Are Out of This World
https://www.dwell.com/article/8-subterranean-homes-that-are-out-of-this-world-c64819ed
On – 15 Aug, 2017 By Michele Koh Morollo
-

Passive Water Storage Tank Heating System
Interesting ideas on using a water storage tank heating system. For many people finding alternative sources of energy and ways of using renewable power is the best way to reverse the damaging effects to environment by the use of fossil fuels. Solar power is starting to gain popularity as a source of renewable energy as the cost of the equipment needed to harness it continues to get cheaper to purchase. The purpose of this article is to introduce the reader to a solar power water storage tank heating system.

This article is from How to Go Solar. The author sincerely believes in using solar energy as an alternative source of power and this concept is another example of to harness the power of nature to improve and enrich the lives of people. All of the information is presented in a way that makes it very easy to read and understand.
Benefits of reading the Passive Water Storage Tank Heating System
Discover that by placing several storage tanks inside a room that is exposed to direct sun it will help maintain the warmth in the room.
It explains in great detail how the system works and how easy it is to install anywhere.
All of the information is explained in a way that is very easy to read and understand.
It also has a number of full color pictures that help to depict several of the parts of the system.https://thehomesteadsurvival.com/passive-water-storage-tank-heating-system/
On – 01 Feb, 2017 By
-

How To Create A Permaculture Garden That Supports Your Local Ecosystem
There is no set formula for developing this type of permaculture garden design, but there are some permaculture best practices:
1. Copy nature’s blueprint and enhance it with useful plants and animals. Think of the structure of a forest and try to mimic it with your plantings. A canopy of tall trees will give way to smaller ones, flanked by large and small shrubs and, finally, by the smallest plants. Edge habitats, where trees border open areas, are perfect for fruiting shrubs, such as currants, and for a variety of useful native plants, such as beargrass (xerophyllum tenax), which is used for weaving baskets. Mimicking these natural patterns with permaculture provides for the greatest diversity of plants.
2. Stack plants into guilds. A guild includes plants with compatible roots and canopies that might be layered to form an edge. As you learn more about your site, you’ll discover groups of plants that work well together. For example, pines, dogwoods, and wild blueberries form a guild for acid soil.
3. Make use of native plants and others adapted to the site (but defintely not these plants).
4. Divide your yard into zones based on use. Place heavily used features, such as an herb garden, in the most accessible zones. (Here are 7 backyard weeds that are actually medicinal herbs in disguise.)
5. Identify microclimates in your yard and use them appropriately. Cold, shady corners; windswept spots in full sun; and other microclimates present unique opportunities. For instance, try sun-loving herbs like creeping thyme on rocky outcroppings; plant elderberries in poorly drained areas.
On – 01 Mar, 2017 By
-

A Life Without Bills: Middle-Aged Couple Builds $30,000 Off-Grid Cob Home
A Life Without Bills: Middle-Aged Couple Builds $30,000 Off-Grid Cob Home
Written by: Tricia Drevets How-To Print This Article
If you are intrigued by off-the-grid living but are put off by the expense of building your own self-sufficient house, you need to take a look at a couple’s home in Bisbee, Ariz. They built their 600-square-foot abode for only about $30,000.
Today, they are debt free and pay no bills for water, heat, trash pick-up or electricity, and they are gaining expertise as gardeners. Their only regular bills are for Internet service and property taxes.
Karen and Bill, who were both in their 50s when they began building their home in the fall of 2010 and moved in about 18 months later, did all the work themselves. They were profiled on the YouTube “Life Inside A Box” channel.
“We are loving it every day,” Karen says. “It was a lot of hard work, but we chose to do it.”
A video tour begins outside the front door where Karen and Bob explain that the home is made of cob and straw. They have experimented with different forms of plaster over the straw to help defend the home against Arizona’s unrelenting sunshine.
The Pocket-Sized Backup Battery That Can Jump-Start Your Car!
“We used the basic principles of solar design,” says Bob, “with south- and southeast-facing windows.”
As they enter the home, Karen is quick to mention that everything in their home — except for the new energy-efficient refrigerator they purchased to fit in with their solar system — is either used, gifted or repurposed in some way.
“We made a real effort to recycle as much as we could,” says Karen, pointing out salvaged tin, wood, sinks and furniture pieces in the colorful, inviting home.
The open floor plan and the home’s high slanted roof offer a feeling of spaciousness. The bathroom is the only separate room, with the bedroom partitioned from the main room. A small curtained area is the storage room. “We are minimalists,” Bob says. “We don’t have a lot of stuff.”
Outside, the couple displays their solar system, which, along with their septic system, comprised the major costs for the home. Six main solar panels are nearby. Another four smaller ones power the well. The slanted roof off the back of the house captures rainwater to help irrigate garden beds, trees and plants.
Also on the property are two trailer homes that friends gave to the couple and that Bob later refurbished for their use. One is a warm weather guesthouse, and the other serves as Bob’s workshop. He built a structure to connect to that trailer, which he calls his “man cave” and which also serves as a cold weather guest room.
In the workshop, Bob says he tries out other alternative home concepts, such as crushed paper walls, that he did not get to incorporate into his home.
Raised garden beds, many of which have shades to protect plants from the Arizona sun, are also on the property. Bob and Karen admit they are still learning about gardening, but they are eager to add more homegrown food to their lifestyle.
When asked for advice for others who are considering building an off-the-grid home, Karen and Bob both are quick to stress simplicity.
“Don’t overreach,” Karen emphasizes. “Make a simple plan and then stick with the plan.”
Bob says that he and his wife were motivated by the idea of having a debt-free lifestyle. “We did everything out of money saved, and then we sold half of our 60 acres when we needed more money. … Many people aim too high, and end up getting divorced or having a house that is simply too big to maintain.”
Both Bob and Karen stress that you can always add on another room or another building later if you have the need.
“You will find that you can live in a small space very nicely,” Karen adds.
Would you want to build or live in a cob house? Share your thoughts in the section below:
Discover The Secret To Saving Thousands At The Grocery Store. Read More Here.
On – By Tricia Drevets
-

No dig, ditch back-breaking cultivation and grow great vegetables
Origins of no dig cultivation methods are not completely clear, but the benefits of having healthy soil, bountiful crops with minimal work is clear! Managing your allotment/home vegetable garden using techniques such as double digging are time consuming, labour intensive and damage the delicate balance which exists in soil between beneficial bacteria, insects and microbial content. All of which are vital to the health of your soil and by extension the health of your delicious crops.
Incorporating organic material into soil is not a new concept, worms, insects, fungi and microbes have been enhancing soils organic content whilst aerating and binding soil together without having to dig in composted green waste or similar materials by hand for millions of years. By studying nature we can find ways to create efficient systems which work and enhance the natural world.
Pioneers in the UK like Charles Dowding, have been growing crops such as salad leaves for years with the no dig method, ranging from small back garden operations to acres of crops, even mainstream shows such as Gardener’s World have started to see the benefits of permaculture and no dig, as shown by Monty Don. The main concept of the no dig garden incorporates the ideals and principles of permaculture by mulching your growing area with composted green waste, straw, leaf mould, composed bark chippings and similar material. These mulches help to suppress weeds whilst the worms, insects and microbes continue to break down all this lovely organic material, incorporating it into your soil.
For best results you can add other design elements alongside your no dig site to enhance biodiversity, attract beneficial insects such as predator beetles and pollinators and make the most of the water fall your site receives.
Some of the methods which you could use alongside your no dig patch are …
- Adding beetle banks
- Create insect hotels
- Companion planting
- Attract pollinators
- Create a mini wildlife pond
- Design for your lands water flow
Why not give the no dig style of cultivation a go and see what this wonderfully simple method can do for your garden/allotment this year. Wildlife & Eco Gardens can help you get started with your new gardening system or help with composting advice to get the best quality compost for your no dig beds.
On – 25 Apr, 2017 By
-

Issues With Selling or Buying a Farm


“There are a multitude of things to take into consideration when selling your farm, together with a number of issues that will require careful deliberation. Two such issues, which are not immediately apparent but may have an impact on a sale are, the issue of paying for ingoing’s and add-ons as well as the technical issue of Listed Building Consents,” explains Tim Parsons, Director at H&H Land and Property.

Here Tim gives some further background:
In the case of ingoing’s and add-ons, the issue here is that when a property is launched onto the market, agents can sometimes include items, which a buyer is required to purchase in addition to the basic property price. These can include amongst other things growing crops, Basic Payment Schemes (BPS) entitlements, pits of silage or other crop in store such as straw. Often these items are required to be purchased separately, based on the valuations at the time of completion. This in turn can result in complications for the buyer. Not knowing exactly what the additional costs will be until valuation day can make it difficult for buyers to budget for how much to borrow or to secure the necessary funding.From a sellers point of view the implication of including ingoing’s and add-ons is that it can potentially delay completion. So, when selling, it is all about transparency of what is included, simplicity and certainty. The more certain information that can be given at the beginning of the process, rather than towards the end, will aid a smoother sale. By doing this from the outset, the buyer will know what they are buying, what is included in the sale and what they need to budget for, ensuring a smooth and trouble free process for both parties.
Listed Building Consents are another issue often overlooked when readying a farm for sale. Although not applying to all properties anyone purchasing a listed building must ensure that any work, which has been completed, has been granted the necessary ‘Listed Building Consent’ for all works completed. Listed Building Consent in simple terms is required for any works of demolition, alteration or extension carried out to a listed building. Anyone who does not have Listed Building Consent for works completed to a listed building is breaking the law; this can have significant consequences as it constitutes a criminal offence, as opposed to just a planning offence.
Listed Building enforcement action is not time limited. So, for instance, if you bought a property, which is listed, and it did not have the proper consent for alterations, such as double glazing or a wall knocked down, you will need to secure retrospective consents. Obtaining retrospective consents can be both a long and arduous process, and in the event of it not being secured, it can be very costly to remedy the issues.
One of the first things a solicitor will look for from a seller when a listed building is being acquired are all necessary consents, so from a selling point of view, it is imperative that you make sure that the necessary consents are in place before placing the property on the market. If you are the buyer, you just need to check through the paperwork with the proper authorities prior to signing on the dotted line.
To conclude, Tim says “if you are thinking of selling it is important to plan your strategy early and ensure that all of your paperwork is in order. Proper planning and preparation from the outset will certainly help to ensure that any potential issues or delays are ideally avoided or at least minimised.
“Help and guidance is readily available for both buyers and sellers, but if you are at all unsure about any aspect of selling or purchasing farm property, it is worth discussing your concerns with your agent. It is in everyone’s interest, where possible to address any issues before they arise.”
http://www.stackyard.com/news/2017/03/business/04_hhland_farm.html
On – 03 Mar, 2017 By
-

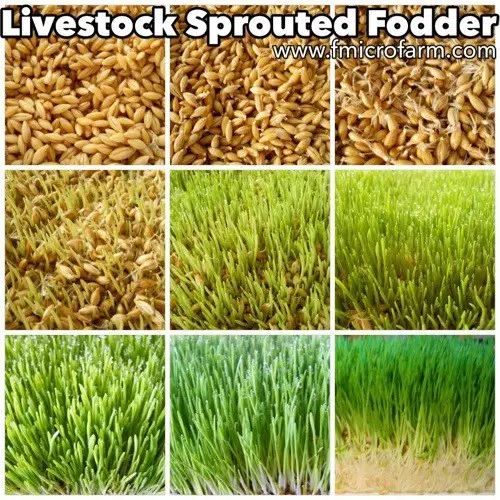
Grow Sprouted Fodder for Homesteading Livestock Animals

Learning how to grow sprouted fodder for homesteading livestock animals is a great way to give them a treat as well as much needed protein. Chickens, rabbits, goats, sheep, pigs, alpaca, horse and cows all would be eager to eat fodder.
Make sure you like The Homestead Survival and Homestead Survival Facebook, and explore our PINTEREST BOARDS for innovative ways you can become self-sufficient on a budget.
If you are new to fodder for your animals, then this article will give you a well-rounded introduction to the whole process, advantages and developing your own system to grown your own.
Fodder development and changing to your homegrown fodder will be a big plus on your farm. You will be able to begin the process of transition all of your livestock to sprouted fodder. A new feeding program is best to double check with your farm vet.

But in all seriousness, if you are new to sprouted fodder, what are the advantages versus using different kinds of feed? The seed in its state is basically just a carbohydrate and without sprouting, it will travel the animal providing very little protein. Your animals, no matter what species, need protein.
In the past, seeds were milled or flacked by steam to open slightly and some protein was passed. Digestibility is the number one consideration in your animals. Without that, your protein is trace amounts.
For example, barley fodder possesses in the high eighty percent of digestible protein. It travels to the animal’s muscle which helps bear good stock. And you want your animals to have the ingestion of organic grains. This also meets USDA standards for “grass fed beef”.
These offerings of knowledge below provides so much information that is clearly stated and also guide you to a sprouted fodder system that will meet your needs and save money. You can custom produce the fodder and add what your vet suggests for added nutrients. Enjoy!
Click here to read about how to grow sprouted fodder for homesteading livestock animals:
https://fmicrofarm.wordpress.com/2014/03/22/sprouted-fodder-for-livestock-a-complete-review/
https://thehomesteadsurvival.com/grow-sprouted-fodder-for-homesteading-livestock-animals/
On – 17 Apr, 2017 By
-

Grow Sprouted Fodder for Homesteading Livestock Animals
Learning how to grow sprouted fodder for homesteading livestock animals is a great way to give them a treat as well as much needed protein. Chickens, rabbits, goats, sheep, pigs, alpaca, horse and cows all would be eager to eat fodder.
Make sure you like The Homestead Survival and Homestead Survival Facebook, and explore our PINTEREST BOARDS for innovative ways you can become self-sufficient on a budget.
If you are new to fodder for your animals, then this article will give you a well-rounded introduction to the whole process, advantages and developing your own system to grown your own.
Fodder development and changing to your homegrown fodder will be a big plus on your farm. You will be able to begin the process of transition all of your livestock to sprouted fodder. A new feeding program is best to double check with your farm vet.

But in all seriousness, if you are new to sprouted fodder, what are the advantages versus using different kinds of feed? The seed in its state is basically just a carbohydrate and without sprouting, it will travel the animal providing very little protein. Your animals, no matter what species, need protein.
In the past, seeds were milled or flacked by steam to open slightly and some protein was passed. Digestibility is the number one consideration in your animals. Without that, your protein is trace amounts.
For example, barley fodder possesses in the high eighty percent of digestible protein. It travels to the animal’s muscle which helps bear good stock. And you want your animals to have the ingestion of organic grains. This also meets USDA standards for “grass fed beef”.
These offerings of knowledge below provides so much information that is clearly stated and also guide you to a sprouted fodder system that will meet your needs and save money. You can custom produce the fodder and add what your vet suggests for added nutrients. Enjoy!
Click here to read about how to grow sprouted fodder for homesteading livestock animals:
https://fmicrofarm.wordpress.com/2014/03/22/sprouted-fodder-for-livestock-a-complete-review/
https://thehomesteadsurvival.com/grow-sprouted-fodder-for-homesteading-livestock-animals/
On – 17 Apr, 2017 By
-

Adding Animals to the Homestead
Somewhere along your homesteading journey, you will probably get the itch to start adding animals to the homestead. Or, the opportunity will present itself in an offer you can’t refuse. Perhaps someone is giving away a flock of “free” chickens, or you fall in love with a baby goat and decide this is the right time for adding animals to the homestead.
What Is the Right Time for Adding Animals to the Homestead?

Whether it’s a well planned adventure, or a series of events, you should have an idea beforehand of what each type of care the animal will require. We have raised and kept many kinds of pets and livestock at Timber Creek Farm. Our first animals were horses and ponies, followed by goats, a donkey, chickens, rabbits, ducks, sheep, turkeys, cows and pigs. There is much to be said for practical, hands on learning. I will be honest, and tell you that I have not always followed the advice I am giving out now. As they say, hindsight is 20/20!
Read and Ask Questions Before Adding Animals to the Homestead
Ask lots of questions and be prepared for on the job learning! But, that said, try to be as prepared as possible, BEFORE adding animals to the homestead!
1. Build suitable fencing and secure housing.
This can be a hard point if you are not sure what the animal needs. Different animals and poultry require different housing and fencing. Chickens will be safely housed in a secure coop with appropriate ventilation and interior accessories such as nest boxes and roosts. Pigs don’t require an enclosed building necessarily. An open shed will serve as adequate shelter but the fencing for pigs most likely will need a line or two of electric to persuade the pigs to stay put. Know what each species needs in order to be raised successfully.
2. Be aware of predators in your area and learn how to keep your animals safe.
If all of this is new to you, ask other neighbors or the Extension Service agent in your area for information about possible predators, in your area. Use the appropriate fencing to keep predators out of the animal’s area. Using the wrong wire fencing can lead to tragedy. You can read more about the different fencing for chickens in this post.
3. Make sure you have a way to get plenty of water to the animals, even in subfreezing temperatures.
There aren’t many things that happen around the farm that I don’t enjoy. Except for carrying water to the animals when the hoses are frozen and the water tanks are solid blocks of ice. We need about 15 gallons of water in the morning and evening to keep everyone hydrated. That’s just the animals who don’t have floating tank deicers in their water. Water is a big concern during extreme weather. In the event of possible power outage from a big storm, we stock up by filling all the tanks before the storm hits. Yes, think about water. These electric heated water bowls can help with water staying thawed during the day. I recommend uplugging them at night and refilling in the morning. Chickens don’t need water available while they are sleeping.
4. Having all things in place before the animals arrival, will add to your enjoyment of raising livestock.
I preach this. It’s my mantra. Unfortunately, I don’t often take my own advice. Yes, I too succumb to bringing home animals without making the proper plan ahead of time. Fortunately, we have lots of available options for temporary housing when my heart gets ahead of my better judgement. But it all goes smoother if you plan ahead. Believe me, you will still have plenty of reasons to make adjustments once you get to know the new arrivals.

What is the best animal to start with?
I can’t tell you which animal type is the best one to purchase first, when adding animals to the homestead. This depends on your ability to care for them and your particular passions. If you love fiber crafts and yarn then you may want to raise your own sheep or fiber animals. If the thought of caring for a large sheep scares you, perhaps an angora rabbit would be a good choice. Large families or those with specific dietary needs, may consider raising meat animals might help the food budget.
Urban homesteaders may have limitations set by the town government, on what can be kept within the city limits. I put the information that you can use to make a decision into a table format. The dollar estimates are based on an average cost in the mid Atlantic region at the time of writing. Your local feed store or veterinarian prices may vary but this will give you a starting place for your planning.
How Much Time is Involved in Animal Care?
All livestock require everyday care. We feed all of our animals twice a day. I am sure there are folks who feed once a day but feeding twice a day gives you twice the opportunity to head off a potential problem. Sometimes, twenty four hours can make a difference in the health of your animal, and catching an illness early can often save the animals life. Each week, more intensive labor chores are completed, such as moving hay bales to the barn, cleaning stalls and pens, and filling up water troughs. Basically, the larger the animal, the larger the cleanup effort!
Refer to the following sections for my estimates on the physical strength, costs and care required for various species.
Care Needs of Different Homestead Livestock
Physical Strength Needed Average Costs Time requirement Concerns or notes Chickens and Ducks
(laying hens for eggs)Other than being able to clean the coop regularly, carry water to the coop and hold a chicken if it should need medical attention, strength needed is average. Raising poultry is suitable for those learning to homestead. In a coop and enclosed pen situation, estimate 50 lb bag of layer ration for 12 – 15 mature hens. Costs will vary but an estimate of $12- $16 dollars a week is an average. If you are able to free range, the feed cost will go down. Minimum of twice a day care needed to freshen the water, remove old feed and distribute fresh feed. Cleaning weekly as needed. Less cleaning is needed in the winter months as the accumulated bedding will help warm and insulate the chicken coop. Free Range can mean a free dinner for the foxes and racoons. Having a sturdy coop that can be tightly shut will protect your hens from predators. Rabbits Not a significant requirement. Similar to poultry. 1 rabbit estimate of 5lbs of feed per week. Will vary with the cold weather. Rabbit will eat more during cold weather. Approximately $3- $8 dollars a week plus fresh food supplements such as leafy greens, carrots, bananas, apples Twice per day check and refresh water and food. During below freezing temperatures, water may need to be refreshed more often. Nail clipping needed and general body condition checks needed. Hutch must be secure and predator proof. Goats – for milk, fiber or meat, field buddy for a horse You may need to lift a goat onto a stand for examination or to give meds, shear fiber, or general care. Strength can be a factor although there are ways to work smarter and not harder. Goats prefer browse to pasture grass so the hay can be of lower quality, weedier except for lactating dams and last stage of pregnancy. Commercial goat chow cost average $13 – $18 for a 50 lb bag. We feed half a cup per goat/twice a day, with free choice hay and browse. Approximately 1 hay flake per goat per day (hay bales separate into portions called flakes) Basic care for a herd of goats will take about 30 minutes, two times per day. Check fences, observe the goats, feed, and water.
Weekly, clean up the stall area and remove soiled hay. Replace bedding. General stall cleaning and maintenance.Goats require yearly vaccinations. You can learn to do this on your own, except for the rabies vaccine which in many states has to be administered by a veterinarian. Hoof trimming needs to be done two to four times a year. Breeding animals may require more care, Pigs More cleaning will need to be done so more strength will be required. The pigs can be pushy and aggressive for food. Pigs are very resourceful and can use many different food types to convert to muscle mass. Kitchen scraps, garden waste, hay and commercial feed can all be used to produce a healthy animal. Pig feed average cost is $17. Whole corn is another alternative and can be a cheaper choice. Fencing for the pig area or pig pastures will be a time consuming factor before bringing home the piglets. I believe the use of electric fencing is a must with pigs. We use both post and board fencing with dual electric lines inside the fence line. I do not recommend raising pigs as a first homestead animal choice. I recommend developing some homestead instincts and animal knowledge before venturing into raising pigs Cows – beef yes physical strength is required. varies. Pasture with strong fencing is a must. Finishing the beef cow on grain will run about $11 and $14 dollars a bag. daily care may not amount to much depending on your property but in the big picture, raising beef cattle can be very time consuming I do not recommend starting a homestead with beef cattle. I hope this gives you a good start on gathering information before adding animals to the homestead. Remember, homesteading is a journey, not a race. Having a field full of livestock, but not enjoying caring for them, is not worth the effort or expense. Add what your family needs and can care for slowly. Enjoy the journey!
We raise animals on our farm for our homestead use. We are not commercial poultry or beef producers. The information I am conveying here is from this point of view. I welcome your constructive comments below. Please share with us, your encouraging tips and advice for new homesteaders.
For more in this series please visit –
So You Want to be a Homesteader Part 1
The Bookshelf- So You Want to be a Homesteader – Part 2
This post was shared on The Homestead Barn Hop,
http://timbercreekfarmer.com/adding-animals-to-the-homestead-so-you-want-to-be-a-homesteader-part-3/
On – 30 Dec, 2016 By Janet Garman
-

Self-Sustainable Lifestyles are Becoming Illegal
Across the U.S. local zoning officials are making it increasingly difficult for people to go off-grid and live self-sustainable lives. Building tiny homes, harvesting rainwater, using solar or wind energy, and even building community gardens are being targeted and in some cases, the people involved are even threatened with jail time and fines.
Tiny Homes
Tiny Homes are structures 500 square feet or less and are one way for people to break free of mortgages, taxes, utility bills, and the general entrapment of having more than is necessary. They’re especially attractive to Millennials and retirees, or those seeking to live off-grid. In Maryland, tiny-house legality will likely be handled at the local level as a zoning or building code issue where placement on a property is determined by local zoning and land use regulations.
A priority for many tiny home owners alongside being self-sustainable, is reducing their carbon footprint and many are opting to use the elements for their energy from solar and wind, collecting rainwater, and reusing gray-water. And in many areas those who put their tiny home on a piece of land away from big cities with the intention or living off grid and self sustainably, are considered outlaws by the state because they are refusing to hook up to the utility grid. Tiny homes everywhere are being targeted by unjust laws to keep people tangled in debt.
Solar Panels
The issue of developers and homeowner associations banning homeowners from installing solar panels is widespread across the nation, but is especially relating directly and significantly to Texas, California and Florida, since homeowners in those states are overwhelmingly governed by property owners’ associations. Homeowners have lost lawsuits and have been forced to remove solar units they installed because they conflicted with an HOA’s binding legal obligations written into the deed of a property by the seller. These covenants can penalize buyers by fining those who fail to obey them. In January, Nevada practically killed its solar industry, causing solar providers to leave the state by increasing their tax on solar customers by 40 percent!
Collecting Rain Water
Harvested rainwater is storm water that is conveyed from a building roof, stored in a cistern, and disinfected and filtered before being used for toilet flushing. It can also be used for landscape irrigation. In some places it is illegal to even collect rainwater, threatening those who do with jail time and fines, but often you have to jump through a bunch of hoops, such as registering with the division of water rights or some states that put a limit on how much water you are allowed to collect on your property at time.
Community Gardens
Community gardens are also labeled a threat of the food industry because of the freedom it provides for low income and impoverished people. One example of a garden being shut down is the South Central Farm that was a community garden located at East 41st and South Alameda Streets and the garden was the largest community garden in the United States. The city allowed the farm the be created but sold the property to Ralph Horowitz in a secret deal out from under the citizens, and the new owner attempted to evict the farmers even though the farmers were able to raise the money to buy the land themselves.The selling of the land was corrupted, as it involved many backroom deals but it still ultimately lead to the demise of the peaceful garden. There were many protests and acts of civil disobedience for several years before the farm was finally bulldozed in 2006. There have also been many cases from around the country where the city or HOA’s shut down peaceful community gardens and even regular front yard gardens.
Building On Your Own Land
Many landowners are also being targeted just for building structures on their own land without having adequate permits. Even people who are building their homes well within codes are being forced to tear down the structures they have spent so much time and money creating. Activist Adam Kokesh, outright bought a piece of land in Arizona, started building and making improvements to it and not soon after he was harassed by David Williams, an employee of the county government. David Williams believed a written document from 1910 obligated Adam to comply with David. After Adam had his lawyer contact David and David was unable to provide any evidence that the code applied to Adam, David only escalated the situation by offering Adam a false choice, either an admin hearing or a criminal prosecution. This is still an ongoing issue for Kokesh as he has elected to not make the regular updates he was making about progress on the land. Which not only affects him as a paid content creator, but also those he was inspiring and helping learn from his venture.
Though people continue to struggle for the freedom to use their land and structures as they see fit, this self-sustainable movements only continue to grow. More people are choosing to live a more environmentally friendly life and will continue to build a life free from corporate choke-holds. Time will only tell if the state will continue to attempt inhibit the growth or encourage self-sustainable lifestyles but for now their choice is clear.
https://thehomestead.guru/self-sustainable-lifestyles-illegal/
On – 06 Apr, 2017 By Hailey
-

Tips for Terrific Tomatoes, from Soil Prep to Staking
Plump, sun-ripened tomatoes are indisputably the crown jewel of home vegetable gardens, and a successful tomato crop means giving them the best start possible. As with everything, getting the most out of your tomatoes is all about preparation.
Joining us again to talk tomatoes and more is the Organic Gardener Jeanne Nolan.
Not sure how to start your garden? With help from Jeanne Nolan and her team, we will guide you through the process from selecting a site for your garden to staking crops and everything in between.
 Strategies for Container Gardening
If you’re one of the many Chicagoans living in an apartment or condo with limited outdoor space, growing your own food can seem like a challenge – but, Jeanne Nolan says, anything you can grow in the ground can be grown in a container with just a few adjustments.
Ask Jeanne Nolan and The Organic Gardener crew.
http://chicagotonight.wttw.com/2017/05/25/tips-terrific-tomatoes-soil-prep-staking
On – 25 May, 2017 By Erica Gunderson
-

รอยยิ้มของชาวบ้านบ้านบุคราม ที่ใจดี ทำเมนู “อ่อมไก่” ที่แสนอร่อยให้แดเนียลได้ลองชิมนะครับ สนุกมากๆเลย 😉 #longrukyim #buriram #localfood #farmer #solarpump
รอยยิ้มของชาวบ้านบ้านบุคราม ที่ใจดี ทำเมนู “อ่อมไก่” ที่แสนอร่อยให้แดเนียลได้ลองชิมนะครับ สนุกมากๆเลย 😉 #longrukyim #buriram #localfood #farmer #solarpump
รอยยิ้มของชาวบ้านบ้านบุคราม ที่ใจดี ทำเมนู “อ่อมไก่” ที่แสนอร่อยให้แดเนียลได้ลองชิมนะครับ สนุกมากๆเลย 😉 #longrukyim #buriram #localfood #farmer #solarpump
Source: https://www.instagram.com/p/BUMIiWAjDax
#longrukyim, #buriram, #localfood, #farmer, #solarpump, longrukyim, buriram, localfood
-

Arid land to a fertile Eden: permaculture lessons from Portugal
The land undulates upwards into gentle hills, cradling nooks of fertile terraces growing sweetcorn, sunflowers and tomatoes, before rolling down into tranquil lakes. It looks like a natural Edenic paradise on earth. But 20 years ago this land was arid and barren, and farming was a struggle.
The land is called Tamera, the name given to these 330 acres in southern Portugal by a community of 30 people who moved here from Germany in 1995. Today, 200 people from all over the world live here. Through simple practices of digging swales (ditches) and creating water retention spaces, Tamera’s ecology experts have transformed an area on the brink of desertification – and say they can do the same anywhere in the world.
The community wanted to be more sustainable and grow more of their own food, rather than importing it, and it was clear that water would be central to being able to live autonomously on the land.
“When I came to Tamera in 2006, trees were dying and wells were drying out,” says Bernd Mueller, director of Tamera’s Global Ecology Institute and one of the engineers behind the transformation.
At that time, in the summer months, Tamera looked like a desert with hardly any vegetation. In the winter months, however, there was heavy rainfall and flooding. Mueller and his co-engineer Thomas Lüdert realised that most of the water was running off the soil and causing damage to infrastructure, rather than soaking into the earth.
“It rushed down to the rivers causing erosion and other damaging side effects,” says Mueller. The project’s goal, then, was to retain all the rainwater that falls on the land, to refill the groundwater which was getting lower each year, and to provide flowing spring water.They started from the top of the hills, hit hardest by erosion and overgrazing. “The wind and the water eroded all the fine earth that should serve as a sponge for the rainwater,” says Mueller. “We started to manipulate the situation so these places retain the rainwater falling on them. Then you start to build structures like swales, which fill with rainwater and slowly filter into the earth.”
The lakes were dug out and formed without any concrete seal at the bottom so water can seep into the earth. “There’s a principle in permaculture called the triple S – slow, spread and sink,” says Mueller. “When you have flowing rainwater, something in your ecosystem is wrong. You have to slow it down, spread it over the land and let it sink.”
Transformation of the landscape began in August 2007, and by February 2008 a new spring had appeared at the edge of Tamera’s boundary. “I was surprised. I didn’t expect that to happen so fast,” says Mueller. “We suddenly had a creek going through the valley, and that brought more lush vegetation and animals; wildlife responds immediately to constant access to water.”
The Tamera case study has been presented to the EU and at the UN’s Cop22 in Marrakech by the Global Ecovillage Network. “For us it was important from the beginning to change the situation in Tamera, but do it in a way that it will be a model for the rest of the world,” says Mueller, who has travelled most continents to consult on water projects. “When you scale the ecological problems down to principles, it’s all due to the same mistakes. In all the cases I have seen all over the world, the key to ecosystem restoration is rainwater and vegetation management.”
Mueller has consulted on water management in Israel and Palestine, Turkey, Jordan, Kenya, Togo, Brazil, Bolivia, Colombia, and has shown how the Tamera model can be used in development and humanitarian settings.
After the earthquake in Haiti in 2010, Mueller worked with NGO Cafod on a project at the Carradeux camp for internally displaced people (pdf), providing sanitation, drinking water and waste management. Recommendations for the camp included harvesting rainwater from roofs, providing alternative fuels to wood to prevent deforestation, and installing composting toilets.
“I’m happy to support [Tamera] because they’ve got a different way of doing things,” says Geoff O’Donoghue, Cafod’s operations director who worked with Mueller on the Haiti project. He says that the Tamera approach helps in humanitarian settings because they have an awareness of the bigger picture. “There’s so much you can do which isn’t more expensive, but requires a front-loading of knowledge and design.”
After the consultation in Haiti, the Blueprint Alliance was set up for organisations to share sustainable solutions in humanitarian emergencies.
Mueller also worked with a local government in Kitui, Kenya (pdf). “I witnessed how in a short time a supportive local government could make a programme prompting swale building on a large scale,” he says. “In three months, I couldn’t recognise the land. It was a relatively small amount of money that was invested there. After three years every farmer could see the effectiveness of it.”
So could this approach be used somewhere experiencing extreme drought or even famine, such as South Sudan? The country has similar ecological conditions to Kenya, says Mueller, where he has seen how effective it can be. Mueller is now focusing on showing Tamera’s new water paradigm (pdf) to governments, the UN and NGOs, and supporting community-based projects.
“The ecological knowledge is there and its effectiveness can be proved in so many cases,” he says. “The problem lies in political strategies and social habits.”
On – 01 Jul, 2017 By Anna Leach
-

How Soil Type Affects Land Values
A farm’s greatest asset is its land. If you’re considering buying land with an ag land loan, looking into the land’s soil type is an important step in determining the worth of the property. It’s also an indicator of how much work the soil will need in order to provide a nutrient-rich environment for crops.
Soil classification is based on the texture and size of the particles in the soil, as well as on the mineral and nutrient content. The six most common soil types are loamy, sandy, peaty, silty, chalky, and clay. Each of these base soil types become naturally combined in varying ratios to produce entirely new and unique soils in each state.
Every part of the country has one, or a mixture, of the six main soil types. And just like each state has an official flower or bird, they also designate a state soil. Florida’s official soil is called “Myakka.” It originates from marine deposits and is a key component of Floridian flatwoods.
There are a variety of tools for assessing a farmland’s soil type. Chuck Cruse, AgAmerica’s Regional Account Manager for Florida, highly recommends heading to the USDA’s Natural Resources and Conservation Services (NRCS) web page. This tool allows users to create a map of their land or land that they are considering for purchase. The process takes the user through four basic steps: (1. Define your land area of interest; (2. Gain detailed descriptions of the soils in that area; (3. Access and save soil data and crop suitability data with the Soil Data Explorer; and (4. Order a free instant printable report, which creates a complete picture of the quality of a specified piece of land, including yield potential. The NCRS database currently contains data for 95% of the nation’s counties and anticipates having 100% in the near future.
Different crops prefer different soils, so determining the soil’s compatibility with certain crops is a key concern for the region’s ag Extension office. Extension agents are familiar with the area while possessing access to an array of useful data when it comes to soil quality and which land offers the best yield, and for which crops.
The USDA also collects data on what’s known as “prime farmland designations,” which are based on physical and morphological (organic) characteristics such as the depth of the water table in relation to the root zone, potential moisture holding capacity, the degree of salinity, permeability, frequency of flooding, soil temperature, erosion potential, and soil acidity.
Data about a farm’s soil type is used to help create the land appraisal. Appraisals are a common part of securing a land loan and are a complex equation involving a variety of factors with soil quality being only one of them.
Land appraisers develop economic assessments of agricultural acreage using soil samples. To determine the property’s value, they’ll review past yield records, look at existing irrigation and/or potential for new irrigation, and examine border features to assess how these might impact soil productivity.
While the southeastern region of the U.S. has a wide array of soil types, there is a very unique and valuable soil type found prominently in Florida — muck soil. Otherwise known as “black gold,” muck is a highly fertile soil that has amendments and nutritional value present without having to fertilize or irrigate heavily. The value of a parcel that contains muck soil fluctuates based on the depth of the muck, which can range from 12 inches to 30 feet deep in some areas. The deeper the muck, the more valuable the property is. However, there are only small areas of muck located in the state of Florida, the largest mass of it bedding in Palm Beach County around the bank of Lake Okeechobee.
“Muck is where sugarcane is primarily grown,” Cruse says, “because it takes very a minimal amount of work to grow it. You can get three to four cuttings off one planting of sugarcane, depending on the variety. When the farmer rotates the cane with sweet corn or other vegetables, it helps recycle those amendments back into the soil naturally. Once they’re done growing the cover crop, they’ll go in and till that crop, putting the nutrients and supplements back into the soil that’s then used to grow another crop of cane that will last another three to four years.”
Many farmers are finding innovative techniques to duplicate this scarce “black gold.” For instance, there are some sugarcane growers that are farming the cane on what is considered sand land. While the soil is entirely different than the muck, they’re bringing in mud and peat substitutes from the mills to replicate the nutrient-rich muck soil.
“These folks have the opportunity to bring some, what they call, ‘mill mud’ back to their properties to put the amendments back into the sand soil,” Cruse explains. “This gives them the properties and nutritional products that mimic the muck soil and grow better crops, even though they don’t have any depth of muck on the sand land. These farmers are putting anywhere from 12 to 24 inches of mill mud on top of the sand to help get the crop’s roots to be hardier, stronger, and to produce a better crop.”
http://www.growingproduce.com/vegetables/how-soil-type-affects-land-values/
On – 17 Nov, 2016 By Phoebe Moll


