Your cart is currently empty!
Author: Barakah Farm Staff
-

How to Put Your Homestead Animals to Work
Are you looking for ways to simplify your homestead processes?
I’m going to share a few ways for how to put your homestead animals to work to help save some precious time.
How many of you are looking for ways to save time on your homestead? I’m raising my hand.
Some days it seems like there are never enough hours. Am I right?
One way that we try to save precious time around our homestead is by striving for a simpler life. But sometimes homesteading doesn’t really feel simple.
There’s always something that needs to be done. We get up early, take care of our family and animals. There seems to be never ending projects, repairs, or routine maintenance.
A sometimes overlooked way to save time is by using your animals as helpers by doing what they were born to do.
And by doing this, not only does it help us, but it also keeps them happy and healthy.
How To Put Your Homestead Animals to Work

Garden Prep
Goats, chickens, and pigs help prep garden areas before planting. Goats help by getting rid of unwanted brush, chickens scratch and help till the ground. Pigs are also great at digging and turning soil.
They Provide Fertilizer
Aka manure. Goats, rabbits, and chickens are great sources of manure for the garden.
Some say that using chicken manure is best because it is very high in nitrogen and also contains a good amount of potassium and phosphorus.
We use a mix of both goat and chicken manure around here. And personally, I prefer using goat manure over most other livestock because it’s almost odorless.
Pest and Insect Control
Chickens, ducks, geese, turkeys, guineas, and pretty much all fowl help keep insects under control.
Guineas are especially helpful if you live in an area with a lot of ticks. We have definitely noticed a decrease in the amount of ticks hanging around here since we added guineas to the homestead.
I just found the first tick of the season on my daughter this morning. And you know one of my first thoughts was… Time to add more guinea fowl!
Compost Help
Using chickens in the compost pile helps to keep it turned, saving that ever so valuable time. Chickens naturally scratch and help break down the grass, leaves, and food scraps into beautiful compost that you can use in your garden!

Zero Waste
Animals love to eat treats from the kitchen! Whenever we have leftovers or scraps of food from the kitchen, I give them to our animals.
Have leftover scrambled eggs from breakfast? Feed them back to the chickens!
Certain foods are better for the ducks, or chickens. And some are better for the goats or the dogs. If you have pigs, they love most leftovers or scraps. Whatever isn’t safe for some of our animals goes to another.
Providing them with kitchen treats, keeps them happy and healthy. And it also helps us cut down on waste.

Lawn Care
Goats, sheep, and donkeys are great at keeping up with the lawn care. While they probably won’t give you a manicured lawn, they definitely save us mowing time over the summer!
Brush and Land Clean-Up
Speaking of yard care, goats are excellent browsers. They love to browse around for their food and in doing so, they clear up unwanted brush, weeds, grass, and even trees.
We put our goats to work to help with our homestead income and allow them to clear up brush at a local ranch.

Predator Control
Many different livestock can help protect each other as well as smaller animals from predators. We have a huge problem with predators in the area where we live.
We can’t free range our chickens and other smaller animals safely unless we have a livestock guardian out there to watch over them. This is what we do instead.
Many people keep a livestock guardian dog. Others use donkeys and llamas. Some work better than others.

Sometimes having a protective rooster or geese with your chickens can help. Our rooster is very protective of his ladies and our ducks are also helpful with keeping the predators away. Having our goats near the chicken coop has helped deter the predators a little for us.
Nothing is full proof though. So it’s always important to make sure we have a variety of options.
Herding
Many breeds of dogs are excellent helpers for rounding up stray cattle, goats, and sheep. We have a very special bred Hanging Tree Cattle dog that is excellent in helping my husband move and round up our goats and cows.
There are tons of different herding dogs that are bred for this job and are easily trained.
Companionship
Aka instant therapy.
Last but definitely not least. And perhaps, one of the most rewarding jobs of all. They provide great companionship and are total mood boosters!

So there you have my top ten ways of putting animals to work on the homestead. It’s all about saving time, working smarter and not harder!
How do you put your animals to work on the homestead?


http://bootsandhooveshomestead.com/animals-to-work/
On – 03 May, 2017 By marywoita
-

Alternative Energy, Create A 1Kw Solar Energy System With Less Than $800
Alternative Energy, Create A 1Kw Solar Energy System With Less Than $800
I Have Created A New Product On How To Build Solar Panels And How To Install A 1kw System On A Roof. 4 Solar Panels, Charge Controller, Deep Cycle Battery And Inverter To Get 220 V.great Conversion Rate. On – By
-

Creating a Food Forest – Step by Step Guide – Permaculture Apprentice
One of my earliest memories of visiting my grandparents’ farm was playing on the dry stone wall, tossing stones around and just generally fooling around.
Then, looking down, I came across a small seedling sticking out the side of the wall, growing in nothing, with barely any soil between the stones.
Out of childish curiosity more than anything I decided to set it free from the heavy stones and leave it to grow on its own. That was 20 years ago…
 Today, that seedling is this strapping young fellow on the image left – European Ash tree.
He has survived the droughts, heavy snows, pouring rains and sub-zero temperatures all by himself, without anyone taking care of him.
As I sit under his shadow today and plan my food forest I’m curious to find out how trees flourish without human intervention.
How come wild apples, plums and cherries from the nearby forest do so well while the cherry tree I planted in my orchard five years ago has died miserably? To understand this I needed to return to the place where the seed of this Mountain Ash tree came from and revisit my teacher – the forest itself.
Forests are our teachers
Just by my house, some 50m away is an entrance to a forest. I visit there often, it makes me feel relaxed, I enjoy the serene sounds of nature, the falling leaves, birds and other critters. Most importantly, I go there to observe and learn.
You see, given enough time every ecosystem ends up like a forest. This is the end point of an ecological succession; a point where the ecosystem becomes stable or self-perpetuating as a climax community and, without any major disturbances, the forest will endure indefinitely.
This is exactly what you want your own food forest to be like. To achieve a low maintenance abundance of fruit, nuts, berries and herbs you’ll want to create a forest-like system where fertility comes from various sources, where you’re greatly aided by fungi, where wildlife is your primary pest control, where soil holds water like a sponge, and where you have a high diversity of plants.
You want a carefully designed and maintained ecosystem of useful plants and emulate conditions found in the forest.
However, the problem is often that you’ll find yourself starting out with a bare field, a blank canvas and the overall plan can feel a little overwhelming. Sometimes even reading books such as Edible Forest Gardens can make things harder rather than easier.
While creating my own food forest, I broke down the plan into smaller, manageable steps. I want to make as few mistakes as possible and to be honest, I don’t have time to make them.
Right, let’s dive in and see how this process can help you go from that bare field to a fully-functioning ecosystem inspired by forests.
1. What do you want from your food forest?
First you have to be clear about the ultimate goals of your project.
Why is this important?
You see, with a clear goal, everything becomes easier, you know where best to place your efforts and, most importantly, what are the priorities, what to focus on and what to postpone for the time being.
You have to think are you doing this because of: 1. being more self-reliant, 2. making an income, 3. producing healthy food 4. educating others 5. having a fun project for all the family
As you can see, each of these will require different considerations for your precious time and money. For example, if your goal is to create an income from your food forest, you’ll want to focus on researching which tree crops sell well locally and then think about how to grow them in the most efficient manner.
On the other hand, if you just want to be more self-reliant, you’ll want to think about how to create a diverse food forest with as many fruits, nuts and herbs as possible to fulfill your needs and stop being dependent on the grocery store.
Don’t overdo the thinking at the outset, but just be clear what you want from the beginning.
2. Explore, Sit Quietly and Observe, Analyse
- Explore your local forest so you’ll have an idea what will grow best in your area
Start with taking casual walks in your local forest. When designing a food forest you want to learn from the local ecosystem and try to emulate it. This is why such observations are important, this is how you discover what plants will grow best in our area.
You’ll want to look around and identify the plants that are thriving. As Mark Shepard would say: identify the perennial plants, observe how they grow in relation to one another, and take a note of the species. Later on, you can use that list to find commercial productive variants of the wild plants that you can grow in your food forest.
This step is crucial, because if you want to create an edible landscape that requires less work and maintenance, you need to grow species that are well adapted to your area, i.e. species that are volunteering to grow around your site.
If you have nature as your ally and use the natural tendencies of the native vegetation, then you’ll be doing considerably less hard work. This is one of the fundamental permaculture principles of working with nature rather than against it.
For example, when I walked in my forest I saw elderberries, hazels, hawthorns, lindens, cherries, apples, junipers, and the list goes on. So, guess what I’ll be growing in my food forest?
I’d also be taking seeds from those naturalized species and using them as rootstock for my plants. But that’s a lesson in itself, so be sure to read my post on growing trees from seeds.
- Sit quietly and observe your site
Next, sit at the future site of your food forest, no matter if it’s 5 or 50 min, just sit there quietly. Brew yourself some coffee or tea and just be mindful of what is happening around you. Immerse yourself and study the wildlife, feel the breeze, listen to the sounds of the natural world around you. You can learn a great deal simply by sitting quietly.
One of my best ideas, and one that saved me a lot of time, came when I just sat down and observed my site. For years, I tried to get a wild hedge under control and year after year I was cutting it, but it kept on re-sprouting. This mindless management involved a great deal of work, as I always found myself battling against the hedge’s natural inclinations.
It wasn’t until one day, when I was sitting quietly looking down at the hedge, that I came up with an easy solution to the problem. I asked myself a simple question: How can I let nature do the work for me? As I observed the hedge more thoughtfully, I realized that some of the species growing there were actually useful, while with others, I had even planned to grow them there anyway.
If I just gave a head start to species I want there, they would eventually overgrow the ‘non-useful’ ones, and I wouldn’t need to mindlessly cut down everything each year. Sometimes we are just too much in working mode to come up with solutions that are actually a whole lot easier. Having the time to observe, think and ask the right questions helps us save money, time and unnecessary labor.
These moments of mindfulness help put things into perspective and reveal a wealth of important information about the site itself.
- Do a site survey and make a basic map
It’s time to put on your permaculturist explorers’ hat and take notes about your site. You’ll want to ‘read the landscape’ and note down everything you can decipher about your water situation, climate, soil, slope, aspect, wildlife…
The landscape you see around you and its resulting ecosystems are formed from the interaction of climate, landform, soils and living things. Therefore, to better understand your site, you should analyze these elements, or parts of them, one by one…
At this point, you want to be actively involved and walk the site, conduct surveys and look at different natural processes. You can use modern technology (smartphones and desktop computers) to help you understand the weather patterns, terrain shape and water movement across the land.
You also want to get your hands dirty and investigate your soil’s texture, structure and biological activity. You can also perform some lab tests on your soil and experiment with some basic tests yourself. There are many things to explore. Help yourself and download my checklist below.
Download your free site survey checklist HERE!Based on the information you’ve collected, make a rudimentary hand-drawn map or use Google Earth as a base layer and annotate the printout with your notes. You can even make multiple thematic maps for each of the landscape components you’ve analyzed.
From the map, it should be visible where the site potentials lay, and what you’ll need to design for.
3. Design – Create a layout and choose the plants
- Choose a general layout – orchard, woodland, savannah
There are four basic layouts that determine the final look of the food forest: In their book, Edible Forest Gardens, Dave Jacke and Eric Toensmeier suggest more options but I’ll round it down to the basics:
- Savanna type systems – alley cropping and silvopastoral system – examples: Mark Shepard/Grant Schultz
- Orchards – woodlands with regularly spaced trees – examples: Permaculture Orchard, David Holmgren
- Mid – to late succession woodland – this is what we are trying to emulate – examples: Robert Hart, Martin Crawford
- Closed canopy forest – end point of a succession – these are mature forests – example: “Your local forest”
Which layout suits you best depends on your goals and your site’s characteristics (climate, terrain, biome, etc.). Different systems require a different design approach, management, and maintenance….
Savanna-type or agroforestry systems are based on a keyline design and are much better suited for commercial fruit, nut and herb production. Usually implemented on a broadacre scale, this is a layout with equidistant rows that enables efficient machine harvesting.
The woodlands we call orchards are more of a hybrid system that you can use for both commercial production and home use. The layout also has equidistant rows, but permaculture orchards are usually implemented on a relatively smaller scale.
Mid- to late succession woodlands offer the opportunity for the most varied, interesting, complex, and productive patterns of trees shrubs and herbs. Although primarily geared towards home food production, you can implement this layout on your suburban backyard but also scale up to a farm scale.
Wondering how to start planning the layout. Download this free step-by-step guide and find out how to design a permaculture orchard?- Start by outlaying your infrastructure first
Start your design with the scale of permanence in mind and plan your water, access and structures first. It’s best to begin with these essentials because they will be the most permanent elements of you food forest.
This includes thinking about the most suitable places for your water tanks, irrigation lines and other water elements, as well as planning for the locations of access points, different buildings and fences.
Water planning comes first, as water is the number one priority for any permaculture system. The water systems that you develop in this stage will become permanent land features that other infrastructure components will follow.
Immediately after designing the water systems, consider where to put your roads and paths. Their placement will define your movement around your food forest for many years to come, so think long and hard about their potential locations. Once they’re in, it’s hard to rearrange them.
The pattern of the fencing will generally follow that of access, and you’ll be able to subdivide your food forest into different growing zones. By doing so, you’ll be able to manage and protect them separately if necessary. Finally, consider where to put different buildings, if any…
Good infrastructure design is essential in order to minimise maintenance, maximize productivity, and provide a habitat for beneficial animals.
- Make a list master list of plants you wish to grow
Make a master list of plants – your desired species and others necessary to fulfil a certain purpose in your food forest. Think about ecological functions needed throughout the garden such as food production, the gathering and retention of specific nutrients, beneficial insect nectar plants, and ground cover for weed control.
Create a spreadsheet with each of these categories, do the research and list all the plants you want. Now, if there is a desired species that simply won’t work on your site, you can always find an ecological equivalent, i.e. an ecologically similar species that fills a similar community niche in comparable habitats.
For this you can use climate-analogous species. Based on the climate classification of your site, you can find almost identical climates across the globe, and then, by researching plants in those areas, find all kinds of interesting species you didn’t know you could grow.
However, growing plant species that aren’t native to your bioregion can be working against the natural tendencies of your site. You can make things easier on yourself and only focus your attention on what’s proven to work. Here’s what I mean…
Based on the inspection of your local forest in step 1, you’ll have an idea what species grow best in your area. These native and naturalized species are part of the already functioning and thriving ecosystem. All you need to do now is imitate that ecosystem on your site but use the more productive variants of these species.
Be sure to include these plants in your master list!
- Create guilds from your master list of plants
This is the very core of forest gardening. You want to create effective polycultures that share the resources and mutually support themselves. But how can you choose the right combination of plants? Here are just a few of the recommendations from Edible Forest Gardens.
You can do your guild build based on what you know or guess about plants, their species niche, and how they interact. In this way you can also create novel plant combinations through your experiments.
You can create a random mixture. A lot of people will just select a group of interesting plants and throw them together and see what happens. However, while it is sporadically ok to do so to spice things up, if the whole garden is like this, it will probably result in failure.
You can also try to emulate a habitat and use a model ecosystem as a template for design, incorporating species directly from the model habitat. This model habitat could be your local forest.
This is, of course, the easiest way to win. Here, you’re not inventing anything new, rather you’re copying what already works in nature. All you need to do is observe how the native plants grow in relation to one another and imitate that in your food forest.
If you’re not sure where to start, Download my free PDF with 5 Temperate Climate Guild examples you can recreate in your food forest.- Do a patch design – define your planting areas and plant spacing
Design your patches one by one, a patch could be a row, a contour or a grouping of plants in one area. However you decide to tackle the patch design, the most important aspect is deciding on the planting distance.
If you followed the design process and started your design by choosing the overall layout, you should already have an idea on the distances between the patches. Now let’s look at how to space the plants within the patch itself.
The easiest way to determine this spacing is by using the ‘crown touching rule’ and placing the individual trees a crown’s diameter apart. For this, you’ll have to find the information on the size of the individual mature trees’ crowns and use that as your guide.
Usually, the biggest mistake people make is overly-dense spacing where tree crowns are interlocking. This is OK when you’re planting a screen or hedge, but otherwise this will put stress on the plants and limit their growth.
In his book, Creating Forest Gardens, Martin Crawford recommends adding 30-50% more distance around each woody plant if you want more sunlight for understory plants. Also, you want to plant wider than ‘crown touching’ distance when soil conditions are limiting, in order to reduce competition between plants for limited resources.
4. Prepare the site
- Adapt your site if necessary
If you’re not starting from scratch with a bare field, the chances are there is something already growing there and you’ll need to adapt your site accordingly. This means clearing unwanted vegetation and leaving whatever you find useful. You can use any available biomass for mulch, compost, wood chips, firewood, mushroom inoculation….
For example, I will be leaving some naturalised plums and using a wood chipper to create some mulch from the trees and branches I don’t need, plus I’ll be using the wood for my hugel beds.
- Shape the earth to your advantage and optimize water retention
After you cleared the vegetation, you can start the earthworks for optimizing water retention on your site. This involves shaping the earth in a way that promotes water infiltration, distribution and storage.
Effectively, what you want is to do first is to slow, spread, and sink the water as it falls from the sky into the soil. The soil is the cheapest place to store water, and it’s the largest storage resource available on most sites. To do this, you can use two very famous techniques: keyline plowing/subsoiling and swales on the contour.
Following this, you want to have a way to capture as much water as reasonably possible and store it for dry periods. You can do this by digging ponds that will store the water and diversion drains that will collect and distribute that water when necessary across the site.
Whether you’re going to use one or both of these strategies depends on your site conditions: climate, terrain, soil, your context…I think one question on everybody’s mind is whether or not to swale it. For assistance, I would encourage you to look at this cheat sheet by Ben Falk if you’re in two minds about doing swales on your site.
- Set up infrastructure and put down irrigation, pathways and fencing
Following the earthworks, begin with the most difficult, important or permanent elements of the food forest.
Start by putting down pathways throughout your site, they are important as they define your different growing zones and protect them from the compaction. You want to minimize compaction in the areas you’ll be planting soon after and having clearly defined pathways keeps you on track (pun intended).
A well built pathway can also act as a hard surface runoff and collect the water that you can then connect with your other water elements you built in the previous step. Integrate rather than segregate!
Fencing the site is the next important thing. I can’t recommend building a main perimeter fence and enclosing your whole site strongly enough. Importantly, there are security issues and protecting from theft or trespassing and, moreover, I hear a lot of people regretting not doing this type of a fence first in order to ensure that their trees get protection from wildlife.
You don’t want those deer, coyotes, kangaroos, sheep or rabbits nibbling on your seedlings.
Finally, if necessary, put down irrigation and install water tanks – you simply can’t overdo it when it comes to making sure there is enough water during the months of drought.
- Build up your soil and improve the soil structure
It will come as a surprise to many, but improving the soil first rather that planting straight away saves time. This is because waiting for a year and simply conditioning the soil during that time and then planting in year two yields better results than planting immediately.
For improving the soil in this transitional period prior to planting, you can add soil amendments such as compost, compost tea, fertilizers or use cover crops, all with the goal of improving the fertility of the soil so that your plants get a decent head start. However, there is a caveat to this soil building…
Ideally, food forest soils contain a fungal presence ten times higher than that of bacteria. So you should aim to recreate those conditions.
In the beginning, you’ll be probably starting out from a bare field and you want to continually nudge your soil towards fungi domination. You can do this by inoculating the soil with fungi or cover cropping with green manure crops – Michael from the Holistic Orchard recommends red or crimson clover in preference as these two nitrogen-fixing legumes have a stronger affinity for mycorrhizal fungi. Finally, you want to spread woody mulch everywhere to feed the fungi in the soil.
For more info about improving the soil in your food forest read my Definitive Guide to Building Deep Rich Soils by Imitating Nature.
5. Source the plants and start planting
- Start a nursery or buy plants – your choice
Now that all the preparation work is complete, you can start planting. You basically have two options depending on the budget: grow your own trees (and shrubs of course) or acquire young ones.
If you’re on a tight budget, I would suggest growing most of your trees yourself. Actually, regardless of your budget, you shouldn’t stray from learning how to grow your own trees. This is one of the most important skills you can have as a permaculturist, and the chances are that sometimes the type of the trees you’ll need won’t be even available to buy.
Growing your own trees is like printing your own money. It’s actually quite simple and you don’t even need that much space. You can read all about it in my post on ‘How to set up a Small Permaculture Nursery and Grow 1000s of Trees by yourself’ and start your nursery today.
Another option is to buy young trees from nurseries. However, the trees will be more expensive, already grafted and probably already one or two years old. If you have the budget and don’t have time to grow your own trees or to wait, this is the way to get an instant orchard without the hassle of setting up a nursery.
- Phase your project and plant in stages
Planting a food forest can take place in stages or all at once. However, being honest, you’re unlikely to do it all in one go. More realistically, you’ll be planting your food forest in stages and over the course of several years. As long as you already know the outline of your rows or patches, you’ll know where to plant. After this, it’s only a matter of slowly filling the space with plants.
The establishment in stages normally involves planting hedges and/or canopy trees in the first year or two, then later shrubs and a ground cover layer. Here is a recommendation from Martin Crawford’s Creating a forest Garden book:
Windbreak/hedges and edges>>Canopy layer including N fixers>>Shrub layer including N fixers>>Perennial/ground cover layer>>annuals, biennial and climbers.
Depending on your layout, you can also add annual veggie production to this. At least in the beginning, there will be a lot of light and space available for you to use to grow your beyond organic vegetables.
- Finally, put your plants in the ground
I won’t go into detail on how you should be planting, for step-by-step details watch the Permaculture Orchard documentary where Stephan explains how to plant a tree in great details.
In short, just make sure you dig a large enough planting hole, spread the roots and sprinkle in mycorrhizal inoculant or dip the roots in a mycorrhizal root dip if required, then refill the hole with the soil you took out.
In almost every instance, you should use sheet mulch after planting to control the weeds. Unless the soil is very poor, do not add extra materials to it. Most importantly, don’t forget to mulch with the right type of material, since you’ll be growing woody perennials you’ll have to feed the soil biology (fungi) with woody mulch.
Conclusion
Creating a food forest is a multi-stage process and you don’t have to go through all the steps outlined above in the exact order. The idea behind this post is to give you a framework for planning and planting your first trees. Aftercare and maintenance will be a subject for another post.
There are four main books I would recommend if you’re serious about starting a food forest: Edible Forest Gardens, Creating a Forest Garden, Holistic Orchard and Teaming with Microbes – there is plenty of invaluable advice to be found in each.
So, where are you in the whole process of creating a food forest?
Let me know in the comments section below!
https://permacultureapprentice.com/creating-a-food-forest-step-by-step-guide/
On – 05 May, 2017 By papprentice
-

Backyard Garden ‘Cash Crops’: Make Money with a Home Garden
 There’s not a thing wrong with growing beautiful flowers and donating them to senior citizens on your block. But for people who want to make a profit from a backyard garden, it’s time to ditch the roses and start making some real money.
The fact is that just about anyone with an average-sized yard can create a profitable garden. Depending on what the “crops” are, the financial yield can range from small change to a significant amount of money. Much depends on the quality of the soil, the local climate, and the regional market for various herbs and “cash-crop” plants. Very little depends on the innate talent of the gardener because the basic skills are easy to pick up.
How to Begin with a Simple Plot or a Greenhouse
Start out small and slowly add to your garden’s size and sophistication, experts suggest. The National Gardening Association points out that even a very small plot, measuring no more than 10 feet by 15 feet, can yield approximately $600 worth of produce in a single year. That’s after an investment of about $75 on seeds, water, plant food, etc.
Saving $525 on the annual grocery bill is nice, but how can gardeners bump that number into the thousands? Research has shown that the number-one motivating factor for starting a home garden is “saving money on groceries.” That means people want to know more about this valuable topic.
One key point that amateur gardeners need to remember is to plant the foods they enjoy eating. The more items in a garden that end up on your plate, the more money you’ll save in the long run.
After doing some research and then deciding exactly what to plant, note that a small greenhouse is also a great investment and can usually pay for itself in one year or less, especially if you build it yourself from scrap lumber and a few purchased supplies.
The Best “Cash Crops” for a Home Garden
So, what to grow? Besides opting for the foods you eat, perhaps there are a few items that sell briskly at the local farmer’s market. Buying seeds and starting some plants indoors is a smart way to begin. The National Gardening Association has a very helpful chart, here, about what the cost is to produce various levels of yield for common garden crops.
Depending where you live and how long winter lasts, it is possible to earn some serious money by growing “specialty crops,” things that are not common to the average household garden. What are the best cash crops for a 600-square foot backyard garden?
On an investment of less than $300, you can grow lavender, bonsai plants, gourmet mushrooms, garlic and specialty herbs. All have ready markets and are easy to grow. Gourmet garlic comes in four varieties: porcelain, purple-stripe, elephant and rocambole. Because garlic tolerates a variety of weather conditions, it is one of the highest profit crops for home gardeners.
Specialty crops can be sold at a farmer’s market or to local retailers and gourmet food stores. Lavender can be sold to local florists and boutiques that use the fresh plants to make all sorts of beauty products.
Bonsai plants and gourmet mushrooms are also an easy sell. Local florists often depend on nearby residents to supply them with fast-selling items like bonsai. As for gourmet mushrooms, they are perhaps the most profitable of all crops on this list. Sold fresh at farmer’s markets or in local stores, it is easy to build up a small network of buyers for your high-quality, home-grown shiitake or oyster mushrooms. Because they can be grown indoors and are thus “climate-proof,” mushrooms are a home garden favorite of entrepreneurs all over the U.S.
Money-making Medicinal Plants and Organics
All of the above-mentioned cash crops can be grown as organics to increase their prices at market, but remember to follow organic guidelines for pest control, watering, and plant food throughout the growing cycle. Organics bring much higher prices and some sellers at farmer’s markets specialize in organic produce. Making a business connection with a few organic sellers can boost your home garden’s profits significantly.
Medicinal plants and herbs are another high-profit category for home growers. Some of these items are a bit finicky but can be grown in a backyard garden. Currently, the most in-demand medicinal herbs are Chamomile, Echinacea, Feverfew, Lavender (see above), Marigold, Lemon Balm, and Basil.
Actually, there are more than a hundred medicinal herbs you can grow but the above seven are the most popular with most local health stores and other retail buyers. The main advantage of growing herbs and specialty crops like mushrooms and garlic is the tiny amount of space needed for a profitable yield.
Facts and Myths about Home Garden Businesses
Myths about home gardening abound, and unfortunately keep many people from giving this fun endeavor a try. Here are some of the most common myths, with their “debunking” facts immediately following:
“It’s too expensive.” A home garden can be started on less than $100 of seeds and supplies. Then, it pays for itself about five times over within the first year.
“It’s too much trouble and hard work.” You can devote as much time as you want to a profitable home garden, but the minimum is about four hours per week. That averages out to a tad more than a half hour per day, hardly a major time commitment. As for the “hard work,” a portable, low-slung chair or thick, washable cushion and good posture make the job easy and fun. No need for backbreaking labor with a home garden.
“Home gardening requires lots of technical knowledge.” If you can read and understand simple instructions, there are literally thousands of gardening manuals and books for beginners online and off. Most are either free or very low cost. Building a backyard garden is not corporate farm management or brain surgery. It’s simple to learn, and very rewarding.
“It’s hard to make a profit with a backyard plot.” In reality, it’s hard not to make a profit with a small garden. Even if you consume everything you grow, your grocery bill will be lower and you will probably be healthier from eating all that unprocessed, home-grown produce.
Let the Learning, Earning (and Fun) Begin!
With no more than a backyard and desire to make a few extra bucks, anybody can start a profitable home-garden business. Depending upon how much time and effort you want to put into the endeavor, the activity can become a fun hobby or a full-blown avocation.
Many retired people spend time in their gardens every day. Being outdoors and staying active is also a smart way to maintain overall good health. If approached with realistic expectations and the right amount of planning, home gardening for profit can be a healthy and exciting way to earn extra money.
https://www.selfrely.com/backyard-garden-cash-crops-make-money-with-a-home-garden/
On – 03 Feb, 2017 By Lester Beltran
-

Free Ranging: The Pros & Cons
When I brought my first animals home to the farm there was no question in my mind as to whether they would live the life of free range animals. I wanted my animals to be just as free as I was, free to explore, roam, hunt for food, and live their own life while coexisting with the humans.
The pros of free-ranging outweigh the cons. If you can’t be home to free range the feather and fur babies full-time you can do partial free ranging.
-

Tiny Oregon ‘ghost town’ may be reborn as a permaculture school

Buyers of the town of Tiller, Oregon have plans to turn it into a campus with a focus on teaching permaculture. (Photo: Landleader.com)
Tiller, Oregon, a small town built at the turn of the 20th century on the fortunes of the timber industry, may soon become a beacon for a more sustainable future.
Located in the sprawling Umpqua National Forest, Tiller went from virtual unknown to international star earlier this spring after it was listed for $3.85 million. Included in the sale is 257 acres with 28 tax lots, multiple domestic and agricultural community water rights, six houses, the shuttered local market, a gas station, and associated infrastructure like sidewalks and fire hydrants. There’s also nearly a mile of scenic waterfront along the South Umpqua River and Elk Creek. The local elementary school, which closed in 2014, is available separately for $350,000.
You can see a promotional video detailing both the town’s history and sale below.
“The new owners of this extraordinary opportunity will find the ability to structure a wide variety of different zonings, tax lots, structures and natural resources into a prosperous future along the natural flowing South Umpqua River,” the narrator says over drone footage of the town’s natural beauty. “The region has a vast variety of fish and wildlife abound. And recreational options rivaled by none.”
According to the AP, Tiller’s decline occurred roughly three decades ago in the wake of environmental regulations that effectively limited timber production in the forests surrounding the town. As jobs dried up and families moved away, one local resident began buying up properties. When that individual passed away several years ago, much of the town was tied up with the deceased’s estate.
“Between the dying economy and the dying owners, Tiller became a new opportunity that had never been available before,” Richard Caswell, executor of the estate, told the AP. “I started getting inquiries from all over the world, essentially, ‘What was it? And what could you do with it?’ It’s the buyer and their imagination that’s going to determine what Tiller can become.”
Deciding the next chapter for Tiller
 The shuttered Tiller Market was once a hub for the more than 250 residents who lived in the region. (Photo: Landleader.com)
Immediately after the listing for the town went viral, realty agent Garrett Zoller says interest began pouring in. Speaking with Oregon Live, he said the pitches included everything from developing the site into a senior care facility to a fishing retreat and even a hemp production hub.
The first buyers to get the town under contract, however, was a couple from Oregon in the nearby town of Ashland. Zoller won’t yet say who they are, hinting at a larger unveiling sometime in the next few weeks, but he did reveal that they are involved in an industry and have “grand plans” for the site. They also intend to turn the school into a campus with a focus on permaculture.
“He said the plan is to help people get back to the land in an area with a long growing season and productive soils,” Oregon Live reported, adding that the buyers have financial backing from California to make it a reality.
 Tiller’s natural beauty, long exploited for timber, may soon support a more sustainable industry. (Photo: Landleader.com)
A quick search of permaculture businesses in Ashland turned up a number of firms, including the nonprofit Southern Oregon Permaculture Institute. Could this group possibly be planning a big expansion into Tiller?
Whatever entity steps forward to breathe new life into the town, Zoller says the forces behind it are intent on making the transition as welcoming to nearby residents as possible.
“They realize they have one shot at making a first good impression,” he added to Oregon Live. “I think people will be happy. There will not be dynamic change. No NASCAR raceway.”
Related topics:Education,Sustainable GardeningOn – 19 Aug, 2017 By Michael d’Estries
-

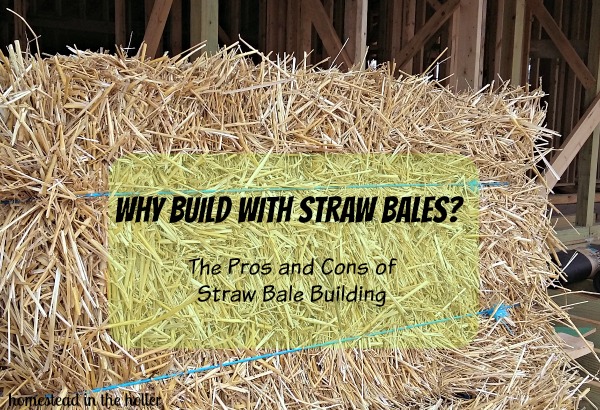
Why Build With Straw Bales?
Why Build With Straw Bales?
TravisStraw Bale Building
If you are a regular reader, you already know we are in the middle of building a straw bale insulated home. I often meet people who assume I am therefore some sort of straw bale evangelist. This always strikes me as odd because I can’t really understand why I would want to push my building choices on someone else. As an adult, I feel perfectly able to consider the options and weigh which ones fit our desires and needs. Therefore, I feel most adults are likewise capable of the same.
So, if you have to ask why you would build a straw bale home, please don’t build one! If you think straw bale homes mean rodents, rotting straw, fire or other similar disasters, please insulate with something that you are comfortable with. Rest assured that we don’t care and certainly won’t judge your choice harshly!
That said, if you *are* interested in straw bale, let’s consider why you might do it:
-
Chemicals – some people are extremely sensitive to chemicals that are often used in common building materials. Think of the glues in plywood or OSB. Those are often harmful whether you are sensitive or not. Think of some of the flame retardants used in things like insulation. If you choose the right bales, you can be assured that at least those aren’t introducing more chemical outgassing into your dwelling.
-
Insulation – straw bales provide an insulation value of somewhere between R40 and R50, depending on the bales and installation. This would be an expensive level to reach with typical pink fiberglass insulation.
-
Difficulty – straw bales are relatively easy to install, leading to a good opportunity to do it yourself. Keep in mind that it is very labor intensive though, so if you don’t have help or lots of time, it could end up being the wrong choice.
-
Fire – straw bales properly installed in a coating of plaster have been shown to be extremely fire resistant. In fact, in lab testing, it was found to be far superior to standard wood frame construction.
-
Rodents/Pests – straw bales turn out to be relatively pest resistant, owing to two details of a typical installation. First, both sides are covered in wire and plaster, making a solid surface (actually 1+ inches of rock in the case of lime plaster) that prevents entry of any rodents. Second, the bales are installed very, very tightly. This leads to very little space within the wall for a rodent to even move about. In fact, the stud cavities in traditional wood-frame construction leaves much more open space for a rodent.
-
Embodied energy – this isn’t something that you often hear discussed, but consider the energy used in creating the pink fiberglass insulation in a typical wall. Quite a bit of energy is required to make, package, and transport such a product. Compare that to straw that is typically locally sourced and is grown using solar energy. There is the energy used for planting, harvesting, etc, but it is still much lower than the typical insulation product at a building center.
-
Mildew/mold/rot/etc – mold is a topic that often comes up with straw building discussions. Yes, if the wall cavity is continually kept damp, mold will be present. However, this isn’t unique to straw building by any means. Consider what moisture in a normal wood-framed wall does. It isn’t pleasant either. So, yes, mold is absolutely an issue, but that is true of any building form. Just be sure to consider flashing, overhangs, and plaster types and thicknesses. All these things work together to prevent mold/moisture issues.
-
Big Bad Wolf – this just has to be addressed because it is almost always the first response when people hear about a straw bale project. Apparently the three little pigs story has really ruined straw’s image as a building material! There are numerous techniques for building straw buildings, so all can’t be covered here. Instead, let’s address the form we have chosen for our project. First, the actual support comes from good old wood. We use a form of post and beam framing, which provides larger openings than standard stud framing to stuff the straw into. So, even without the straw, the building is structurally sound. Second, the bales are pressure fit into the walls, making them quite secure. Third, the bales are then covered with welded wire, tying everything together and providing good sheer strength. At this point, there really is no great worry of “blowing the house down”. Finally, three coats of plaster are applied inside and out. We have chosen lime plaster, so the end result is over 1 inch of limestone coating over the bales. Suddenly, wood framing and vinyl siding is sounding rather inadequate.

All that said, straw bale building is no panacea. It has drawbacks just like any other system:
-
Space – The walls take a lot of space as a typical bale is 18″ wide. That level of insulation takes space! Keep that in mind when designing rooms.
-
Labor – Straw bales take a lot of labor to handle. They are bulky and need to be stacked and stacked again during the process. Installing them means notching and re-tying. Plastering is hard work and usually 3 coats are required.
-
Mess – Straw bales are messy to work with. When they are handled, they leave a big mess. When they are notched and re-tied, they leave a bigger mess still.
-
Unusual – Straw bale construction is not very common, so finding skilled labor to help is unlikely. There is plenty of education available online and in books and videos, but it requires time to learn. Please do consume such material though as there are a few mistakes that can be made that could turn a project bad.
So, don’t look to me to push straw bale building on you. You need to choose what fits your needs. If you choose conventional wood framing and are content with that, wonderful! If you want something more unusual, great. Look at all the options — straw, cord wood, cob, etc. Above all, have fun and build something beautiful that makes you happy! Happy building!

http://www.homesteadintheholler.com/blog/why-build-with-straw-bales/
On – 27 May, 2017 By Travis
-
-

How Small Farms are Feeding the World
In the April 2017 issue of The Lancet: Planetary Health, researchers from the Commonwealth Scientific and Industrial Research Organization (CSIRO) in Australia report that small (defined here as up to about 50 acres) and medium-sized (defined here as about 50 to 250 acres) diversified farms currently produce more than half of the world’s micronutrient-rich foods (farms over 250 acres produce a larger proportion of sugar crops, oil crops, and cereal grains).

The team evaluated data concerning the production of 41 major crops, the nutrient contributions of those crops, and the size and diversity of farms producing them from around the world (the study summarizes results into 9 geographic regions).
Farm Size
You may be surprised to learn that large farms are not the biggest crop producers in North America – they are only the largest producers in South America (50%-80% of all crops produced) and in Australia and New Zealand (80%-90% of all crops produced). In North America, about 80%-90% of the production of most types of crops (vegetables, sugar crops, roots and tubers, pulses, oil crops, fruit, and cereal grains) is split about equally between medium-sized and large farms. Small farms produce the rest, leaning a bit more toward fruits, vegetables, and roots and tubers in North America.
In sub-Saharan Africa, Southeast Asia, South Asia, and China, the pattern is reversed, with small farms producing about 75% of all crops. In Europe, West Asia, North Africa, and Central America, all sizes of farms contribute more equally to the total.

Crop Diversity and Nutrition
The researchers found that in general, the smaller the farm, the greater the diversity of crops produced. Farms with higher diversity also tended to produce crops higher in micronutrients (large, non-diversified farms tended to produce more volume of fewer crops, and typically produce more crops that are higher in calories and lower in micronutrients than small farms do).
The Role of Organic Food
Organic farms tend to be smaller than conventional ones in the U.S. (according to the USDA’s 2012 Census of Agriculture, the average size of a farm in the U.S. was 434 acres, and the average size of an organic farm was 285 acres in 2008). Organic farms also tend to grow a wider range of crops, often those that are high in micronutrients. Supporting organic farmers by buying organic food and beverages helps keep the existing farms sustainable.
Organic management techniques are often highly appropriate technology for small farms and farms with more labor equity than cash to spend on off-farm inputs, making organic farming knowledge a powerful tool to help small farmers around the world succeed and boost their yields.

Small Farms and the Future
The report goes on to stress that maintaining the existing small farms and adding new ones will be critical in meeting the world’s expanding food requirements going forward, especially in sub-Saharan Africa, Southeast Asia, South Asia, and China, where they account for such a sizable portion of current production.
Supporting the needs of small farmers with issues such as access to land and spreading appropriate knowledge and small-scale technology must be an important part of any effort designed to support food security and sustainability. According to the World Bank, land issues are critical as almost three-quarters of the world’s population lacks registered legal titles to the land they use – a huge problem for farmers in developing countries. In developed countries, the cost of buying, owning, or leasing land for farming is more of a problem.
Consumers can help keep small farms and organic producers financially sustainable by shopping locally as much as possible and by choosing organic as much as possible. It is also important to support the work of groups that are helping farmers get access to land and the education and tools they need to run financially sustainable operations. Make sure your elected officials understand that we need small and organic farmers!
http://blog.naturespath.com/how-small-farms-are-feeding-the-world
On – 09 Aug, 2017 By Jean Nick
-

How Small Farms are Feeding the World
In the April 2017 issue of The Lancet: Planetary Health, researchers from the Commonwealth Scientific and Industrial Research Organization (CSIRO) in Australia report that small (defined here as up to about 50 acres) and medium-sized (defined here as about 50 to 250 acres) diversified farms currently produce more than half of the world’s micronutrient-rich foods (farms over 250 acres produce a larger proportion of sugar crops, oil crops, and cereal grains).
The team evaluated data concerning the production of 41 major crops, the nutrient contributions of those crops, and the size and diversity of farms producing them from around the world (the study summarizes results into 9 geographic regions).
Farm Size
You may be surprised to learn that large farms are not the biggest crop producers in North America – they are only the largest producers in South America (50%-80% of all crops produced) and in Australia and New Zealand (80%-90% of all crops produced). In North America, about 80%-90% of the production of most types of crops (vegetables, sugar crops, roots and tubers, pulses, oil crops, fruit, and cereal grains) is split about equally between medium-sized and large farms. Small farms produce the rest, leaning a bit more toward fruits, vegetables, and roots and tubers in North America.
In sub-Saharan Africa, Southeast Asia, South Asia, and China, the pattern is reversed, with small farms producing about 75% of all crops. In Europe, West Asia, North Africa, and Central America, all sizes of farms contribute more equally to the total.
Crop Diversity and Nutrition
The researchers found that in general, the smaller the farm, the greater the diversity of crops produced. Farms with higher diversity also tended to produce crops higher in micronutrients (large, non-diversified farms tended to produce more volume of fewer crops, and typically produce more crops that are higher in calories and lower in micronutrients than small farms do).
The Role of Organic Food
Organic farms tend to be smaller than conventional ones in the U.S. (according to the USDA’s 2012 Census of Agriculture, the average size of a farm in the U.S. was 434 acres, and the average size of an organic farm was 285 acres in 2008). Organic farms also tend to grow a wider range of crops, often those that are high in micronutrients. Supporting organic farmers by buying organic food and beverages helps keep the existing farms sustainable.
Organic management techniques are often highly appropriate technology for small farms and farms with more labor equity than cash to spend on off-farm inputs, making organic farming knowledge a powerful tool to help small farmers around the world succeed and boost their yields.
Small Farms and the Future
The report goes on to stress that maintaining the existing small farms and adding new ones will be critical in meeting the world’s expanding food requirements going forward, especially in sub-Saharan Africa, Southeast Asia, South Asia, and China, where they account for such a sizable portion of current production.
Supporting the needs of small farmers with issues such as access to land and spreading appropriate knowledge and small-scale technology must be an important part of any effort designed to support food security and sustainability. According to the World Bank, land issues are critical as almost three-quarters of the world’s population lacks registered legal titles to the land they use – a huge problem for farmers in developing countries. In developed countries, the cost of buying, owning, or leasing land for farming is more of a problem.
Consumers can help keep small farms and organic producers financially sustainable by shopping locally as much as possible and by choosing organic as much as possible. It is also important to support the work of groups that are helping farmers get access to land and the education and tools they need to run financially sustainable operations. Make sure your elected officials understand that we need small and organic farmers!
http://blog.naturespath.com/how-small-farms-are-feeding-the-world
On – 09 Aug, 2017 By Jean Nick
-

Living Fences – How To Make A Living Fence For Your Garden…Step by Step DIY Projects
Living Fences – How To Make A Living Fence For Your Garden…Step by Step DIY Projects

Fences on your farm or homestead define property boundaries and separate production zones (garden, pasture, orchard). They provide privacy and security from animal (and perhaps human) intruders. They confine livestock and protect them from predators. They guard crop areas from wild raiders (such as deer) as well as animal allies (such as sheep and goats).
Your first choice for such a multifunctional homestead necessity may be manufactured fencing: woven or electric wire, welded livestock panels, boards on pressure-treated posts, or even virgin or recycled plastic. As the energy and environmental crises deepen, however, such options are becoming less appealing and more expensive.
The chemical preservatives, paints, and galvanizing agents used in fence manufacturing and maintenance may have toxic spillover effects in the environment. Furthermore, most manufactured fencing is a “one for one” solution. A woven wire fence meant to contain livestock, for example, provides that service and nothing more. The key to a more self-sufficient homestead that imitates natural systems is finding solutions that simultaneously solve more than one problem, provide more than one service and support more than one project. Enter living fences.

The Many Benefits of Living Fences
A living fence is a permanent hedge tight enough and tough enough to serve almost any of the functions of a manufactured fence, but it offers agricultural and biological services a manufactured fence cannot. For instance, it provides “edge habitat” that supports ecological diversity. As more species (insects, spiders, toads, snakes, birds and mammals) find food and refuge in this habitat, natural balances emerge, yielding, for example, a reduction of rodents and crop-damaging insect populations.
ARTICLE–Hay Bale Gardening: Effortless Food Production with No Weeds, No Fertilizer & Less Watering (VIDEO)
Depending on the plant or tree species you choose, living fences can provide food and medicine or fodder for your livestock. Your animals will also enjoy the shade of a dense hedge. The foliage of some hedge plants, such as elder and Chinese chestnut, contains more protein than the quintessential protein forage crop, alfalfa. Willow and honey locust also make good fodder. I’ve been experimenting with Siberian pea shrub recently, as the peas can be harvested to feed poultry.
Leguminous species included in the fence, such as black locust and pea shrub,fix nitrogen in the soil throughout the root zone, and you can harvest some of that nitrogen for garden mulches and compost in the form of leafy prunings. A living fence increases soil humus as its leaf litter and root hairs (which the plants shed to balance loss of top growth to pruning or browsing) break down.
Living fences are windbreaks, which reduce soil drying, wind erosion, and stress on livestock or crop plants, thus increasing yields. Hedges sited along contours can reduce rainfall erosion on slopes.
Living fences can last far longer than manufactured ones — for as long as the natural life span of the species used, which may be hundreds of years. Many species can be “coppiced,” meaning they will send up abundant new shoots after the main trunk has been cut. A living fence of a coppiced species readily renews itself following selective cutting for wood fuel and other uses.
The Lost Ways…a true story about our grandparents days!
Turn Back the Clock 150 Years: The Lost Ways is an amazing program created to find out how our grand parents has survived in their crisis and they make us to learn the little secrets that helped them to survive in spite of almost everyone else dying. Now this is your chance to be part of saving our ancestors’ lost ways. Just I hope that there are more people like you and me who deeply believe that the best way to survive the next major crisis to look back at how people did things 150 years ago…..Watch this wonderful video
⇓

Finally, a living fence, unlike a static manufactured fence, brings an ever-changing beauty to your landscape: flowers in spring, colorful fruit in summer, brilliant colors in fall and a complex, geometric structure in winter.

Living Fences in America
Though common in ornamental landscaping, living agricultural fences haven’t been used much in the United States, despite extensive use in countries that supplied Colonial America with most of its new settlers. George Washington tried to carry on the tradition at Mount Vernon because, like modern gardeners and orchardists, he was plagued by deer and other marauders. Washington, concerned by both the labor and the loss of forest involved in producing split-rail fencing, concluded that growing living fences was not only a good idea, but was a necessity.
According to Washington’s diary, the species he settled on as most suitable was “Honey locust; the seed of which not to be put more than Six Inches a part; that when they get to any size they may be so close, stubborn, and formidable, as to prevent an escalade [incursion by predators] … indeed I know of nothing that will so effectually, and at so small an expence, preserve what is within the Inclosure, as this plant.”

Osage Orange
Major living fence applications in the United States have utilized Osage orange trees (Maclura pomifera), also called hedge apple or horse apple. For an incredibly tough, enduring windbreak that’s a major player in a local ecology, probably nothing surpasses Osage orange.
It was planted extensively in the central and eastern areas of the country in the 1800s (before the invention of barbed wire), especially to fence the rapidly colonized prairies. After the Dust Bowl in the 1930s, thousands of miles of Osage orange were grown as shelterbelts to prevent wind erosion.
Easily propagated from seeds, cuttings, or sprouts from the roots, Osage orange is tolerant of a wide range of soils, resistant to drought, long-lived, and affected little by insects or disease. Planted at a spacing of 1 foot, in four years it makes a fence that is “horse-high, bull-strong, and hog-tight.”
The sharp, stout thorns on Osage orange growth deter deer and livestock. A couple of heavy prunings a year can keep an Osage hedge 4 feet high by 2 feet wide. Without hard pruning, however, it will rapidly grow much taller.
Because Osage orange coppices vigorously, farmers can clear-cut sections of fence on a 10- to 16- year cycle for fence posts (about 4,000 per mile) that are immune to termites and are the most resistant to decay of any North American tree species. Osage fence posts have been known to stand in the soil for more than 50 years without rotting. The hard, strong wood was previously used to make hubs and rims of wagon wheels.

Establishing Living Fences
Homesteaders typically create living fences by planting appropriate shrub or tree species — started nursery plants, stem, or root cuttings or seeds — at close spacing. As they mature, the saplings are pruned tightly to force thick, bushy growth and form an impenetrable hedge.
How to build a Solar Panel System -Smart Power4all ! Learn how to produce off-grid power-How to Slash Your Power Bill by up to75% (or more) in less than 30 days – Guaranteed! Video Below

Another fascinating option is to join the individual plants by “inosculation.” Inosculated trees or shrubs are planted 4 to 8 inches apart. As they grow, crossing branches are tied, and they then grow together into natural grafts. The result is a closely meshed barrier that becomes stronger and more resistant each year.

Multifunctional Options
A living fence that will be exposed to deer or goats needs to offer deterrence to keep the animals in or out, whichever the case may be. Hawthorns are small trees with stout thorns that make a good defense system. They produce berries that are edible (by wild birds and people) and that can be used medicinally. The wood makes good fuel and tool handles.
Other thorny species that could be used to make living fences are pyracanthas, jujube, hollies, black locust (also fixes nitrogen), honey locust (which has high-protein seeds and pods for livestock and people), prickly ash, and rugosa rose (which has vitamin C-rich fruits, or “hips”).
Of course, your choice of species depends on your climate and the purposes for which you want to use the fence. A couple of widely adaptable species illustrate the multifunctional possibilities.
Jujube (Ziziphus jujuba), hardy in Zones 6 to 9, fruits precociously, and grows quickly even in poor soil and drought. A young tree I planted two years ago (northern Virginia, Zone 6b) is now covered with sweet, pleasant-tasting fruit. The fruits, leaves, seeds, and roots have been used in various Asian medical traditions, and the leaves make excellent livestock fodder. The dense wood makes fairly good fuel, charcoal, and agricultural implements.
Hedges of tagasaste (Chamaecytisus palmensis), which remains in leaf year-round, have been used extensively as windbreaks and shelterbelts in drier regions, and in Australia, they’ve been used as green firebreaks (used to stop the spread of fire).
Would you like to see a garden that needs no watering, no digging, no fertilizing, no weeding and produces fresh, organic food on auto-pilot, year after year? One that can yield up to 8 times more produce than traditional gardens, to feed you and your family in times of crisis with some of the healthiest, tastiest, most nutritious food you could possibly eat… and it can fit right in your back yard.Watch this video below!

A deep-rooted nitrogen-fixer, tagasaste grows rapidly even in poor soil and dry conditions. It makes a hedge that recovers quickly from frequent cutting and browsing. Many livestock species, including ruminants, pigs, and poultry, relish tagasaste’s foliage, which is 20 to 27 percent protein. An early bloomer, it’s excellent forage for honeybees. It coppices readily, and its wood makes good fuel.
If you want to try an inosculated fence, a wide range of tree, shrub, and vine species are good candidates: elm, a number of the oaks, olive, dogwood, beech, hornbeam, peach, almond, hazel (filbert), a number of the willows, sycamore, grape and wisteria. Trees with pliable branches are especially suitable, with apple, hawthorn, linden, and pear among the best.
ARTICLE–2017 Finale to Hay Bale Gardening; and Thoughts on Late Summer Gardening
You may certainly mix different species in your living fences. You could set larger trees — fruit or nut trees, for example — at greater spacing than a tightly planted hedge, and then fill the gaps with lowergrowing species such as rugosa rose or berry brambles, which would produce harvestable food and thorns for deterrence.
Disadvantages
Establishing living fences can be labor-intensive — think of planting 450 seeds or cuttings per 100-yard stretch of fence. Before the fence becomes well-established, you’ll need to take care to protect it from weeds, deer and domesticated browsers. Regular pruning of the mature fence may be necessary. Of course, if you use the prunings for mulches or livestock fodder, the chore is hardly lost effort, and in some cases, the pruning can be left to grazing livestock.
The Future of Agricultural Fencing
Since the death of George Washington’s dream of farm-grown fences, Americans exploiting an incredibly rich continent and rapid technological innovation have usually preferred manufactured fences to living ones. As we enter a new age of ecological limitations and awareness, however, we will hopefully rediscover the benefits of growing our fences. We may even discover a new land ethic through utilizing a farm resource that serves as a major part of the landscape and spans generations.

How to Start an Osage Orange Living Fence
1. Collect “oranges” in fall and store them in buckets exposed to freeze-thaw cycles — and even rain and snow — all winter.
2. During the same fall, plow a furrow where you want the hedge. Leave it open and let the soil mellow over winter.
3. The following spring, at about corn planting time, add a bit of water to the buckets and mash the fermented oranges into a thick slurry.
4. Dribble the slurry along the furrow.
5. Partially backfill the furrow with some soil to cover the seeds.
6. If it seems prudent (i.e., the tree seedlings are consistently crowded), thin the seedlings to about 18 inches.
7. In fall, lay the seedlings over in the trench, weaving them together. Backfill the trench, but don’t cover the entire stem of any tree.
8. The second year, the trees will sprout a mess of lateral branches that will grow straight up.
9. In the second fall, weave the new vertical stems together so you get a horizontal stem barrier about 2 feet from the ground.
10. In the third year, prune the hedge’s shoots to the final height you desire (4 to 5 feet works well for most purposes). Pruning the rapidly growing verticals several times over the summer will stimulate the lower buds and branches to produce more (and more vigorous) growth.

If you found this inspiring, be sure to bookmark this page, Pin it to Pinterest, and/or share it with your gardening friends on Facebook…
RECOMMENDED:
How did our grandparents lived almost 100 years?
What they ate, how they ‘fought’?
What kind of teas they drank?
The Lost Ways…a true story about our grandparents days!
They got things done or else we wouldn’t be here!Watch this video and you will find many interesting things!Watch this FREE Video

http://www.newsprepper.com/living-fences-make-living-fence-gardenstep-step-diy-projects/
On – 12 Feb, 2017 By Nsdrtopert
-

How to Plant Efficiently With Permaculture Principles
The term permaculture is being passed around fairly frequently in agricultural circles these days. To make a complex idea quite simple, when it comes to growing things, permaculture seeks to do it as efficiently and low-impact as possible. Where organic gardening could still be cultivating rows of single crops, permaculture looks for ways of mixing useful plants to create beneficial relationships that craftily replicate nature.
Think about it this way: When you see a natural forest, left to its own devices, the plant (and animal) life is healthy, abundant and diverse all own its own. There is no need for fertilizers, pesticides, herbicides or whatever else because the symbiotic relationships between the flora and fauna, including insects, regulate themselves such that the entire ecosystem maximizes its functionality.
With permaculture, often referred to as lazy farming, practitioners seek to mimic these natural systems. Rather than tilling up soil, planting in rows and weeding like mad, trees, vegetables, bushes, herbs, vines, tubers and even weeds can all (and have for millennia) grow well without so much human effort to keep them separated and meticulously groomed.
Good Guilds! What an Idea!
In fact, all of this grooming is contrary to how it’s supposed to happen, which is why gardening has the reputation of being such a laborious undertaking. It doesn’t have to be. With the right ideas and planning in place, several different species can be grouped in such a way that they not just work in harmony but actually fulfill each other’s needs. These groupings are called guilds.
The most commonly recognized guild for many is the trio used by Native Americans: corn, squash and beans. But, why did they do this? Well, these plants help each other out, in turn all yielding better crops. Corn provides a pole for the beans to grow on. The beans provide nitrogen to soil (the main ingredient in most fertilizers), with sugar from the corns’ roots to feed the nitrogen bacteria. The squash grows along earth, covering the ground so that weeds are minimized, insect-devouring animals have a place to hide and the soil stays moist, protected from the sun.
This trio, though, is quite a simple sample of the relationship complexities guilds can actually maintain. In fact, guilds can be composed of a dozen or more different perennial plants (those that don’t require annual cultivation), including multiple trees, an entire harvestable crop of vegetable bushes, greens, flowers, herbs, and roots. They can, in essence, be the beginning of an entire self-sustaining eco-system.
How to Make a Your Own Mega-Productive Permaculture Guild
Now, observing the fact that nature produces its own recurring plant groupings over time, with the slow unfolding of particular plants and animals gathering into wonderful little extended families, permaculturalists try to replicate similar relationships, only they do so with plants that are also useful to humans.
While coexisting corn, beans and squash is a great concept, full-on guilds have much more going on. Specifically, there are seven layers to think about. Forest guilds are centered around a large tree (overstory), often a fruit or nut tree, surrounded by smaller trees (understory) interspersed with shrubs, such as berries. Below that, plants get green and herbaceous, including culinary herbs and salad greens, and there will need to be something covering the soil (groundcover). Then, there are vines, climbing up things, and tubers growing under things.
Of course, this not just a random collection of plants but rather a careful puzzle-plotting of pieces that perform well together. Each guild can be composed a different components when growers understand what roles each plants are playing and what is needed in return.
Here’s a basic fruit tree guild, something that could actually be created in most suburban backyards:
- At the guild center is an apple tree.
- Around it, you’ll need nitrogen fixers, which can come in the form of ground cover, such as clover, maybe even some small legume trees, like pigeon pea, spaced around the edges. These fertilize everything, provide ground cover, mulch, and yield more food. Maybe throw a hazelnut tree in there.
- Inside the mix, incorporate pest-deterring plants, such as chives, basil and mint, and on the edges, use pest-distracting plants like dill and sunflowers.
- Next, it’s important to have a weed deterrent, which usually equates to a plant with big leaves, like squash or cucumber, or a guilder’s favorite: comfrey, which has deep taproots to pull nutrients up from the depths, medicinal uses, and nutrient dense leaves for mulching and fertilizing.
- Include vertical and underground elements, like wild yams, which are shade tolerant vines that supply edible tubers.
Different plants work better in different climates, so find out what’s growing in your area. Once it’s all going, the lazy farmer more or less just gets out of the way, visiting for a harvest here and there, occasionally chop and drop mulching the place to keep the organic matter thick and nurturing. But, in fact, the guild can take care of itself and you.
Lead Image Source: Renaud Camus/Flickr
http://www.onegreenplanet.org/lifestyle/how-to-plant-efficiently-with-permaculture-principles/
On – 15 Oct, 2016 By Jonathon Engels
-

All About Permaculture: Traditional Farming Mixed With Modern Tech to Create a Sustainable System
At a time when our meals consist of more chemicals than nutrients and our natural resources are fast depleting, I was fortunate to have stumbled upon an alternative way of living/ growing that could be a game-changer, namely, Permaculture.
While reading about feasible means to sustainable living, I chanced upon the Facebook page of Aranya Agricultural Alternatives. Here, the page spoke of something called ‘Permaculture’ and offered a 12-day Design Course (residential) in it.
Sometimes, impulse and curiosity make for a good match — I attended a brief talk about seed preservation and exchange that was conducted by the volunteers of Aranya and signed right up for the Permaculture Design Course (PDC).
The term ‘Permaculture’ was coined by Bill Mollison in 1978. The word is a contraction of permanent agriculture and also of permanent culture. The aim of Permaculture is to create systems that are ecologically sound, economically viable and self-sustaining. It is applicable in both rural and urban contexts and at any scale.
There are several definitions by several masters, but the premise of Permaculture is based on observation of natural systems, the wisdom found in traditional farming practices, entwined with modern technological and scientific know-how to create a conscious design and a cultivated ecology.
The PDC was conducted (mostly) by Narsanna Koppula, a pioneer of Permaculture in India.
New experiences, changed mindsets:
Narsanna believes the forest is the future and he spreads his message through his non-profit organization “Aranya Agricultural Alternatives”, presently operating in the rural and tribal areas of Telangana and Andhra Pradesh.
As someone with little to no idea about Permaculture, I was not sure what to expect out of the course. For the most part, I believed, it was going to be about sowing and planting practices. It was an eye-opener to know that Permaculture is like a multidisciplinary toolbox that includes agriculture, water harvesting, renewable energy, natural building, agroforestry, waste management, animal systems, appropriate technology, economics and community development.
The first part of PDC was conducted at Polam Farm near the Singur Reservoir, Andole village, Telangana.
Polam was barren land till about two years ago. Today, this 96 acre young farm is a bustling cesspool of activity and life. In 2015, Supriya and Anil Gaddam started developing the farm with the aim to make it a regenerative, eco-friendly and sustainable place. The impetus for the change happened after Supriya did her Permaculture Design Course as well.
Polam Farm is also the chosen venue for the upcoming (and first-ever in India) International Permaculture Convergence (November 27 to December 2, 2017).
Our day began early with morning walks that evolved into can-you-guess-what-that-seed/tree/plant-is sessions. Indigenous plants, nitrogen-fixing plants, medicinal herbs etc. were patiently pointed out to us. We learnt about soil and micro-systems, about wind breaks and live boundaries, about how fire could destroy and ground water be replenished. We learnt to observe… the number one rule of Permaculture.
Throughout our course, we were often reminded about how we humans are not superior to other life forms. In his book The one straw revolution, Japanese farmer and philosopher Masanobu Fukuoka stated that Permaculture is a philosophy of working with, rather than against nature.
Thus, Permaculture is based on the three ethics of –
Earth care – ensuring a healthy balance for all life systems to continue and multiply
People care – provision for people to access all necessary resources
Fair share – a means to provide for the first two principlesOur lecture sessions were interspersed with practicals. We dug trenches and percolation tanks, we planned for sectors and zones, we designed farms, and we planted several saplings. Sometimes, we did the same stuff several times over, until some of us started mumbling botanical names in our sleep. Pongamia pinnata is forever etched in my memory.
The second part of the course was conducted at Aranya Farms, Zaheerabad.
This farm is an oasis of green and an excellent example of rain-fed agriculture in the dry lands.
Aranya is the perfect location to learn about Indian Permaculture, water harvesting, plant identification and uses. It is a warm, welcoming, constantly evolving place with one motto: (almost) everything should come from the system and remain as long as possible within the system.
We were lucky to be there during sowing season and saw firsthand the ploughing and sowing of millets and green grams using traditional methods.
We learnt from a local medicine woman about the healing powers of different herbs and plants. We had sessions on water harvesting, mapping and urban gardening. We learnt about pollinators and their benefits and what to look for while buying a piece of land. We were taught about the importance of seed exchange and preservation. We visited local farms and saw how Permaculture could change their lives, and we had Permaculture change our lives even as we were learning about it.
Narsanna always told us, “label is not important, work is important. If you cannot work in a farm, find a way to become the bridge between a farmer and the end consumer. If you cannot do that, reduce your energy usage, plant a kitchen garden, spread awareness. Small changes will combine to form a system that will become self regulatory, self sustaining.”
I am doing just that by trying to make as many people familiar with the word ‘Permaculture’.
Learn about Permaculture:
Aranya Agricultural Alternatives conducts Introduction to Permaculture and Permaculture Design Courses throughout the year.
Find details about the International Permaculture Convergence here.
Like this story? Or have something to share?
Write to us: [email protected]
Connect with us on Facebook and Twitter.
NEW: Click here to get positive news on WhatsApp!http://www.thebetterindia.com/109993/permaculture-agriculture-self-sustainable-inclusive-tomorrow/
On – 03 Aug, 2017 By Uma Iyer
-

Toronto company wants to build tiny homes in backyards
Amidst Toronto’s condo boom, many groups are working on alternatives to building taller and taller building by finding creative solutions to the city’s housing crunch, including one called Tiny Toronto.
Founded by Sa’ad Ahmed, the company has been based out of Ryerson’s Design Fabrication Zone for the past year, and its team – which includes a group of students from the University of California at Berkley – is building a prototype of a 104 square foot unit that homeowners can use as a work or studio space.
Just like the U.K.’s Wondershed, Tiny Toronto’s digital strategist Frederico Neumann says the company hopes to help folks maximize space and reduce commute times with these small, pre-fabricated units.

A prototype of Tiny Toronto’s studio shed. Photo via Tiny Toronto.
Eventually, Tiny Toronto has plans to create garden suites, coach houses and even laneway houses in backyards across the city, but especially in more suburban areas.
Like groups such as Lanescape, Tiny Toronto wants to take advantage of oft-overlooked spaces (backyards and laneways) to help boost the housing supply in the city.
A report about the feasibility of introducing a local laneway housing initiative could materialize by early 2018, if city council approves a motion on it at this week’s meeting.
http://www.blogto.com/city/2017/07/toronto-company-wants-build-tiny-homes-backyards/
On – 19 Aug, 2017 By Amy Grief
-

This ready-made tiny home can be shipped to any destination
There are those who work for months or even years to create a beautiful tiny home out of nothing, but if you don’t have time for all that, now you can order your own ready-made Mobile Home. The compact structure, designed by Ruzanna Andressa Oganesya, is built on a moving platform and can be transported virtually anywhere. Those looking to go off grid hassle free can order it to be delivered to their desired location, ready to use as a serene mountain retreat or even as an urban home addition.

The Mobile Home is a prefab modular construction that is wide enough to fit on a freight-liner truck bed, making delivery ultra-convenient. The home is compact, approximately 150 square feet, and comes with all of the basic necessities, including a selection of furnishings. The compact house is a unique shape, almost completely covered in glass panels. Adding to its charm is a lovely open-air deck that leads into the interior.Related: Inhabitat spends the night in a Harvard-designed tiny cabin in the woods

On the interior, a mezzanine floorplan allows for optimal use of space. The bedroom hovers over the living space connected by an open staircase. Along with the glass walls, a skylight floods the home with natural light. Strategically located just over the bed, it allows residents to enjoy a bit of stargazing as they nod off to sleep.http://inhabitat.com/this-ready-made-tiny-home-can-be-shipped-to-any-destination/
On – 28 Mar, 2017 By Nicole Jewell
-

Manawatu homeowners off the grid after designing alternative solar energy system
Manawatu homeowners off the grid after designing alternative solar energy system
 Murray Wilson/ Fairfax NZ
Norbert Reiser built his own alternative solar energy system and installed it to power his house.
A Feilding homeowner has not paid a power bill in six years after building his very own alternative solar energy system.
Norbert and Renate Reiser have been self-sufficient since 2010, with the $15,000 system converting sunlight into power and servicing all their household appliances.
They also grow vegetables, fruit, chickens and sheep for food.
 Norbert Reiser
Norbert Reiser’s home-built controller system.
The couple moved from Bavaria in Germany in 2001 and it took Norbert eight years to reconfigure his home’s power circuit.
READ MORE:
* Power prices set to increase in South Canterbury
* Nextgen Energy committed to giving back to community
* Electricity Authority: Brand makes no difference to power supply
* Peer-to-peer platform allows households to use each other’s solar powerThe poor summer and abundance of liquid sunshine hasn’t hindered the couple’s lifestyle where they carry on with showers and use appliances as per usual.
 Murray Wilson/ Fairfax NZ
The $15,000 system converts sunlight into power and servicing all household appliances.
“It was one of my main reasons to come to New Zealand. Not only is it a lovely place, but I could live my dream to be self-sufficient with my own electric energy,” he said.
“The rising power consumption from a rising Kiwi population creates a lot of stress to our hydro generators and water resources.
“The price of petrol and energy will never go down any more, so being self-sufficient helps. From my perspective, this is the same price, on investment, than you would get on the grid.”
The unit converts energy from sunlight into electricity, which is then stored in two batteries under the house.
Ad Feedback googletag.cmd.push(function() { googletag.display(‘storybody’); });In winter, a wetback heats the hot water cylinder so power can be preserved. Water is circulated through pipes and is heated using heat from the fire.
Norbert Reiser, an industrial electrician by trade, said the couple cooked on a gas stove, with only the fridge and freezer running fulltime.
In case of an emergency, they have a back-up generator. In six years they’ve only had to use it three times.
“It’s for if the weather is really bad – if we have maybe five, six days of constant rain,” he said.
Resier intended to build a garage where he could install more solar panels. The aim was to rely less on two storage batteries.
“I can prove that it is possible to build a self-sufficient house off the grid,” he said.
“I built my own controller circuits and got the main parts from the electronic shops, like inverters, power meters for inlet and outlet.
“It is like being the conductor of an orchestra – all these components then get alternated to my specific needs.”
Living off solar energy required people to be on their toes and thinking all the time with an understanding of how to use energy wisely, he said.
– Stuff
On – 28 Feb, 2017 By KILMISTER
-

A Secret Method for Raising Animals in the Winter
Winter can be extremely difficult on your animals, especially for those homesteaders who live in the northern parts of the country. With temperatures dropping down into the single digits or even lower, not many animals are going to want to lay down on the cold ground in order to sleep. Therefore having an alternative to sleeping on the ground would be invaluable to any homesteader.
This article was written, posted and shared with all of the readers at a website called Simple Living Country Gal. The author of this article came up with great idea that anyone who raises livestock and lives in any part of the country that gets really cold in the winter time. The method described in the article does not require a whole lot effort or cost of extra materials.
Benefits of reading the article A Secret Method for Raising Animals in the Winter
Discover a safe, easy to do way to provide your livestock with a warm, cozy place to sleep in the winter.
The method described in the article is really easy to follow and can be used with any species of livestock.
You will find that while it does lead to extra work in spring when it comes times to cleanup, but there is an extra bonus; the lower layers make a great soil conditioner.Click here to read about:
http://simplelivingcountrygal.com/the-deep-litter-method/
https://thehomesteadsurvival.com/secret-method-raising-animals-winter/
-

‘You started a quiet revolution’: Tributes flow for permaculture ‘father’ Bill Mollison
Tributes are flowing from around the world for the Tasmanian man who co-founded the global permaculture movement.
Bruce Charles “Bill” Mollison — known as the “father of permaculture” — died on Saturday in Hobart, aged 88.
His system advocated agricultural ecosystems that were sustainable and self-sufficient.
Mr Mollison rose to prominence after publishing Permaculture One with David Holmgren in 1974.
The book advocated a system “working with, rather than against nature” when producing food, and favoured cultivating species suited for local conditions.
He founded the Permaculture Institute in 1978, his ideas influencing hundreds of thousands students worldwide.
Well-known horticulturalist and former ABC Gardening Australia host Peter Cundall described permaculture as “an all-encompassing method of actually living without in anyway disrupting the environment”.
“It was the way of the future, and this is why it became so exciting,” he said.
“The greatest contribution Bill made was as an outstanding marketer and a brilliant public speaker.
“So he not only toured different parts of Australia, but then went overseas and went to Africa, India and other places.”
Mr Cundall said the biologist helped grow Tasmania’s reputation as the birthplace of the environmental movement.
“Tasmania is in many ways unique because it started this whole business of trying to live within our environment without destroying it,” he said.
Mollison unlike any other academic: co-author
Mr Holmgren lived and worked with Mr Mollison as they were writing Permaculture One.
He told 936 ABC Hobart Mr Mollison was unlike any other academic at the University of Tasmania, and it was his “ecological thinking” that struck the young student.
Mr Holmgren said there was a lot of interest in what the pair were doing in the late 1970s.
“It was also a time with a huge interest in what we would call sustainability today,” he said.
“There were six mainstream publishers who approached a rambunctious Tasmanian academic and a completely unknown graduate student wanting to publish Permaculture One in 1977.
“Bill was actually really the father of the permaculture movement because of his genius in setting up the teaching system that he described and it all being outside academia.”
Mr Holmgren said he would be remembering Mollison at the Australasian Permaculture Convergence in Perth in next week.
“It will be a huge point of reflection and a celebration of his contribution,” he said.
‘You started a quiet revolution’
Social media has been flooded with tributes, and a page “In Memory of Bill Mollison” has been created on Facebook.
“May his words and teachings of permaculture continue to spread like chickweed in our gardens,” read a post on the Facebook page Women Who Farm.
“Thank you Bill for providing humanity with an education that no other leader has been able to achieve. RIP,” Glenn Shannon Kett wrote.
“You started a quiet revolution. You have sown the seeds of change, and you will live in the bounties of nature, in every flower, in every tree, in the soil and the water, and in every hand that nurtures nature,” wrote Vani Bahl, a Facebook user from California.
The author won numerous awards for his work and was also the first foreigner invited and admitted to the Russian Academy of Agricultural Sciences.
Mr Mollison was born in Stanley in 1928 in Tasmania’s north-west, and left school aged 15 to work in a number of jobs, including as a shark fisherman, seaman, forester and mill worker.
He spent his final years at Sisters Beach on the state’s north-west coast.
http://www.abc.net.au/news/2016-09-26/tributes-flow-in-for-permaculture-father-bill-mollison/7878118
On – 26 Sep, 2016 By Ted O’Connor


