Your cart is currently empty!
Month: March 2018
-

Permaculture Zone Planning for When Winter is Coming – All Self-Sustained

Something that can be of value to any prepper at any stage of development, even urban preppers in tight dwellings, is planning. Permaculture’s sectors and zone maps are two of the most powerful tools for developing a plan, both for assessing risks, identifying resources, and developing efficient plans for a site.

Usually sectors gets covered first. I’m going to cover Zones instead. I highly endorse doing a search for “permaculture sectors” – that’s where risks and resources are going to be found. Research it with an eye for defensive and evacuation potential as well.
Zone mapping in permaculture is where we define areas by our presence, using activity and energy input level. By consolidating things that need the same amount of interaction, or even each other, we can greatly increase our efficiency. With a map that actually shows our patterns, and our goals, we can move or site things to maximize that efficiency.

Permie Zones
Permaculture zones are abstract geographic areas delineated from the other areas of our property – or our habitual paths – by the amount of time we spend in that area. The zones are based on access, not geographic nearness to our homes and beds. Many zone map examples are shown in concentric rings, but actual zones are drawn and defined by our energy and presence, not distance.
Permaculture universally recognizes 5 zones, in ascending order based on the time we spend there. Sometimes there’s a Zone 0 for the self or the home. The primary-activity and most-visited zones are Zones 1 and 2.
1 – Very intensive presence – Most active, usually multiple trips/passes daily
2 – Intensive use – Active, possibly still multiple visits per day, but not quite as frequent as Zone 1
Zone 1 is where your paths most frequently take you. It’s based almost entirely on our human environment.
Things like kitchen herbs and table gardens that need irrigation or are harvested from daily, pets and livestock that are visited daily for care or entertainment, and daily waste and composting areas are located in Zone 1.
Our kitchens and bathrooms are pretty automatic on a household/apartment level, although in permaculture, most will automatically stick the whole house in Zone 0-1.
I don’t, because I have a front stoop I almost never go in/on/through, a spare bedroom I’m only in one part of the year, only pass through my den, and on a daily basis, I usually only poke my head into the living room if I’m looking for a person or a dog. On the other hand, my father spends far more time in the living room. He rarely uses his kitchen porch, whereas my mother and I are on ours ten to fifteen times a day for access to the yard, gardens, or letting animals in and out.
The inclinations between the back and kitchen doors and-or time spent in different rooms change the views and the opportunities our presence offers. For us, it matters. For others, maybe not as much.

Zone 1 sometimes includes livestock, or sometimes they’re bumped to Zone 2, even if they’re livestock we bed down and release, milk, collect eggs from, or feed twice daily.
Zone 2 includes those areas that may not see quite as much human interaction. Regularly permies will include things like perennials with longer seasons between harvests and less daily and weekly care needed, and some livestock like foraging cattle or meat goats.
Zones 3 and 4 see increasingly less human interaction and fewer human inputs (or will, once established).
Zone 3 is larger elements, usually – the bulk foods like grains and orchards, animal pastures, ponds. They are things we may only see weekly, monthly or quarterly.
Zone 4 gets even less interaction. Usually this is managed land, tailored for foraging, livestock fodder and crop trees, timber, and longer-term grazing.
Zone 5 is an area that humans largely leave alone. Some will define this as an entirely wild area. Some will define it as a managed wild area.
To some, it’s for nature and only nature – left as a green-way – while to others, periodic hunting or foraging in this area is expected. For others, Zone 5 might be brush piles, frog houses, owl and dove and bat houses, little native patches of weeds, and other things we scatter through a yard and garden and affix to buildings to encourage helpful wildlife.
This site http://deepgreenpermaculture.com/permaculture/permaculture-design-principles/4-zones-and-sectors-efficient-energy-planning/ has a more detailed set of examples and some graphics of Zone definitions. It also has some subsections about common zone sizes.

Permaculture Research Institute – Urban farm rabbits located over composting bins, near water catchment, and along path between house, shed and garage.
Urban & Suburban Sites
There’s nothing wrong with taking a set of known factors and twitching it. Zone definitions can be rearranged and relisted, tailoring them to fit our lifestyles.
 For an apartment, condo, or a single-family home on less than a half-acre, zones shrink and include our floorplan. When we turn to sector mapping, we zoom out and include more of our neighborhood with condos and small yards, but that “zoom” can apply to zones as well.
Regardless of where we’re going, or what’s around us as we putter through the day, our habits tend to change by season, and what’s around us changes. There may be areas we can “expand” into besides our own property.
That’s really worthy of its own article, but some examples would be any areas we can hit with seed bombs for wild edibles or for plants that can be improving the soil now for use in a crisis. We might have parks, verges, ditches and other areas that are untapped resources but are on some of our daily, weekly and monthly beaten paths. We might also find landowners (or absent landowners) to talk to about growing space, or have rooftops or fire escape landings that we can use for planters and water catchment, now or “after”.
Knowing where we go most frequently will help even the tiniest studio prepper identify places that have the most potential with the least effort – and that’s really what efficiency is all about, with efficiency one of the major gods of the permies.

Multiple Maps
What I recommend and what I do for clients is to actually print three identical maps. Two are for “right now”, and are going to be our habitual activity maps, one for the “high season” when we’re outside the most and one for the “slow season” when we’re outside least.
The third map is going to be our “ideal” map – what we’re about to work to make happen.
See, we’re going to use these maps to identify existing zones using our current activity. However, going back to efficiency, we’re also going to use them as a planning tool. Some of the trends we identify will lead to changes, hopefully consolidating our zones of activity for better efficiency.
We can also nab a wider view for our neighborhoods, even as home- and landowners.
Those with significant acreage might want to do one map set with just the house and the 0.5-1 acre it sits on and a second set with the whole property and a margin around it.


Supplies for Mapping
Printing and drawing really is the easiest way to make this happen. You can use computer programs to trace lines that will progressively darken or lighten with every pass. That’s not crazy talk, since it offers opportunities to make multiple-scale maps at once, then just zoom in and out. For the average client, it’s a black-and-white drawing or Google map of their property, regularly with a chunk of the surrounding area that’s going to leave some margin for additional notes.
I really like the Google Earth maps that are nice and up-to-date, and that you can adjust by season and time of day. They let you pick noon in the barest of winter, which lets you “see” more of your property. If you can’t get a free submission to Google Earth, find out if a local library has it, do some screen grabs at various zooms/scales and print them off wherever it’s cheapest.
For paper, standard letter 8.5×11” is fine, or we can go up to 11×17 or even 17×24” if we want.
We’ll also want some coloring supplies.
A couple of sharpened crayons or colored pencils are fine. Markers also work, although you either want really fine points or really big maps. Aim for colors that are easy to see on a simple map, that you’ll be able to see the map through (no dark Sharpies or pens), and that will darken as you overlap lines. Red, orange, blue, and pale purple tend to work really well.

One Map
If you only want to print one map, no big there. Hit the dollar store for some of that thin notebook or copy paper that you can trace through. You can shine a light through some plastic or use a bright window to help see better. Call it an overlay.
You can also create a larger map and make overlays of your zones and sectors using contact paper and map pens or grease pencils.
Overlays will also help reduce printing in case you decide you want to add seasonal maps, do maps for each member of the family, or combine everything into a single map.
It’s also a backup against an ill-timed sneeze, doggy nose-bump, or a beloved’s alarm going off and making us jump with a marker in our hand. Hey, we’re preppers. Prepare for crazy things.
The Process of Activity Mapping
This is where the “darkens as we overlap lines, but not too dark” comes into play. Observe, then color.
Start with your first work-day wake-up, and trace your tracks through the house, then outside it. Back and forth, bathroom, coffee, paper, animals, meals, vehicles, back and forth, all through your day until you tuck yourself in at night. To and from the bus, trash can, walking the dogs, as we hang out and retrace steps from vehicles or gardens to sheds and garages, the hose, indoor faucets, all the way down our rows and around our flower/garden beds.
Don’t draw bird-flies straight lines. Trace the actual path everyone takes. Then repeat for the work week, and the weekend.
Remember, it’s the overlaps – resulting in darker colors – that give us our current intensity of use. Be honest with yourself. You’re the one who does or doesn’t benefit.


Zone Map
Your existing zone map just drew itself.
The darkest areas are your 0-1-2 zones. Your palest and untouched areas are your Zone 4and really, really excellent places to expand that Zone 4 or develop your Zone 5.
Now we go through, and kind of divide those spaces into blobs and blurbs and modern art. We can re-draw or trace our map and give them different colors now, or make them more uniform shades, or just more clearly delineate edges.
You should be able to identify some of the areas you only hit a couple of times a year, like pruning, or places we inspect and repair only as needed.
We should also be observant enough to know those wide, looping, lightly-drawn areas are only us mowing – and maybe we keep those in our map in their apparent zones, or maybe we go back and remove those, or lighten them to more accurately reflect how much attention they actually get while they’re getting mowed. Otherwise, especially for us Southerners, our summer map is going to show our twice-weekly or 2-6 times-monthly sing-along ride or teenager’s slave labor as getting more attention than our workshop and laundry room.
Shoveling snow and raking leaves has some impact on applying the information we just gathered, but not really a ton, so you can go light there, too, if you like.

Applying the Zone Map
Our map doesn’t just sit there. It’s a tool, one of many.
Most of us are likely to have some of our darker/intense areas out there on their own, and many of us likely have dark lines like a drunken spider’s web hooking and criss-crossing.
Those oddball dark jags are places where we can consolidate some of our activities, instead of leaving them suspended and isolated. That will save us time and effort, which will make us more efficient.
When we plan to expand gardens or even change where we keep the tools we use, consult the existing zone map. Places we’re already passing make excellent locations for those.
If we’re passing them regularly, they get more attention and we see that they’re dry, being eaten by critters, sick and sad, or ready to harvest. Being faster to respond to them, and able to respond immediately with tools if necessary, will result in better yields.

Worm bin composter located near the source of feed and easy access to water.
Sometimes we might look at our plan and actively renovate things we already have in place – especially if those things don’t get the attention they should. The extra attention and ease may make it worth it to switch from conventional beds to a series of trash cans turned into vertical gardens, from hot composting piles kept across the yard to a pipe composter in a keyhole bed or a worm composter near the kitchen or the trash.
We may move livestock so it’s faster and easier to get them into gardens for pest control or tilling, or to get composted manure onto large plots. We might move them somewhere else so they’re easier to toss kitchen scraps to.


We might eschew the usual advice of sticking an orchard out-out so we can put small livestock under it, or to make some additional use of our dog runs and kids’ play areas.
Things like the sectors that affect our property, stacking elements and stacking functions, mapping water movement, and switching to low- or lower-labor growing styles that fit into our busy lives can all help make our properties, big or small, more efficient and productive.
A zone map will help us further analyze where we can increase our efficiency and help us visualize how the puzzle pieces of our production and resources can best fit together. We can then play with the map, marking future expansions to see how they’ll fit in with our current traffic flows and patterns, and make our properties more versatile, resilient and productive all over again.
Source : www.theprepperjournal.com
CLICK the Book below to learn more How to Become Completely Self-Sufficient

Check out these related articles from our site :
They Grew 6,000 lbs of Organic Food on 1/10th Acre in the City! Here’s How…
Preparing Lawn For Winter How To Do It Like A Pro
24 Lost Gardening Tips from 100 Years Ago
Are these 8 common mistakes creating a tomato timebomb in your garden?
101 Gardening Secrets the Experts Never Tell You
14 Practical Tips to Make Your Garden Crops Last Longer This Year
Other Survival Solutions(This are the most reliable survival books that you can find)
http://www.allselfsustained.com/permaculture-zone-planning-winter-coming/
On – 14 Nov, 2017 By R. Ann Parris
-

Agriculture in the Digital Age: Digital Assets. Digital Usage. Digital Workers.
Editor’s note: This is a summary of the article “Agriculture Is Being Left In The Digital Dust”, authored by Steve Cubbage, president of Record Harvest, and contributing writer to Farm Journal Ag Tech, published March 27, 2018. Read it here.
Agriculture is one of the largest industries, yet it has the least amount of accessible data.
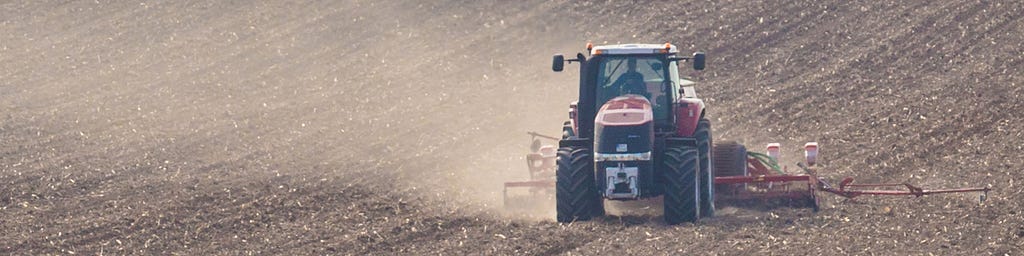
Over the past two decades, agriculture has seen major advancements in big data, self-driving tractors and combine yield monitor technology. However, according to the McKinsey Global Institute’s Digitization Index, agriculture currently is in single digits for realizing the digital potential in the U.S. economy.
Cubbage explores the index research and questions why, agriculture, with it’s focus on precision agriculture ended up in the “rear view mirror” regarding digital data. The good news is that agriculture has a lot of potential to grow. But who will drive the change?
You can read the full article here.
What do YOU think?
How do you plan to collect digital data in your operation? How will it affect how you run your business?
Agriculture in the Digital Age: Digital Assets. Digital Usage. Digital Workers. was originally published in The Dirt on Medium, where people are continuing the conversation by highlighting and responding to this story.
-

The Mindset of Monoculture – The Permaculture Research Institute
The Mindset of Monoculture
Since the onset of the Industrial Revolution, it has been fairly easy to fall into the mindset of monoculture. The lure of big machines offering us power and control; making our lives easier in some senses, but more complicated in others; has led us into an all-encompassing embrace of the mindset and paradigm that made the modern-day world possible.
For thousands of years, we collectively labored away at a lifestyle that was completely vulnerable to the elements of nature. Months of hard work growing the crops we needed to survive could be wiped out in one fell swoop by an extended drought or an unmanageable pest problem. A simple bacterial infection could lead to death and citywide plagues were a common occurrence.
When the Industrial Revolution rolled around, we began to find that our vulnerability could be reduced through trusting in a paradigm that promised to control the natural world and direct it for our own use. All we had to do was trust that the masters of capital and wealth would continue to find ways to keep us on the path of progress and growth.
While the spoils of that growth have hardly been fairly shared and distributed, the vast majority of us have come to believe wholeheartedly in the industrial-capitalist growth paradigm which has reached every corner of the globe. From downtown Manhattan to the tiniest villages in Malawi, many of us have come to believe that the only viable path forward is through embracing a worldview and lifestyle that originated in Europe and has reached its most powerful manifestations in the United States.
Having access to antibiotics and the internet might be considered universally as beneficial and good, but we rarely pause to consider what comes alongside these apparent advantages. The arrival of Penicillin and Google to the furthest reaches of the globe have also brought Shakira, Walmart, and Monsanto as well. The Western civilizational paradigm is by nature broad, large-scale and all-inclusive. Very rarely do communities and cultures around the world have the freedom to autonomously decide what aspects of western civilization will be incorporated into their lifestyles and livelihoods. More commonly it´s a “my way or the highway” imposition of economic, political, and social norms.
Helena Norberg-Hodge is the author of the book “Ancient Futures” which looks at how the imposition of foreign, Western norms has negatively affected the culture and lifestyle of the Ladakh people of Central Asia. According to Norberg-Hodge, “the old (Ladakh) culture reflected fundamental human needs while respecting natural limits. And it worked. It worked for nature, and it worked for people. The various connecting relationships in the traditional system were mutually reinforcing, encouraging harmony and stability.”
As the western monocultural mindset began to replace that harmonious cultural paradigm that had been worked and reworked over thousands of years of continued existence in one place, the Ladakh cultural fundamentally changed. By our western, capitalist instruments of measure, the Ladakh people were “richer” monetarily. However, the introduction into the monetary economy also brought a host of other problems that upset the stability of the community and ecosystem.
Industrial-capitalist globalization requires our full allegiance and as more and more people have been convinced and forced into accepting that paradigm, our world has lost the richness of epistemological diversity. The mindset of monoculture has effectively robbed us of thousands of different ways of seeing and understanding the world and our place in it.
According to the Indian author Vandana Shiva “we’ve moved from wisdom to knowledge, and now we’re moving from knowledge to information, and that information is so partial – that we’re creating incomplete human beings.” The loss of our cultural and epistemological diversity to the Western monocultural mindset is as much a threat to our continued existence as is climate change or any other of the numerous perils we collectively face.
The Way We Grow our Food Today
Nowhere is this mindset of monoculture more evident and clearly seen than in what we eat and how we produce the foods that nourish us. Only sixty years ago, small farmers around the world produced thousands of diverse crops from heirloom seeds handed down over generations. Traditional agricultural methods that sought to preserve the continued fertility of the places where they lived were implemented with great care.
While droughts and excessive rains did cause famines from time to time, people overall were well fed and lived lives of decent subsistence. As our world´s population began to geometrically increase starting about 200 years ago, however, the burgeoning capitalist/industrialist class began to try to convince us that the only way to feed the world was through dependence on an agricultural system that sought to maximize productivity through the use of massive amounts of synthetic fertilizers and pesticides.
At first, the Green Revolution did bring a surprising increase in agricultural production. The fertile fields that had been cared for by generations of traditional agricultural practices accepted the abuse of the synthetic inputs offered by agro-corporations. The influx of added nutrients through chemical fertilizers increased yields. Herbicides and pesticides made it easier for small farmers to control the weeds and pests that for centuries had been manually controlled.
But all was not as good as it seemed. As small farmers began to depend completely on the new inputs and technologies offered by the mega agro-corporations, they also simultaneously abandoned those traditional practices that maintained the fertility of their lands. Instead of diversified farms for subsistence and local markets, more and more farms began to grow monocultures of crops that the global commodity market deemed as the most important.

Corn, soy, wheat, and rice now make up the vast majority of crops grown around the world. To grow these monocultures for any sort of profit requires small farmers to become bigger. Instead of farming 40 acres, you now needed 5,000 acres and huge machinery such as combines and tractors. Traditional knowledge was lost as was the fertility of the fields. Topsoil today is washed away with every rain as the hypoxic “dead” zone in the Gulf of Mexico continues to grow. Small farms with diversified production gave way to massive monocultures of genetically modified crops grown with the “help” of GPS controlled combines and tons of agrochemicals.
Dangers of Monocultures
There are a whole host of dangers associated with monocultures. The annual tilling of the soil for nutrient hungry crops has pretty much decimated the life of the soil that brings natural fertility. Synthetic, oil-based fertilizers now give offer the basic nutrients that plants need to grow, though the lack of the various micronutrients provided by healthy soil has led to nutrient deficient crops. When oil becomes scarcer, we will collectively face the challenge of how to provide fertility to our depleted soils in order to feed our growing population.
Nature has no monocultures. If you look around a natural ecosystem, you will find a diversity of plants growing together in one place. Each plant serves a particular function in that ecosystem together with the fungi, insects, animals, etc. A greater diversity allows for more resilience within the ecosystem itself. “Don´t put all your eggs in one basket” is a piece of wisdom you probably heard from your grandmother when you were younger. With industrialized monoculture agriculture, not only have we placed all our eggs in one basket, but we´ve also placed that basket of eggs at the very edge of the table where any unexpected movement will surely cause them to fall.
By going against the patterns of nature that design for diversity, we have effectively accentuated our vulnerability. The concentration of one type of plant in large proportions invites disaster. Whereas diversity allows for natural predators to control one another, monocultures allow for a proliferation of troublesome pests and plagues that can ruin crops. Industrial agriculture has “solved” that problem by continually inventing stronger and stronger pesticides, fungicides, and every imaginable type of poison to try and control the natural world. Genetically modified crops have genes from certain types of bacteria spliced into them to keep those crops safe from certain types of disease.
Though it may comfort us to believe that agro-scientists are being successful in their quest to control the natural world, the reality is that for every problem they “solve”, two more problems arise. The natural world simply does not tolerate monocultures and will do all it can to reverse back to diversity.
Bayer-Monsanto Merger
After 60 or so years of the Green Revolution, it is becoming ever clearer that the promises of abundance and control of nature are not unraveling the way we hoped. Our soils are less fertile, our crops are ever more vulnerable to pests and disease, and we have lost countless numbers of heirloom genetic material. One would think that these problems would lead us into seeking out a new path on how to grow our food. But when faced with an increasing vulnerability, unfortunately, our tendency has been to bunker down and continue to blindly believe in the promises of the agro-giants that control the food and farming industries.
Recently, Monsanto and Bayer, two of the largest agro-chemical corporations in the world, merged together in a 66 billion dollar deal to form a massive company that effectively controls a huge part of our agricultural future. Monsanto is best known for its production of genetically modified seed while Bayer is a specialist in agro-chemicals including pesticides, fungicides, and synthetic fertilizers. Together, they will effectively dominate the agricultural industry and through their lobbying efforts continue to make sure that agricultural policies continue to benefit their pockets.
Once the merger is completed, only three companies will own 60% of the seed sold around the world and 64% of all pesticides. Is it really a safe and sane idea to entrust our future to a company that was a Nazi contractor (Bayer) or a company that manufactured Agent Orange (Monsanto)?
Related
Popular
https://permaculturenews.org/2017/11/15/the-mindset-of-monoculture/
On – 15 Nov, 2017 By Tobias Roberts
-

Restoration Agriculture
Around the globe most people get their calories from annual agriculture – plants that grow fast for one season, produce lots of seeds, then die. Every single human society that has relied on annual crops for staple foods has collapsed. Restoration Agriculture explains how we can have all of the benefits of natural, perennial ecosystems…;

Acres U.S.A.Price:
$30.00$22.19 Free Shipping
Around the globe most people get their calories from annual agriculture – plants that grow fast for one season, produce lots of seeds, then die. Every single human society that has relied on annual crops for staple foods has collapsed. Restoration Agriculture explains how we can have all of the benefits of natural, perennial ecosystems and create agricultural systems that imitate nature in form and function while still providing for our food, building, fuel and many other needs – in your own backyard, farm or ranch. This book, based on real-world practices, presents an alternative to the agriculture system of eradication and offers exciting hope for our future.Used Book in Good Condition
Full Customer Reviews:
-

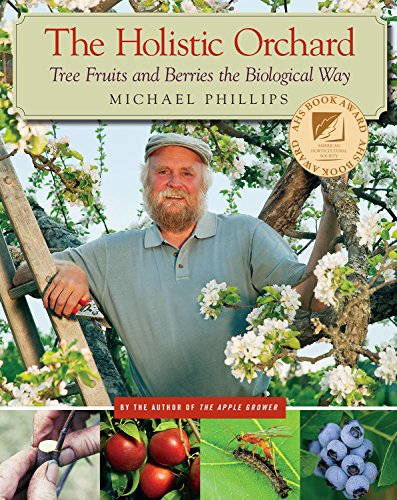
The Holistic Orchard: Tree Fruits and Berries the Biological Way
Many people want to grow fruit on a small scale but lack the insight to be successful orchardists. Growing tree fruits and berries is something virtually anyone with space and passionate desire can do – given wise guidance and a personal commitment to observe the teachings of the trees. A holistic grower knows that producing…;
Chelsea Green PublishingPrice:
$39.95$28.70 Free Shipping
Many people want to grow fruit on a small scale but lack the insight to be successful orchardists. Growing tree fruits and berries is something virtually anyone with space and passionate desire can do – given wise guidance and a personal commitment to observe the teachings of the trees. A holistic grower knows that producing fruit is not about manipulating nature but more importantly, fostering nature. Orcharding then becomes a fascinating adventure sure to provide your family with all sorts of mouth-watering fruit.
The Holistic Orchard demystifies the basic skills everybody should know about the inner-workings of the orchard ecosystem, as well as orchard design, soil biology, and organic health management. Detailed insights on grafting, planting, pruning, and choosing the right varieties for your climate are also included, along with a step-by-step instructional calendar to guide growers through the entire orchard year. The extensive profiles of pome fruits (apples, pears, asian pears, quinces), stone fruits (cherries, peaches, nectarines, apricots, plums), and berries (raspberries, blackberries, blueberries, gooseberries, currants, and elderberries) will quickly have you savoring the prospects.
Phillips completely changed the conversation about healthy orcharding with his first bestselling book, The Apple Grower, and now he takes that dialogue even further, drawing connections between home orcharding and permaculture; the importance of native pollinators; the world of understory plantings with shade-tolerant berry bushes and other insectary plants; detailed information on cover crops and biodiversity; and the newest research on safe, homegrown solutions to pest and disease challenges.
All along the way, Phillips’ expertise and enthusiasm for healthy growing shines through, as does his ability to put the usual horticultural facts into an integrated ecology perspective. This book will inspire beginners as well as provide deeper answers for experienced fruit growers looking for scientific organic approaches. Exciting times lie ahead for those who now have every reason in the world to confidently plant that very first fruit tree!
Ships from Vermont
Full Customer Reviews:
-

Assessing a Property Before Designing It – The Permaculture Research Institute
Assessing a Property Before Designing It
For the purpose of this article and the scope of which I’m looking to explore, we are going to begin by assuming a hypothetical property is already bought and paid for. In short, we won’t be going into all of the legal assessment ideas that might be involved when buying a property, though many of these thoughts could help in choosing one to buy. Instead, we’ll be looking at assessing properties from a design perspective, gathering a checklist of things to identify when implementing a permaculture project seems to be in the near future.
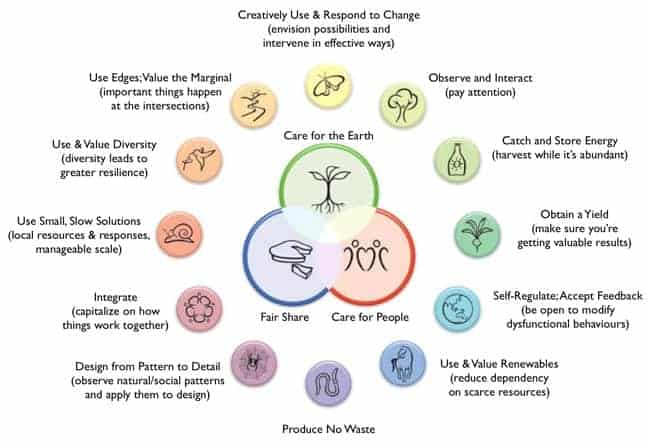
Obviously, at the foundation of all permaculture design, we rely on the famous three Permaculture ethics of earth care, people care, and return of surplus, but when assessing a property, we need to focus more on the minutiae of maintaining these ethics. This is the time we pay attention to the less easily packaged permaculture principles. This is the time when we observe and interact, when look to utilize natural patterns, when we discover opportunistic edges, and when we sniff out ways to integrate things rather than segregate them.
As amazing as all that sounds, we’ll also need to start whittling these principles down from grand theories to applicable data. Once we step into a project or onto a property with the intention of designing it, all the good ideas and positive ethics become a matter of physical application. This is the moment just before the pencil goes to drawing board, before the shovel plunges into the soil, the moment before the hammer hits the nail, and we need a good start. So, in terms of assessing a property, where do we begin?
Before the First Footprint
Even before we first step onto the property, there is a lot we can learn, and that starts both with the intentions of the client, the infrastructure surrounding the project, and the general climatic information of the region. These are things that the property itself can’t tell us but that are, nevertheless, integral to what is going to happen in our design.
What the client wants, even if that client is the designer, needs to be fully realize. Goals need to be establish, be them grand or small, and they need to be prioritized. Limitations, such as budget, ability, and regulation, have to be realized. It doesn’t make sense to be in the mindset of animal husbandry or rice production if that doesn’t work towards the desired effect of the design, nor does it serve the design to work outside of realistic financial means.
The infrastructure surrounding a project both includes what is there, which becomes more relevant in the observation phase, and what is meant to be there. It’s important to know what the client wants—roads, dams, home, etc.—prior to getting onsite and imagining it there. There’s no point in considering where to put the glasshouse if there isn’t going to be one, no point in plotting out an access road to the back of the property if a footpath suffices.
Finally, there is a lot of information to be gathered before visiting the site. We need to know about the climatic zone, the coordinates, the boundaries, the size, and the contour, all of which can be accessed via the internet. We need to know about weather averages as well as the extremes. We need to know about the location itself, particularly what’s around in terms of settlements, landscapes, and large bodies of water, not to mention its history.
Gathering this information puts us in the right frame of mind for looking at what is actually there and needs to be accomplished. Before we arrive, we already know things that are and aren’t possible, and we are able to focus on what tasks are actually at hand. To assess a property without knowing these things can be a serious waste of time and lead to a lot of frustration, both for the designer and the client.
What to Look for When Observing
Once on site, the game changes from conceptual to actual. Trees are or aren’t there. We can feel the slope underfoot, spot animal tracks, hear the wind through the grass, smell the soil, and sit in the shade. This is where we see what is really there to work with and compile lists based on reality of the space rather than general information. Both of these things—the specific site and the regional data—have to factor into the design.
The land itself is going to be hugely important to what is possible. We have to figure the slope and all of its changes, and we have to do the same with aspect, which will tell a lot about the way the sun interacts with the land. We have to look at how water moves across it, as well as where that water congregates, if it does. We have to get to know the soil, its content and pH balance. We have to be aware of what native plants and animals are there and how these behave on the property.
We also have to be aware of what infrastructure exists and in what state, including both that which is on the land itself and that which is near it. Obviously, any existing structures, including buildings, roads, and smaller things, will both create designing opportunities to improve them, as well as eliminate the need to invent them anew. Buildings and roads near the property are also relevant, as they may come with pollution, be that noise, chemical, or visual, and they may provide opportunity, such as harvest rain runoff from streets.
Energy flows, too, are going to really factor in to design choices. These flows include the angles of the sun, as well as elements that create shade. They include the aforementioned movement of water across the property, both during rain events as well as permanent waterways. The wind, too, will factor in, so we need to know its direction, where it’s at its fiercest and perhaps where it peters out. We need to be aware of other energy that might affect what we are doing: mudslides, volcanic activity, human interaction, etc.
Gathering all of this information puts us in the right mindset for designing based on site specific information rather than the general data alone. Before we design, it’s important that we become personally familiar with a space, and only then will we be able to take advantage of what is already there and address any obstacles. To assess a property without meeting it in person will surely result in incomplete information that could cause lapses in judgment when designing.
Why We Do All of This Assessing
So much assessing will later lead us to design possibilities and solutions we wouldn’t otherwise be aware of, but it can’t do that if we don’t take the time to research and observe. Even if some of the information seems too minute to be concerned with at such an early stage, it is precisely because we are aware, even at the early stages, that we can create a more effective design. This attentiveness is how we begin taking advantage of what nature has to offer, working with the planet rather than imposing our blind will upon it.
Feature Photo: Courtesy of Kim Carpenter
Related
Popular
https://permaculturenews.org/2017/11/03/assessing-property-designing/
On – 03 Nov, 2017 By Jonathon Engels
-

The Tiny Home Built By A Bad-Ass Single Mom
Watch Next: http://skr.cm/ZWGnow
Subscribe: https://www.youtube.com/c/seekerstories?sub_confirmation=1When Kelley Lewis was left on her own as a single mom to raise three young children, she was determined to still achieve the dreams she had in mind for her family – including a lakeside cabin for weekends and getaways. In Going Off Grid, Laura Ling examines how more Americans are choosing to live a more sustainable, simple lifestyle.
Join the Seeker community!
Twitter: https://twitter.com/SeekerNetwork
Facebook: https://www.facebook.com/pages/Seeker-Network/872690716088418?ref=hl
Instagram: http://instagram.com/seekernetwork
Tumblr: http://seekernetwork.tumblr.com
App – iOS http://seekernetwork.com/ios
App – Android http://seekernetwork.com/androidExecutive Producer: Laura Ling
Producer: Paige Hansen
Cinematographer: Matthew Piniol, Spencer Snider
Editor: Lee Mould -

In Dialogue with Ben Falk – Resilience
In this episode Dan Palmer from Making Permaculture Stronger enjoys a rich dialogue with Ben Falk from Whole Systems Design. Dan and Ben explore issues and themes around:
- heathy living processes of design and creation
- working with clients
- the relation of necessity to beauty
- part of what it might mean to enjoy an authentic, healthy, connected life.
http://www.resilience.org/stories/2017-11-07/dialogue-ben-falk/
On – 07 Nov, 2017 By Dan Palmer
-

Permaculture backyard permaculture design

I fell in love with Backyard Permaculture Design & Gardening years ago
Ever since I’ve been slowly learning backyard permaculture design from great permaculture books and applying all the design priciples that I can. Today I’m going to discuss what permaculture is with some examples of permaculture design. I’ll also show you our homestead permaculture set up + future permaculture design goals.
What is backyard permaculture design?
A simple explanation of permaculture is to build up your garden, soil and backyard homestead so that it is self-sustaining with little to no energy input from external resources but that’s low maintenance too. This of course takes time, but the goal is to create a backyard that works together using patterns often seen in nature and replicating them to the backyard.
Permaculture patterns and designs are inspired by the natural life cycles we see in the wild, which flows in circles and is never uniform.

Some things you can do to practice permaculture are
- Observe your land, microclimate, local natural life cycle systems to replicate a similar pattern for your backyard. Polyculture garden beds for example.
- Catch & store energy that’s needed such as water (mulching beds and building a swale).
- Reduce input costs as much as possible such as soil amendments by creating your own.
- Let animals and natural rhythms do a lot of the work for you.
Permaculture Design= Creating Zones
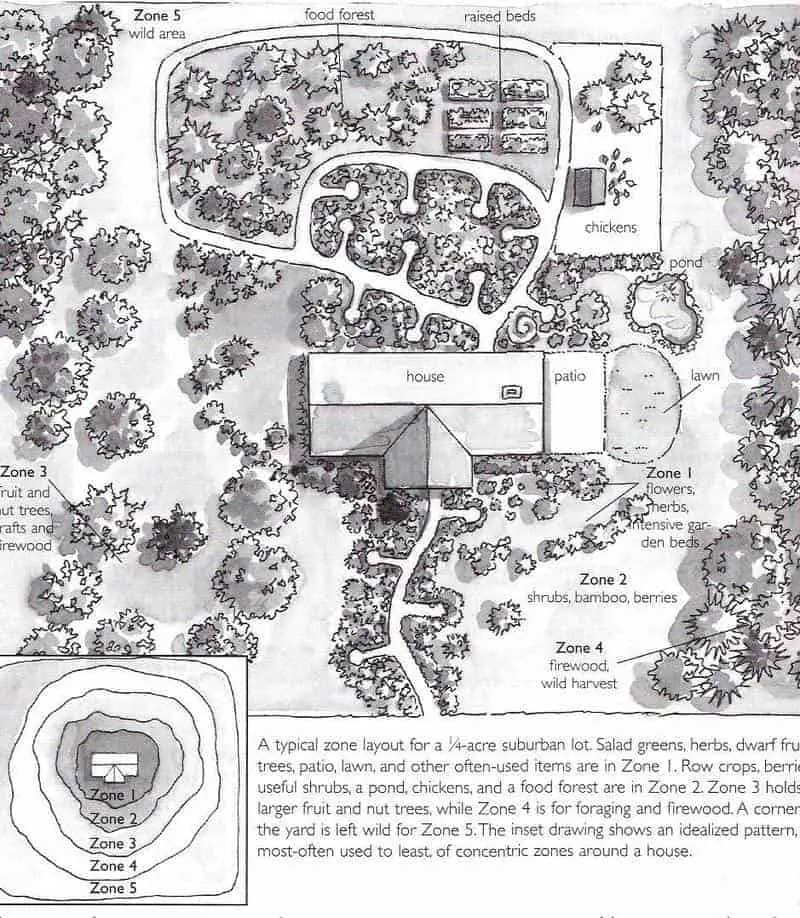
Illustration of Zones from Toby Hemenway
Permaculture Magazine shows you the break down of permaculture principles.
Some Permaculture Examples
Permaculture example #1
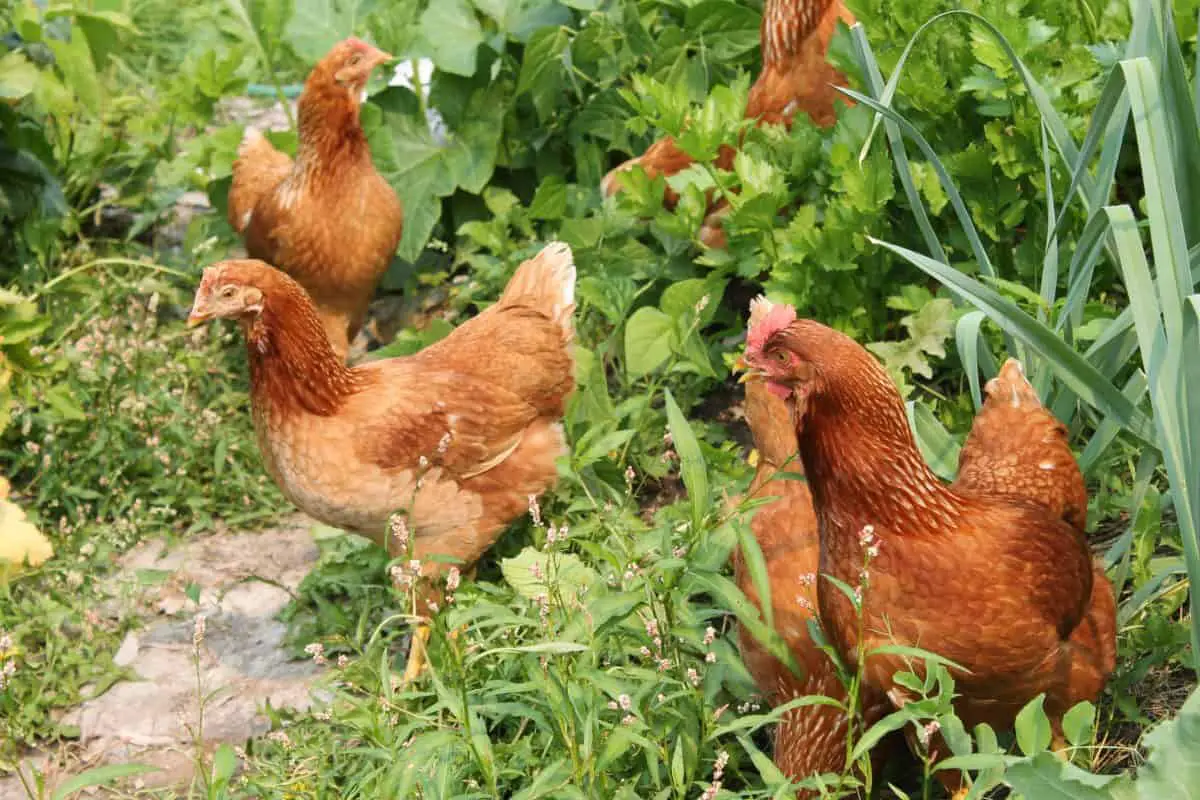
Instead of relying on buying chicken feed, you create and design a backyard system that benefits feeding your chickens instead of just ‘keeping them’. You’ll create different areas for them to eat from, let areas rest so it can re-grow, grow mealworms or grass sprouts for them to it. You’ll put your chickens to work and let them do the composting for you. Your chickens get to free-range and control pests, eat up decomposing fruit from fruit trees. You let the coop bedding and manure to rest and decompose which you’ll fertilize your garden with which helps your plants to grow and builds up your soil. You also get happy chicken eggs! If you have the space you’ll grow some grain for your chickens for the winter months.

Permaculture example #2
With permaculture gardening, you’re designing a garden that builds up your soil over time, attracts pollinators or reduces pests. Maybe you have an area outside your garden where you grow comfrey that you cut down twice a season and make fertilizer tea (instead of buying it) or use it to build up the soil. You cant keep chickens so you practice vermicomposting and composting
Our Backyard Permaculture Design
Right now we’re building up our backyard into permaculture design zones and I’ll be sharing with you how we build it over time (it will take years!). Right now we’ve been creating short term and long term homestead projects for our backyard. Although we live on 2.5 acres, our set up is in a fenced area about 1/4 of an acre because we have herds of elk that come through and need further fencing.
Some of the backyard permaculture gardening and design we’ve done so far:
- Building a permaculture herb spiral, see the step-by-step here.
- Creating rotational permaculture chicken runs around our garden to reduce feeding costs and pests. See the design here.
- Helping the wild pollinators and increasing biodiversity in our backyard with these tips.
- Let the chickens free-range safely under our fruit trees, and planted future trees to create a chicken food forest zone.
- Purchased organic or heirloom seeds from reputable seed companies like these ones.
- Practiced companion planting in our vegetable with herbs and flowers.
- Getting the chickens and worms do the composting for us for the lazy composting way.
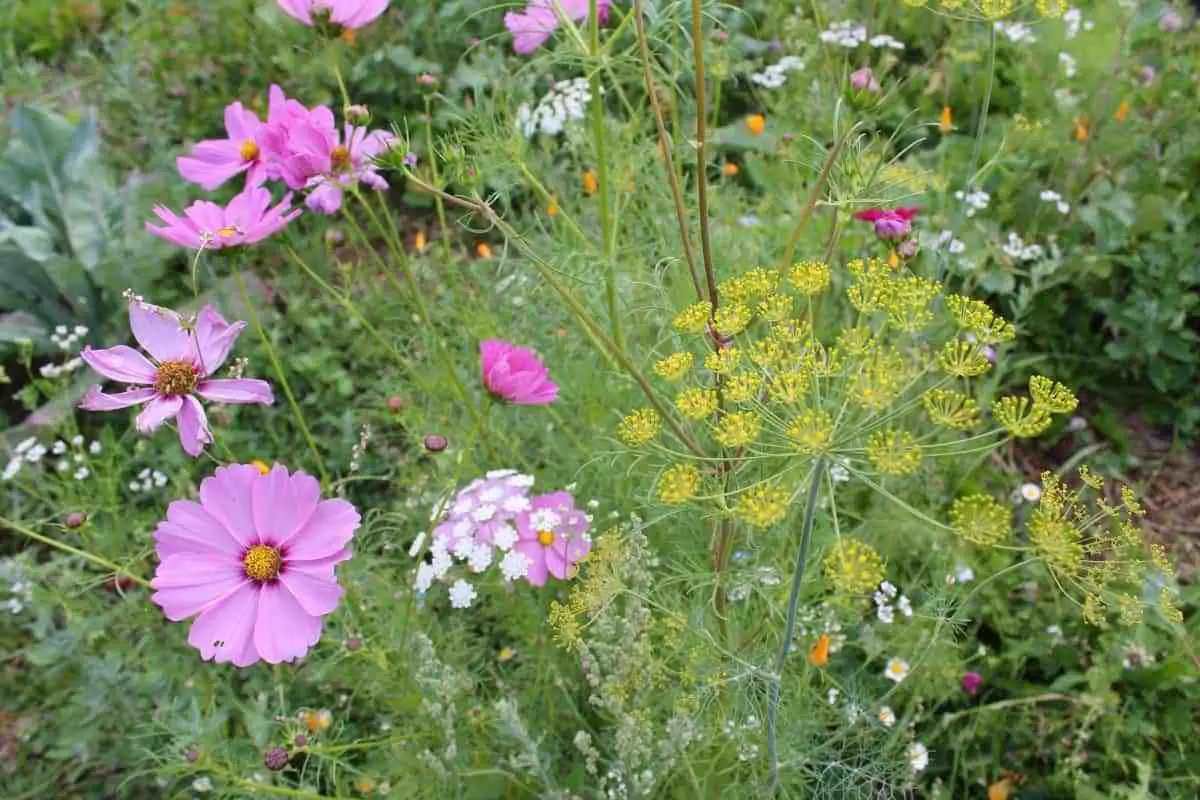
- Planted a medicinal herb garden which attracts many bees, and planted butterfly and bee wildflower blends around our garden.
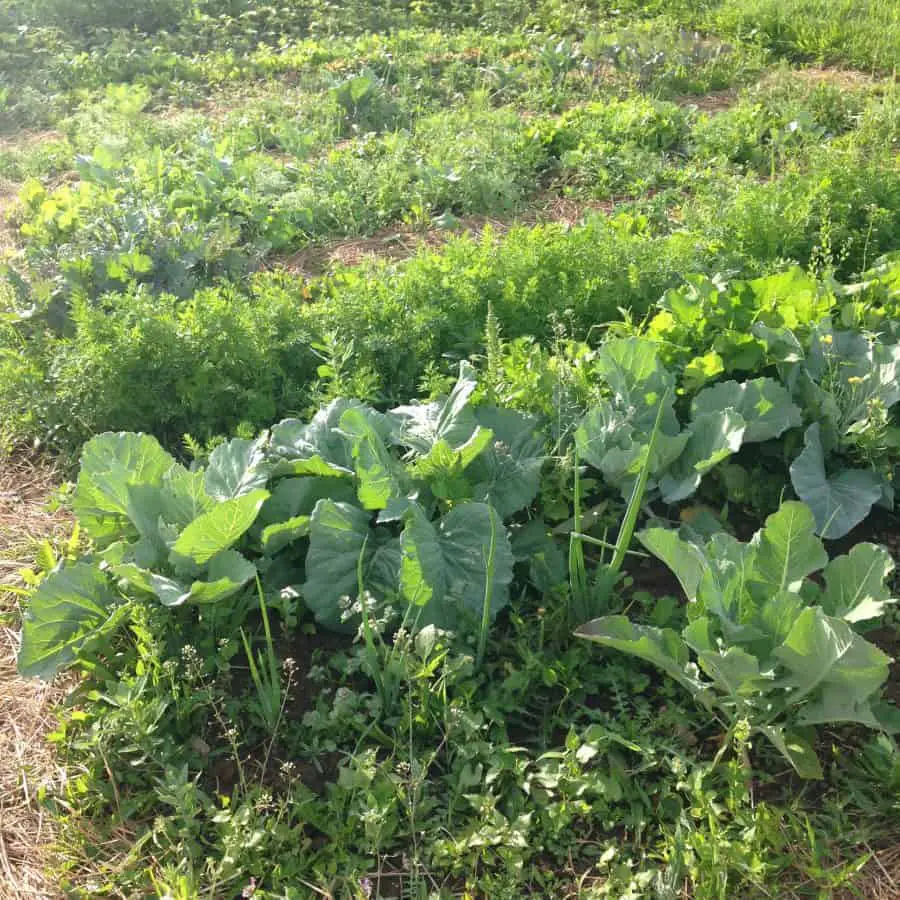
- Built permaculture polyculture garden beds. Learn what polyculture is and see some examples in this post.
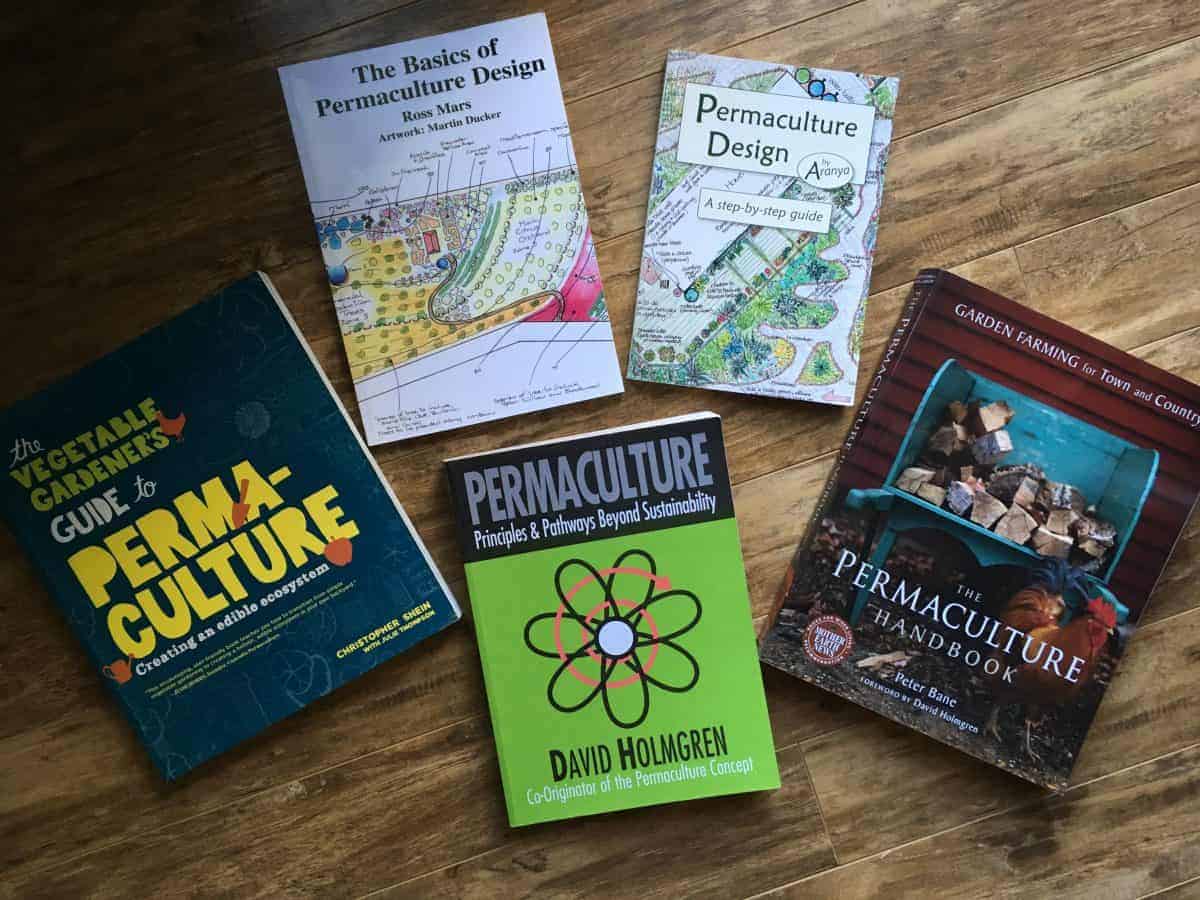
permaculture design books
There are many fantastic permaculture design books out there. A few of my favs are in the above photo however there are more than I wish to get like the food forest ones.
Some fantastic permaculture blogs & posts
- Milkwood Permaculture is awesome & also offers courses
- Tenth Acre Farm has been a fav for urban permaculture
- Permies.com has all sorts of great permaculture discussions
- Joybilee farm shows you Hugelkultur garden beds
- Deep Green Permaculture
- Permaculture BC

https://www.familyfoodgarden.com/permaculture-backyard-permaculture-design/
On – 08 Nov, 2017 By
-

Land of Our Own: New River, Arizona
This is the fascinating story of a family’s homestead days in New River and about the general development of the community. Hardships and heartaches mingled with simple pleasures in this once isolated country to fulfill the dream of land of their own. Pauline Essary Grimes wrote this book, which she published in November 1987 and…;

CreateSpace Independent Publishing PlatformPrice: $7.50 Free Shipping
This is the fascinating story of a family’s homestead days in New River and about the general development of the community. Hardships and heartaches mingled with simple pleasures in this once isolated country to fulfill the dream of land of their own. Pauline Essary Grimes wrote this book, which she published in November 1987 and dedicated to her parents Rowena and Bill Essary in honor of their 60th wedding anniversary. This re-print of the original edition makes the lively general community history of New River available to every interested reader.
Full Customer Reviews:
-

Our Permaculture Life: Eat your hedge!
Eat your hedge!

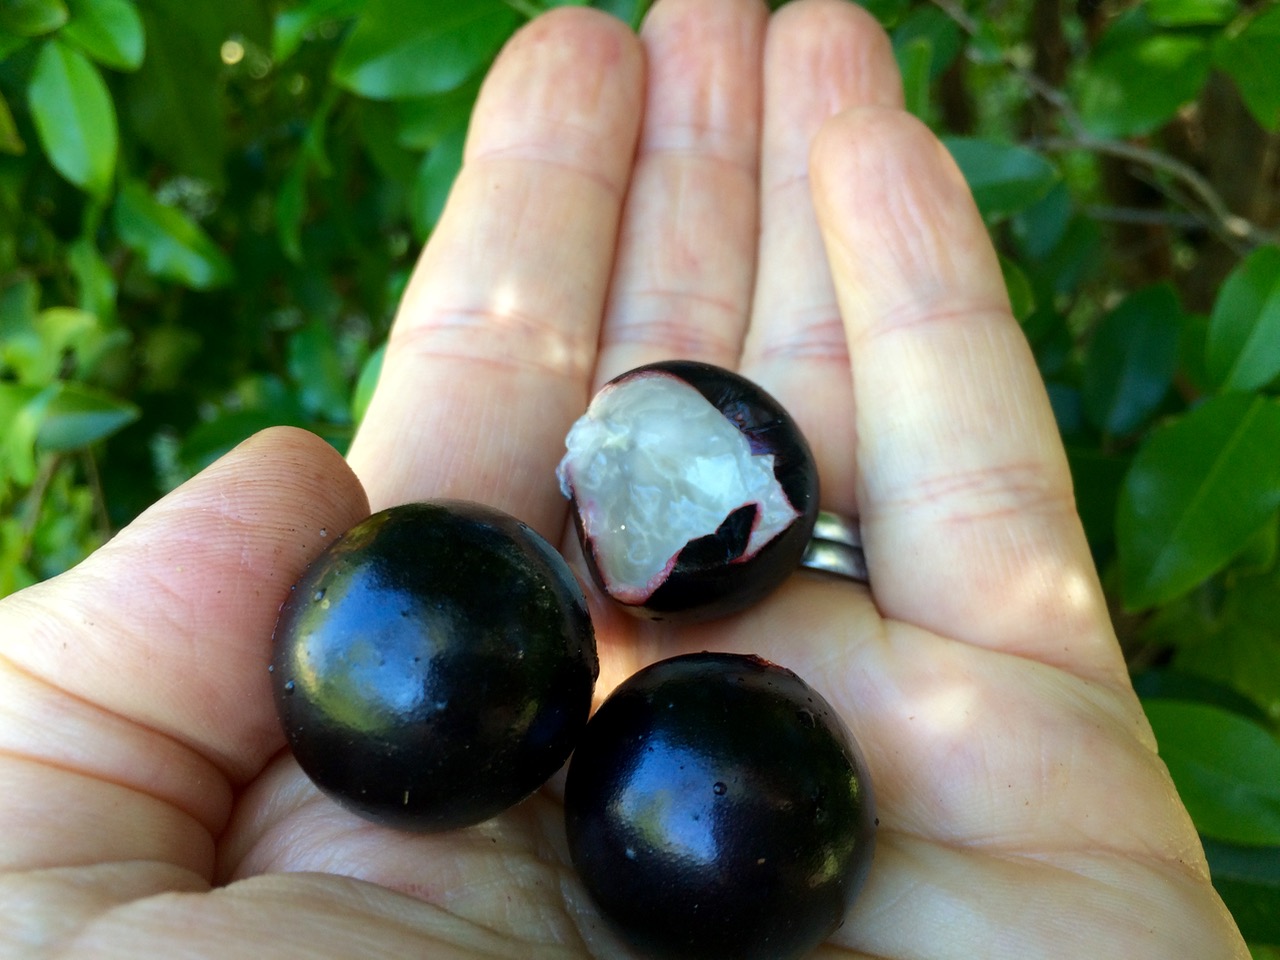
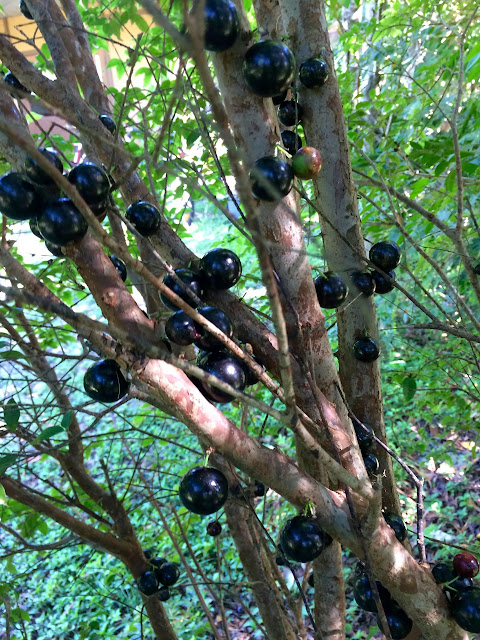
This hedge is delicious!Today we harvested kilos of fruit from one of the berry plants we hedge. Jaboticaba (Plinia cauliflora), otherwise known as the Brazilian grapetree, has fruit like grapes – sweet, round, juicy and delicious!
Jaboticaba is great as a hedge but also in a pot, in a food forest, on a verge, in community garden or school garden – a neat, hardy and delicious tree.I have a few Jaboticabas in my home garden. They are slow growing and reasonably small still, just a couple of metres tall, but that’s as big as I want them to get otherwise the fruits are out of reach. It will be getting a haircut soon.Other fruit trees I hedge are things like Acerola Cherry (Malpighia emarginata), Grumichama (Eugenia brasiliensis) and Riberry (Syzygium luehmannii). Their dense foliage, shiny leaves, interesting flowers make a great hedge and it means I can better access the fruit.
I really love the idea of making every part of the garden productive and delicious. There are a lot of hedge plants that provide nothing but a screen. It’s such a great idea to add extra value to it – food, habitat, mulch ….

I really like to eat the fruit of Jaboticaba fresh. I like the pop it makes when you bite into it followed by the burst of sweetness. I typically spit out the thickish skin, which is a little tart tasting, but sometimes I eat that too.

After harvesting the fruit only lasts a few days so depending on the harvest size, it could be necessary to make jam, cordial, wine, tarts or liquer.
Jaboticaba as a small hedge:
- Jaboticaba responds well to being trimmed.
- Jaboticaba keeps it’s leaves right down to the ground.
- Jaboticaba’s leaves stay looking shiny and welcoming in both the wet and dry seasons.
- It has anti-oxidant and anti-inflammatory properties.
I like Jaboticaba at the entrance to my garden because:
- The plant delineates where the footpath to my house is.
- I see it everyday and can and keep watch for when the flowers are forming – it reminds me to keep an eye out for the fruit.
- I see when the fruit is ripe so I can harvest it before the birds get to it.
What edible hedges do you/could you eat?
- What plants work best for this in your climate?
- What is your favourite edible hedge?
Happy gardening. Feel free to share this post.
Subscribe to Morag Gamble’s Newsletter to receive my PDF – 12 Tips for a Thriving Edible Garden:
Subscribe to: Post Comments (Atom)window.___gcfg = { ‘lang’: ‘en-GB’ };
window.setTimeout(function() { document.body.className = document.body.className.replace(‘loading’, ”); }, 10); window[‘__wavt’] = ‘AOuZoY5W6Yi7Nzi0w17VqUv171zTRbEsnA:1511456645188’;_WidgetManager._Init(‘//www.blogger.com/rearrange?blogIDx3d801030191087496810′,’//our-permaculture-life.blogspot.com/2017/11/eat-your-hedge.html’,’801030191087496810′); _WidgetManager._SetDataContext([{‘name’: ‘blog’, ‘data’: {‘blogId’: ‘801030191087496810’, ‘title’: ‘Our Permaculture Life’, ‘url’: ‘http://our-permaculture-life.blogspot.com/2017/11/eat-your-hedge.html’, ‘canonicalUrl’: ‘http://our-permaculture-life.blogspot.com/2017/11/eat-your-hedge.html’, ‘homepageUrl’: ‘http://our-permaculture-life.blogspot.com/’, ‘searchUrl’: ‘http://our-permaculture-life.blogspot.com/search’, ‘canonicalHomepageUrl’: ‘http://our-permaculture-life.blogspot.com/’, ‘blogspotFaviconUrl’: ‘http://our-permaculture-life.blogspot.com/favicon.ico’, ‘bloggerUrl’: ‘https://www.blogger.com’, ‘hasCustomDomain’: false, ‘httpsEnabled’: true, ‘enabledCommentProfileImages’: true, ‘gPlusViewType’: ‘FILTERED_POSTMOD’, ‘adultContent’: false, ‘analyticsAccountNumber’: ‘UA-51799185-2’, ‘encoding’: ‘UTF-8’, ‘locale’: ‘en-GB’, ‘localeUnderscoreDelimited’: ‘en_gb’, ‘languageDirection’: ‘ltr’, ‘isPrivate’: false, ‘isMobile’: false, ‘isMobileRequest’: false, ‘mobileClass’: ”, ‘isPrivateBlog’: false, ‘feedLinks’: ‘x3clink relx3dx22alternatex22 typex3dx22application/atom+xmlx22 titlex3dx22Our Permaculture Life – Atomx22 hrefx3dx22http://our-permaculture-life.blogspot.com/feeds/posts/defaultx22 /x3enx3clink relx3dx22alternatex22 typex3dx22application/rss+xmlx22 titlex3dx22Our Permaculture Life – RSSx22 hrefx3dx22http://our-permaculture-life.blogspot.com/feeds/posts/default?altx3drssx22 /x3enx3clink relx3dx22service.postx22 typex3dx22application/atom+xmlx22 titlex3dx22Our Permaculture Life – Atomx22 hrefx3dx22https://www.blogger.com/feeds/801030191087496810/posts/defaultx22 /x3ennx3clink relx3dx22alternatex22 typex3dx22application/atom+xmlx22 titlex3dx22Our Permaculture Life – Atomx22 hrefx3dx22http://our-permaculture-life.blogspot.com/feeds/8421834927878779799/comments/defaultx22 /x3en’, ‘meTag’: ”, ‘openIdOpTag’: ”, ‘adsenseHostId’: ‘ca-host-pub-1556223355139109’, ‘adsenseHasAds’: false, ‘ieCssRetrofitLinks’: ‘x3c!–[if IE]x3ex3cscript typex3dx22text/javascriptx22 srcx3dx22https://www.blogger.com/static/v1/jsbin/771816573-ieretrofit.jsx22x3ex3c/scriptx3enx3c![endif]–x3e’, ‘view’: ”, ‘dynamicViewsCommentsSrc’: ‘//www.blogblog.com/dynamicviews/4224c15c4e7c9321/js/comments.js’, ‘dynamicViewsScriptSrc’: ‘//www.blogblog.com/dynamicviews/965d429a6ef42a9d’, ‘plusOneApiSrc’: ‘https://apis.google.com/js/plusone.js’, ‘sharing’: {‘platforms’: [{‘name’: ‘Get link’, ‘key’: ‘link’, ‘shareMessage’: ‘Get link’, ‘target’: ”}, {‘name’: ‘Facebook’, ‘key’: ‘facebook’, ‘shareMessage’: ‘Share to Facebook’, ‘target’: ‘facebook’}, {‘name’: ‘BlogThis!’, ‘key’: ‘blogThis’, ‘shareMessage’: ‘BlogThis!’, ‘target’: ‘blog’}, {‘name’: ‘Twitter’, ‘key’: ‘twitter’, ‘shareMessage’: ‘Share to Twitter’, ‘target’: ‘twitter’}, {‘name’: ‘Pinterest’, ‘key’: ‘pinterest’, ‘shareMessage’: ‘Share to Pinterest’, ‘target’: ‘pinterest’}, {‘name’: ‘Google+’, ‘key’: ‘googlePlus’, ‘shareMessage’: ‘Share to Google+’, ‘target’: ‘googleplus’}, {‘name’: ‘Email’, ‘key’: ’email’, ‘shareMessage’: ‘Email’, ‘target’: ’email’}], ‘googlePlusShareButtonWidth’: 300, ‘googlePlusBootstrap’: ‘x3cscript typex3dx22text/javascriptx22x3ewindow.___gcfg x3d {x27langx27: x27en_GBx27};x3c/scriptx3e’}, ‘hasCustomJumpLinkMessage’: false, ‘jumpLinkMessage’: ‘Read more’, ‘pageType’: ‘item’, ‘postId’: ‘8421834927878779799’, ‘postImageThumbnailUrl’: ‘https://3.bp.blogspot.com/-eWAq1RjVgZo/WgqJb4zXarI/AAAAAAAAFxw/JKZJZGQaV1wK22N1LeLsImz1yGvCvOSSgCK4BGAYYCw/s72-c/10%2Bways%2Bto%2Buse%2BDIY%2Bkombucha%2Btea%2B%252828%2529.jpg’, ‘postImageUrl’: ‘https://3.bp.blogspot.com/-eWAq1RjVgZo/WgqJb4zXarI/AAAAAAAAFxw/JKZJZGQaV1wK22N1LeLsImz1yGvCvOSSgCK4BGAYYCw/s640/10%2Bways%2Bto%2Buse%2BDIY%2Bkombucha%2Btea%2B%252828%2529.jpg’, ‘pageName’: ‘Eat your hedge!’, ‘pageTitle’: ‘Our Permaculture Life: Eat your hedge!’, ‘metaDescription’: ”}}, {‘name’: ‘features’, ‘data’: {‘lazy_images’: ‘false’, ‘unsupported_browser_message’: ‘false’, ‘lightbox_img_parsing’: ‘true’, ‘video_theatre_support’: ‘true’, ‘sharing_get_link_dialog’: ‘false’, ‘sharing_native’: ‘false’}}, {‘name’: ‘messages’, ‘data’: {‘edit’: ‘Edit’, ‘linkCopiedToClipboard’: ‘Link copied to clipboard’, ‘ok’: ‘Ok’, ‘postLink’: ‘Post link’}}, {‘name’: ‘template’, ‘data’: {‘name’: ‘Awesome Inc.’, ‘localizedName’: ‘Awesome Inc.’, ‘isResponsive’: false, ‘isAlternateRendering’: false, ‘isCustom’: false, ‘variant’: ‘light’, ‘variantId’: ‘light’}}, {‘name’: ‘view’, ‘data’: {‘classic’: {‘name’: ‘classic’, ‘url’: ‘?viewx3dclassic’}, ‘flipcard’: {‘name’: ‘flipcard’, ‘url’: ‘?viewx3dflipcard’}, ‘magazine’: {‘name’: ‘magazine’, ‘url’: ‘?viewx3dmagazine’}, ‘mosaic’: {‘name’: ‘mosaic’, ‘url’: ‘?viewx3dmosaic’}, ‘sidebar’: {‘name’: ‘sidebar’, ‘url’: ‘?viewx3dsidebar’}, ‘snapshot’: {‘name’: ‘snapshot’, ‘url’: ‘?viewx3dsnapshot’}, ‘timeslide’: {‘name’: ‘timeslide’, ‘url’: ‘?viewx3dtimeslide’}, ‘isMobile’: false, ‘title’: ‘Eat your hedge!’, ‘description’: ‘Morag Gamble blogs about permaculture in the home, garden and community.’, ‘featuredImage’: ‘https://3.bp.blogspot.com/-eWAq1RjVgZo/WgqJb4zXarI/AAAAAAAAFxw/JKZJZGQaV1wK22N1LeLsImz1yGvCvOSSgCK4BGAYYCw/s640/10%2Bways%2Bto%2Buse%2BDIY%2Bkombucha%2Btea%2B%252828%2529.jpg’, ‘url’: ‘http://our-permaculture-life.blogspot.com/2017/11/eat-your-hedge.html’, ‘type’: ‘item’, ‘isSingleItem’: true, ‘isMultipleItems’: false, ‘isError’: false, ‘isPage’: false, ‘isPost’: true, ‘isHomepage’: false, ‘isArchive’: false, ‘isLabelSearch’: false, ‘postId’: 8421834927878779799}}]); _WidgetManager._RegisterWidget(‘_NavbarView’, new _WidgetInfo(‘Navbar1’, ‘navbar’, null, document.getElementById(‘Navbar1’), {}, ‘displayModeFull’)); _WidgetManager._RegisterWidget(‘_HeaderView’, new _WidgetInfo(‘Header1’, ‘header’, null, document.getElementById(‘Header1’), {}, ‘displayModeFull’)); _WidgetManager._RegisterWidget(‘_PageListView’, new _WidgetInfo(‘PageList3’, ‘crosscol’, null, document.getElementById(‘PageList3’), {‘title’: ”, ‘links’: [{‘isCurrentPage’: false, ‘href’: ‘http://our-permaculture-life.blogspot.com/’, ‘title’: ‘Moragx27s Blog’}, {‘isCurrentPage’: false, ‘href’: ‘http://our-permaculture-life.blogspot.com/p/workshops-with-morag.html’, ‘id’: ‘1229547198800664812’, ‘title’: ‘Learn with Morag’}, {‘isCurrentPage’: false, ‘href’: ‘http://our-permaculture-life.blogspot.com/p/home.html’, ‘id’: ‘6738236805730425382’, ‘title’: ‘Moragx27s Organisations ‘}, {‘isCurrentPage’: false, ‘href’: ‘http://our-permaculture-life.blogspot.com/p/about-our-permaculture-life.html’, ‘id’: ‘569757929003027244’, ‘title’: ‘About Our Permaculture Life’}, {‘isCurrentPage’: false, ‘href’: ‘http://our-permaculture-life.blogspot.com/p/contact.html’, ‘id’: ‘1616199860901713438’, ‘title’: ‘Contact Morag’}, {‘isCurrentPage’: false, ‘href’: ‘http://our-permaculture-life.blogspot.com/p/subbscribe.html’, ‘id’: ‘8669352275844821328’, ‘title’: ‘Subscribe’}], ‘mobile’: false}, ‘displayModeFull’)); _WidgetManager._RegisterWidget(‘_BlogView’, new _WidgetInfo(‘Blog1’, ‘main’, null, document.getElementById(‘Blog1’), {‘cmtInteractionsEnabled’: false, ‘useNgc’: false, ‘lightboxEnabled’: true, ‘lightboxModuleUrl’: ‘https://www.blogger.com/static/v1/jsbin/1725183242-lbx__en_gb.js’, ‘lightboxCssUrl’: ‘https://www.blogger.com/static/v1/v-css/368954415-lightbox_bundle.css’}, ‘displayModeFull’)); _WidgetManager._RegisterWidget(‘_ImageView’, new _WidgetInfo(‘Image2’, ‘sidebar-right-1’, null, document.getElementById(‘Image2’), {‘resize’: true}, ‘displayModeFull’)); _WidgetManager._RegisterWidget(‘_ImageView’, new _WidgetInfo(‘Image3’, ‘sidebar-right-1’, null, document.getElementById(‘Image3’), {‘resize’: true}, ‘displayModeFull’)); _WidgetManager._RegisterWidget(‘_ImageView’, new _WidgetInfo(‘Image1’, ‘sidebar-right-1’, null, document.getElementById(‘Image1’), {‘resize’: true}, ‘displayModeFull’)); _WidgetManager._RegisterWidget(‘_HTMLView’, new _WidgetInfo(‘HTML1’, ‘sidebar-right-1’, null, document.getElementById(‘HTML1’), {}, ‘displayModeFull’)); _WidgetManager._RegisterWidget(‘_StatsView’, new _WidgetInfo(‘Stats1’, ‘sidebar-right-1’, null, document.getElementById(‘Stats1’), {‘title’: ‘Total Pageviews’, ‘showGraphicalCounter’: true, ‘showAnimatedCounter’: true, ‘showSparkline’: false, ‘statsUrl’: ‘//our-permaculture-life.blogspot.com/b/stats?stylex3dBLACK_TRANSPARENTx26timeRangex3dALL_TIMEx26tokenx3dR5SN618BAAA.lQ_Z11txET6Z_B6heo3ERoIogg4zDnabDk8Wo545lEs.Ek8QZDRs2uZdbrHh8sK-Ww’}, ‘displayModeFull’)); _WidgetManager._RegisterWidget(‘_TextView’, new _WidgetInfo(‘Text1’, ‘sidebar-right-1’, null, document.getElementById(‘Text1’), {}, ‘displayModeFull’)); _WidgetManager._RegisterWidget(‘_BlogSearchView’, new _WidgetInfo(‘BlogSearch1’, ‘sidebar-right-1’, null, document.getElementById(‘BlogSearch1’), {}, ‘displayModeFull’)); _WidgetManager._RegisterWidget(‘_LinkListView’, new _WidgetInfo(‘LinkList2’, ‘sidebar-right-1’, null, document.getElementById(‘LinkList2’), {}, ‘displayModeFull’)); _WidgetManager._RegisterWidget(‘_PopularPostsView’, new _WidgetInfo(‘PopularPosts2’, ‘sidebar-right-1’, null, document.getElementById(‘PopularPosts2’), {}, ‘displayModeFull’)); _WidgetManager._RegisterWidget(‘_BlogArchiveView’, new _WidgetInfo(‘BlogArchive1’, ‘sidebar-right-1’, null, document.getElementById(‘BlogArchive1’), {‘languageDirection’: ‘ltr’, ‘loadingMessage’: ‘Loadingx26hellip;’}, ‘displayModeFull’)); _WidgetManager._RegisterWidget(‘_ContactFormView’, new _WidgetInfo(‘ContactForm1’, ‘sidebar-right-1’, null, document.getElementById(‘ContactForm1’), {‘contactFormMessageSendingMsg’: ‘Sending…’, ‘contactFormMessageSentMsg’: ‘Your message has been sent.’, ‘contactFormMessageNotSentMsg’: ‘Message could not be sent. Please try again later.’, ‘contactFormInvalidEmailMsg’: ‘A valid email address is required.’, ‘contactFormEmptyMessageMsg’: ‘Message field cannot be empty.’, ‘title’: ‘Contact Us’, ‘blogId’: ‘801030191087496810’, ‘contactFormNameMsg’: ‘Name’, ‘contactFormEmailMsg’: ‘Email’, ‘contactFormMessageMsg’: ‘Message’, ‘contactFormSendMsg’: ‘Send’, ‘submitUrl’: ‘https://www.blogger.com/contact-form.do’}, ‘displayModeFull’)); _WidgetManager._RegisterWidget(‘_LabelView’, new _WidgetInfo(‘Label2’, ‘sidebar-right-1’, null, document.getElementById(‘Label2’), {}, ‘displayModeFull’)); _WidgetManager._RegisterWidget(‘_LinkListView’, new _WidgetInfo(‘LinkList1’, ‘sidebar-right-1’, null, document.getElementById(‘LinkList1’), {}, ‘displayModeFull’)); _WidgetManager._RegisterWidget(‘_PlusBadgeView’, new _WidgetInfo(‘PlusBadge1’, ‘sidebar-right-1’, null, document.getElementById(‘PlusBadge1’), {}, ‘displayModeFull’)); _WidgetManager._RegisterWidget(‘_PlusOneView’, new _WidgetInfo(‘PlusOne1’, ‘sidebar-right-1’, null, document.getElementById(‘PlusOne1’), {}, ‘displayModeFull’)); _WidgetManager._RegisterWidget(‘_HTMLView’, new _WidgetInfo(‘HTML2’, ‘footer-3’, null, document.getElementById(‘HTML2’), {}, ‘displayModeFull’)); _WidgetManager._RegisterWidget(‘_AttributionView’, new _WidgetInfo(‘Attribution1’, ‘footer-3’, null, document.getElementById(‘Attribution1’), {}, ‘displayModeFull’));
http://our-permaculture-life.blogspot.com/2017/11/eat-your-hedge.html
On – 14 Nov, 2017 By Morag Gamble
-

Telangana Farmer || Balaiah Inventes Innovative Equipment For Farming || Nalgonda || V6 News
Telangana Farmer Balaiah from Nalgonda district invented Agricultural machinery with his innovative idea. Balaiah says that this equipment works with less expenses for yield.Watch first ever a 24/7 Telangana news Channel V6 News, a Journalist – driven channel that covers news updates, politics, sports, entertainment and cinema. The channel telecast special Telangana programs in complete Telangana dialect.
The channel airs shows like ‘ Top News,Taara, 70MM, Ghadeelu,Teenmaar, Dhoom Dhaam, Mangli Adda,Janapadam, Telangana shaakam, Prateeka Show etc’. Sports, Movies, Politics Controversies, Current Affairs, Technology.. you name it and you find it at the click of a button.
Subscribe us athttp://bit.ly/V6news
Download V6 Android App ►http://bit.ly/V6NewsAPP
Visit our Website ►http://V6news.tv
Twitter ►https://twitter.com/V6News
Facebook ►http://www.facebook.com/V6News.tv
Google+ ►https://plus.google.com/109903438943940210337 -

TALKING TOOLS with Jonathan Dysinger of Farmer’s Friend LLC
Talking about tools with the creator of the Quick Cut Greens Harvester, Jonathan Dysinger.
SUB:http://bit.ly/2d7dQgdPOPULAR VIDEOS:http://bit.ly/2cmcFLe
↓↓↓↓↓↓↓↓↓ CLICK “SHOW MORE” FOR RESOURCES ↓↓↓↓↓↓↓↓↓↓Harvester here:
http://bit.ly/1W3nLGbCaterpillar Tunnel here:
http://bit.ly/2gItRNf1 Day Workshop:http://bit.ly/2cziu7v
Donate:http://theurbanfarmer.co/support/
My online course: www.profitableurbanfarming.com
My book: www.theurbanfarmer.coMusic by: David Cutter Music – www.davidcuttermusic.co.uk
facebook.com/GreenCityAcres
twitter.com/GreenCityAcres
___
FARM EQUIPMENT I USE:
Quick Cut Greens Harvester:http://bit.ly/1W3nLGb
Knife and Tool Sharpener:http://bit.ly/29DHlos
Jang Seeder:http://goo.gl/XGvJtl
Row Bags:http://goo.gl/eI1CLp
Insect Netting:http://goo.gl/rjyimK
The Coolbot:http://bit.ly/2cziu7v
___
CAMERA EQUIPMENT I USE:
Canon Rebel T6i:http://amzn.to/29JApHr
Canon wide angle lens 10-18mm:http://amzn.to/2a2t1pl
Shure Lens Hopper shotgun mic:http://amzn.to/29zpdMz
Joby Gorilla Pod (flexible tripod):http://amzn.to/29JBBu7
Go Pro action camera:http://amzn.to/29JBU8j
Phantom 4 Drone:http://amzn.to/29zqenG
iPad 4 for drone controller:http://amzn.to/29vwKdh -
Solar Heater: 20 Tutorials How To Build and Use DIY Solar Air Heater (Kindle Freebie) | Prepared For Survival – Food Storage & Preparedness
Solar Heater: 20 Tutorials How To Build and Use DIY Solar Air Heater
20 Tutorials How To Build and Use DIY Solar Air Heater
Needless to say, when the winter weather arrives; it gets cold! Some of you right now may be struggling to stay warm and it takes a toll on you, not only physically, but financially as well. But don’t worry friends, because there is a DIY solution for your winter heating needs right around the corner. Because using the information gathered right here in this book you can learn how you can easily and efficiently heat your home all year long with your very own DIY solar heater.
Instead of having your utility bills dictate how you spend all of your hard earned money, you can lift that financial chip right off of your shoulders with your very own DIY solar collecting heater. Learn how to efficiently maximize the warmth of your home. The sun shines over our head every single day, why not create ingenious ways to collect all of that precious energy?
This book has scoured the globe for some of the best solar heater designs that almost anyone can build with just a bare minimum of materials and equipment. Receive in depth instructions on how you can build basic solar heaters, window heaters, and even water heaters. Everything you need to know is right here in this book!
Find out how you can:
- Create a functioning solar collector
- Use Passive Solar Heating
- Maximize House Warmth
- Use Solar Heated Water
- And more!
Solar Heater: 20 Tutorials How To Build and Use DIY Solar Air Heater
http://preparedforsurvival.blogspot.com/2017/10/solar-heater-20-tutorials-how-to-build.html
On – 26 Oct, 2017 By
-

Install Fresh Air Intake for Homesteading Wood Stoves | The Homestead Survival
How to Install Fresh Air Intake for Homesteading Wood Stoves for safety. When using a wood stove that is vented to the outside, every cubic foot of air that goes up and out the stack has to be replaced in the room.

For the second time, (because it is so important) for every cubic foot of air that is pumped outside has to be replaced by an equal quantity of air from another source. If it doesn’t get replaced, there are great chances of vacuum being created. It would cause health concerns to the people living inside the house under these circumstances.
Depending on the location of your wood stove, here’s what you could do to prevent the above from happening. Secure the outlet with the required amount of angle brackets held in place with the sheet metal brackets.
2″ Outside Air Kit For Pellet Stoves. 2″ X 60″ Flex Pipe With Wall Plate Screen. Dura Vent Item Number 3PVP-AIK – (Buy here from Amazon to support our website)
If the above is not possible, use a mounted adapter to hold the angle brackets in place for proper support. If it is not possible to adjust the air intake damper from the inside, try to adjust it from the outside if possible.
When the door is opened, the elbow swings on its hinges and some contraction is seen to facilitate the unrestricted and easy movement of air. Sometimes, it can be insulated with the right material in order to prevent the heat from deforming the outlets or other parts.
If the heat duct connected to the inside of the house is disconnected, the air can be replaced from under the house. Either way, vacuum is not created and the air flow makes the atmosphere inside the house fresh.
With winter around the corner, all the heaters used in the house must be checked and kept ready. All the insulation should be taken care of. A functional unit will prove to be very helpful.
Click here to read about Install Fresh Air Intake for Homesteading Wood Stoves:
http://www.instructables.com/id/Fresh-Air-Intake-for-a-Woodstove-or-Wood-Heater-w/
http://thehomesteadsurvival.com/install-fresh-air-intake-homesteading-wood-stoves/
On – 23 Nov, 2017 By
-

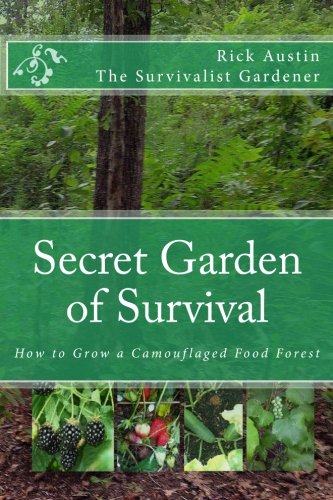
Secret Garden of Survival: How to grow a camouflaged food- forest.
Imagine a food garden that you only have to plant once in your life-time, that takes up very little space, that will provide food for you and your family for the next 30 years; that can grow five times more food per square foot than traditional or commercial gardening; and where you never have to…;
CreateSpace Independent Publishing PlatformPrice: $29.95 Free Shipping
Imagine a food garden that you only have to plant once in your life-time, that takes up very little space, that will provide food for you and your family for the next 30 years; that can grow five times more food per square foot than traditional or commercial gardening; and where you never have to weed, never have to use fertilizers and never have to use pesticide– ever. All diguised as overgrown underbrush, so nobody knows you have food growing there! This book will show you how to do it in one growing season!
Full Customer Reviews:
-

The Breakfast Book: A Healthy Cookbook with Amazing Whole-Food Breakfast Recipes for Better Health and Easy Weight Loss: Healthy Cooking for Busy People on a Budget (Mediterranean Diet Cookbook)
Healthy Breakfasts for Busy Mornings – Simple Meal Ideas to Help You Lose or Maintain a Healthy WeightFrom the author of several bestselling cookbooks, Vesela Tabakova, comes a great new collection of delicious, easy to make family recipes.The Breakfast Book: A Healthy Cookbook with Amazing Whole-Food Breakfast Recipes for Better Health and Easy Weight Loss…;

Independently publishedPrice: $9.99 Free Shipping
Healthy Breakfasts for Busy Mornings – Simple Meal Ideas to Help You Lose or Maintain a Healthy Weight
From the author of several bestselling cookbooks, Vesela Tabakova, comes a great new collection of delicious, easy to make family recipes.
The Breakfast Book: A Healthy Cookbook with Amazing Whole-Food Breakfast Recipes for Better Health and Easy Weight Loss is an invaluable and delicious collection of healthy whole food breakfast recipes that will please everyone at the table and become all time favorites.
If you’re looking for delicious everyday recipes that are not too complicated and are budget-friendly – this cookbook is for you.***FREE BONUS RECIPES at the end of the book – 10 Ridiculously Easy Jam and Jelly Recipes Anyone Can Make!***
Full Customer Reviews:
-

Agroecology and Permaculture Design: Same but Different?
Agroecology and Permaculture Design: Same but Different?
Maddy HarlandMonday, 20th November 2017Dr Immo Fiebrig interviewed Maddy Harland about how Permaculture Design can enhance the design of Agroecology systems. What are its differences and what are its similarities?

What elements of design in permaculture can be linked to agroecological practices and to what extent are they functional in terms of sustainable or regenerative farm productivity and in what context?
Agroecology works well with permaculture design: it uses stacking to create multi-functional yields, microclimates, greater edges, biodiversity, integration of crops rather than monocultural systems, utilizes niches, designing from patterns to details, minimizing waste, using renewable resources, and it is creative and open to experiment and adaptation and– for instance, Moringa is being trailed in Africa, Central and South America as a nitrogen fixer that yields a highly nutritious crop.
It is regenerative as well as sustainable because it can grow its own fertility (no petro-chemicals), stabilize soil, lock carbon in the soil to sequester it from the atmosphere – it is a vital climate cooling form of agriculture. Preventing soil erosion also enhances water quality, ensuring better breeding habitats for aquatic creatures. It is part of a relocalised food production saving food miles and establishing greater food security. It also models itself on indigenous, local forms of agriculture, a shift away from a western neoliberal form of commercial that seeks to export techniques and create a requirement for hybridized seed and mechanized equipment.
Permaculture is not restricted to Earth care systems, it also has the potential to engage its other ethics: people care and fair shares/limits to growth. Agroecology is a growing system whilst permaculture design is a holistic systems based design system that can be applied to land based systems and beyond.
It is interesting to note that Agroecology and the right to food (2012) presented to the United Nations Human Rights Council is a report based on an extensive review of recent scientific literature. The report demonstrates that agroecology, if sufficiently supported, can double food production in entire regions within 10 years while mitigating climate change and alleviating rural poverty.
What elements fulfill both an aesthetic and a productive function – what elements are mostly aesthetic?
In a well designed system, all elements can be aesthetic and functional. For example, tropical flowering native trees attract pollinators. Similarly, wildflower meadows in orchard or forest garden system provide habitat, attract pollinators, and pest-predator like bats who predate on codling moths. There is no either/or.
In what respect would ‘the whole’ be more than ‘its elements’?
In respect to pest control, restabilising soils, creating habitat, fixing nitrogen. The whole provide ecosystem services if we must use that terms.
With regards to the previous questions, what farms would you propose as of ‘lighthouse character’.
My trip to Belize in March 2017 took me to Sattva Land, a three year old food forest designed with permaculture, a former citrus farm and then its ‘parent’, Maya Mountain Research Farm, which was a citrus and cattle farm 27 years ago. They both demonstrate how permaculture can regenerate landscapes using techniques like building swales, making and ultilising biochar to enhance fertility, intercropping, and designing microclimates and exploiting niches and edges, to allow a great variety of species to thrive, i.e. biodiversity.

They also demonstrate ecological building techniques, the use of renewable energy, education, people care, respect for indigenous knowledge and traditions, food security. MMRF specifically offers a scholarship programme to disseminate this knowledge both regionally and all over C and S America. It is an impressive lighthouse project.
I am also impressed by the progress of the Rainforest Saver Project, a charity promoting as a replacement for slash and burn farming in tropical rainforest areas. They work with projects in Honduras and Cameroon and soon Ecuador. Slash and burn is an unsustainable agricultural technique practiced by 200 to 300 million tropical farmers worldwide, because that is the only way of making a living that they know. It means continuously cutting down the rainforests. Inga alley cropping is a successful alternative.
“As Inga alley cropping mimics the natural rainforest ecosystem, the soil is protected and nurtured by the cycling of the Inga tree cuttings. No further chemical inputs are required. Not only is this not a financial burden on the farmer but also it means he is not exposed to highly toxic chemicals. And further down the line, should the farmer wish to sell any of his or her produce on the open market – possibly through a fairtrade co-operative – then he/she should get a premium for organically grown produce. It enables the farmer to make a better living without cutting down more forest.”
Rainforest Saver supports local, grassroots organisations to promote this better way of farming in practical ways.
In Britain, food forest experimentation currently more on garden than farm scale systems. Well established examples are Graham and Nancy Bell in The Scottish Borders, Tim and my garden in Hampshire, Martin Crawford in Devon. These three are 25 years old or more. There are also a whole host of developing forest gardens and this is becoming a movement!
Maddy Harland is the editor and co-founder of Permaculture magazine. You can pay a visit to her forest garden via YouTube. is the author of Fertile Edges – regenerating land, culture and hope. “Breathtaking and strangely rollicking good fun.” John D Liu, Green Gold film maker.
Dr Immo Fiebrig is a post-doctoral research fellow at Coventry University. His current research focuses on Sustainability Assessment, Monitoring & Evaluation of productive permaculture systems, thus leading to the introduction of permaculture produce to the food value chain. This interview was conducted for the first Agroecology Europe Forum – 25-27 October 2017.
https://www.permaculture.co.uk/articles/agroecology-and-permaculture-design-same-different
On – 20 Nov, 2017 By
-

Taking a Pass on Gas – Wood Preferred | Two Ice Floes

Taking a Pass on Gas – Wood Preferred
By
High Desert Homesteading
We recently bought a 22 year old house that had a massive rock gas fireplace. Not only was it useless for producing heat (being mostly decorative) it burned a fossil fuel controlled by a public utility. We much prefer a real fire, not to mention we have years of standing firewood on our property.
While a real wood fireplace/stove was on our prerequisite list for our new home, this house had pretty much everything else. Since the existing fireplace was very large and constructed of solid moss rock, we assumed it must have been a real fireplace at one time and later converted to a gas fired insert by a previous owner.
Forgive the quality of some of the photos. This was an exhausting process for an old guy, so I took photos with whatever device I had handy at the time.


The first part of this article will cover the three D’s: Discovery, Disappointment and Demolition.
While I personally installed a wood boiler and two wood stoves at the old homestead, I had no experience with a major conversion. The first stop was to a local home and hearth type store to get an idea of what we were dealing with and the options for wood inserts…assuming we could use the existing moss rock structure.
We were told it was essential to determine if the structure was originally a wood burner or built for the gas insert – because if it was originally built for gas – you CAN NOT convert it to wood. I thought the “you CAN NOT convert” statement was just a sales line since most home and hearth stores make the majority of their profit on installation work – not the stove they sell you.
However, the first step was knowing for sure if this was an old wood burner or someone actually went to all the labor and expense to build this massive moss rock structure for an older gas insert (older meaning it looked as much like a real wood fire as a politician’s smile).
The house has a large wooden chase on the roof that could have easily accommodated a masonry or insulated pipe chimney. Since the gas insert was nicely mortared into the rock structure, I choose the roof as a starting point to see if looking inside the chase would provide any real clues as to the gas/wood question.
Having fallen off a 2-story roof about a decade ago, I was really hoping to avoid a similar fate this time. However, since there were no active thunderstorms with high gusts of wind (the cause of my previous fall) I cautiously made the climb and pulled the lid from the chase. This provided my first dash of disappointment. There was no indication of a previous masonry chimney and the existing hole for the gas exhaust pipe indicated a larger, insulated double-walled exhaust pipe sometimes used for a wood burning fireplace was never there.
Not one to easily give up hope until (all) the facts prove otherwise, I knew the house had been re-roofed a couple of times during its life. It was possible that all evidence of a wood burner was removed when the gas insert was installed and the house re-shingled. The only way to know for certain was to get a look inside the moss rock structure to see if it contained an old firebox/masonry structure or if it was constructed of wood framing.
As you can see from the photo below, this was not going to be easy because the installation of the suspected gas insert was done well – the insert frame was completely mortared into the structure. I needed to get a look inside while causing a minimum amount of damage in case we decided to forget this project and stick with the gas insert.

Fortunately I have a 15’ long, USB powered borescope. Essentially this is a camera lens placed at the end of a long flexible tube that can be plugged into you phone with an adapter or directly into your computer/laptop/tablet. These can be purchased for less than $20 on eBay. I removed the glass front of the gas insert and drilled a small hole into the top of the firebox in a location that could be easily patched. I then fired up the borescope on my tablet and went in.
Disappointment was only seconds away. While certainly not providing a 4K, HD image, the borescope clearly showed what I most definitely did not want to see: Wood studs and insulation – everywhere. This left no doubt that our massive moss rock structure was, in fact, originally built for the gas fireplace insert – first wood framed, then sheetrocked and finally stone faced and mortared.
No worries – I just have to figure out the process of converting the existing structure to a wood burner. There has to be a way.
My initial disappointment grew as I spent night after night researching every possible avenue trying to find a reliable source that explains how to convert the gas fireplace into a wood burning one. The bottom line is you can’t! Even with a zero-clearance wood burning insert, one which doesn’t require a heavy masonry chimney, the heat generated by the actual wood burning insert itself is too extreme. It is against every building code in the US to do this and is a major fire hazard.
That left only two choices: Rip out the entire moss rock structure and start over, or leave it in place and place a wood stove in front of it. Either way, I (finally) agreed with my wife that with all the other projects that needed to be done, I would, for once, not do this myself. This was to be the first major project I would let a contractor complete. That was until the bids came in. The going rate for removing the moss rock structure, putting the rocks back on the wall and installing the wood burning stove we wanted was over $8500. Way out of our budget. Not going to happen.
After a week of staring at the structure, “Laying Hands” upon it (just trying to get a feel for how many tons of rock/mortar would have to be removed) my wife and I agreed if we wanted a wood stove and wanted it done right, like most everything else we would have to do it ourselves.
Removing the gas insert was not too difficult. Simply remove the mortar around the trim, disconnect the gas line and electrical connections, ‘saws-all’ the sheet metal firebox enough to bend it in, remove some screws and it pulled right out. Just cap off the gas line (I planned to leave it stubbed out on the hearth for possible future use), put some wire nuts on the bare electrical wires (I will re-route it to be used for future use powering a blower unit) and we were ready for the next step.
Now the real fun began. As you can tell from the photos, the moss rocks in question are not pebbles. Some are 2-3 sq. feet and 4”-6” thick. It was time for a serious tool and a lot of manual labor. We decided that I would perform the highly skilled and technical job of operating the small jack/jill hammer and my wife would carry the stones outside as I popped them off. It seemed a fair division of labor in my book.
Popping the stones off was fairly easy. Just place the chisel bit at a 45 degree angle where the stone meets the mortar and pull the trigger. I had to chisel several spots on some stones, but they all popped off without a lot of effort. And, yes, I did actually help my wife carry out the larger ones.
Once all the stones were gone, that left what proved to be a tougher job, removing the 3-4” layer of wired in mortar that covered the structure. I don’t want to indicate that my wife gets upset when a big mess is being made, but I put in ear plugs for this procedure – and it wasn’t to protect me from the sound of the demolition hammer.
After most of the mortar had been removed, it was time to deal with the wood mantle. The mantle consisted of a bunch of laminated pine 2x6s. It measured 5.5” thick, 18” deep and 8’ long – basically solid pine. During construction they framed and dry-walled the area, then hoisted the mantle into place and angle-screwed it top and bottom into every stud. Then the mortar and moss rocks were added, locking the mantle into place.


At this point the only thing left to do was remove all the screws and figure out how my wife could support the 100-150 lb mantle as I removed the last few screws – assuming the weight didn’t just suddenly snap off the screws and allow the mantle to drop uncontrollably.
Fortunately I maintain a miniature hardware store in the shop. I grabbed some pulleys, rope and 4 self-drilling lag bolts (I love those things). Lagging the pulley contraption at the top of the structure and into the sides of the mantle did the trick. As the screws were removed down the line, the pulleys took the weight. Removing the last screw allowed the mantle to gently detach from the wall without breaking any toes, or worse – creating a big mess.
After the mantle was down and dragged out the back door (where it still sits at the time of this writing) it was fairly easy with the help of a saws-all to cut out the framing/drywall in large sections. Done! That left us with bare studs on the back wall and part of the ceiling and a hearth only half covered in flagstone.
Our initial thought was to re-use the moss rock on the back wall. However, since neither my wife nor I are spring chickens, the thought of mixing literally a ton of mortar and lifting all the rocks back up to the top of the wall was less than appetizing. We discussed numerous design ideas (using lighter materials) and came up with something we both liked.
If you are curious about the vertical silver tube mounted between the studs in the photo above, you will have to return for Part Two of this article, which will begin to cover the rebuild process.
Below is an image mock-up I did prior to the rebuild of what we were shooting for.
High Desert Homesteading

http://twoicefloes.com/taking-a-pass-on-gas-wood-preferred/
On – 28 Oct, 2017 By Cognitive Dissonance