Your cart is currently empty!
Tag: harvest
-

September on a Permaculture Homestead in Ireland
“The homestead was built on a gentle rise that sloped gradually away on every side; in front to the wide plain, dotted with huge gum trees and great grey box groves, and at the back, after you had passed through the well-kept vegetable garden and orchard, to a long lagoon, bordered with trees and fringed with tall bulrushes and waving reeds.” ~ Mary Grant Bush
If you would like to see over 15,000 photographs of Bealtaine Cottage, read over 1,000 blogs, or decide to support the work of Bealtaine Cottage, completely dependent on people who value what I do, here’s how…Purchase The Book: A Cottage and Three Acres… https://bealtainecottage.com/a-cottage-and-three-acres-the-bealtaine-story/
Pre-order Book 2: In Search of the Goddess Rising…
https://bealtainecottage.com/book-2-from-bealtaine-cottage-in-search-of-the-goddess-rising/Take a look at The Magical Map… https://bealtainecottage.com/map-of-bealtaine-cottage-and-gardens-purchase-here/
Here is the link to my new Patreon page
https://www.patreon.com/BealtaineCottageHere is where you can send a donation via PayPal:
https://www.paypal.com/paypalme/BealtaineCottageSome links for you to use should you wish to comment on any of the videos on the Bealtaine Cottage YouTube channel…
The Website… https://bealtainecottage.com/
The Goddess Gardens…
https://www.facebook.com/GoddessGardens/Twitter… https://twitter.com/PermaGoddess
-

Ah looking back on the harvest in Oct 2016, just before our 1st frost…
Ah looking back on the harvest in Oct 2016, just before our 1st frost…
Ah looking back on the harvest in Oct 2016, just before our 1st frost warning. I had to hurry up to the garden to pick the remaining peppers. But these cool weather greens were fine with the plunging temps and we ate them into January ️ . . . . #novascotia #halifax #allotment #harvest #homegarden…
Source: https://www.instagram.com/p/Bb___bwAf-R
#novascotia, #halifax, #allotment, #harvest, #homegarden, the, harvest, looking
-

We harvested the rest of the potatoes today. I think we have enough to…

We harvested the rest of the potatoes today. I think we have enough to last the year. Last summer we grew way too much potatoes, but not enough carrots. This year we have lots of carrots, which is good because it’s my favourite vegetable in cooking. I enjoy this slow learing. It’s a practice in patience, growing food. I have to wait a whole year to give it another try. I’ll harves all of the carrots tomorrow, and I’m looking forward to it! ??? #gardenerslife #organicgardening #growyourownfood #permaculture #økologiskhagebruk #dyrkselv #potatoes #carrots #økologisk #kjøkkenhage ? -

The “All Year Round” cauliflower seedlings are looking healthy! I always struggle with overwinter…
The “All Year Round” cauliflower seedlings are looking healthy! I always struggle with overwinter…
The “All Year Round” cauliflower seedlings are looking healthy! I always struggle with overwinter crops so I’ve got my fingers crossed for these babies! . . . #allotment #growyourown #homegrown #kitchengarden #sustainable #organic #ediblegarden #allotmentlife #gyo #gardening #autumn #urbangardenersrepublic #harvest #diy #frame #plantsupport #sustainablesprout #hydrovegan
Source: https://www.instagram.com/p/Bbv5yEwHGv1
#allotment, #growyourown, #homegrown, #kitchengarden, #sustainable, #organic, #ediblegarden, #allotmentlife, #gyo, #gardening, #autumn, #urbangardenersrepublic, #harvest, #diy, #frame, #plantsupport, #sustainablesprout, #hydrovegan, year, round, cauliflower
-

Harvesting the latest round of radishes! What’s not to love – only a few…
Harvesting the latest round of radishes! What’s not to love – only a few…
Harvesting the latest round of radishes! What’s not to love – only a few weeks from seed to harvest to salad! #radish #harvest #cometodinner #salads . . . #urbangarden #urbanorganicgardener #urbangardenersrepublic #seedsnow #growsomethinggreen #thehappygardeninglife #eatseasonal #greenliving #growfood #backyardgarden #organicgarden #farmtotable #gardentotable #hortas_jardins #lovegardeners #cagrown #ediblegarden #containergarden #foods4thought #imsomartha #gardenlife #plantlife #hereismyfood
Source: https://www.instagram.com/p/BbuadK_nSPT
#radish, #harvest, #cometodinner, #salads, #urbangarden, #urbanorganicgardener, #urbangardenersrepublic, #seedsnow, #growsomethinggreen, #thehappygardeninglife, #eatseasonal, #greenliving, #growfood, #backyardgarden, #organicgarden, #farmtotable, #gardentotable, #hortas_jardins, #lovegardeners, #cagrown, #ediblegarden, #containergarden, #foods4thought, #imsomartha, #gardenlife, #plantlife, #hereismyfood, latest, round, radishes
-

Sweet corn is an easy crop for home gardens. Here’s how to plant it
One of life’s great treats is biting into corn that was cooked just minutes after it was harvested from your home garden. If you’ve never had the experience of eating fresh sweet corn right out of your yard, now is the time to plant it. Sweet corn is not one of the more commonly planted home garden vegetables, and there are reasons for this.
Although it rarely grows as high as an elephant’s eye, corn plants are fairly large, and they occupy a substantial amount of space in the garden. As a result, many vegetable gardeners don’t plant corn, especially if they have a small garden.
Each plant produces about two ears of corn, so overall production in the space is not as high as it would be for other popular vegetables, such as tomatoes, squash, snap beans or trellised cucumbers. But if you have the space, growing sweet corn is not that much of a challenge, and the results are delicious.
Types to grow
Many early summer vegetables produce over a period of weeks or even months. Corn, on the other hand, is harvested over a relatively short period of time as all of the ears ripen at about the same time. You can get around this by planting cultivars that ripen at different times.
Recommended sweet corn cultivars grouped by how long to harvest include:
Early-maturing: Seneca Horizon
Mid-season: Bonanza, Merit and Funks Sweet G90 (bi-color)
Late-maturing: Silver Queen (white), NK199, Iochief (AAS), Gold Queen and Golden Cross Bantam.
Or, you can plant the same cultivar in succession. Plant seeds in one area and then plant seeds in another area two or three weeks later.
There also are extra sweet corn cultivars. They contain more sugar than normal sweet corn and are able to hold their sugar levels longer after harvest. Based on the genetics involved, they are grouped into two categories: supersweet and sugary enhanced. Recommended supersweet types (which must be isolated from cross pollination with ordinary sweet corn or sugary enhanced) include How Sweet It Is (AAS), Honey-N-Pearl (AAS), XTender 378, 372, 270 BC, Passion, Accelerator, Summer Sweet #8101W, Summer Sweet #7210Y, #8102 BC, Pegasus and Ice Queen.
Recommended sugary enhanced types include Honey Select (AAS), Avalon, Miracle, Argent, Incredible, Bodacious, Precious Gem BC, Ambrosia BC, Sweet Chorus BC, Temptation BC, White Out, Lancelot BC, Silver King and Sweet Ice. (AAS is All-America Selection Winner.)
Planting
Planting corn early — now through mid-April — reduces problems with corn earworms, the leading insect pest of corn in the home garden. When planted this month, corn typically does not require any pesticide sprays.
Although sweet corn does require room, in a 4-by-8-foot raised bed you can grow two rows of corn with the plants in each row spaced 10 inches apart. That’s 20 plants. If they each produce two ears, you have a generous harvest of 40 ears of corn.
Prepare the ground for planting by first removing any weeds or unwanted vegetation. Turn the soil to a depth of a shovel blade (about 8 inches), apply a 2-3 inch layer of compost or composted manure and a general-purpose fertilizer following package directions, and thoroughly mix everything together.
When planting sweet corn, plant two or three seeds every 10 inches in the row, burying them about one-half to 1 inch deep, and water in thoroughly. After the seeds germinate and the plants are 3 to 4 inches tall, thin to one plant per 10 inches.
Sidedress sweet corn plants with a nitrogen containing fertilizer (ammonium nitrate, calcium nitrate, ammonium sulfate) when the plants are about 16 inches high and again when the plants are about 36 inches high. Corn benefits from generous fertilization.
Pollination issues
Many of the commonly grown vegetables are self-pollinating (tomatoes) or rely on insects for crosspollination (cucumbers), but corn is wind pollinated. The male flowers that shed the pollen are located at the top of the plant in the tassel. The female flowers are arranged in rows along the cob enclosed by the shucks. A silk is connected to each of the female flowers, and the other ends of the silks hang outside the shuck. At least one pollen grain must land on each silk to pollinate a female flower, which produces one kernel of corn.
Each kernel of corn is the result of a separate act of pollination. So, it is important to plant corn properly to make sure the wind deposits the pollen on the silks.
For that reason, we plant sweet corn in a block planting of several short rows side by side rather than one or two long rows. By planting in blocks, you allow the pollen to move from one plant to another more surely no matter which way the wind is blowing. Ears that are poorly filled with kernels of corn are generally the result of poor pollination.
Some gardeners take this farther and do hand pollination. This only is practical in the small plantings done in backyard gardens. When the tassels at the top of the plants begin to shed the yellow, powdery pollen, tassels are cut and shaken over the silks.
Harvest and use
The best time to harvest sweet corn is in the early morning while the temperature is low. To determine when regular sweet corn is ready to harvest, first check the silks to see if they have begun to dry and turn brown. Then feel the ear. It should feel firm and full.
Peel back a shuck enough to puncture a few kernels on the ears with your thumbnail. When sweet corn is at its highest quality, the juice from the kernels will be milky white and runny. It is not ready when the juice is clear and watery, and corn is over mature and starchy when the juice inside the kernels is thick and dough-like.
Corn usually matures 18 to 24 days after the tassels appear or 15-20 days after the first silks appear. Watch the corn closely because the quality changes fast with the normal sweet varieties. Refrigerate or cook immediately after harvesting.
Dan Gill is a horticulturist with the LSU AgCenter.
http://www.nola.com/homegarden/index.ssf/2017/03/sweet_corn_is_an_easy_crop_for.html
On – 25 Mar, 2017 By Dan Gill
-

Growing Shiitake Mushrooms
We got involved with Shiitake Mushrooms through our Agricultural Cooperative Extension Agency. (This is a great resource for any farmer. Make it a point at least to visit your local office and see the different programs they have going on for the farmer.) Back in 2003, our local office started helping traditional tobacco farmers transition into some other type of crop. They proposed growing both edible and medicinal Mushrooms.
By growing both, a farmer has two ways to sell mushrooms. You can grow edible mushrooms and sell to farmers markets, restaurants and health food stores. With medicinal mushrooms, you can pursue the herbal stores and sometimes you can reach out to acupuncturists’ offices. A diversified farm would do both!
Dr. Omoanghe Isikhuemhen of North Carolina A&T State University led the program. They proposed this deal: the school would provide the enough organic mushroom spore to inoculate 25 logs (3-4 ft. long x 4-8 in. diameter) in exchange for data collected by the farmer on how well the mushrooms produced. The farmer had to agree to keep approximately 200-250 logs for research.
The farmer would be given bags of spore with batch numbers only. When giving their data information, the farmer would refer to the batch number. This was, and is ongoing, research to see which strains of shiitake do best in which areas of North Carolina.
Alan and I signed up right away. That is how The Mushroom Hut @ Fox Farms was born! This was our first experience of Non-Traditional Forest Products (NTFP).
We always stress, when starting out on a new venture, to start out small and don’t invest a lot into the project until you see it will work for you. Everything sounds good on paper!
After signing up for the program, we were shown how to inoculate our log and how to care for it while waiting for the harvest—and that would be a very long wait. It can take from 6-12 months for the first fruiting after inoculation (most often 12 months).
Now we’ll show you how to get started.
Equipment And Supplies
- Drill
- Drill bit
- Food-Grade Wax
- Brush/Dauber (to apply the melted wax)
- Spawn
- Logs
- Containers for soaking
You can order most of these supplies from major mushroom spawn and equipment suppliers (examples: Field and Forest, Fungi Perfecti).
Assuming you already have a drill, total cost for all these supplies will be around $100.
Then, you have to scare up a log. If you have trees on your property, you can cut your own as a last resort. You may contact local loggers regarding logs that are too small for lumber—sometimes they’re sold for firewood. Or you can go into the woods and find a candidate that’s already on the ground.
Location For Your Log Yard
Find an area suitable for the production of the Shiitake. An area that is naturally shaded by trees is an ideal area for your log yard. If you are going to force fruiting, you will need access to water so this will be a consideration when deciding where to put your logs.
Best Trees For Mushroom Cultivation
Red and White Oaks and Sweetgums are the best trees for mushroom cultivation. These trees will produce longer than other trees due to their high wood density and strong bark.
Here at the farm we have also used Maple, Beech, Ash, Cherry and Birch. Ash takes longer to produce fruit. The others are good producers, but the bark doesn’t hold up long. Experiment to see what works for you and keep records (a regular calendar is great to write your notes on.) Make sure your tree’s bark is in good condition before you decide to use it.
When To Cut Down Trees For Mushroom Cultivation
The trees should be cut in late fall to late winter (Early Spring only if sap is not up). Be careful not to scuff up the bark. Ragged bark can allow other fungi to invade the bark.
Also, this will allow moisture loss and could slow down fruiting or keep it from fruiting at all.
The Proper Size Of Logs For Mushroom Cultivation
Use logs 3-4 ft. long and 3-8 in. in diameter. Keep in mind you will be moving the logs around. After cutting the logs, if you are not going to use them for a few weeks, make sure they don’t dry out.
Keep them out of direct sunlight, watered if it is unusually dry, or loosely covered if it is too rainy. Make sure there is air circulation.
When To Inoculate
Here in Western North Carolina, we start in March and complete by late April. Contact your local agricultural extension office for suggestions about timing in your area.
Ideally, you’ll use the trees as soon as possible after cutting. Production will be much better if moisture content is high. If you order your spawn before you are ready to use it, you can store it in the bottom of your refrigerator.
The Inoculation Process
Set up a work station for each task:
- Find a location that will be suitable for an electric drill (if you’re in a remote area make sure you have extra batteries).
- Space the holes 6-8 in. apart in rows along the length with 2-4 in. between rows. The holes should be placed in a staggered diamond pattern. (Closer spacings increase the rate of colonization and more rapid production but the spawn won’t go as far). Use your own judgement.
- Using your thumb inoculator, punch it down into the bag of spawn until the inoculator is full then, put it over the hole in the log and using your thumb press a couple of times to release the spawn into the hole. Make sure the drilled hole is completely full of the spawn.
- Now comes the waxing. You can have the wax slowly melting (on low) while you are doing steps one and two—a slow cooker on low will work. Make sure the wax never gets too hot. Use a natural bristle brush or wax dauber to apply the wax completely covering the spawn/hole. air bubbles. Go over it a couple of times if you need to.
Stacking Your Logs
After you have finished inoculating your logs it is time to stack your logs and wait for fruiting. Fruiting time can be anywhere from 6-12 months from time of inoculation. There are three methods of stacking:
- Low stack: this method is simple. All it involves is leaving your logs on the ground. However, it’s best to lay the logs on top of a pallet or cinderblocks to keep ground fungi from invading the logs.
- Crib style: stacking logs on top of each other, with horizontal layers of logs laid perpendicular to each other.
- Lean-to: lean logs up against a fencing, rail or wire.
During this time, make sure the bark/logs do not dry out. If it is unusually dry, you can use an overhead sprinkling system, watering hose, or soak the logs in a container. If soaking in a container, soak between 24-78 hours. This can also be done to force fruiting.
Know your water source! Do not use water from a creek, branch or river that has horses upstream of your mushrooms. E-coli has been found in water from this type of source. Test or filter your water to make sure it is reasonably clean.
Harvesting Your Mushroom Logs
Logs can fruit anywhere from 6-12 months from inoculation, due to reasons like the moisture content in logs, strain of mushroom, air temp, humidity, rainfall and light.
When you see the logs begin to fruit, you can help the fruiting by watering or soaking. It can take about three days for the mushroom to be large enough for harvest. Look under the cap of the mushroom for bugs/snails and brush off with a brush, baster, or plain paper towel.
Collect the mushrooms in box, basket, or stainless steel container. Store them in refrigerator or cool area immediately to preserve their freshness.
Treating The Logs After Harvest
Put the logs in a designated area where you will know these logs have fruited. Keep notes on a calendar as to when you have a fruiting so you can keep up with forcing of these logs.
Only force logs every 6-10 weeks. If these logs have not started to fruit again, you can put them in containers to soak and force another fruiting. After soaking, you can shock the log with a rubber mallet. To do this, just strike the ends of the logs several times. This helps to stimulate the mycelium.
Preventing Pests And Insects
Try to keep leaves raked away from your log stacks. This is a good hiding place for snails and other bugs that love to eat on the mushroom.
You can put out snail baits (saucers of beer) for the snails to drown in. Otherwise you have to pick most of the other bugs off the mushrooms as being picked. There are beetles that like to eat into the wax/spawn. Squirrels may be a problem in some places.
Whatever your reason for growing shiitakes—food, fun or profit—here’s hoping your fungi fantasies are fulfilled!
Susan Tipton-Fox, along with husband Alan Fox, continues the farming and preserving practices passed down to her by her family. She runs on-farm workshops and overnights in Yancey County, North Carolina. Follow her on Facebook: The Mushroom Hut @ Fox Farms.
https://www.niftyhomestead.com/blog/growing-shiitake-mushrooms/
On – 13 Jun, 2017 By Nifty Homestead Community Submission
-

Transitioning the Vegetable Garden from Spring to Summer
— Gardening Tips —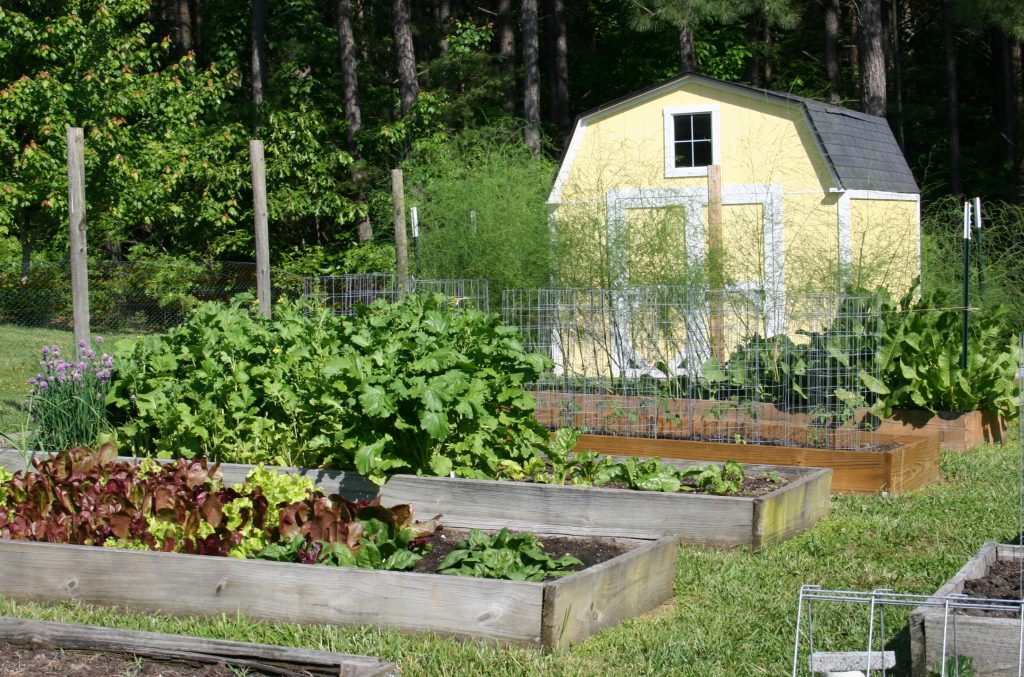
This is the time of year when I transition the vegetable garden from its spring crops into summertime. It’s the time of year when we never seem to have enough room in the raised beds nor enough time to do all of the work we set out to do in a given day.
In the vegetable garden, the broccoli rabe is at its peak, and the lettuce is, too. The beets will be ready for harvesting, pickling, and canning in about three weeks or so. Strawberries for jam are just starting to arrive and are protected thanks to the bird netting that keeps my nemesis, the local crow murder, from eating the harvest before I get to them. Peas twin on the Vine Spine Linking Trellis and start just starting to flower. Onions and garlic are maturing and the radishes are almost finished.
Newly planted carrot and parsnip seeds peek tentatively above the earth. Tomato plants expelled from hothouse splendor now wave from behind the safety of their cages. And waiting on the porch for truly hot weather are the flats of sweet potato plants who need heat and plenty of it to be happy.
Among the herb garden plants, the catnip is ready for harvesting, and I’ve already cut and dried another pint of oregano. I have cinnamon and Genovese basil plants ready to set outside and parsley and dill have been moved from the safety of their flats to the garden beds. I mix parsley and dill into the herb garden, the butterfly garden as food for hungry caterpillars, and in the vegetable garden so there is always plenty for us all.
We’ve been busy weeding all of the flower beds in the perennial garden. It is hot, dirty work. Last year, I got behind in the weeding and the weeds took advantage of my laziness to creep into every nook and cranny among the plants. Hubby and I have worked out a system whereby I week from 7 to 8:30 each morning and then he mulches the area afterward. When we finish the entire garden in about two weeks I will start again, tidying up the areas we’ve already done.
Our goal this year is to keep the garden in top shape as long as we can. The heat is always a problem and keeps me from gardening longer, but I have learned the hard way that a little sustained daily effort accumulates into success.
May is a busy month, but I have found time to update the monthly gardening tip sheets available free here at Home Garden Joy. I have also started a new short gardening book that I think you will enjoy! Stay tuned, be sure to join our email list for the latest information, and keep gardening and growing!
http://homegardenjoy.com/site/2017/05/transitioning-vegetable-garden-spring-summer.html
On – 18 May, 2017 By Jeanne
-

Planning for summer food – MY FRENCH COUNTRY HOME
planning for summer food
Apr 11, 2017


We’re not in the summer yet, not by a long way, but the spring does seem to be in a hurry to move forward here. Consequently I’m having to decide very quickly what to plant in our kitchen garden this year. Since I created the no-dig beds a couple of months ago, I haven’t had time to plant anything, and the only plant showing is the rhubarb that just refuses to give up.
We don’t have a big kitchen garden, it’s as much about looking pretty as producing food. But the few crops that we manage to harvest have to be ideal for summer eating and entertaining.
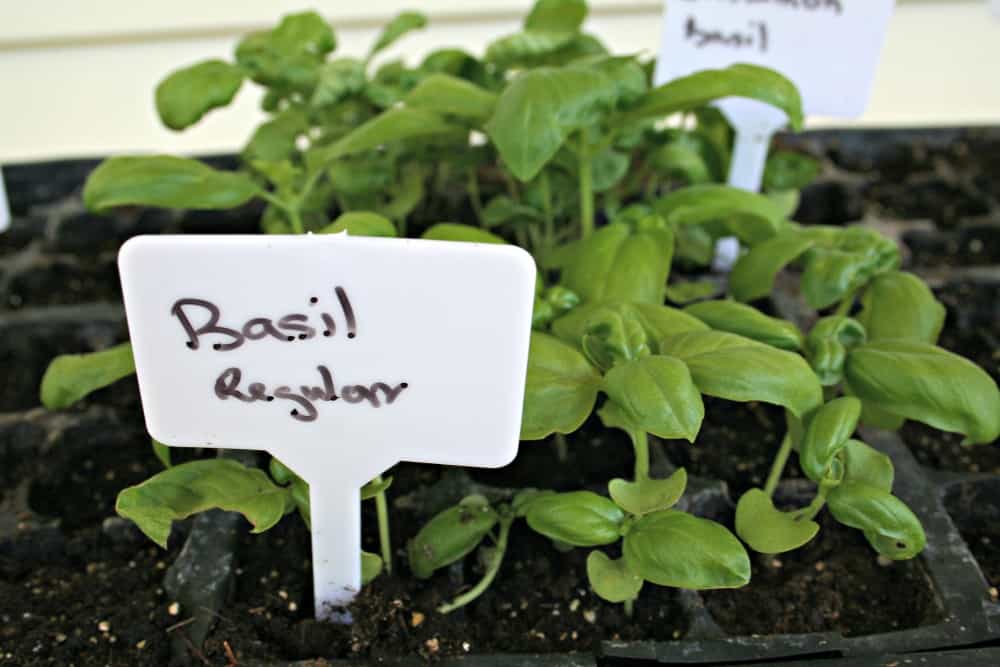
That’s why this year I shall be growing a lot of basil for making delicious pesto sauce for our pasta;

plenty of tomatoes, zucchini and aubergine or eggplant for our stuffed vegetables
and hopefully this year some coco de Paimpol, or white beans which are quite divine as a summer salad. They can actually be bought all year around as dry beans, and the recipe below can be adapted to using dry beans in case you don’t have the possibility or indeed the wish to grow them yourself.

To make a salad of Coco beans for four people as a main dish or for eight people as a small appetiser with a glass of rosé before the meal, you will need:
350 g / fresh white beans preferably the variety Cocos de Paimpol
one onion with a clove inserted for cooking
one finely chopped onion (I prefer to use a violet onion)
sprig of thyme
3 large spoons of olive oil
2 spoons of balsamic vinegar
Cover the freshly shelled beans with cold water, and drop the onion with the clove and the sprig of thyme into the water Bring to the boil and simmer for about 25 minutes or until the beans are just tender.
Strain, rinse in cold water and leave to cool. Chop the violet onion finely, and prepare the vinaigrette then pour the beans into a deep salad bowl and add the onion and vinaigrette with a little chopped chives or basil to taste. Some people like to add some small cherry tomatoes cut in half, but the beans are delicious without.
All this beautiful food was prepared and shot at the Château de Moissac, photos by Franck Schmitt for the book My Stylish French Girlfriends.
•
http://sharonsantoni.com/2017/04/31027/
On – 11 Apr, 2017 By
-

The Easy Way to Grow Loads of Potatoes: In a Trash Can
Potatoes are one excellent staple crop to grow in the home garden, but isn’t there a lot of digging and back pain involved?
Not necessarily! You can grow loads of russets, reds, golds, and even sweet potatoes in a trash can or bucket with minimal work, space, and effort.
It’s common to get up to 25 pounds of potatoes using this method, and it’s really simple too! This takes container gardening to another level.
The perfect bucket for growing any type of potato will have some sort of drainage holes drilled into the bottom–or, you can even cut the entire bottom out. That way, instead of dumping the bucket out to harvest your potatoes, you can just lift it up and they’ll fall out.
A metal or dark-colored can is preferred, to retain warmth and keep sunlight away from the root zone.
The how-to is slightly different for sweet potatoes and regular potatoes, so I’ll talk about regular potatoes first:
Basically, any organic potato you’ve already got will work perfectly as a seed potato. Ideally, they’ll be a bit past their prime for eating, and will have some eyes starting to form.
Don’t cut the potatoes up to look for seeds inside, because you won’t find any! (I once met someone who did this; you’re not alone.)
Instead, cut them into quarters, ideally with at least one “eye” on each piece. Allow these to dry out on the counter for a day or two before planting them.
These potato pieces will be planted cut-side down into your trash can or bucket, and each one will start growing into a new plant.
If you’re growing sweet potatoes, you can buy some organic ones at the grocery store to start your plants with–maybe just one or two.
This time, you’ll want to begin by doing that toothpick-balancing trick that you probably did as a science project in grade school.
Spear the sweet potato around the middle with four toothpicks, and balance it in a glass or jar of water. The sweet potato should be at least halfway submerged. You’ll want to add more water every few days to maintain this level.
Eventually, your potato will sprout stems and leaves, and these are called “slips”.
You’ll cut off these slips with a small sliver of the potato attached, and plant the slips into your trash can or bucket.
How to plant your potato “seeds” and/or “slips”:
Fill your trash can or bucket with about 8-12 inches of compost, and add in your seeds or slips. For white potatoes, bury the seeds with about an inch of compost. For the slips, plant them sideways about an inch down, leaving a few leaves and an inch or so of stem exposed.
As the plants grow, add more compost. You’ll want to keep burying the new growth until only a few leaves remain exposed, about 4-5 inches of compost for every 7-10 inches of growth.
Burying the stems forces plants to generate new root growth (in other words, potatoes!).
Keep them well-watered, and be patient. The whole process will take about four months.
When your trash can is full to the brim, simply continue to water it. The plants will eventually start to flower, and soon after, the whole plant will start to wilt, yellow, and die back.
Stop watering them at this point. This allows your potatoes to mature, which will take about two weeks until they’re ready to harvest.
With sweet potatoes, you’ll want to harvest them as soon as the leaves wilt and blacken from frost.
Then you’ll need to let the sweet potatoes cure for two weeks or more, in a dark, cool, dry place. This will ensure their sweet flavor, and allows them to be stored at room temperature for up to a year!
Incidentally, sweet potato greens are also edible and delicious when prepared like cooked spinach. They’re also pretty in urban landscapes!
Growing potatoes in this way can be a excellent supplement to your food bill, and a great DIY skill to learn.
https://thehomestead.guru/grow-potatoes-trash-can/
On – 05 May, 2017 By Krystal Trammell
-

6 Ways to Increase Food Production in Your Organic Vegetable Garden
Please note that affiliate links are present in this post, which means if you click on a link a buy something, I’ll get like 4 cents for it at no extra cost to you. All recommendations are humbly my own.
-
1. Prepare Your Soil Using a No-Till Method
-

No-Till gardening requires nothing more than reliable tools and good old-fashioned hard labor. Good for you and your garden. - It’s a harsh fact that machines are destroying our soil! When we mechanically till our gardens, our soil’s complex structure gets broken up into tiny particles. Air pockets created by earthworms and arthropods diminish. Colonies of beneficial bacteria and strands of fungal hyphae break apart. When these tiny pieces all settle, they become extremely compacted, leading to poor drainage – the totally opposite effect we hoped tilling would have!
- There’s a common misconception that we must till our soil every spring to aerate, so “roots can breathe” and “water can drain more efficiently,” but the fact is: Tilling does NOT accomplish this. There many other ways we can prepare our gardens that are not only healthier for our soil, but also require much less money and equipment – my preferred method is Double Digging.
Related Enough: Epic Spring Planting Series: My Best Tips for Planting with Seeds
I first learned about double digging from John Jeavons, founder of Ecology Action and the Grow Biointensive farming method, and author of How to Grow More Vegetables, when he presented at the MOSES Organic Farming Conference in 2015. The Double Dig Method entails digging two layers of soil with a shovel using nothing but old-fashioned manual labor. Using the least amount of effort possible, the digger is to “twist” the soil in patches while amending it using organic fertilizers and compost. Watch this instructional YouTube video on double digging (note that there is a second part you’ll need to watch).
Side note, I have a 2-part Soil Building Series: Increasing the Biodiversity of Your Soil Food Web, Part 1 and Part 2. To really get to know your soils on a deeper level, and to learn how to care for them compassionately, I invite you to read those posts!
The benefits of double digging are endless. There’s no intense breaking up of the soil structure. There’s no mass killing of valuable microorganisms, so plants are naturally healthier. All of your earthworms, spiders, centipedes and other beneficial bugs will be left in tact. Your plants’ root systems will grow deeper and stronger. And what’s fascinating is, once you build your soil fertility with organic matter your soil will hold more water, reducing the need to water as often. All of this means MORE FOOD!

Worms are so incredibly important for our gardens and when we are gentle with our soils, we preserve them and their delicate work. Totally Related: 7 Best Organic Soil Amendments for Your Garden
amzn_assoc_placement = “adunit0”; amzn_assoc_search_bar = “true”; amzn_assoc_tracking_id = “heirloomsoul-20”; amzn_assoc_ad_mode = “manual”; amzn_assoc_ad_type = “smart”; amzn_assoc_marketplace = “amazon”; amzn_assoc_region = “US”; amzn_assoc_title = “Stuff We Love for Soil Prep”; amzn_assoc_linkid = “5784ba14ef33b867e91e1877f5f21b5c”; amzn_assoc_asins = “B010CXJ0L4,B00AE12V5M,B00OHSFEG6,B010CRGKAE”;
-
2. Improve Your Soil Biodiversity with Homemade Compost
- If you know anything about compost, let it be this: Not all compost is created equal! The nutrient content of the compost you are using depends on what it is made out of. Did you acquire it from your municipality, in which case it could be mostly decomposed grass and tree trimmings, potentially laden with herbicides? Or did you make it yourself, in which case it is probably a richer concoction of grass and leaves from your yard, kitchen scraps of fruits, herbs, veggies and egg shells, and all kinds of organic matter from your own garden?
You see where I’m going with this. Compost is a great way to feed your garden and introduce more biodiversity into the soil, ideally at the end of the season or during soil preparation.

Homemade compost is the BEST compost – and it doesn’t have to be hard! The best compost to use is your own because you control what goes in it. All of the different types of organic matter we throw into our compost support different types of microbes, and this vastly increases the biodiversity and the nutrient content of our end product. A more biodiverse compost pile means a more biodiverse garden.
Some of us don’t have room to make compost. If you’re one of these people, getting compost from your municipality is fine – usually it’s free, and everyone loves free!
-
3. Stop Stepping on Your Soil
- This might sound obvious, but I’m adding it in here and for good reason: I’ve worked with a ton of people who stepped all over their garden beds until they worked with me. Soil compaction is one reason, while the breakage of tender plant roots is another, but the main reason why you should never, ever step on your soil is because your weight crushes and suffocates your microbes. Healthy soil food web = More nutrients in your veggies!
By now you’re going, Really? For the third time? Microorganisms, microbes or whatever the heck those things are she’s talking about?
The books below changed my life as a gardener and will also help you understand microbes, and your garden, like you never have before:
amzn_assoc_placement = “adunit0”; amzn_assoc_search_bar = “true”; amzn_assoc_tracking_id = “heirloomsoul-20”; amzn_assoc_ad_mode = “manual”; amzn_assoc_ad_type = “smart”; amzn_assoc_marketplace = “amazon”; amzn_assoc_region = “US”; amzn_assoc_title = “”; amzn_assoc_linkid = “be1d2f3f6543bfbef748e4958a695d08”; amzn_assoc_asins = “1604697296,1604691131,1580085792,1603580298”;
I use “microorganisms,” “microbes,” “soil biodiversity,” “microbial life,” and “Soil Food Web” interchangeably throughout my posts, but I mean generally the same thing when I talk about how important they are – “they” being a collection of bacteria, protozoa, nematodes, algae and fungi, billions of which can be found in one tablespoon of your soil. Caring for these living creatures is the most important aspect of growing food.
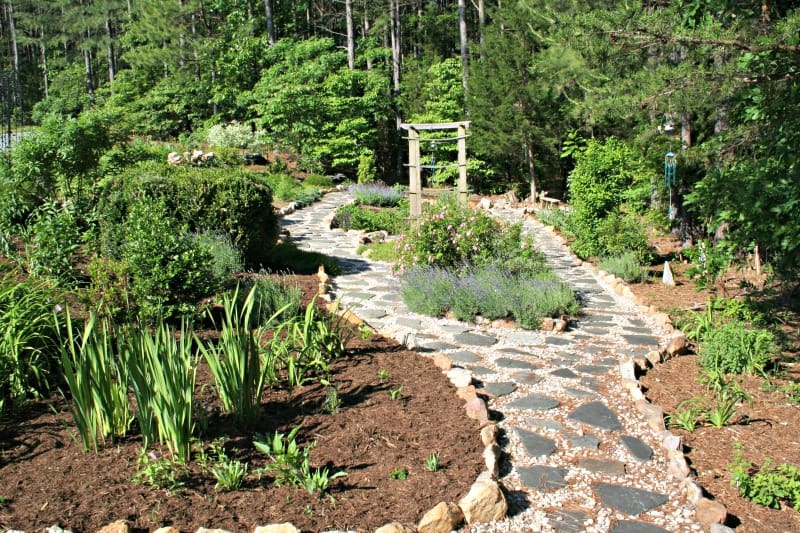
So, a solution to stop stepping on your soil. You need clearly marked, delineated pathways throughout your garden. And once you’ve developed this pathway system, it needs to always stay that way. My favorite and easiest to use path materials are straw, wood chips and stepping stones.

Pathways are the best way to keep yourself, and everyone else, from stepping on your soil. 4. Mulch, Mulch, Mulch
It is so, absolutely important for you to mulch your vegetable garden. Not only does mulch keep weeds down and prevent moisture from evaporating quicker, mulch materials also break down over time and add valuable organic matter to your soil, and provide food sources for your soil food web. Most importantly though, mulch provides a thick, protective layer for your microbes against the harsh outdoor elements.

Spring bulbs loving life in a bed of nitrogen-rich leaf mulch. Though a full-sun space is a blessing and ever-desirable in organic gardening, it can have a detrimental effect on the top few inches of soil by completely drying it out. The top four inches of soil is where most of our microbial life is contained, and the hot sun will crisp and evaporate the little guys right up without a protective layer! Rain can also have undesirable effects – microbes are so tiny that raindrops falling on them has a similar effect not unlike our stepping all over them. The way we can protect our microbes from the natural elements is by using mulch.
Related Enough: Gardening Myths We’re Officially Breaking, or Why You DON’T Need Raised Beds and Fertilizers

The sun is incredibly powerful and will dry your garden right up if you don’t cover it with mulch. There are lots of different options for mulch, but here, I will highlight the simplest mulching solutions…
- – Straw is an economical option because not only is it initially cheap to buy, but you can also use it for your pathways. It is good to use around baby seedlings because it will help prevent birds from nibbling at them, and it will partially break down over winter so it may be incorporated into your soil during preparation in spring. Be sure to get “straw” and not “hay,” where seed heads are present.
- – Decomposed leaves, or leaf mulch, is an attractive mulching option and adds a good amount of nitrogen to the soil as it breaks down and becomes incorporated into the garden bed. Earthworms love it. If you have a lot of trees on your property, you could create a compost pile of leaves and make your own leaf mulch, otherwise it comes bagged at most landscape suppliers. Be aware that if you do not buy certified organic leaf mulch, the mulch you do buy could have residual pesticides – not great for us or our microbial friends.
- – Living mulch is a way of mulching by growing groundcover plants with shallow root systems in between vegetable plants, not unlike cover cropping. Growing living mulches takes a little more maintenance and technique (you must know what plants are acceptable to grow for living mulch and when to plant them), but anyone can do it! Living mulch is so great because it’s very cheap and easy to do (all you need are seeds), it adds lots of color and texture to your garden, and the added root system provides tons of extra food for microbes. Great options for living mulch are sweet alyssum, creeping thyme, creeping jenny, and arugula.
Totally Related: How to Cover Crop Your Vegetable Garden in 4 Steps
5. Get Your Fencing Right

Ok so this is kind of a joke… but not really. I’ve worked with people who put so much time and money into their fence but it wasn’t done properly so they might as well just had an adorable blue gate instead! My adoration for bunnies, squirrels, deer, and especially groundhogs, has waned since I became a vegetable gardener. When you grow food, animal families seem to multiply out of nowhere, and they all have this perfectly-timed instinct that tells them exactly when to nosh your harvest just hours before you can get to it. PESTS!
Totally Related: Battling Garden Pests: The Organic Pest Control of Mindfulness and Compassion
The only way for us to keep pests out of our garden is by building a strong fencing system. I will always say that with fencing materials and construction techniques, the higher quality your materials are, the better results you will have in creating an animal barrier. There will also be less upkeep with damage from storms and weight on it from heavy snow and ice.
There are some basic dimensional fencing details to know, based on what type of animal you need to keep out…
- – Bunnies – The openings in your fencing material should be no larger than 1”x2”, and I think this is a good rule for all garden fencing no matter the pest. Baby bunnies have the ability to get through 2”x2”, and they are everywhere. If you have a gate within your garden fence, be aware of the threshold gap at the bottom of it – the gap should be no more than ½” – a commonly overlooked detail! If you don’t have deer, a 3-foot tall fence is good enough to keep bunnies out. Keep in mind though that you can’t grow tall crops on such a short fence, so sometimes its nice to go vertical anyway.
- – Deer – Your deer fencing should be at least 6 feet tall, preferably 8 feet. It sounds hulking and fortress-like, but it’s actually nice to have fencing this tall because then you can grow pole beans, peas, cucumbers, squash and vining flowers on it. Deer have a tendency to eat plants through the mesh fencing, so you may need to attach a screen or a similar very fine mesh to keep their snouts out. Trick is to avoid attaching this screen too high, otherwise it will block sunlight.
- – Groundhogs/Gophers – These are burrowing animals, living up to 18” underground in large nests connected by a network of underground pathways. They’re incredibly smart. You’ll need to dig a deep trench (ideally 18”) and extend your METAL mesh fencing down that far to keep them out. Groundhogs are not typical in suburban backyards or city yards, but if you’re out in the country, or live near open fields of any kind, you absolutely need to protect your garden from groundhogs or all will be lost. I’ve learned this the hard way.
- – Chipmunks & Squirrels – Just forget it! No matter of fencing, unless you completely cover the top of your garden, will keep them out. If squirrels are taking bites out of your tomatoes, chances are they are sucking the juice out because they’re thirsty. Try leaving shallow dishes of water out for them to drink. I swear it works!

Ever see a squirrel drink? Now you have. They get thirsty, too! 6. Assess Your Tree Canopy
Trees grow fast. Sometimes just a few years after setting up your garden your trees can grow so much that new branches block primetime sunlight.

Trees cast much more shade than you would think, causing leggy, unproductive growth in your garden. If you notice your plants are stunted but you think you’re doing everything else right, I encourage you to spend some time in your yard one day and assess the sunlight in your garden. The Solar Pathfinder is an amazing tool I’ve used in countless gardens to determine sun exposure – it might be worth the price if your garden is large enough, creates revenue, or if you could split the cost of it with other gardeners.
Look up and see if any trees might be blocking the sun pattern. If they are your own trees, and are small enough, go ahead and trim them back with tall tree loppers. If the branches are larger and too high, consider calling a local landscaper or arborist for their tree trimming rates – it is probably worth the cost. You’d be surprised at just how one really tall branch can make hours of a difference in your garden! Visit this post for a blurb on how to determine the hours of sun exposure in your garden.
amzn_assoc_placement = “adunit0”; amzn_assoc_search_bar = “true”; amzn_assoc_tracking_id = “heirloomsoul-20”; amzn_assoc_ad_mode = “manual”; amzn_assoc_ad_type = “smart”; amzn_assoc_marketplace = “amazon”; amzn_assoc_region = “US”; amzn_assoc_title = “Products Mentioned in This Post”; amzn_assoc_linkid = “be1d2f3f6543bfbef748e4958a695d08”; amzn_assoc_asins = “B00AR0RMBI,B009378AG2,B00F0MB40S,B00NGYMVYK”;


http://heirloomsoul.com/6-ways-to-improve-your-existing-garden-tips-from-an-edibles-expert/
On – 09 Apr, 2017 By Fran
-
