Americans love potatoes, eating about 125 pounds, per person, per year. Although potatoes are easy to grow, many off-gridders on small plots of land avoid them because traditional growing techniques take up a lot of space. However, by using the caging technique, you can get a high yield in a small space.
Caging refers to the practice of using a wire cage, wooden box, barrel, or any other device designed to grow potatoes vertically. By using this practice, potato yield can be increased by anywhere from two to 10 times using the same area of garden.
Here’s how caging works:
1. The container
The author’s potato box.
Select the container, or cage, for your crop. It should be 18 inches by 18 inches or larger, with room for 1 to 4 feet high of soil. On my homestead, I use either a 4-foot-square or 5-foot-square raised bed, constructed of wood, which is 16 inches high. There are also commercially available cages designed for growing potatoes vertically, but instead of spending your hard-earned money, I’m sure your off-grid homestead has materials available for constructing one.
2. The soil
Before planting, set aside enough soil to fill the container. For potatoes, a slightly acidic soil that drains well is ideal. I like to use a mix of peat moss, native soil, compost and vermiculite.
3. Planting
Fill the cage with 6 to 8 inches of soil. Plant the seed pieces 3 to 4 inches deep. Let the potatoes sprout and grow to a height of 8 inches or so. The photo above is from my 5-foot by 5-foot potato cage for this year, where I have Yukon Gem potatoes that have grown 6 to 8 inches high.
4. Fill up the Cage
Once the potato plants are about 8 inches tall, like in the photo above, it’s time to partially bury the plants. Take some of the soil you’ve set aside and gently bury the plants about a third of the way.
I just did that in my garden. The photo here shows the potato plants after they’ve been partially buried the first time.
Continue the process of letting the vines grow higher, and then partially burying them, until your cage is full. Take care not to ever bury the plants by more than one-third to a half, and make sure there is adequate moisture.
Tips for Maximizing Success
Successful potato growing begins by selecting the right cultivar for your climate, and growing vertically is no exception. Potatoes originated in the cooler high altitudes of South America, and thrived for centuries in the cool weather of northern Europe and Ireland. So if you live in an area where the summers get hot like I do, choose a variety that has been developed for heat resistance. These include Butterfinger, Defender and Yukon Gem types.
The reason caging works is that some varieties of potatoes will continue to form tubers from parts of the vine that have been recently buried. However, not all potatoes varieties are created equal — some excel at this and some don’t. So for growing vertically, consider those types listed above, as well as All Blue, Carola, Dark Red Norland, German Butterball, Yellow Finn and Fingerling potatoes.
Final Thoughts
Potatoes should be grown on every off-gridder’s garden. They give great yields, provide lots of needed carbohydrates for the hard-working family members, and store for months without electricity. If you’ve shied away from growing them because of traditional space requirements, try caging today.
Emergency Preparedness for Kids: Quick Guide to Prepare your Kids for An Emergency
Make sure you Like SHTFPreparedness on Facebook or Follow us on Pinterest to be updated every time we post great articles on Prepping, Homesteading, Survival, DIY and other topics!
Emergency Preparedness for Kids:
Quick Guide to Prepare your Kids for An Emergency
No one is sure enough when and where a disaster or any sort of emergencies will happen. It strikes quick and random often without warning and dealing with a natural or man-made disaster can be a stressful and nerve-racking experience for anyone, especially for kids.
Even adults are frightened and traumatized by these disasters, thus emergency preparedness must be discussed and upkeep by parents to their kids. Remember, not all the time that your kids are with you so in order to ensure their safety and survival, you need to prepare and train them for the worst-case scenarios.
Preppers are always ahead. Sure thing. How about preppers’ kids, are they preppers too? Emergency preparedness for kids is not just a girl scout or boy scout thing, it is rather arming your kids with extra knowledge and brisk mindset in times of apocalypse which kids might imagine in movies.
How you do you prepare your children for a season of emergencies? Read this page and take a tour of this guide in Emergency Preparedness for Kids plus quick tips to prepare your kids right away.
Talk About Disasters in Advance
Disasters come in many forms and strength, they pay surprise visit oftentimes, so the best way to welcome them is to prepare, prepare and prepare; this discussion with your kids in advance is very important.
Discuss Emergency Plan
When you involve your kids with your emergency plans, you’re giving them the sense of empowerment. You’re allowing them to be in charge, an autonomous child will hold the authority to your family’s safety too. Consider these tips:
·Make and sketch an Evacuation Plan (they’ll surely enjoy this)
·Condition their minds like what they have seen in the movie
·Let them memorize important phone numbers (neighbor, health centers, 911, etc.)
·Get a local map and a highlighter and determine important destinations and the
routes to get there
Get a survival kit and discuss kit rules
Any disaster plan is complete with supplies, like food and water, medicine, tools, gears, and other else. Let your kids help you gather these supplies; this will encourage them to pay attention and take your advice keenly.
Make sure your kids know where the items are to be found, that these items are specifically used during emergencies and you may ask them what item or supply they want to add to the kit. Allow your kids to get it themselves to familiarize these items.
Practice / role-play
You can do this through a game with scenarios for your kids to test their knowledge. Perform scenarios according to their age and development. Do this occasionally like once or twice a year so that your kids are prepared to deal with emergencies as much as possible.
Role-playing emergency situations will reduce panic or anxiety in case of a real emergency occurs. Just make sure to process or discuss the game or scenario you played.
Approaches should differ depending on the age of the child. But even a 5-year-old may be able to understand the importance of having a place to meet up if something happens. Giving kids a role in this situation, especially after they see disasters somewhere else, is an advantage to make them feel safer.
Guide Your Kids During the Splash of Disaster
The feeling of fear is natural but in times of emergencies, your kids are surely in a great mess. They will be looking clues on what to do and definitely look for you to rescue. Here are few things to keep in mind during the splash of disaster:
·Keep calm.
This is the best weapon in any kind of catastrophes. Kids will surely calm when your parents will keep calm too. If you show any sign of distress, your kids may become more scared, noticing your fear as an indication that the danger is real. If you demonstrate calmness and in control, your kid may feel more confident and better able to cope up.
·Stay indoors.
Listen to the news for updates and warnings. It is important to know what the officials and other person-in-charge instructions, whether the disaster is under control and just stay indoors or you need to evacuate from your house for safety.
·Remove any electrical connected-wires as much as possible. This will help you lessen the possibility of catching radiation in your house or you can just turn off the main electrical switch.
·Evacuate when local authorities’ told you to do so. When you need to evacuate, stay calm. Turn off the main electricity switch, close the windows, secure the safety of your house and bring your survival kit or go-bag.
Once a Kid Feels Afraid Is Really Afraid
Kid’s fears increased by their imagination, and never take these feelings for granted. Your words and actions surely suffice reassurance; just be sure to portray a realistic picture that is both honest and sincere.
During emergencies, things can always get out of control. But your kids will feel confident knowing that you’re doing your best for them. Posing hugs and building security is necessary during these times. So when you sit with your kids, make sure they know that you will do everything you can to keep him as always, no matter what the odds are.
Help Your Kids Recover After a Disaster
Know What to Expect
Kids depend on familiar and encoded routines. Once an emergency interrupts their system, they may become confused, frightened, or unwilling to perform and these may be expressed in a different manner like withdrawal, aloof or shyness and perhaps lead to aggressiveness and other extreme behavior.
That is why, it is imperative to talk and explain to your kids what has happened in your house, your surroundings, the people or even the community you have lived in (in case worse scenarios happen). This allows them to internalize and reflect on what they have felt during the splash of disasters until it’s over.
Know What to Do
Be keen on your kids’ emotional and psychological state by asking first what is in their mind. Your kids need to participate in your family’s recovery activities and soon they will feel that things are getting back to normal.
Prevent your kids to watch or view television programs or news report about the event or any kind of disaster. It can be upsetting for them and possibly recall a tragic or a discomfort feeling, especially kids are too young to control and hold on to their feelings.
Know How to Help Kids Cope
Kids may not be aware that they are emotionally disturbed by the catastrophic experience you had in your family. You need to gradually know how to get rid of unfriendly symptoms. Here are few keys to help them recover:
·Have a normal conversation and never brought up the topic first, wait until your kid opens up about it.
·Expose your kids to an outdoor activity that will help his mind divert to a variety of things. You may consider camping, fishing or just play around your house like the normal thing you do.
·Always give a positive reinforcement or positive regard towards your everyday discourse.
Ultimately, one of the most important ways you can minimize your kids’ stress and anxiety in an emergency situation is through coping well yourself.
Karen Pagan is the author for PreparedBee.com. She has been working with writing for over three years. She spends most of her off-work time reading books, practicing dance, and catching up with the new TV shows she’s been missing. You can reach her at
Homesteading after retirement is possible. Homesteading isn’t about how much you have, it’s a lifestyle. You can be a homesteader at any age, you could have 2 chickens, a container garden, and focus on making you life simple and decluttered. When you start homesteading after retirement you’ll have a happier stress free life.
Becky’s Social Media Links: Instagram: http://instagram.com/beckyshomestead Facebook: http://facebook.com/beckyshomestead
SUPPORT BECKY BY SHOPPING AT: Official Becky’s Homestead T-Shirts: http://beckyshomestead.com/portfolio/beckys-homestead-t-shirts/ Becky’s Favorite Things: http://beckyshomestead.com/favorites Becky’s Guide To BUYING LAND: http://beckyshomestead.com/portfolio/beckys-guide-to-buying-land/?utm_source=youtube&utm_campaign=description_links&utm_medium=organic Becky’s Guide To Choosing Your LOG CABIN KIT: http://beckyshomestead.com/portfolio/log-cabin-kits-buyers-guide/?utm_source=youtube&utm_campaign=description_links&utm_medium=organic
Roots, Coops & More, based in Augusta, displays its Maine-built chicken coops at the 2017 Common Ground Fair in Unity.
Back in the days before the Great Recession, Steve and Lori Gingras of Augusta seemed to have their lives figured out pretty well.
Steve, a self-employed carpenter, built all kinds of houses for his customers. Lori, a high school English teacher, taught her students. After work, the couple would take care of their two sons and their small in-town farm, which featured a large kitchen garden, goats, honey bees and — perhaps most importantly — chickens.
But when the recession began in 2008, eroding Maine’s building trades economy, Steve’s construction jobs seemed to quickly disappear. The Gingrases had to figure something else out, and when they looked at the backyard coop that Steve had built as a Mother’s Day gift to Lori, inspiration struck.
“I remember thinking wow, there might be something to this,” Steve Gingras said this week, adding that he built one and advertised it on Craigslist just to see what would happen. “It really took off. It was one of those aha moments.”
That instant interest helped lead the couple to create Roots, Coops & More, which sells Maine-built chicken coops, coop accoutrements, cold frames for gardens, raised garden bed frames, root cellar consultation and much more. Lately, they’re venturing into the world of tiny houses, too.
“We mostly sell tiny homes for chickens and tiny homes for people,” Lori Gingras said.
The tiny houses and the chickens coops, though built for different audiences, have some things in common. Both are built to last and to look good, too, with an aesthetic appeal that makes Common Ground Fair attendees stop in their tracks as they pass the Roots, Coops & More display. Some of their coops look like classic farmhouses and barns on a miniature scale, with thoughtful touches such as windows to allow natural light, side doors for easy clean-out and raised, roomy nest boxes and roosting bars. Many have attachable coop pens to allow chickens to peck at the lawn without fear of being nabbed by a fox or hawk.
The Gingrases knew what they liked in a chicken coop, and figured that other people would like the same kinds of things. They were right.
“With us, our model was just to have products that we found useful, that we were using and we knew were working,” Lori Gingras said. “And that we could sell for a reasonable price.”
According to the company’s 2017 price list, coops range from $479 for an unassembled, unpainted kit to $1,250 for an assembled, painted “Coop Deluxe,” with room for ten chickens.
The business climate for homesteading supplies such as they provide has changed over the nearly ten years since they started Roots, Coops & More. At the beginning, there weren’t a lot of other people selling chicken coops or doing root cellar consultation. In fact, it sort of seemed that people interested in homesteading were in a definite minority. Back then, many Mainers weren’t talking about gardens and chickens, preserving their own food or knowing their farmer. With the recession, that seemed to change, the Gingrases said, and their business was one of the only local places to go for cute coops and other homesteading supplies.
“I think there’s a resurgence happening,” Lori Gingras said. “I think we were just a little bit ahead of the bubble.”
They found that a lot of their customers were new to the world of backyard chickens and they had both a lot of questions and, at times, a lot of concerns. For instance, Lori said, people called looking for a coop in a hurry, because they were keeping their chicks in the bathroom and the growing birds needed a new place to live as soon as possible.
“People can be stressed by that,” she said. “Once they spend time with chickens, they see it really isn’t that difficult. You just need to keep them fed and keep them hydrated.”
Lori and Steve Gingras enjoyed sharing advice about raising chickens and other parts of homesteading with the people they met. For about five years, the business was very busy, with the family selling from 75 to 100 coops a year. Then other competitors started to get into the coop game, both other family-owned small businesses and large companies such as Home Depot and Tractor Supply. Roots, Coops & More found that sales slowed down quite a bit.
“Now, we’re lucky if we do 40 a year,” Steve Gingras said.
It’s OK, he said, because his home construction business has come back. But the Gingrases like Roots, Coops & More and want to keep growing it sustainably, which is one reason why they are getting into the tiny house market. Steve is now finishing a 180-square foot tiny house on wheels that a customer commissioned, which he said is ultimately going to cost between $25,000 and $30,000. The tiny house features lots of natural light, fine craftmanship and high ceilings that make it seem larger than it is.
“It’s snug, but for one person or perhaps a couple, I think it would be quite comfortable,” Steve Gingras said.
Between the coops, the tiny houses and their other creations, the Gingrases feel good about their small business that, like their structures, is built to last. Steve Gingras said that he enjoys having a type of work that is different than his day job.
“Because I work alone and spend a lot of time alone, it’s nice to interact with people who appreciate what you do. I enjoy that,” he said.
Lori Gingras also said she enjoys meeting customers who have similar interests to hers and who sometimes become friends.
“I love sharing our knowledge and educating people about homesteading,” she said. “And meeting all the really cool people we’ve met over the years.”
1500’ Feet of Fedge (food/hedge, living fence). A Crater Garden bringing the growing zone up from 4 to 7. Four row tree belt to block wind, produce food and increase moisture.
↓↓↓↓↓↓ CLICK “SHOW MORE” FOR RESOURCES ↓↓↓↓↓↓↓↓
NOTE: Yes, some of those links above are affiliate links. What? Well, that just means I get a small commission if you actually click through that link and buy something. Hey, I figured if I’m gonna link to the actual stuff I use (and recommend) I might as well get a little dough from it, right? I don’t get much, but every little bit helps. Plus, I’m trying to earn a little to cover my time, money and energy we’re putting into this… You know, make it sustainable so that I can keep on keeping on.
Failure is easy. So easy, in fact, that most people who achieve it do so without ever meaning to. But in case you need any ideas to help ensure your homesteading efforts crash and burn, here are a few tips to help keep you on the path toward epic homestead fail.
1. Be focused on life in the city. Seek frequent fulfillment at malls and gourmet restaurants and sidewalk concerts and art festivals. Prefer urban amenities to the beauty of striking sunsets and dancing kid goats. Crave the company of crowds instead of the richness of feasting upon vegetables you planted as seeds. Love the night life, and care little about the satisfaction of jobs well-done in mended fences and weeded gardens.
2. Be picky about the weather. Dislike being outdoors in anything but the perfect temperature and conditions. Expect to stay in the house unless it’s exactly the way you like it outdoors.
If it’s too hot or too cold or too muggy, stay on the couch. Don’t even consider going out to check on the animals during a blizzard—just stay in by the fire with your hot chocolate and let livestock fend for themselves.
3. Maintain an enduring attitude of negativity. Complain about homesteading all the time. Anticipate that everything will go wrong. Don’t even bother creating workarounds or attempting to learn from your mistakes. In fact, altogether avoid taking responsibility for what goes wrong—just blame it on bad luck or other people instead.
4. Be impatient. Hate the idea of having to wait for fruit trees to bear, vegetables to grow, sap to boil, bread to rise, a snowstorm to end, or the mud to dry up in front of the barn doors. Forget that homesteading doesn’t always supply guaranteed two-day delivery, and refuse to accept the idea of natural processes taking place on their own timetable. Demand what you want, and demand it now.
5. Expect to have things done for you. Require lots of services, like the ones readily available in urban areas. Insist upon regular trash pickup, taxi service, convenient public transportation, ample shopping opportunities, a wide variety of ready-to-eat food deliveries, paid housecleaning options—and by all means, expect to be first on the list for rescue and power restoration after a natural disaster.
6. Hate animals of all kinds, both domestic and wild. Don’t ever consider living in harmony with livestock or wildlife. Instead, consider them all adversaries—remember it’s always you against them. When the cows are agitated and challenging at milking time, don’t look around to see what’s bothering them—just bully them into submission instead. And when raccoons threaten your corn patch, spread poison for acres in an attempt to annihilate every animal that comes near your homestead.
7. Need to get away a lot. Declare that life is hardly worth living if you can’t spend the winter holidays at a nice ski resort on the other end of the continent and spring break in the Caribbean. Require a lot of time on weekend and week-long getaways with friends and relatives. Insist on at least one cruise every year.
8. Amass a lot of debt. Buy the biggest and best of everything right away and just put it all on payment plans. Buy a piece of property that is right on the edge of your ability to make the mortgage, and don’t pay any attention to the potential cost of upkeep. Maintain a budget so tight that you rarely have two nickels to rub together by the end of the month—and that’s even before the bill for the unexpected veterinarian visit comes in! Wind yourself into a tight financial ball without a bit of wiggle room.
On the other hand, it’s possible that failure may not be your homesteading goal. I know that I personally have made some errors so egregious that looking back afterwards it was hard to tell whether or not my actual intent was success or failure.
Maybe you have done that, too. But in moving forward, you may want to do your best to avoid doing the things on this list—and in fact strive to do just the opposite—if, in fact, homesteading success is in fact your goal.
What would you add to our list? Share your tips in the section below:
Do you keep homestead records? Have you wondered if they’re worth the effort? I’ve been keeping homesteading records in a homestead management binder for years and can answer with a hearty, “YES!”
The question is, “What can I do to make juggling a homestead work in harmony with all the modern demands on my time and energy?” Let’s face it Ma Ingalls didn’t have many of the pressures we have these days! (I’m not saying her life was easier. No way!)
For most of us, just because we start farming our backyards doesn’t mean all the other responsibilities of life disappear. Between work, homeschooling, farm chores, gardening, food preservation, balancing a social life, community service, scratch cooking & baking, larger homes, etc.., modern homesteader’s have more to balance these days. Our mental load can be heavy! (Tell me, I’m not the only one!)
Over the years, I’ve learned the value of keeping homestead records and one of the biggest reasons is there is that much less mental load.
7 Reasons You Need to Keep Homesteading Records
Less Mental Load
Your homesteading binder is an organized dump for all of the information you’re gathering and observations you’re making. Which means instead of trying to remember everything, you now have an amazing reference tool at your fingertips. By keeping homestead records, you may actually retain more than if you were trying to remember it all.
Let’s be honest.
You can’t remember the average number of eggs your hens were laying last April, can you? What about two years ago?
Recording details about our homestead gives us information which allows us to discover patterns that affect production and/or costs.
Know How Much You’re Growing
Wouldn’t you love to know exactly how much food you’re able to produce off your own land? It’s an encouragement when you can quantify how all your hard work has paid off. A little bit coming in from the garden every day might not seem like a whole lot, but when you add it together, you’re probably growing a lot more food than you realized!
One of the surprising ways knowing how much I’m growing has encouraged me was during the years of a crop failure. Seems there is always one crop that was a complete bust. Because I kept production records across the homestead, I realized other areas picked up the slack and our overall production was nearly identical to previous years when the failed crop was abundant! It made me feel like much less of a failure!
Discover How Much You’re Spending
Do you wonder if all of this work is even making a difference to your budget? Are you really saving money? One of the reasons folks get into homesteading is to live more economical, self-sufficient lives. You’ll hear some say how much you can save by homesteading and others say it’s nothing more than an expensive hobby. When you track your homestead expenses, you can see where you fall on the spectrum.
Knowing how much you’re spending can challenge you to come up with creative solutions to save, ideas on how to make a little extra income, and create a budget (and stick to it.)
Or you may find, much to your surprise, you’re not spending nearly as much as you thought and you can even expand your homesteading efforts!
Set Goals and Track Your Progress
Challenge yourself to find new ways to “homestead smarter,” to grow more and save time and money in the future! Compare your homestead experiments with past years to find out which methods are most productive. Or which aren’t worth the time and effort you’re putting into them.
Make Better Decisions
Who likes making the same mistake twice? Not me! Keeping homesteading records serves as a tool to help you know what things you’re doing that worked… or didn’t work. It might be years before you need the information again and by then you may have forgotten it.
For example, maybe you want to see if you can save money on feed. You want to know if fermenting, using fodder, feeding free choice vs. ration, or even free-ranging will increase your production or reduce your expenses. If you have records of what it was costing you before to compare to your experimental area of production you can make better decisions when managing your homestead.
This is just the tip of the iceberg! The possibilities to make your homestead better are endless!
Your Custom Homestead
Having a system for managing your homestead is like creating a “custom homestead how-to” just for you! Your homestead is your unique little paradise on earth and there’s no other just like it- not even at your neighbors!
Keeping homesteading records tracking weather patterns, your favorite seed varieties and companies, seed age and viability, when to plant seeds and transplants, crop rotation, transplanting (too soon, too late), productivity in an intensive garden, which breeds of hens are most productive on your farm, how long can you expect your hens to molt, how many hours of daylight do you have over winter…. is all information that will help you discover the best way to steward your land.
Spend Less Time Doing Chores
When your homestead is organized you actually spend less time doing chores. Ever heard the old adage, “It’s easier to clean a clean house than a dirty one?” Same goes for on the homestead. If you keep on top of chores by knowing when is the best time to get them done instead of procrastinating, you increase efficiency and spend less time doing chores and more time enjoying your farm!
Digital Records or Paper Records?
So which are the best type of homestead management records to keep? Well, that’s something you have to decide for yourself! Some folks are more suited to paper and some folks are embracing technology and keeping digital records.
I’ve been using paper-based Homestead Management Printables until last year before I made the switch to digital and I’m not looking back. My records are definitely more thorough and complete now that I have my “homestead binder” with me where ever I go. Entering information is a lot easier now and I don’t have to worry about losing my notes outside!
Benefits of Paper Records
Writing your records out by hand reinforces information in your mind.
More room for creativity and self-expression
Safe in the event of an SHTF catastrophe that leaves you without access to your records
Embodies the principles of slow, simple living
Benefits of Digital Records
Your “Homestead Binder” (phone) fits in your pocket. Unlike a bulky binder, they’re with you everywhere.
Easier note-taking with voice to text or a few quick & easy taps. No more dirty, wet notes. (Cause if homesteading is anything, it’s messy!)
No more using your body as paper. I have had my entire arm front and back “tattooed” with notes I took in the field and wanted to transfer to my binder.
No more wasted time finding a pen. (Maybe just a problem in our home?)
No worrying about lost or forgotten notes and receipts. Your records are backed up and secure.
Data can be shared between different devices. (This is a big way SmartSteader is changing my life! The accuracy of my homestead records depended on the hope I got all receipts. Now my husband can just enter them into the app himself when he leaves the store. No excuses!
No more spending hours doing math! A game changer for me! I used to set aside a few hours every month for math and swapping out papers for the new month. Plus an entire day or two to tally everything at the end of the year, calculate totals and averages, differences between years, and enter paper notes into a document so I don’t have to worry about losing papers (or so I can search for specific items.)
For me and many others, the benefits of keeping digital records far outweigh the benefits of paper ones.
The biggest benefit is the time I save keeping a digital homesteading binder allows me more time to spend enjoying my farm.
Time for playing with my family, learning new ways to improve our homestead, reading a book, or taking a walk in the woods!
SmartSteader Features
Track expenses
Record harvest yields
Income tracking
Headache-free price per pound calculations
Graph production
Take notes and record observations
Metric measurement conversion
Areas of Production
Garden,
Chickens,
Dairy Cows & Goats,
Laying Chickens,
Meat Production including Rabbits, Meat Chickens, Pork, Sheep, Beef, and Turkey
Custom Records- Got something unusual most folks aren’t growing or raising? Name your own record to manage that aspect of your homestead. This feature is great for tracking general farm expenses like fuel or infrastructure. I’m going to get creative and use it for keeping soap making records next year.
The future for SmartSteader is bright! We have a ton of features in the works!
Future SmartSteader Features
Freezer / Pantry Inventory
Butchering Records
Incubation Chart
Breeding Records
Beekeeping
Seed Starting Calculator
Individual Animal Records
Weather Log
Report Generation (So you can print off a summary of your records and have a paper copy)
Calendar Scheduling
Isn’t it awesome!
And YOU can enter for a chance to win 1 of 100 SmartSteader annual subscriptions we’re giving away this week!! How exciting is that??!!
Giveaway ends 11:59PM December 8th and winners will be randomly chosen the next day. Remember to use an email address where I can reach you if you win! The winner will only have 48 hours to respond before I choose a new winner so keep your eyes peeled.
How to BUY Homesteading Honey Bees for Beehives is helpful knowledge when trying to get started in getting set up in beekeeping.
The first bit of knowledge a new beekeeper should have is not how to raise them, but how to purchase them. People may believe they by sticking a hive or nest in the tree, they will swarm over and live there. There’s a chance that could happen, but it is not the same as properly raising them under a controlled environment. For those who are interested in purchasing honey bees for the springtime first – have to know the process.
Ordering them is actually a difficult task for first-time beekeepers because they are not aware of certain words and phrases beekeepers use. It’s like code. Professional beekeepers know all of this like clockwork, from ordering them, to preparing for their arrival, to start working with them.
The first thing for new beekeepers is that they should pick what system they will utilize in purchasing groups of bees. There are a few differences. The bees should be purchased early right before the spring, and all newbies should study the entire basics of beekeeping and what to do when they arrive. In fact, this should be done before they’re even ordered. Get every piece of the field ready – especially the suit – for when they come.
Deluxe Beehive Starter Kit – Premium Bee Hives for Beginners and Pros and All the Beekeeping Supplies You Need –
Package bees are one method of their arrival, where they come along a wire in a wooden shoe box-like package. About 10,000 (or whatever amount) of bees should be buzzing inside, including the queen of the bunch in its own cage. One bottle of sugary syrup is connected inside to feed them (because honey is sugary sweet)during their transfer. There’s the queen, its minions, and a few male bees, but the queen is on top. If everything else is ready and you know what to do, go on honey-making with the bees.
Click here to read about How to BUY Homesteading Honey Bees for Hives:
Jonathan Dodd of Nebraska is jammin out his 5 acre homestead with permaculture abundance: Market gardens, fruit and nut trees, chickens, ducks, geese, pigs, sheep and ALL kinds of goodness. It’s hard to believe just how much one can do on only five acres of land.
↓↓↓↓↓↓ CLICK “SHOW MORE” FOR RESOURCES ↓↓↓↓↓↓↓↓
Want more of Jonathan and his 5 acre homestead? Get the 40 minutes extended version of this tour inside my DIY Abundance Member area (under the permaculture section): http://bit.ly/2qm33Hs
MUSIC:
1st song: “Beautiful Day For the Road” by James Forest
2nd song: “Pausa” by Interior Feel”
—————————————
SUPPORT US WHILE YOU SHOP:
What to support us for FREE shop from this link: http://amzn.to/299fCOI
We use Amazon Prime all the time to have stuff shipped right to our door! http://amzn.to/29ebL3P
NOTE: Yes, some of those links above are affiliate links. What? Well, that just means I get a small commission if you actually click through that link and buy something. Hey, I figured if I’m gonna link to the actual stuff I use (and recommend) I might as well get a little dough from it, right? I don’t get much, but every little bit helps. Plus, I’m trying to earn a little to cover my time, money and energy we’re putting into this… You know, make it sustainable so that I can keep on keeping on.
How to build a Homesteading Wooden Pallets Chicken Coop DIY Project is just the kind of task a frugal homesteader will embrace wholeheartedly.
The provision of shelter for chickens is essential for their health. Just as human beings are affected by different weather conditions such as heat and cold, chickens are also affected by them. There is a need to protect your chickens from every sort of harm ranging from weather to predators. These elements put the lives of the chickens in danger.
During cold seasons, the shelter should be able to keep them warm to protect them from the risk of hypothermia. This is characterized by a drop in the temperature of the birds. The way to avoid this is to ensure that the chickens do not get wet. The construction of chicken coop is significant, and there are few things to consider to ensure that the chickens are comfortable.
For the ammonia accumulated from their droppings to be constantly removed, there must be proper ventilation in the chicken coop. The construction of wooden chicken coop is also preferable because of its durability, and they can also be moved from one place to another. This article is concerned with the basic steps you can take to construct a comfortable chicken coop that will house your chickens. It will also help you to construct the coop to your taste while following simple instructions. The aim is to protect the chickens from danger and also ensure that they reproduce according to your expectations without any obstructions.
Click here to read about building Homesteading Wooden Pallets Chicken Coop DIY Project:
LIVE OAK — Ellen Mitidieri plans to share her homesteading knowledge and experience at the Live Oak Public Library next month.
Mitidieri, who owns 80 acres near Luraville, will give a homesteading presentation at noon Dec. 7 as part of the library’s continuing Pioneer Life Lunch & Learn Series.
Homesteading is a lifestyle of self-sufficiency, characterized by subsistence agriculture and home food preservation.
The presentation will cover financial savings that come with adopting a homesteading lifestyle and the satisfaction that comes with that style of living. Health benefits will also be discussed.
For more information, please call the library at 386-362-2317.
How to Install Fresh Air Intake for Homesteading Wood Stoves for safety. When using a wood stove that is vented to the outside, every cubic foot of air that goes up and out the stack has to be replaced in the room.
For the second time, (because it is so important) for every cubic foot of air that is pumped outside has to be replaced by an equal quantity of air from another source. If it doesn’t get replaced, there are great chances of vacuum being created. It would cause health concerns to the people living inside the house under these circumstances.
Depending on the location of your wood stove, here’s what you could do to prevent the above from happening. Secure the outlet with the required amount of angle brackets held in place with the sheet metal brackets.
If the above is not possible, use a mounted adapter to hold the angle brackets in place for proper support. If it is not possible to adjust the air intake damper from the inside, try to adjust it from the outside if possible.
When the door is opened, the elbow swings on its hinges and some contraction is seen to facilitate the unrestricted and easy movement of air. Sometimes, it can be insulated with the right material in order to prevent the heat from deforming the outlets or other parts.
If the heat duct connected to the inside of the house is disconnected, the air can be replaced from under the house. Either way, vacuum is not created and the air flow makes the atmosphere inside the house fresh.
With winter around the corner, all the heaters used in the house must be checked and kept ready. All the insulation should be taken care of. A functional unit will prove to be very helpful.
Click here to read about Install Fresh Air Intake for Homesteading Wood Stoves:
The Homestead Act first came into effect in 1862 when President Abraham Lincoln signed the bill to promote homesteading where a homesteader would be provided with a land to build a home, farm the land for a minimum of 5 years and make some improvements. This Act provided 160 acres of land to the people willing to homestead in exchange for a small filing fee and the amendments that followed increased the allotments further promoting homesteading in the US. This is now no longer in effect and ended in 1976 with the introduction of Federal Land Policy and Management Act. However, homesteading was allowed until 1986 only in Alaska.
So, you might think that homesteading can be difficult and incur huge costs in today’s times. To some extent this is true, but there are still free land available in the US in this 21st century providing the opportunity for homesteading though limited in number.
1. Lincoln, Kansas
With 3500 total population and no serious reports of any crime, this is a picturesque 720 square mile county with farm animals, buffaloes, and beautiful hillsides. The website of Lincoln states that it has broadband internet, nine miles of Interstate 70 and local medical care.
You will need to apply for free land which is also qualified for their ten-year property tax rebate program to homestead in a suburban setting. The plot sizes vary from 12000 square feet to 36000 square feet where you need to build your house within 18 months from the date of receiving your free land.
This city has a population of approximately 2000 with major city conveniences at a short distance. The lots are 155 feet wide by 93 feet deep where you have to build your new home with a permanent foundation within 18 months, and the construction should start within 12 months. The buyer needs to deposit $500 which is refundable after the end of the deed and must enter into a contract with a building contractor within six months. The lands are also exempt from at least 50% of property tax over a ten year period.
This is a small town with approximately 900 people where the major industries are agriculture, fishing, outdoor hunting, and healthcare. If you comply with all the terms, you will get free lands for homesteading. As of now, there are 26 lots available where the new home needs to be built in a minimum of 1200 square feet excluding the garage, basement, and porch.
The other building requirements are that it should have an overhang of minimum 18 inches and 5-12 pitch roof, two car garages, and three bedrooms. An agreement needs to be signed with a building contractor, and the building should be completed within two years after getting the possession of the designated lot. Also, at this time there are no assessments against these lots.
This beautiful small town is quite popular for the outdoor activities it offers. Free lands are on offer for homesteading requiring you to apply the same. Once you are allotted a designated lot, you need to start building your home within 120 days and completing it within 12 months. You also need to live in the home for at least a year. The home must be built on a basement or crawl space foundation with residential design standards and a minimum of 5-12 pitch roof.
This city is providing free land for both commercial and residential purposes. However, you need to deposit $500 to get the land which is refunded after the completion of your home. The city also provides with low-interest loans and business incentives.
You have to complete the home within 12 months from the date the land is allotted to you and needs to move in within 24 months. Also, your home needs to be minimum 1400 square feet on the ground level with a basement or crawl space foundation.
This city offers two separate sub-division offers with free lands for applicants who qualify for homesteading. All the available lots vary in size with all utilities and are on paved streets.
Reaping benefits from the original Homestead Act of 1862, this city has incorporated the Homestead Act of 2010 to promote homesteading so that the neglected properties can be put to use and also generate utility fees and taxes. Free lots are provided on a first-come-first-serve basis where the applicant needs to stay for at least five years. The population is around 12500, and the city is very accessible.
This city offers lots that are completely free in two different options which are Market Rate Homes and Workforce Homes. The lots under the Market Rate Homes are provided on a first-come-first-serve basis with a deposit of $1000 which is refunded after the home is built. The lots are provided to the homeowners with limited income and assets that meet a set standard for the Workforce housing. They are also eligible for a loan of up to $20000 in down payment to build their home at extremely low-interest rates.
This beautiful village has ten free lots available as of now and to apply for the same; you need to contact or visit the village office. The homes need to be on a foundation but no specific details are mentioned, and so, it is better to drop in at the office to get all the necessary details of the lots.
This small town has a housing subdivision offering free lots. With all the basic amenities available for living, you can apply for homesteading in the free available lots. The cost of living here is also very low. To know more about the details of the lots and requirements, you need to get in touch with the City Office.
This small town has very little population with around 150 people and has many free lots available for an approximate average size of 80 x 120 feet. Your home needs to be completed within 18 months from the date the lot is provided to you and should be at least 1200 square feet. With no specific requirements, you can avail the free lands by applying with a proposed floor plan of the house intended to be built.
However, you are not allowed to do poultry farming or breed livestock or other animals for commercial purposes. Marne has all the requirements for living, and also, you can enjoy low crime rate and tax rate.
This town has a population of about 1200 and offers free lots of 86 x 133 feet with the requirement to build your home within one year. Though the land is free, assessments will be conducted for the cost of developing your property with sewer, gutter, streets, and water. This fee is around $25000 that can be reduced to $14000 through Tax Increment Financing (TIF) for candidates who qualify. This amount is to be paid semi-annually over a 15 year period with real estate taxes.
Though the lands are not free nor will you become the owner, this is mentioned because it is extremely cheap. The Government has begun this initiative to offer cheap farmlands with a lease for 60 years. The farmlands are protected along with a house already built, and the average rent is between $500 and $1000 per month.
This town is on Interstate 70 with great connectivity and has an approximate population of 650. The town has 480 acres of land which is on offer for free to set up business or industry which will provide employment as well. You need to check out the requirements as it might suit well to set up your homesteading business.
The town has all the basic services that are required to fulfill your necessities. It has excellent schools, services from high-speed internet providers, medical stores and clinic, restaurants, clothing stores, etc. The acquisition of 3 water wells recently by the Town of Flagler has boosted the water supply that will be ideal for irrigation in agriculture.
This city has a population of nearly 39000 is looking to attract energy providers, suppliers for industries and food processing industry so that it can employ many people. The lands are provided for free, and your homesteading business can fit in their requirements. You will be granted industrial park property, and they are also in low tax “Michigan Renaissance Zones.”
If you can provide 25 jobs, you will be granted 5 acres of land. Similarly, 12 acres for 50 jobs, 20 acres for 75 jobs and 30 acres for 100 or more jobs. The city also provides tax benefits, incentives, and state business credits.
This town in the coastal region of Maine has a population of approximately 4000 and offering 3.5 acres of land for businesses that can provide at least 24 jobs. The town has all the necessities to run a business smoothly and for living like water supply, power supply, internet services, parking, etc. Camden is looking to attract sustainable businesses and industries like food processing, biotech, medical labs, financial services and information technology. Sustainable agriculture is more preferred as it is eco-friendly.
This is a very small town in Alaska’s interior that has no grocery stores, traffic lights or gas stations. The weather is very pleasant and is a picturesque place with the view of Mount McKinsey and Northern Lights. The population of this place is less than 300 but has plenty of free lands on offer an d ideal for homesteading.
Currently, 26 lots of 1.3 acres are provided to the people who are willing to apply. There is a refundable deposit of $500 that needs to be submitted for applying, and you can enjoy the benefits of no sales tax, property tax, state tax and apparently no crime and traffic.
There are numerous uses for wood ash around the homestead. Throwing away this useful material when cleaning out the wood burner or fireplace is almost inexcusably wasteful.
Wood ash is the powdery residue that is left in the wood burner collection tray or beneath the firewood grate after wood is burnt. It has been used a potash to enhance the soil by both farmers and gardeners for centuries.
The tedious but necessary chore of cleaning out the fireplace or wood burning stove might feel at least a little bit less like a chore when you begin thinking of all the ways you can repurpose the firewood “waste.”
Pot ash was once so popular in England folks were buying land and cutting down trees specifically for the purpose of collecting wood ash. “Pot Ash Fever,” it during the 18th Century after farmers in the new world discovered how beneficial the residue from burnt logs could be in the garden.
Just 20 years after the birth of America, the first patent in the newly created country was signed. United States Patent $1 was issued for a fertilizer creation process centered around wood ash. Pot Ash Fever lasted until a simpler and less expensive manner of generating both lime and potassium was invented, years later.
Top Ways To Use Wood Ash On The Homestead
Compost Pile – Pour cooled wood ash directly onto the compost pile and allow it to go to work for you by increasing the overall potassium content of the dirt. Wood ash contains trace minerals that help to churn out a nutrient-rich soil for starting seedlings and cultivating container, vertical gardening, and greenhouse crops.
You can even sprinkle a handful or two of wood ash composting soil onto struggling plants in a traditional garden to give them a helpful nutrient boost. Before putting the garden to bed for the year in the late fall, treat the ground with wood ash to help harden it against a loss of vital nutrients over the long winter months.
Wood ash also helps to strengthen crops that thrive on calcium. Mix together one-fourth of a cup of wood ash in with a 5-pound bucket of soil and use it when sowing peas, grapes, tomatoes, garlic, spinach, green beans, and avocados.
Toothpaste – Some varieties of wood create an ash that serves as a natural whitener in homemade toothpaste. The toothpaste, well actually, most recipes that use wood ash to whiten teeth are technically a tooth powder, typically has a very pleasant taste. Ash from some trees are not suitable for homemade tooth powder, conifer trees, in particular, are far too astringent and can actually damage tooth enamel.
The potassium hydroxide (lye) present in wood ash can help get rid of plaque while whitening teeth. Daily use of wood ash for an extended period of time has caused tooth enamel damage, regardless of the type of tree that was used as firewood, in some individuals.
The ash from soft wood is most often used when creating this type of homemade tooth powder. To make a wood ash tooth powder, simply combines equal parts of the ash with any one or more of the following: baking soda, orange peels, lemon peels, turmeric, cinnamon, anise, cloves, activated charcoal, bentonite clay, xylitol, and calcium carbonate.
Pour the ingredients into the blender and hit pulse for about 30 seconds. Dip a dampened toothbrush into the powder and brush your teeth as you would with commercially manufactured toothpaste.
Lye Water – Making your own clearning products is cheaper and typically a lot healthier, than buying chemical-laden products at the local big box store. Boil approximately three tablespoons of wood ash in a cup of water and then use a coffee filter to strain the mixture.
Lye water is excellent for cleaning silverware, glass, removing rust, and most types of cookware. Lye water is not the same type of material used in the making of lye soap. Some folks even drink a few tablespoons of lye water on occasion to cleanse their intestines.
Egg Preservation – Long before their were refrigerators, farmers used wood ash to preserve the longevity of the eggs laid by their hens. To dry pack eggs, mix together equal parts of wood ash, lime, cooked rice, clay, and salt. Roll the egg into the mixture until it is fully and thickly coated – or wrapped.
If the egg yolks appear gray or green when you crack them, the egg is no longer good. For the sake of safety, use the soak or sink in a bowl of water test before eating, cooking, or baking with dry-packed eggs.
Natural First Aid – Wood ash has long been regarded as a bacteria killer that can also enhance the healing process of wounds and burns. Mix together equal parts lye water and liquid soap and the apply liberally to the wound to cleanse the area.
Pest Deterrent – Place some wood ash into a bowl or other open container and put it in areas where mice, rats, cockroaches, and other unwanted household visitors frequent to deter them from entry – or send them running back into the great outdoors where they belong!
Odor Remover – Pour one cup of wood ash into a smelly trash can or similar stinky container, spot, or space and allow it to absorb the odor. You can also pour some wood ash into a bowl and place it into the refrigerator to eliminate food odor as well.
Livestock Pest Remover – Keep a container of wood ash in the barn and sprinkle it on livestock – and your domestic pets too, to deter lice, ticks, and fleas. If you don’t mind the feel and look of firewood ash in your own hair, sprinkle some on before going outside to do chores or spending time in the woods to ward off ticks on your as well.
To enhance the tick and flea repellent power of wood ash, mix it in a two to one part ratio with apple cider vinegar to more thoroughly and deeply penetrate the fur and flesh of your livestock.
Little Old Ants – Those annoying little insects might look like they can light and carry just about any dropped picnic morsel, but they cannot pack away wood ash – and they apparently don’t like that! Pour some wood ash anywhere you discover an ant colony and watch the whole tribe of insects suddenly pack up and relocate.
Stain Remover – Wood ash can also be mixed in a two to one part ratio with warm water to create a stain removing paste. Gently wipe the paste on the stained on clothing or furniture and allow it to set for approximately five minutes before wiping away the paste.
Seed Preservation – Put your heirloom seeds inside a clay pot and cover them with woo ash. You can add more seeds in between layers of wood ash until the clay pot is filled to the top.
Fruit and Vegetable Preservation – Farmers in many regions around the world routinely preserve fresh fruits and vegetables by putting them into clay pots or digging a hole, and filling it both the produce and wood ash.
When preserving more than one food item in a single pot or hole, a layer of wood ash around all sides of the produce must be present to prevent the food from touching each other, the dirt, or the pot, and rotting. The top of the clay container or hole must be covered with a lid or pieces of wood as tightly as possible to prevent air from getting inside.
Hair Treatment – Wash your hair with lye water and then rinse with apple cider vinegar for a natural oil-reducing treatment.
Ice Remover – Because wood ash also possesses salt, it can be poured on to frosted windshields and sidewalks to melt ice – or place on the surface in advance to help prevent ice from forming. If you have satellite dishes for internet and cable service, wood ash may also help prevent them from icing-up during a winter storm, as well.
Rennet Preservation – This essential ingredient in cheese-making has long been preserve by putting it inside a container (an animal horn was used in ancient times) and covering it completely with wood ash. Mud as used to seal the top of the container, meaning an animal horn, before hanging it from a tree for safe-keeping. This process is believed to keep the rennet good for at least several years.
Plant Frost Helper – If the temperatures are predicted to dip to an unseasonably cold degree, sprinkle some wood ash on leaves to prevent frost.
Humidity Remover– Place cooled wood ash into a METAL container in any room where the humidity levels are too high and allow the natural substance to draw the moisture from the air.
Skunk Smell Remover – If you or your pets get sprayed with a skunk, save your tomato juice for chili and rub some wood ash onto the hair and flesh instead to remove the awful and lingering odor.
Fire Extinguisher – Stockpile wood ash to help put out interior or exterior fires. I keep a bucket of ash in my barn and next to all of the hay bales for just that purpose.
Slug Infestation – Keep snails and slugs out of your garden by lining the rows between the crops with a relatively thick layer of wood ash. If you have particularly stealthy slug, grind up some eggshells and mix them together with the wood ash. The egg shells hurt the bellies of the slugs and they will meander in another direction as rapidly as feasible to avoid the eggs hells.
Aquaponics – To reduce algae and enhance the water used in aquaponics farm operations, pour in 1 tablespoon of wood as for ever 1,000 liters of water.
Clothes Storage – Instead of buying moth balls to protect stored clothing and blankets, sprinkle some wood ash on top of, around, and underneath the material. The wood ash won’t stain and can simply be shaken off and the clothing or blankets washed if need be, before wearing or using.
What are some of your favorite uses for wood ash around the homestead? Please leave a note in the comment section to share any possible wood ash uses we missed and let us know how well the items on our list worked on your homestead!
Are you one of the many people looking for a simpler, less hectic lifestyle? Instead of running on the consumer nation treadmill like most people, I decided to take action and go in a different direction, which is where my off-the-grid project began. Knowing that other people are searching for the same thing, I decided…;
Are you one of the many people looking for a simpler, less hectic lifestyle? Instead of running on the consumer nation treadmill like most people, I decided to take action and go in a different direction, which is where my off-the-grid project began. Knowing that other people are searching for the same thing, I decided to document my adventure in great detail for their benefit.
In “Going Off the Grid: The How-To Book of Simple Living and Happiness,” I provide a step-by-step guide on how to downsize your life, find your private piece of land, and then build a self-sustaining home. I recently built my own off-the-grid home in northeast Washington State, so this advice comes from first-hand experience. When building any home, things are not as easy as they appear on those DIY television shows. But with a little knowledge about how the process works in the real world, I believe anyone can achieve their dream of living a more quiet and peaceful life. The hardest part is taking that first step, and this book is the right place to start for any person interested or curious about an off-the-grid lifestyle.
What some people are saying about Going Off the Grid: The How-To Book of Simple Living and Happiness:
“This book is an essential read for anyone yearning to trade the suburban lifestyle for a more simple rural lifestyle.”
“Very knowledgeable and entertaining writer. Covers all the bases. Would recommend to anyone thinking about doing the same.”
“You’ll appreciate his straightforward nonsugar coated words: he tells it like it is and doesn’t attempt to sell readers on a “unicorn” one-size-fits-all solution. The author’s candor about dealing with building contractors alone is worth the price of the book.”
“This book is easily worth the price when you discover how much time and money it will save you. Mr. Collins provides answers to questions that people probably don’t even know they need to ask and his real world experience brings a healthy dose of reality to the idea of building off grid.”
Permaculture (permanent agriculture) is the conscious design and maintenance of agriculturally productive ecosystems which have the diversity, stability, and resilience of natural ecosystems. It is the harmonious integration of landscape and people providing their food, energy, shelter, and other material and non-material needs in a sustainable way. Without permanent agriculture there is no possibility of…;
Permaculture (permanent agriculture) is the conscious design and maintenance of agriculturally productive ecosystems which have the diversity, stability, and resilience of natural ecosystems. It is the harmonious integration of landscape and people providing their food, energy, shelter, and other material and non-material needs in a sustainable way. Without permanent agriculture there is no possibility of a stable social order. Permaculture design is a system of assembling conceptual, material, and strategic components in a pattern which functions to benefit life in all its forms. The philosophy behind permaculture is one of working with, rather than against, nature; of protracted and thoughtful observation rather than protracted and thoughtless action; of looking at systems in all their functions rather than asking only one yield of them; and of allowing systems to demonstrate their own evolutions.Used Book in Good Condition
Raw feeding for cats and dogs is becoming increasingly popular, and for good reason. With commercial cat food containing everything from indigestible grains to contaminated ingredients to harmful additives, a raw, species-appropriate diet is really the best way forward.
The Benefits of Raw Feeding Your Cat
Cats are obligate carnivores, which means that they should only be eating meat, and not much else. However, not only does commercial cat food usually contain no more than a 3-4% meat, this tends to be a by-product, meaning that there is not much nutrition to it.
By switching to a raw food diet, you will soon notice your cat beginning to look and feel better. Here are a few of the benefits:
One of the other benefits that is often not mentioned is hydration. Cats have a high thirst drive, but are not naturally good at drinking enough water. The reason for this is because cats are designed to obtain their main source of water from their food, since 70% of whole prey, be it a mouse, a rabbit or a bird, is made up of water.
By switching to a raw diet, your cat will get most of its water intake from food, and will be able to stay hydrated much better.
Take a look at this video, which features top vet Dr. Karen Becker, discussing the benefits:
https://www.youtube.com/watch?v=G3wLTlqnMMg
Here is another video in which seven vets discuss the benefits :
Raw Feeding Risks
One of the main issues that people have with raw diets for pets is that it could pose a health risk to humans, but preparing raw food for your cat is no different to preparing meat for humans. Good hygiene and cleanliness needs to be practiced for both, such as washing your cat’s bowl after each meal, and cleaning surfaces after meat has been on them.
When it comes to health risks, salmonella is one that people worry about. However, salmonella is found in the GI tract of 18% of cats, no matter what they eat. It is naturally present in the environment, and naturally shed through their feces and saliva, even if they are on a dry food diet.
In fact, there have been more recalls for dry pet food due to dangerous levels of salmonella than their have for raw food.
There are quite a few other raw feeding myths out there, and it’s worthwhile familiarizing yourself with these at the beginning of your raw journey.
Here are a few common questions:
Many veterinarians are against raw diets for cats, shouldn’t you be listening to them?
Those same veterinarians have also likely undergone little training in pet nutrition. Those who have, such as qualified pet nutritionists, are much more likely to be aware of the advantages that a raw diet has.
Many veterinarians also tend to see a large number of owners feed an unbalanced raw diet, resulting in a malnourished cat. This is why it is important to educate yourself before starting out, to ensure you are providing your cat a healthy, balanced diet.
Won’t your cat choke on bones?
No, but the important point to emphasize here is that the bones need to be raw. Cooked bones splinter when chewed, causing everything from choking to intestinal punctures. However, when raw bones are chewed, they have clean edges, which are then worn down into smooth surfaces by your cat’s stomach acid, meaning that they don’t cause any damage as they travel through the body.
Don’t cats live longer on a cooked diet?
Commercial diets have only been around for 50 years or so, and, in that same time, there has been a significant rise in obesity, diabetes and cancer in cats. The connection between the two cannot be ignored, especially when you take a look at how much healthier raw fed cats tend to be.
This video will talk you through a few other raw feeding myths:
Raw Diets vs Cooked Diets
While cooked diets can be better than commercial diets, raw diets still tend to surpass cooked diets.
One reason for this is that the process of cooking transforms the nutrients found in meat, altering their composition and making them less bio-available to your cat.
Cooking also degrades the nutrients, meaning that you lose out on so many amino acids, vitamins and minerals, which would have otherwise been present in the meat in its raw form.
In order to compensate for the deficiencies of a cooked diet, you would need to add in a number of different supplements, and this then becomes really difficult to properly balance out.
Figuring Out the Daily Amounts
Before you can work out how much food you need to feed your cat each day, you need to know his or her weight.
A simple way to weigh your cat, especially if they don’t stay on the scale by themselves is to weigh yourself first. Then, pick your cat up and weigh the two of you together. Subtract your weight from the weight of both of you, and you’re left with your cat’s weight.
Generally, you should be feeding your cat between 2-4% of their body weight each day, although you can double this if you are feeding a kitten, up until a year old. It is usually best to stick with two meals for an adult cat, and four meals for a kitten.
If your cat is overweight, start with 2% until the weight has dropped down to an ideal level, after which you can increase it slowly, until you find a percentage that maintains your cats ideal weight.
If your cat is extremely active and lean, go with 4%.
If you are not sure, start with 3%, and adjust this up and down when needed. Ideally, you should be able to feel your cat’s ribs, but not see them, and this should give you a good indication of whether or not you need to feed more or less.
Since you will likely be feeding your cat twice a day, you need to divide this daily amount by two, in order to work out how much you need to feed each meal.
When it comes to what actually makes up your cat’s raw meals, here is the breakdown:
83% of their meal needs to be meat
7% of their meal needs to be bone
5% of their meal needs to be liver
5% of their meal needs to be another secreting organ
Keep in mind that when you are feeding a bone, there is still going to be some meat attached to it, meaning that the weight of that bone would account for some of the meat requirements, as well as the bone requirements.
Here are some guidelines when it comes to understanding how much of each bone is actually bone:
Bone Type
Actual Bone Content in %
Chicken neck, with skin
36%
Chicken neck, without skin
75%
Chicken back
44%
Chicken foot
60%
Chicken rib cages
88%
Chicken wing
46%
Duck neck
50%
Duck wing
39%
Whole rabbit, with pelt
10%
Whole rabbit, without pelt
28%
Pork and lamb ribs
45%
Here is an example of what it all means:
If your cat weighs 11lbs (5kg) and is already at an ideal weight, then 3% of their body weight would be 150g. This is the amount you would need to feed each day:
83% of 5,29 oz or 150 g needs to be meat, which works out to 4.39 oz or 124.5 g.
7% of 5,29 oz or 150 g needs to be bone, which works out to 0.37 oz or 10.5 g.
5% of 5,29 oz or 150 g needs to be liver, which works out to 0.26 oz or 7.5 g.
5% of 5,29 oz or 150 g needs to be another organ, which works out to 0.26 oz or 7.5 g.
If you were to include a chicken wing, which has 46% bone, into their meal, and it weighs 100g, then this means that 46g of that chicken wing is bone, and the remaining 54g would count as meat.
While the recipes below do take these percentages into account, it is still important to understand them for yourself, especially if you plan on adapting the recipes.
These calculations can seem confusing at first, and do end up putting many off raw feeding. However, once you have done them, you will likely not need to do them again, and, even if you do, raw feeding will have quickly become second nature by then.
It is also important to remember that all of these percentages are just guidelines. As you get more accustomed to raw feeding, you will end up adjusting these to suit the needs of your individual cat.
Already Raw Feeding a Dog?
If you already raw feed a dog, you will likely already be aware of the 80/10/5/5 guidelines. The reason why the guidelines for cats is slightly different is because the prey that cats would naturally catch would not be the same as dogs. For example, rodents contain just 5% bone and 4% liver, while rabbits contain less than 10% bone and 4% liver, and birds are even lower in both bone and organ content.
Another difference between raw feeding cats and dogs is that cats, unlike dogs, cannot create taurine in their bodies, so you do need to be aware of the differing taurine contents in certain meats. This will be explained in more detail further down.
Transitioning Your Cat to a Raw Diet
To Grind or Not To Grind?
If you are transitioning a kitten to a raw diet, then chances are that this will be extremely easy. Usually, the younger the cat, the quicker they will adapt, and they seem to instinctively know what their body needs.
However, when it comes to adult cats, this can be slightly trickier…
If your cat is currently eating kibble, you have a couple of options. Kibble is like junk food to cats, so the majority do not easily switch straight over to raw.
Instead, you can either move him over from kibble to a canned food, and then begin swapping parts of this out for a ground up raw food.
Alternatively, you can start mixing his kibble in with the ground up raw food, gradually reducing the amount of kibble that you include, until you can completely cut it out.
While it may be tempting to practice tough love, and simply not feed your cat anything else until he eats the raw food, this is something that you should never do. Cats have a unique predisposition to contracting hepatic lipidosis, which is a form of liver failure that can occur if the cat does not eat for 24 hours.
This means that you must make the transition to raw at your cat’s own pace, rather than trying to rush him through it.
Here are a few other tips that you can try out to encourage your cat to eat the raw food:
Drizzle it with some of the juice from a can of tuna
Mix in a small amount of grated cheese
Crumble some dried liver over the top
Sprinkle some crushed kibble, or any other treat that your cat loves, over the top
If you already prepare meat to cook at home for human consumption, there is nothing wrong with offering different cuts of meat to your cat to try. You may find that your cat absolutely adores a certain protein, which means this is the protein to begin with when transitioning your cat.
To Grind or Not To Grind?
Grinding raw food is one of the most popular ways of raw feeding cats, and this is because the final texture is similar to that of the canned foods that cats are already accustomed to, making for an easy transition to the raw version.
This is also a great way to feed elderly cats, who may be missing a few teeth.
However, the fact that ground food does not require any chewing is also a downside to younger cats, as the chewing and tearing of the meat, and the crunching of the bones, is a great way to keep their teeth clean.
Grinding can also degrade quite a few nutrients within the meat, so, if this is how you are going to feed the recipes below, you will need to add in a few extra supplements. Scroll down to the Supplements section for more.
Raw Cat Food Recipes
The recipes below are designed to be served up as small chunks, or even larger chunks if your cat enjoys working for his food.
Keep in mind that the bones that cats are able to eat are quite limited, and, for some of the proteins mentioned below, such as beef, there are no bones that would be suitable for a cat. In those cases, the bones have been replaced with alternatives.
When it comes to adding water into each of these recipes, this depends on whether or not you feel your cat could do with the extra hydration. It also depends on the consistency of food that your cat prefers – if he likes it wetter and sloppier, then definitely add in some extra water.
All of these recipes make around 1kg of food. The number of days that this will last for depends on the amount that you will be feeding your cat each day. You may find it more convenient, as well as cost-effective, to double or triple these batches when making them.
Recipe 1: Chicken-Based
Ingredients
350g chicken thigh meat
200g chicken heart
50g chicken gizzard
300g chicken neck, with skin
50g chicken liver
50g chicken kidney
50g sardines
1 raw chicken egg
Water (optional)
Method
Chop all of the ingredients up into chunks, leaving the thigh meat as larger chunks and the offal into smaller chunks
Place everything into a large bowl or bucket and mix in the egg.
Weigh out what your cat needs on a daily basis and then portion this up into containers.
Recipe 2: Beef-Based
200g beef steak
200g beef mince (make sure this contains no additives, such as salt or onions)
100g beef lips
100g beef tongue
100g beef heart
200g chicken wing
50g beef liver
50g beef spleen
50g sardines
1 raw duck egg
Water (optional)
Method
Slice the steak, tongue, lung and heart.
Chop the chicken wings into two or three pieces each.
Chop the liver and spleen into small chunks.
Place everything into a large bowl or bucket and mix in the egg.
Weigh out what your cat needs on a daily basis and then portion this up into containers.
Recipe 3: Lamb-Based
Ingredients
200g lamb leg meat
200g lamb shoulder meat
100g lamb lung
200g lamb heart
200g chicken back
50g lamb liver
50g lamb kidney
50g sprats
4 quail eggs
Water (optional)
Method
Chop the leg, shoulder, heart and sprats into chunks.
Hack the chicken back into slivers that would be an easy size for your cat to chew on
Chop the liver and kidney into small chunks.
Place everything into a large bowl or bucket and mix in the eggs.
Weigh out what your cat needs on a daily basis and then portion this up into containers.
Recipe 4: Pork-Based
Feeding raw pork to cats can be quite a controversial topic, with some believing it is dangerous, but others believing the opposite. This also depends on where you live, as pork from different parts of the world can carry different parasites. If you are unsure about feeding pork, do some extra research on pork from your area, and speak to other local raw feeders to see what information they may have.
Ingredients
200g pork loin
200g pork leg meat
100g pork cheek
300g pork mince
100g chicken rib cage
50g pork liver
50g pork testicles
50g mackerel
1 chicken egg
Water (optional)
Method
Cut the rib cages into bite-sized pieces.
Chop the pork meat and mackerel into chunks.
Chop the liver and testicles into smaller chunks.
Place everything into a large bowl or bucket and mix in the eggs.
Weigh out what your cat needs on a daily basis and then portion this up into containers.
Recipe 5: Rabbit-Based
Rabbits can often be purchased whole but gutted, along with their fur, which many believe acts as a natural wormer.
Whole rabbits weigh a couple of kilograms each, and, if you are able to purchase a whole rabbit, all you really need to do is chop the whole thing up into bite-sized pieces. You could also ask a local butcher to break the rabbit down for you.
This is an example of feeding whole prey, which will be explained in more detail further down.
Recipe 6: Turkey-Based
Ingredients
400g turkey thigh meat
100g turkey breast meat
200g turkey heart
200g chicken back
50g turkey liver
50g turkey kidney
50g sardines
1 duck egg
Water (optional)
Method
Cut the chicken back into bite-sized pieces.
Chop the turkey meat and mackerel into large chunks.
Chop the liver and kidney into smaller chunks.
Place everything into a large bowl or bucket and mix in the egg.
Weigh out what your cat needs on a daily basis and then portion this up into containers.
Feeding Fish
While many people believe that fish should make up a large part of a cat’s diet, this is not actually true. While fish does contain omega-3 and omega-6 fatty acids, making them essential, this should still be kept to a minimum.
One reason for this is due to the toxins and pollutants that are found in fish, as well as the antibiotics. To avoid this, opt for wild fish rather than farmed fish.
Sardines or sprats tend to be one of the best varieties to feed, and this can be both fresh or canned. If you are opting for the canned version, make sure you check the salt levels before feeding, and pick the ones that have been preserved in water rather than oil or a sauce.
If you would prefer not to feed fish, you can replace the fish in these recipes with a drop of fish oil a day. Make sure that you do not forget to replace the weight of the fish with a meat alternative.
Adapting Recipes and Mixing Proteins
Each of the recipes mentioned above can be adapted based on what meat you have available to you.
Once you understand how much meat, bone and offal your cat needs, you can mix and match to your heart’s desire.
Here are some ideas of other cuts of meat, offal and bone that you could feed:
Meat
Offal
Bone
Heart
Liver
Wings
Tongue
Kidney
Ribs
Lung
Pancreas
Necks
Fillets
Testicles
Carcass
Off cuts
Brain
Cheek
Spleen
Trachea
Gizzard
Brisket
Penis
Green tripe
In addition to making up batches of cat food in advance, you also have the option of measuring out what your cat needs on a daily basis. You can then split this up into two meals.
For example, the bowl in the image below contains:
A chicken foot (keep in mind that this may be too hard for some cats to chew)
Turkey chunks
Beef heart chunks
Lamb leg off-cuts
A quail egg
Homemade kefir for probiotics
The evening meal will consist of lamb liver, beef kidney, and some chicken chunks.
While this style of feeding does mean that your cat would be able to enjoy more variety on a daily basis, It would only really work if you are able to always have some defrosted bone, offal and meat in your fridge.
However, if your cat is quite a picky eater, this can be a great way to work out exactly what he actually likes, so that you can base your meals around those proteins.
Feeding Whole Prey
Feeding whole prey is exactly what it sounds like – feeding whole animals. This is as close as you can get to a cat’s natural diet, containing the ideal balance of everything a cat needs, and requires little to no preparation.
Here are some examples of whole prey that you can feed, feather and fur included:
Mice and rats
Quail
Day old chicks and ducklings
Hamsters
Rabbits
Partridge
Guinea pigs
Chicks
Ducklings
Small fish
How to Store Raw Cat Food
When putting together raw cat food, it’s always easier to do this in large batches. However, as with all raw meat, it cann’t be stored for more than a few days in the fridge.
This is where your freezer comes in. Simply store two days’ worth of cat food in your fridge, and each time you take a box out, replace it with a box from the freezer, so that it has defrosted by the time you need it.
If you bought a large piece of meat, such as a whole lamb’s liver, and only need a small portion of it to create your batch, there is nothing wrong with defrosting it, taking what you need, and then re-freezing it. The only thing that this will affect is the texture, which is why humans do not tend to do this.
Adding Supplements
Many raw feeders add supplements into their cat’s food, and this is something that only you will be able to decide for yourself with more research.
If you are feeding a balanced diet, with a variety of different proteins, as well as some whole prey, then supplements will not generally be needed.
If you are choosing not to feed fish, then you will need to feed a fish oil instead. While omega-3 and omega-6 fatty acids used to be found in beef and poultry, this is no longer the case, unless you are able to source solely grass-fed proteins. When it comes to choosing a fish oil, go for a salmon oil or a small fish oil. Stay away from cod liver oil, as this contains too much vitamin A, especially since you are already feeding liver.
Taurine is another supplement that is commonly added in to raw cat food. This is a type of amino acid that is essential when it comes to your cat’s health. Taurine can be found in just about every muscle meat, and, generally, the harder working the muscle, the more taurine it contains. This is why heart is included in every recipe above.
Grinding your cat’s food causes the taurine in meat to oxidize, decreasing the amount that is available to your cat. For this reason, if you grind your cat’s food, it would be wise to add in some extra taurine. Do not worry about overdoing this, because any excess taurine will simply be expelled in your cat’s urine.
One final supplement that you may wish to add is a probiotic. These boost the immune system and aid in so many different parts of your cat’s health.
Of course, there are plenty of other natural supplements out there for different health issues. From arthritis to lack of energy, if your cat does have a specific issue that you would like to address, it would be worth looking into the various supplements available.
Substituting Bone for Calcium Supplements
There is nothing that can really replace the goodness that real bones can bring, especially since they contain the ideal ratio of calcium to phosphorous. However, if for some reason you cannot feed bone for a while, there are a couple of calcium supplements that you could try.
Bone meal is one of the most common, but make sure that you buy the version formulated for human consumption, rather than for in the garden.
Crushed eggshells are also a great calcium source, but be wary of using store-bought eggshells, as these may have been bleached or chemically sprayed. If you have laying poultry on your homestead, then you already have a great calcium supplement freely available to you.
This video will talk you through how to make eggshell powder:
However, keep in mind that this is only advisable for a short term period, and you need to switch back to feeding bone, even if it is in its ground up form, as soon as possible.
Keeping an Eye on Stool
Your cat’s stools can tell you so much about their diet and health, which is why it is important to keep a close eye on this, especially when transitioning them to a new diet.
If your cat seems to be constipated, and is producing stools that are white and crumbly, then this is an indication that you have fed too much bone. Feed a boneless meal for the next meal, and the stools should go back to normal.
If your cat’s stools are loose, runny and dark in color, then this is an indication that you have fed too much offal or heart. While some cats can tolerate a large amount of heart in their diet, others cannot, so this is something that will need to be adjusted based on your individual cat.
Should You Be Including Fruits and Vegetables?
As mentioned above, cats are obligate carnivores, which means that they do not need any fruits and vegetables in their diet. They also have a difficult time digesting them, so you should really try to avoid feeding these as much as possible.
However, if your cat has taken a particular liking to a fruit or vegetable, this will not do any harm when fed on occasion, as long as you have checked that that particular food is safe to feed to cats.
Treats and Snacks for Raw Fed Cats
Even though you feed your cat a raw diet, you can still use commercial treats on occasion. However, these do contain additives and other harmful ingredients, so, if you are wanting to pay extra attention to your cat’s health and nutrition, it would be best to avoid these.
However, if you are able to find commercial cat treats that contain nothing but meat, then this should be no problem, but make sure that you are aware of the meat’s origin.
Alternatively, you could try making your own treats at home. If you have a dehydrator, you are likely already aware of how to dehydrate meat. Simply cut the meat into thin slices, dehydrate them, and feed them to your cat as a treat.
If you do not have a dehydrator, you could dehydrate meat in your oven, keeping it on at its lowest temperature, with the door slightly ajar so that moisture can escape.
Here’s how to dehydrate some simple chicken treats:
Where to Source Your Meat From
Initially, many people tend to find raw feeding more expensive, but, once you get into the swing of things, you will learn how to source your meat for cheaper.
Local butchers will often have off cuts, as well as bones, that they are willing to give away for free, as will local farmers and hunters. Hunters in particular could be a great source of whole prey for your cat, especially rabbits.
There are also more and more raw suppliers popping up all over the world. They will not only sell everything that you need to put together a homemade raw diet for your cat, but will also sell complete mixes, meaning that all the hard work will have already been done for you. While these are more costly, they are great for those days when you have run out of cat food but do not have the time to whip up another batch.
Learn Even More
Raw feeding can be intimidating to begin with, and there is no denying that there is so much to learn. In fact, even seasoned raw feeders are constantly learning.
While most veterinarians are trained when it comes to raw feeding, pet nutritionists will, so if you would like some advice tailored to your individual cat, it’s worth contacting one.
There are also plenty of books out there that will teach you more about cat nutrition. If you would prefer to watch something rather than read, take a look at the Netflix documentary called Pet Fooled, as this will teach you so much about the dark side of the pet food industry.
Finally, don’t dismiss the power of social media. There are so many raw feeding groups and forums out there, and these are moderated by raw feeders who have so many years of experience. These are always so useful when you have an urgent question that needs answering, or if you would simply like to find a mentor to help you along the way.
Summary
Being the closest thing to a completely natural diet, raw feeding will do so much good for your cat. While there is so much to learn, do not feel overwhelmed, as it will not be long before you begin to get the hang of things.
Post a comment below if you have any questions about raw feeding, or would like to know more about tailoring a raw diet to your cat’s individual needs.
Disclaimer: Neither the author nor New Life On a Homestead shall be held liable for the negative effects that result from using the advice in this article. Before employing any of the advice in this article, please contact your pet’s veterinarian.
Hey! Ini here to share the “Achievements & Failures” of our year on the land.
This year was a doozy. At times I felt aligned and deeply in my purpose and life path, grateful and jubilant. Other times I felt so frustrated upset and like everything sucked, I felt like giving up everything. But the truth I’ve realized through experience after an epic 2017 is that If I don’t commit myself fully and live life as voraciously as possible, I’m missing out on the most profound highs and successes and all the lessons and growth that come with upset and failure.
So what did 2017 bring? Short answer A LOT. It was a year full of severe changes, hard work ands struggle, satisfaction, rejuvenation, abundance… A really big year for us at Mountain Jewel. It is our 2nd year developing a raw piece of land into a thriving diverse ecosystem guided by the ethics and values of permaculture. PHEW! Here’s a brief list of major happening on our Homestead in 2017 :
We were featured on a Discovery Channel show, we build a solar shed, we set up our solar system to provide off grid electricity, we got a solar powered well pump, we set up a shower, we installed drip irrigation, we erected a high tunnel, we harvested an abundance of garlic, potatoes, tomatoes, peppers, and sweet potatoes we’re enjoying through the winter, we grew many medicinal herbs and set up a tincture business (Mountain Jewel Botanicals), we made an octagonal log cabin into our home, we raised our first chickens, we got goats, we planted hundreds of edible/useful trees and shrubs and vines (the fruit of which we will harvest for decades to come), we got two bee hives and caught a honeybee swarm, harvested our first haul of honey, we tattooed each other, put in a vineyard, plugged mushroom logs with shiitake, we danced to our friend’s music, we floated our local water ways and hunted and ate armadillos.
Where to begin? For starters our yurt (the only “inside” space on our 18 ac homestead ) was moldy at the beginning of the year. In a wake up coughing, not breathing well, tight chested, swollen face OH SHIT THIS SUCKS kinda way. We had left for several months in the last stretch of 2016 and came back to a yurt that was actively culturing mold in our incredibly humid climate. So the year began with a failure to secure a safe and restful home space. Not interested in leaving or pursuing other options offsite, we slept in our screened in gazebo. Luckily our winters aren’t too harsh, but a couple of nights dipped to 8 degrees and waking up shivering is no fun for anyone.
Not having a safe space to rest and rejuvenate after a busy and hard work-filled first year on our homestead, we deicide to do what we’ve always done, just keep moving forward. We didn’t have much choice in the matter as my partner and I have given ALL of our selves to this dream of establishing a thriving food forest, homestead and eventually opening Mountain Jewel to interns, visitors and workshop particpants as a center for earth connection & permaculture education. This is our life! It really sucked a bag of rocks to have no space to breathe easy out of the elements. Everyday seemed to drain me a little more, push my limits and dampen the spirits. Out of this push to get our needs met, in early January we began construction of a shed to house our future solar system, meet our storage needs and even offer a safe sleeping space.
We dug a foundation by hand in the rocky Ozark soil. Returning many of the rocks to create a rubble trench. We began to fill poly bags with gravel to create an earth bag stem wall. We used green locally milled oak 2x6s to frame the walls and raised them with help from our friends. We roofed the building and were cruising along when along came a message to would shift the year in a MAJOR way.
Our instagram account had a message from the casting director from Homestead Resuce. It’s a reality TV show on Discovery Channel that features the Raneys, a homesteading family from Alaska. They “save” homesteaders in a dramatic portrayal of the struggles of homesteading. They invest their skills and a generous network budget into making the lives of homesteaders easier/better/safer.
During the interviews I was quite nervous (pretty rare for me). I felt like I was in 3rd grade delivering a speech that I wasn’t ready for. I knew it didn’t matter, as this was just a silly interview, but I still felt unsure of myself. That said, once it was over I knew we were going to win and be selected to be on the show. And we were.
It all happened in a whirlwind of activity beginning with a site visit 3 weeks after the interview. Two crew members came and scoped things out, briefing us on what to expect. Then they were gone and we were told they would return with 20 people in a couple weeks. It all happened so fast! When the full crew arrived our life was turned upside down. It really felt like a mini invasion as our normally quiet, basically solitary life was abruptly filled with a flurry of hectic activity.
Being on TV was never something I wanted or dreamed of. But here it was, unfolding in front of me. The Raney family wanted to tear our yurt down without giving us a clue as to what would happen in it’s place. This whole process was deeply unsettling and uncomfortable in many ways. The whole thing was filmed, and being TV there is always a push to get the content to tell their intended story. This coupled with high standards and ethics made for an interesting compromise.
In the end we were stoked on what they set our to build, an octagonal cedar log cabin. WOW, I was shocked and happy.
Another big improvement that was made through Homestead Rescue was the installation of a solar powered well pump. Up until now we had been hand-pumping water for all the household and irrigation needs. They hooked us up and had a pump installed for us. They paid for solar panel and needed hardware, which gave us the great opportunity to practice wiring solar panels ourselves for the first time. They also installed a water tower with a cistern that channeled water through a cedar aqueduct to another raised cistern. We then installed drip irrigation to water our plants (of which Wren started from seed over 100+ varieties this year, many of them perennials we can enjoy for years to come!).
Just after the filming of the show, we finished the solar shed by siding it with waney/live edge cedar we felled from our land. The siding was all cut on site and therefore had no lumber miles! Not to mention, the live edge completely changes the face of a square building to create a beautifully organic feel. We installed our 8 PV panels on the roof of our solar shed. We learned about wiring and installed the charge controller, batteries and inverter than now provides us with ample AC electricity. What a life changer! We also learned how to wire sockets and set up a ceiling fan in the gazebo. After this, we soon purchased an energy efficient freezer (now happily full of food we put up). This was a HUGE step forward for us as we can now store food easily with renewable energy, build with power tools and have some creature comforts like lights and fans.
I am still so grateful for this progress!!! I give thanks everyday for the abundant energy harnessed from the sun. We were never interested in tying into the grid (still roughly 80% powered by coal in Missouri) and wanted to really walk our talk. Getting ourselves wired to produce our own electricity has been such a blessing.
Another success was growing and storing oodles of garlic, potatoes and sweet potatoes (we’ll write posts on this and how you can successfully grow your own!). This feels rewarding to be able to grow calorie dense foods to sustain and nourish these bodies that work so hard.
We also tried our hands at grazing goats to help mow down brushy areas. We traded labor for a friend’s wethers (castrated males) from her milking herd. We effectively turned our brushy landscape into high quality meat. The harvesting process was definitely impactful as we saw these goats come into this world and were responsible for ending their lives. This was an emotional trying process, but one which I am grateful for. We also harvested some of the chickens from our flock and made some delicious soups and stocks!
This fall, after erecting the main structure months earlier, we framed the walls of our high tunnel. After removing 28 five gallon buckets of rocks and a few boulders (I said we had rocky soil, and it’s only 200 square feet), we were set to plant the fall crops that keep us in fresh produce through the winter. Yay for winter salads! This was great success because it protects our food and greatly extends the season. It also gave us a good first step before embarking on a much larger high tunnel approaching 2000 square feet (which we got a grant for- we will also write a post on this!).
The most recent success was realizing the first phases of broad scale food forest plantings. We actually received a USDA grant to maintain forested land and plant edible trees and shrubs (we’ll do a post sharing the details). A fantastic reminder that we are doing the right thing and are being blessed. We planted over 100 trees and shrubs including hazelnuts, chestnuts, hican (hickory x pecan), new jersey tea, paw paw, pears, apples, apricots, almonds etc… This dream and vision for manifesting abundant and diverse productive ecosystems in line with natural cycles is so important. This dream is MUCH bigger than us and I truly believe we are held and supported in our endeavors. This dream is worthwhile…
This has been an abundant year, full of life and beauty. It feels like the struggles we overcame at the start of the year built and strengthened our resolve and determination. After so many confirmations and blessings, we’re ending the year in a restful space, with gratitude overflowing. Taking the winter slowly and remembering to laugh, read and play. Thanks to all those that came before, all the encouragement, and those who see our visions and support the good work of co-creating an abundant and beautiful life of Earth.
As always, feel free to resteen, upvote and comment! Also, we write these posts to share our knowledge and awareness with YOU! If you see something that sparks your interest in what we’ve written and would like to know more, please suggest an article for us to write! It’s a blessing to us to share and this helps us know what you’re interested in.
OFF GRID with DOUG and STACY: This is just 1 of many videos we will be posting talking about our 5 years on the off grid homestead and what is next for us as we are just about done with the infrastructure of our 11 acres in the mid west.
Here is the sun oven coupon: YOU STILL HAVE THE 70.00 OFF COUPON AVAILABLE HERE IS THE LINK : http://sunoven.com/dougstacy
*follow us on Instagram: https://instagram.com/off_grid_with_doug_and_stacy/


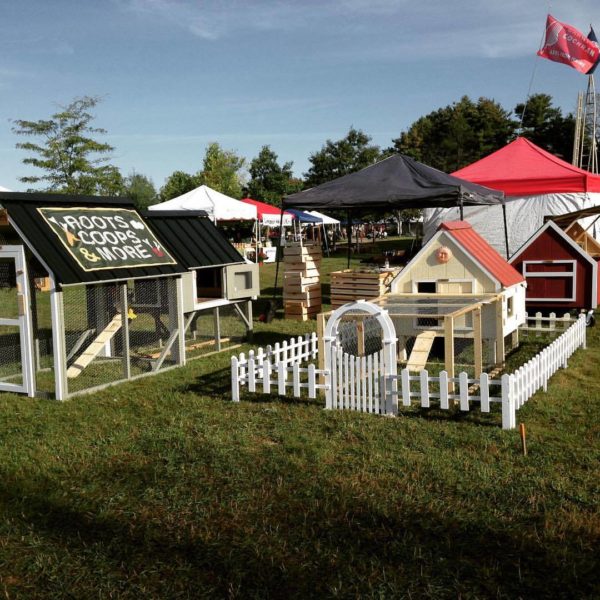


 Do you keep homestead records? Have you wondered if they’re worth the effort? I’ve been
 For most of us, just because we start farming our backyards doesn’t mean all the other responsibilities of life disappear. Between work, homeschooling, farm chores, gardening, food preservation, balancing a social life, community service, scratch cooking & baking, larger homes, etc.., modern homesteader’s have more to balance these days. Our mental load can be heavy! (Tell me, I’m not the only one!)
 Set Goals and Track Your Progress
 Benefits of Digital Records


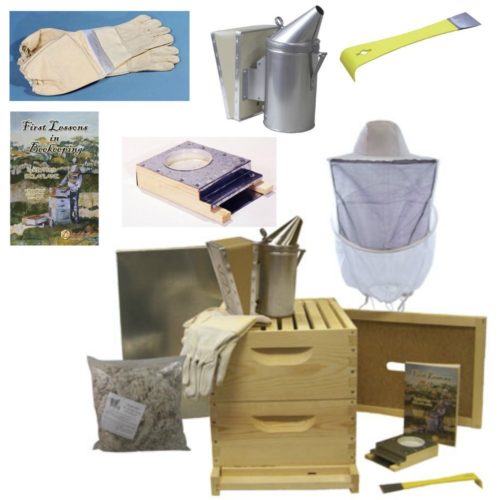


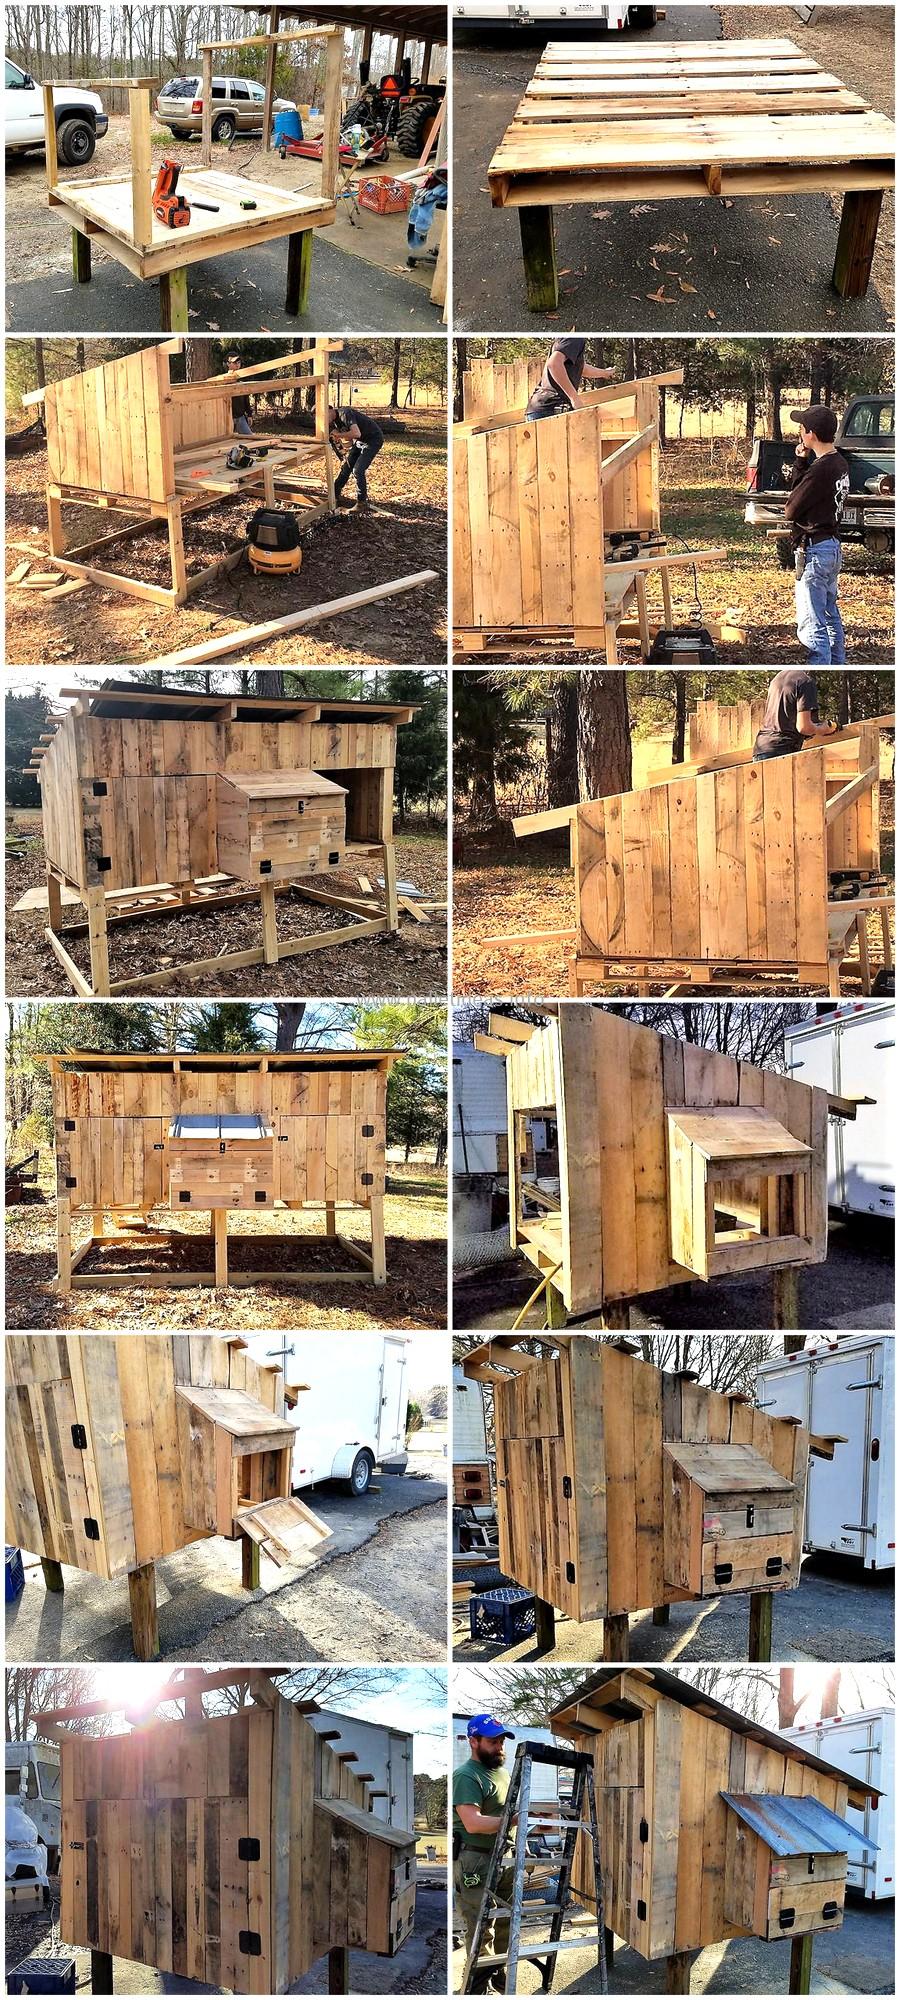


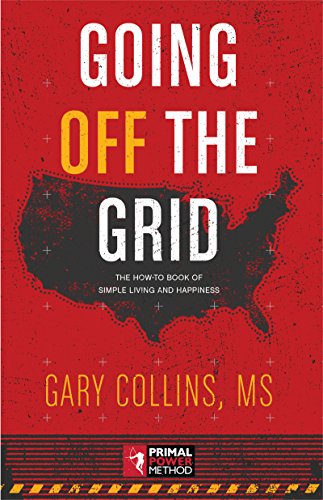


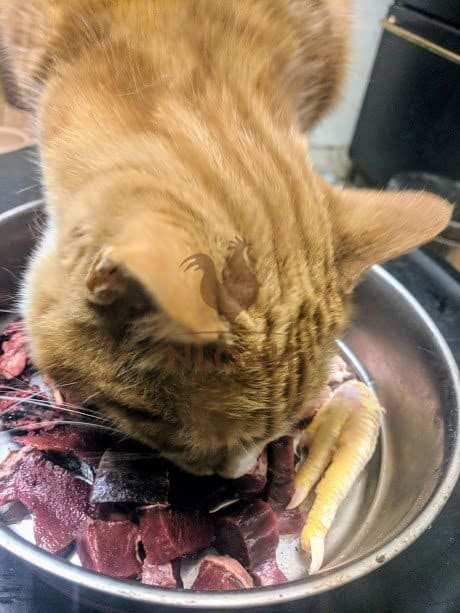
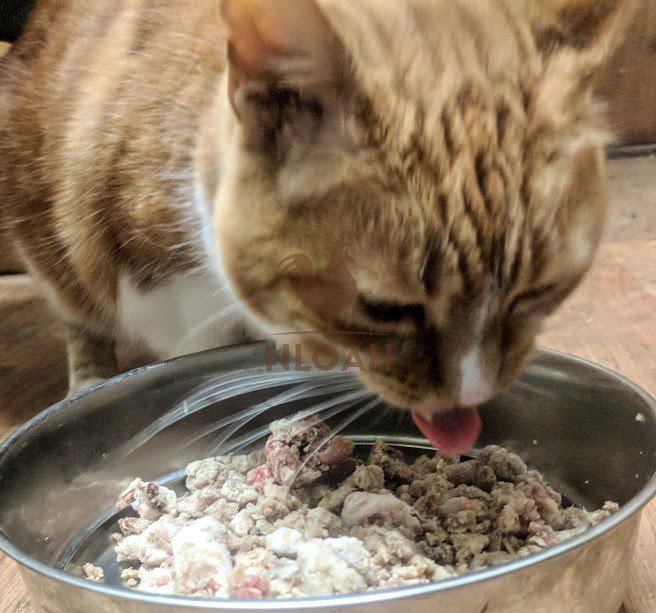


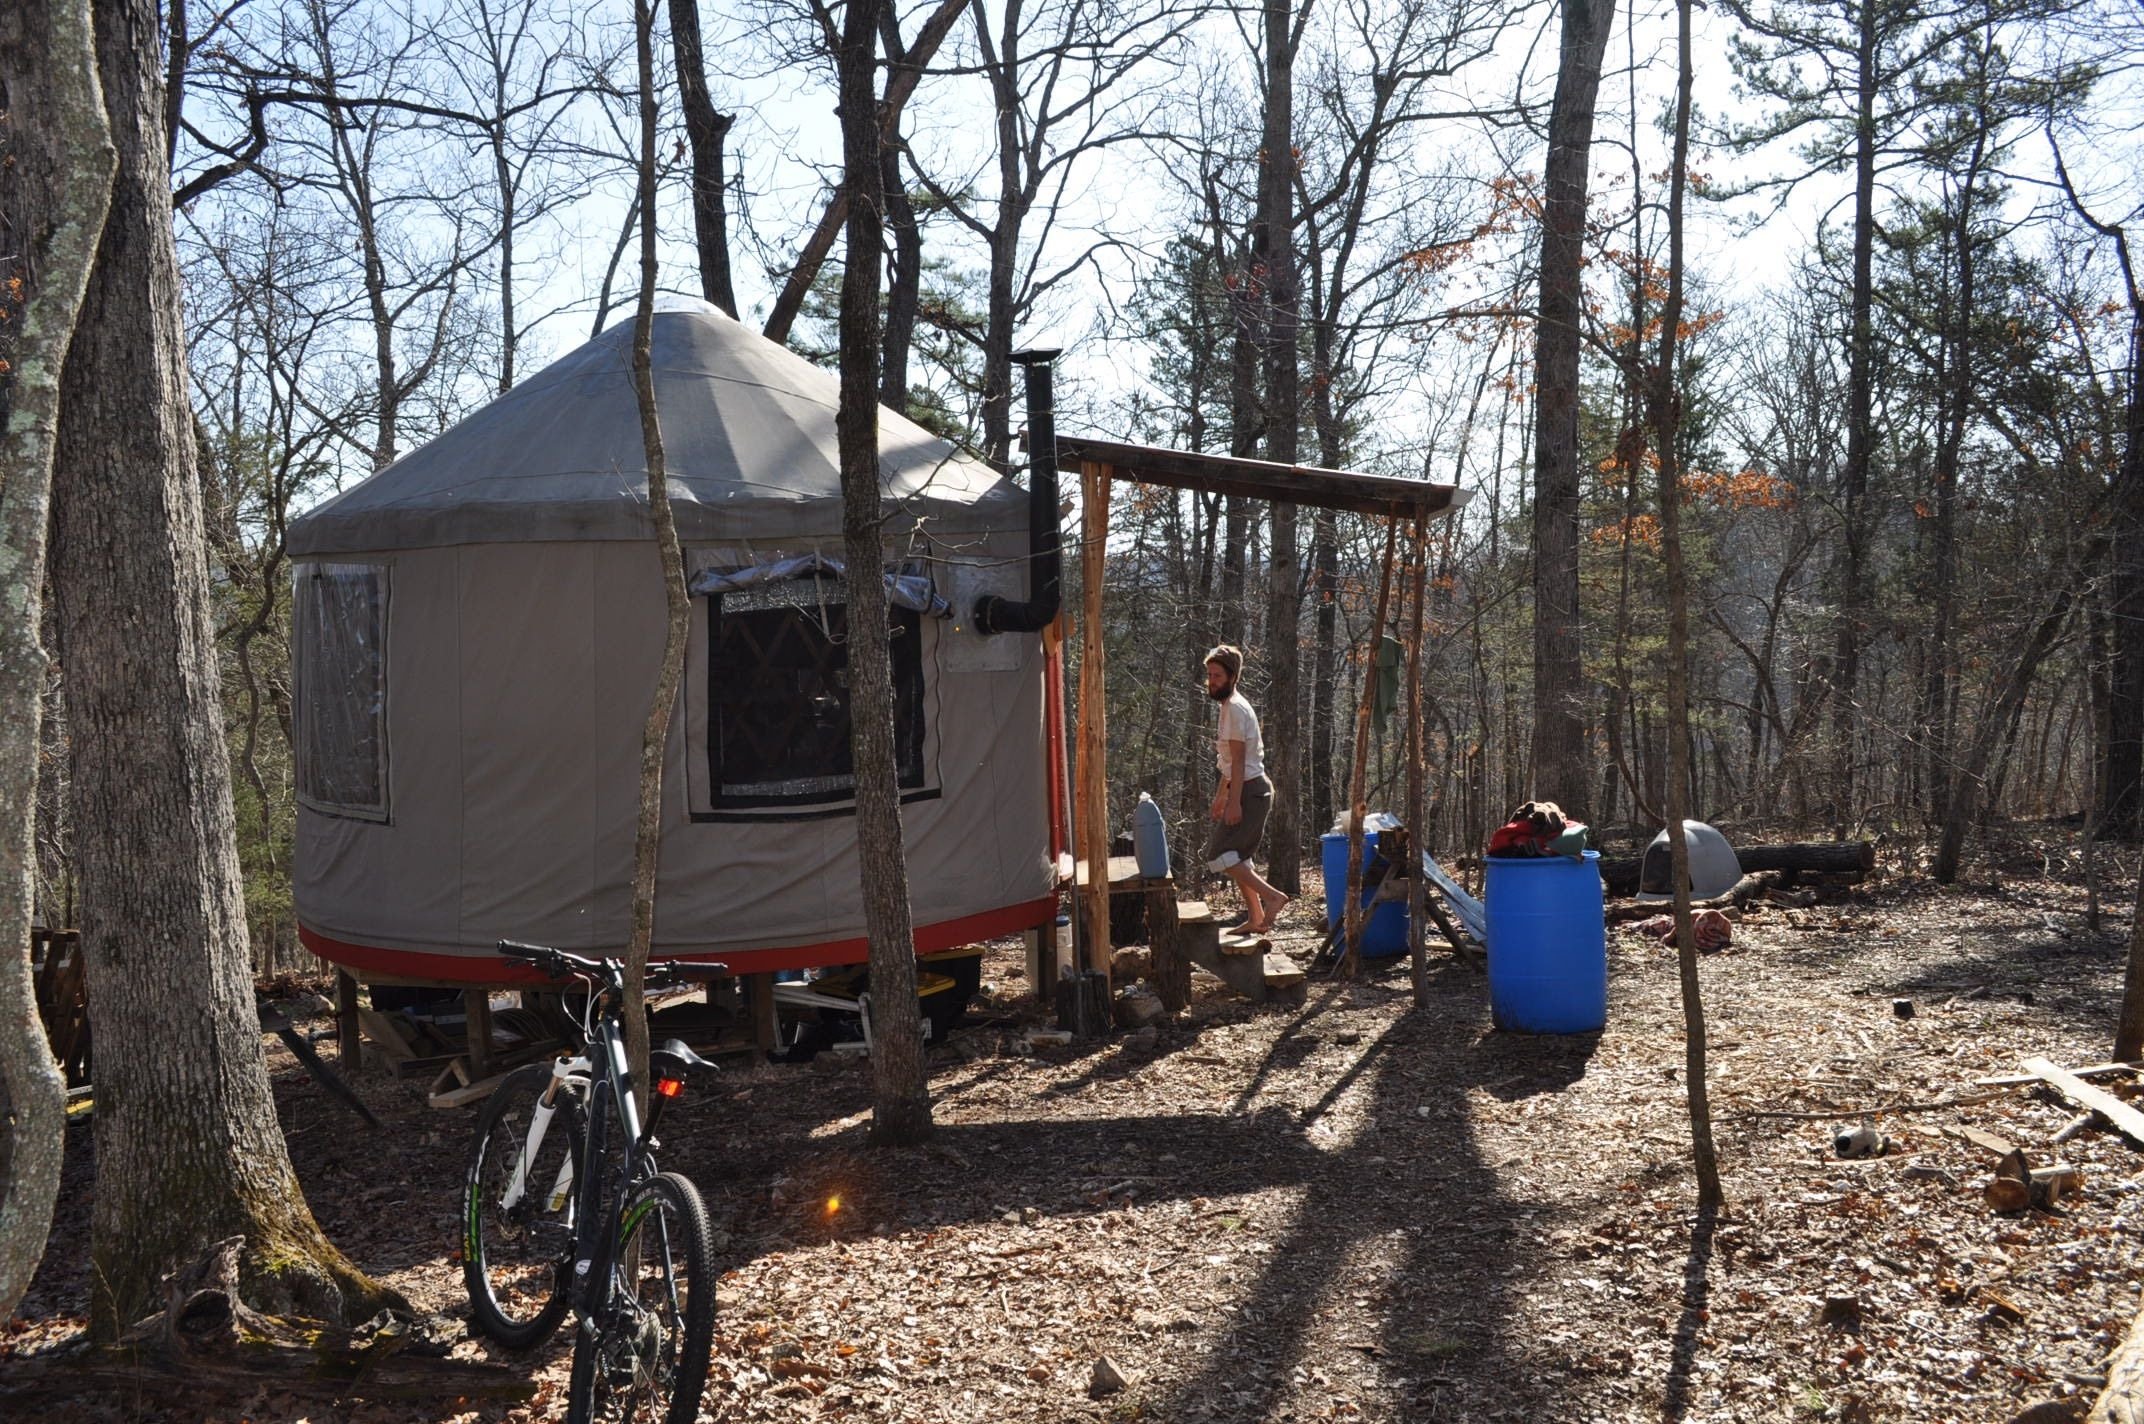
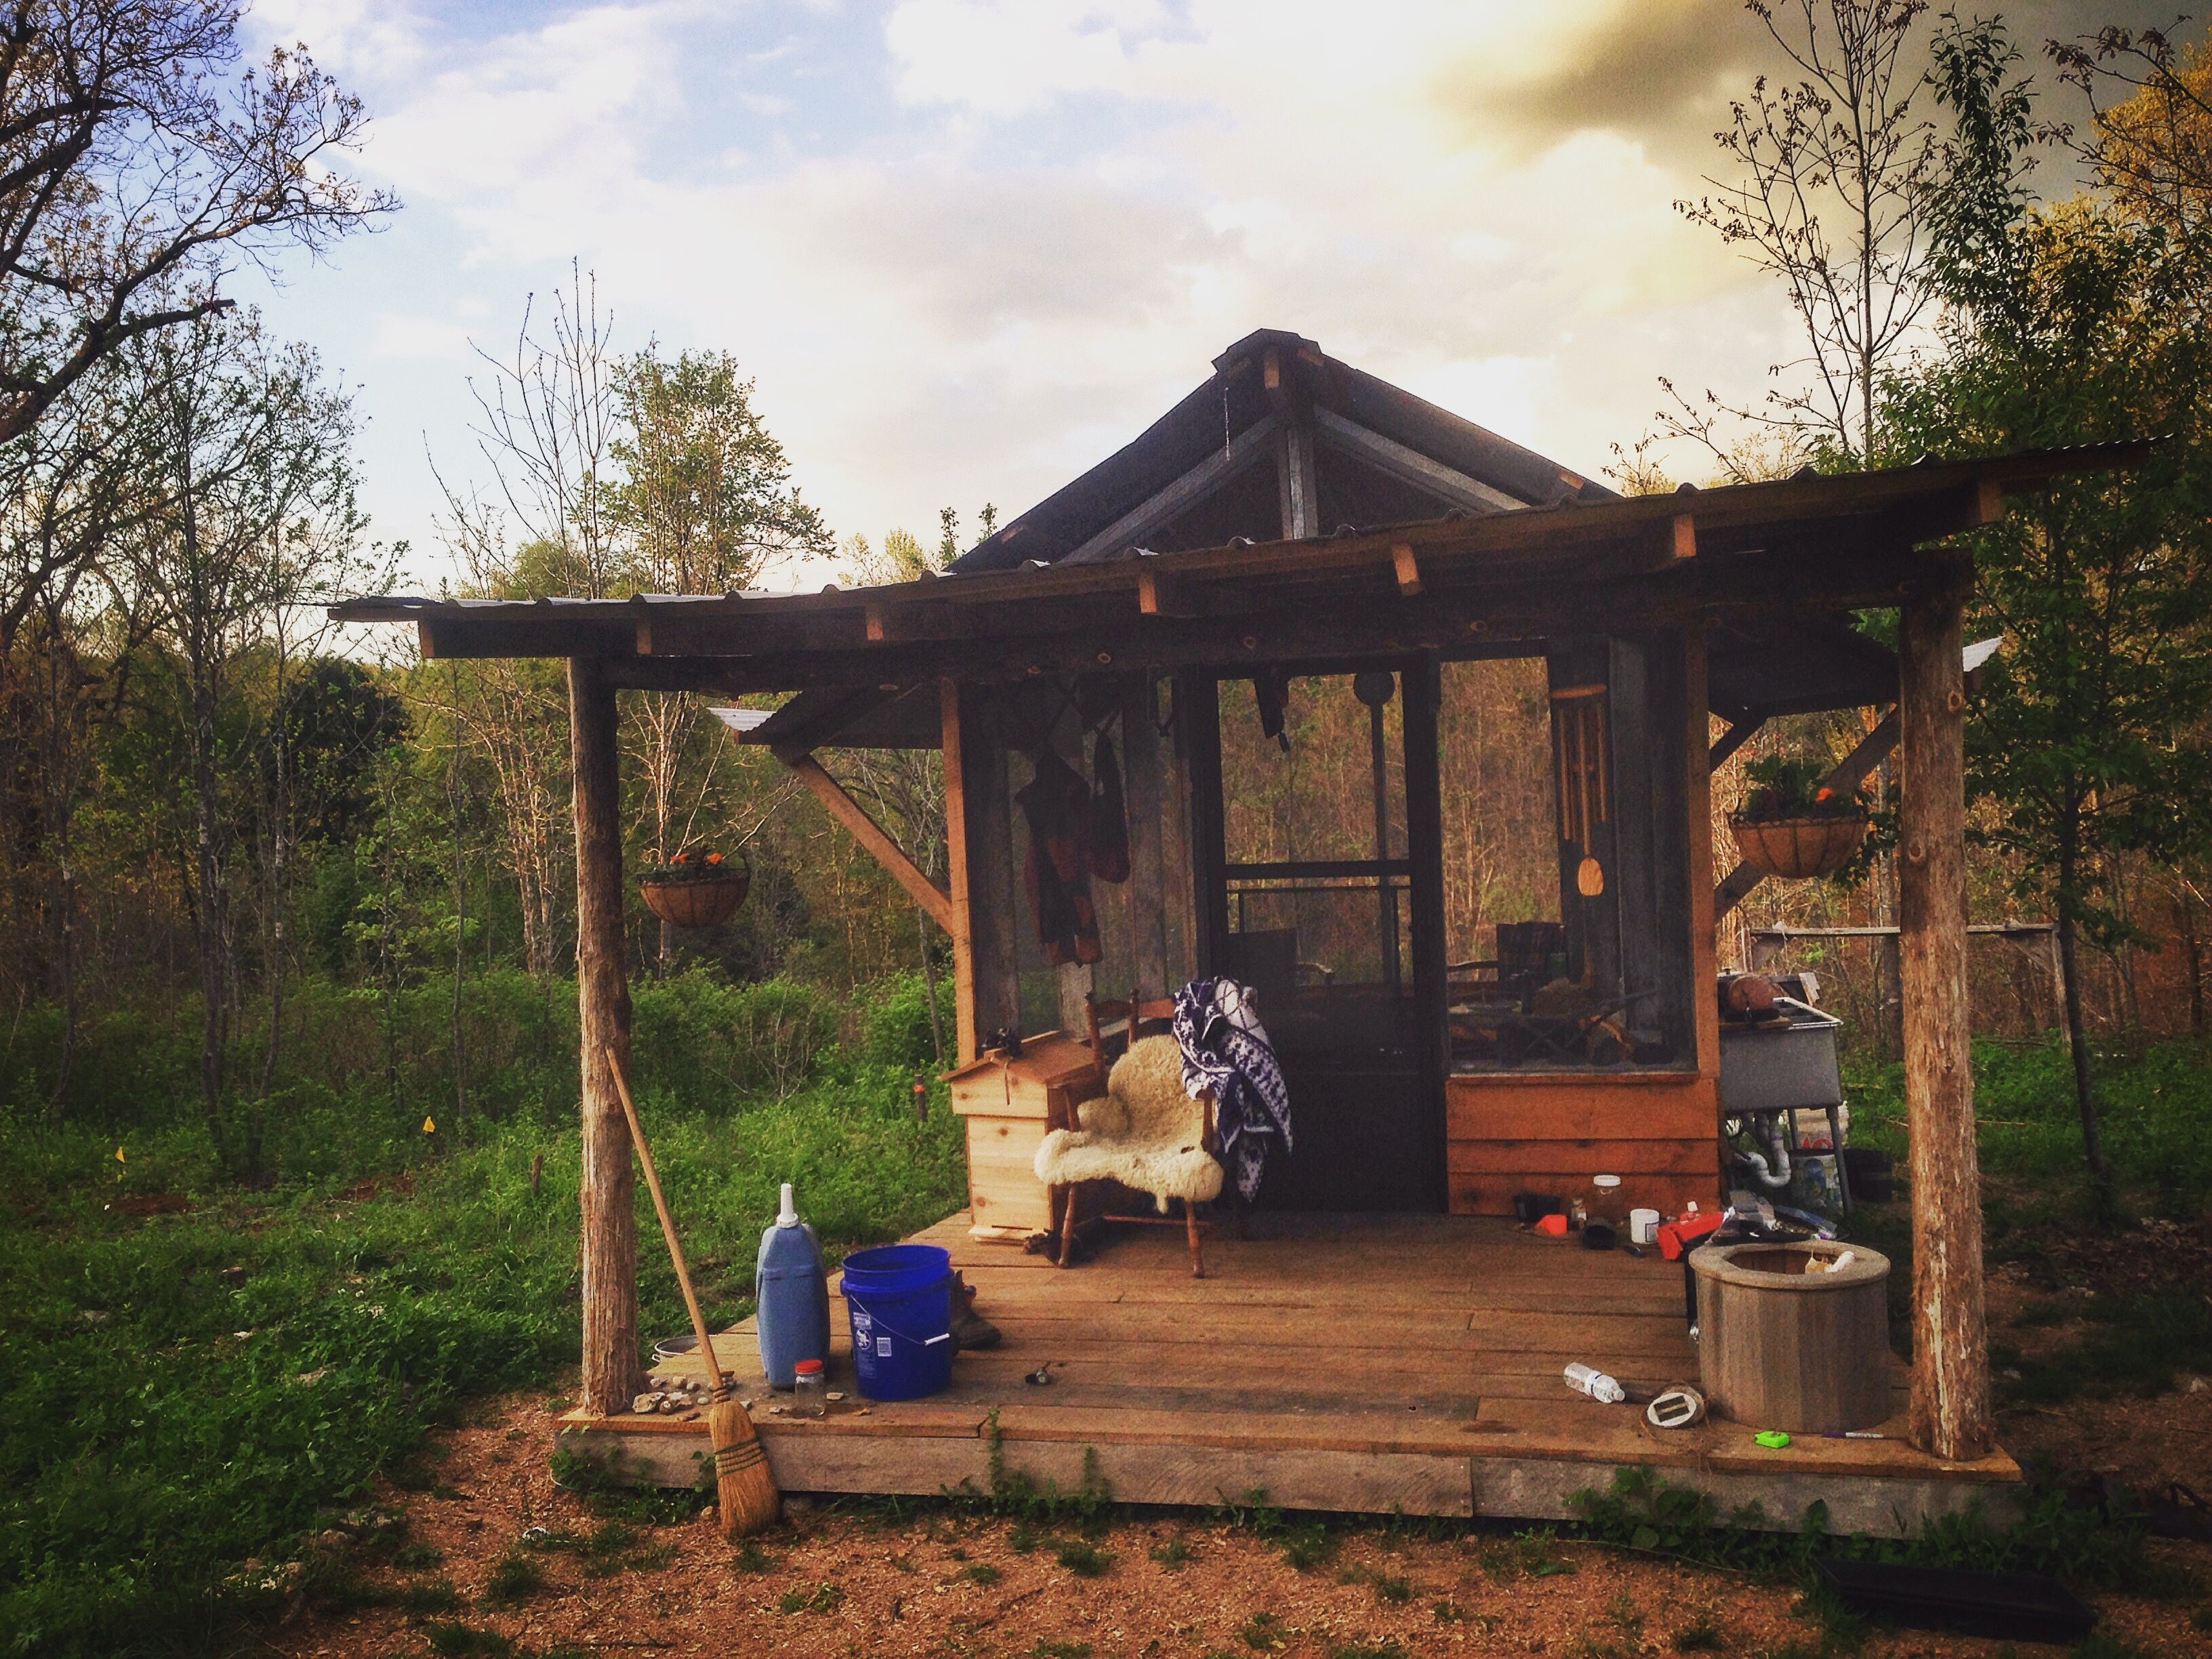

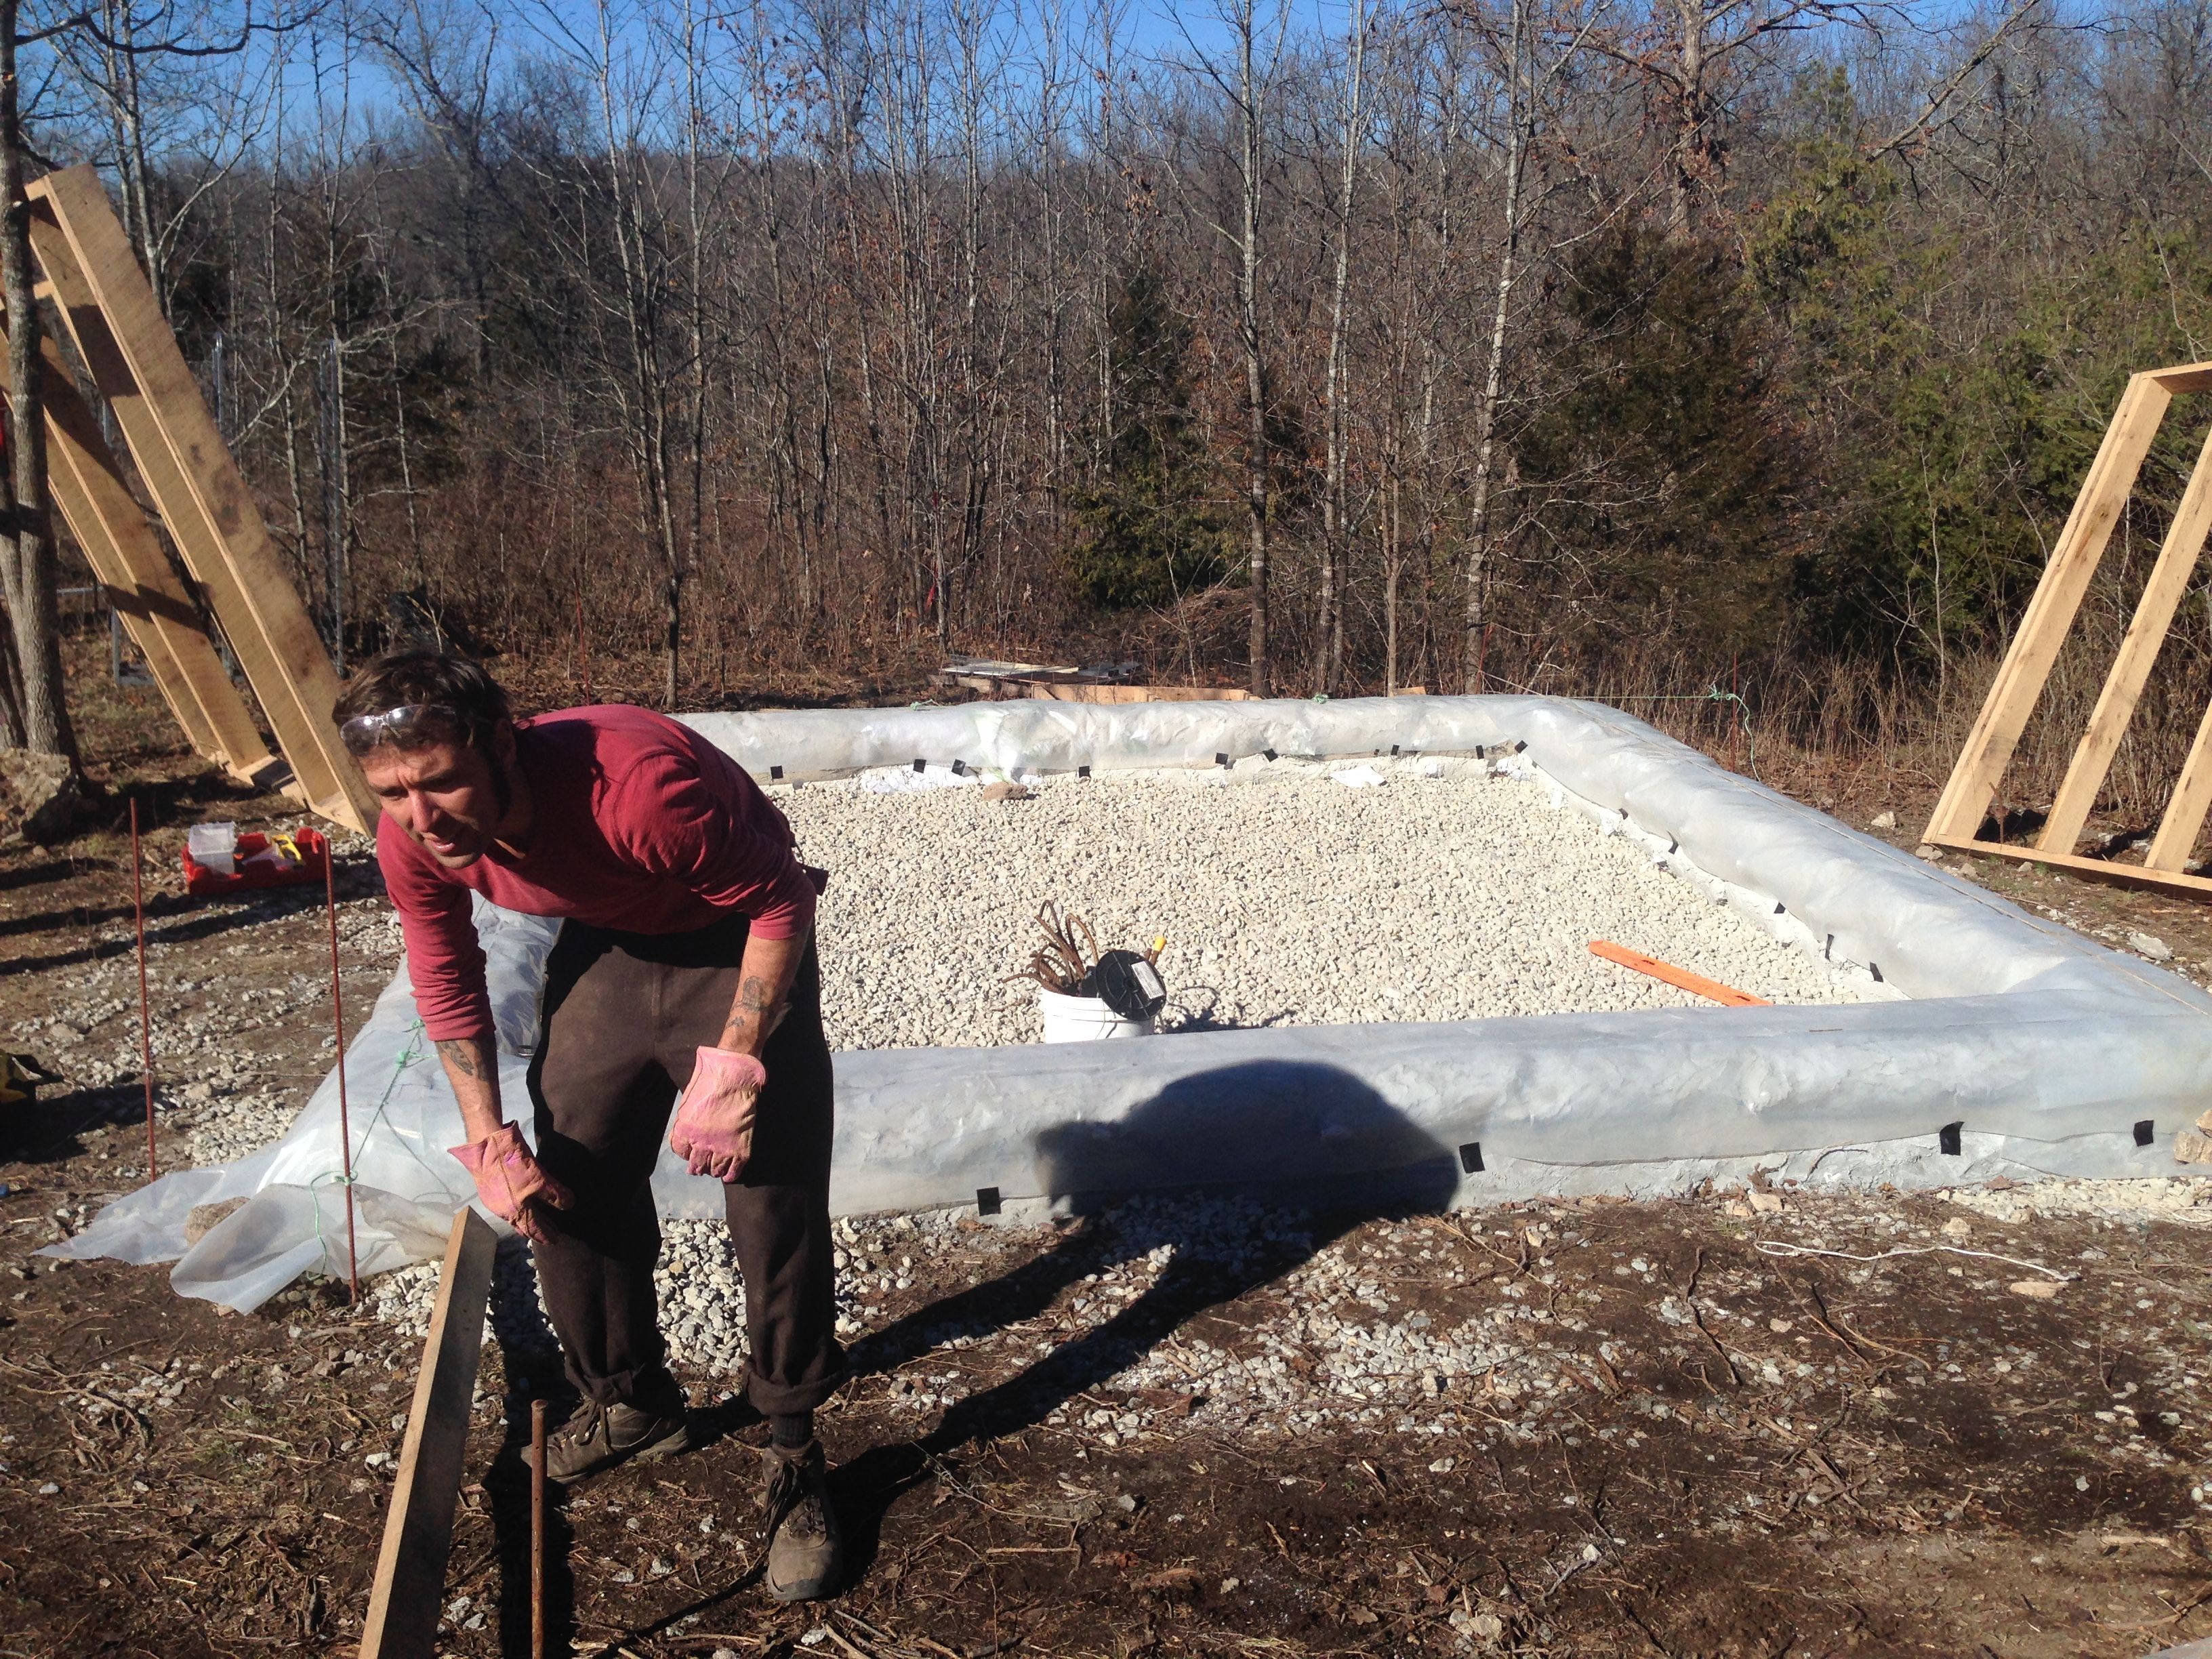

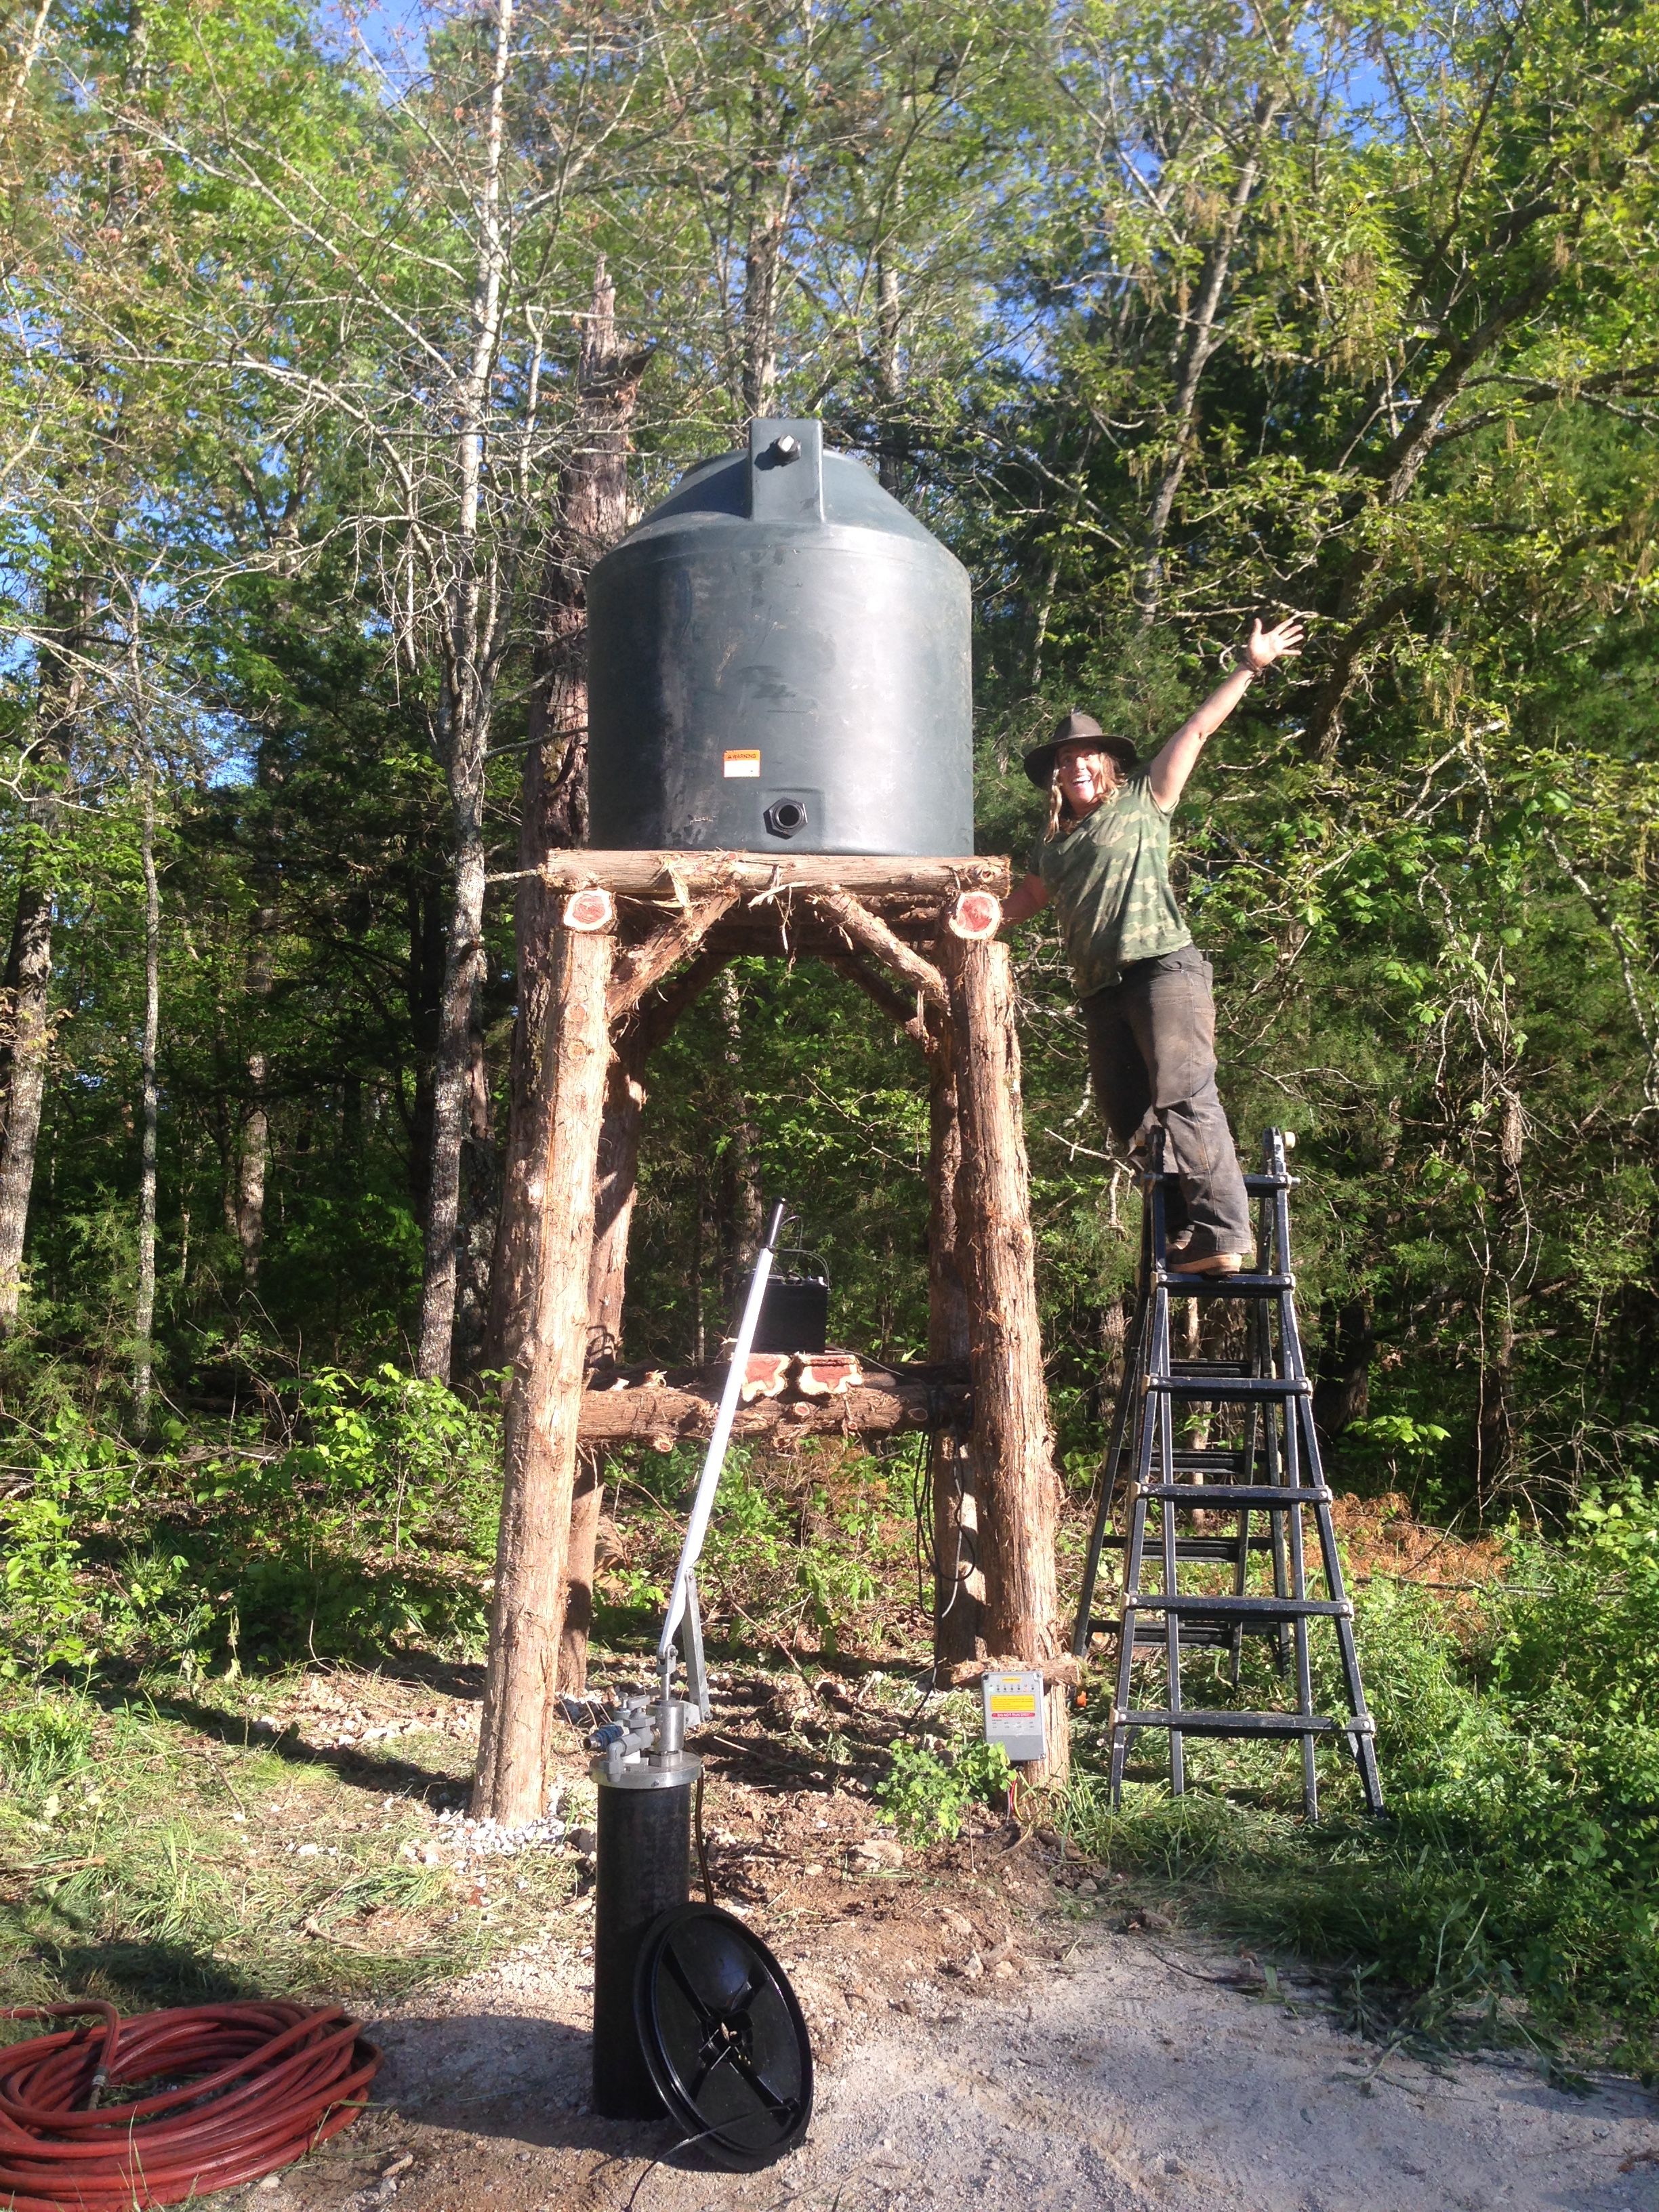
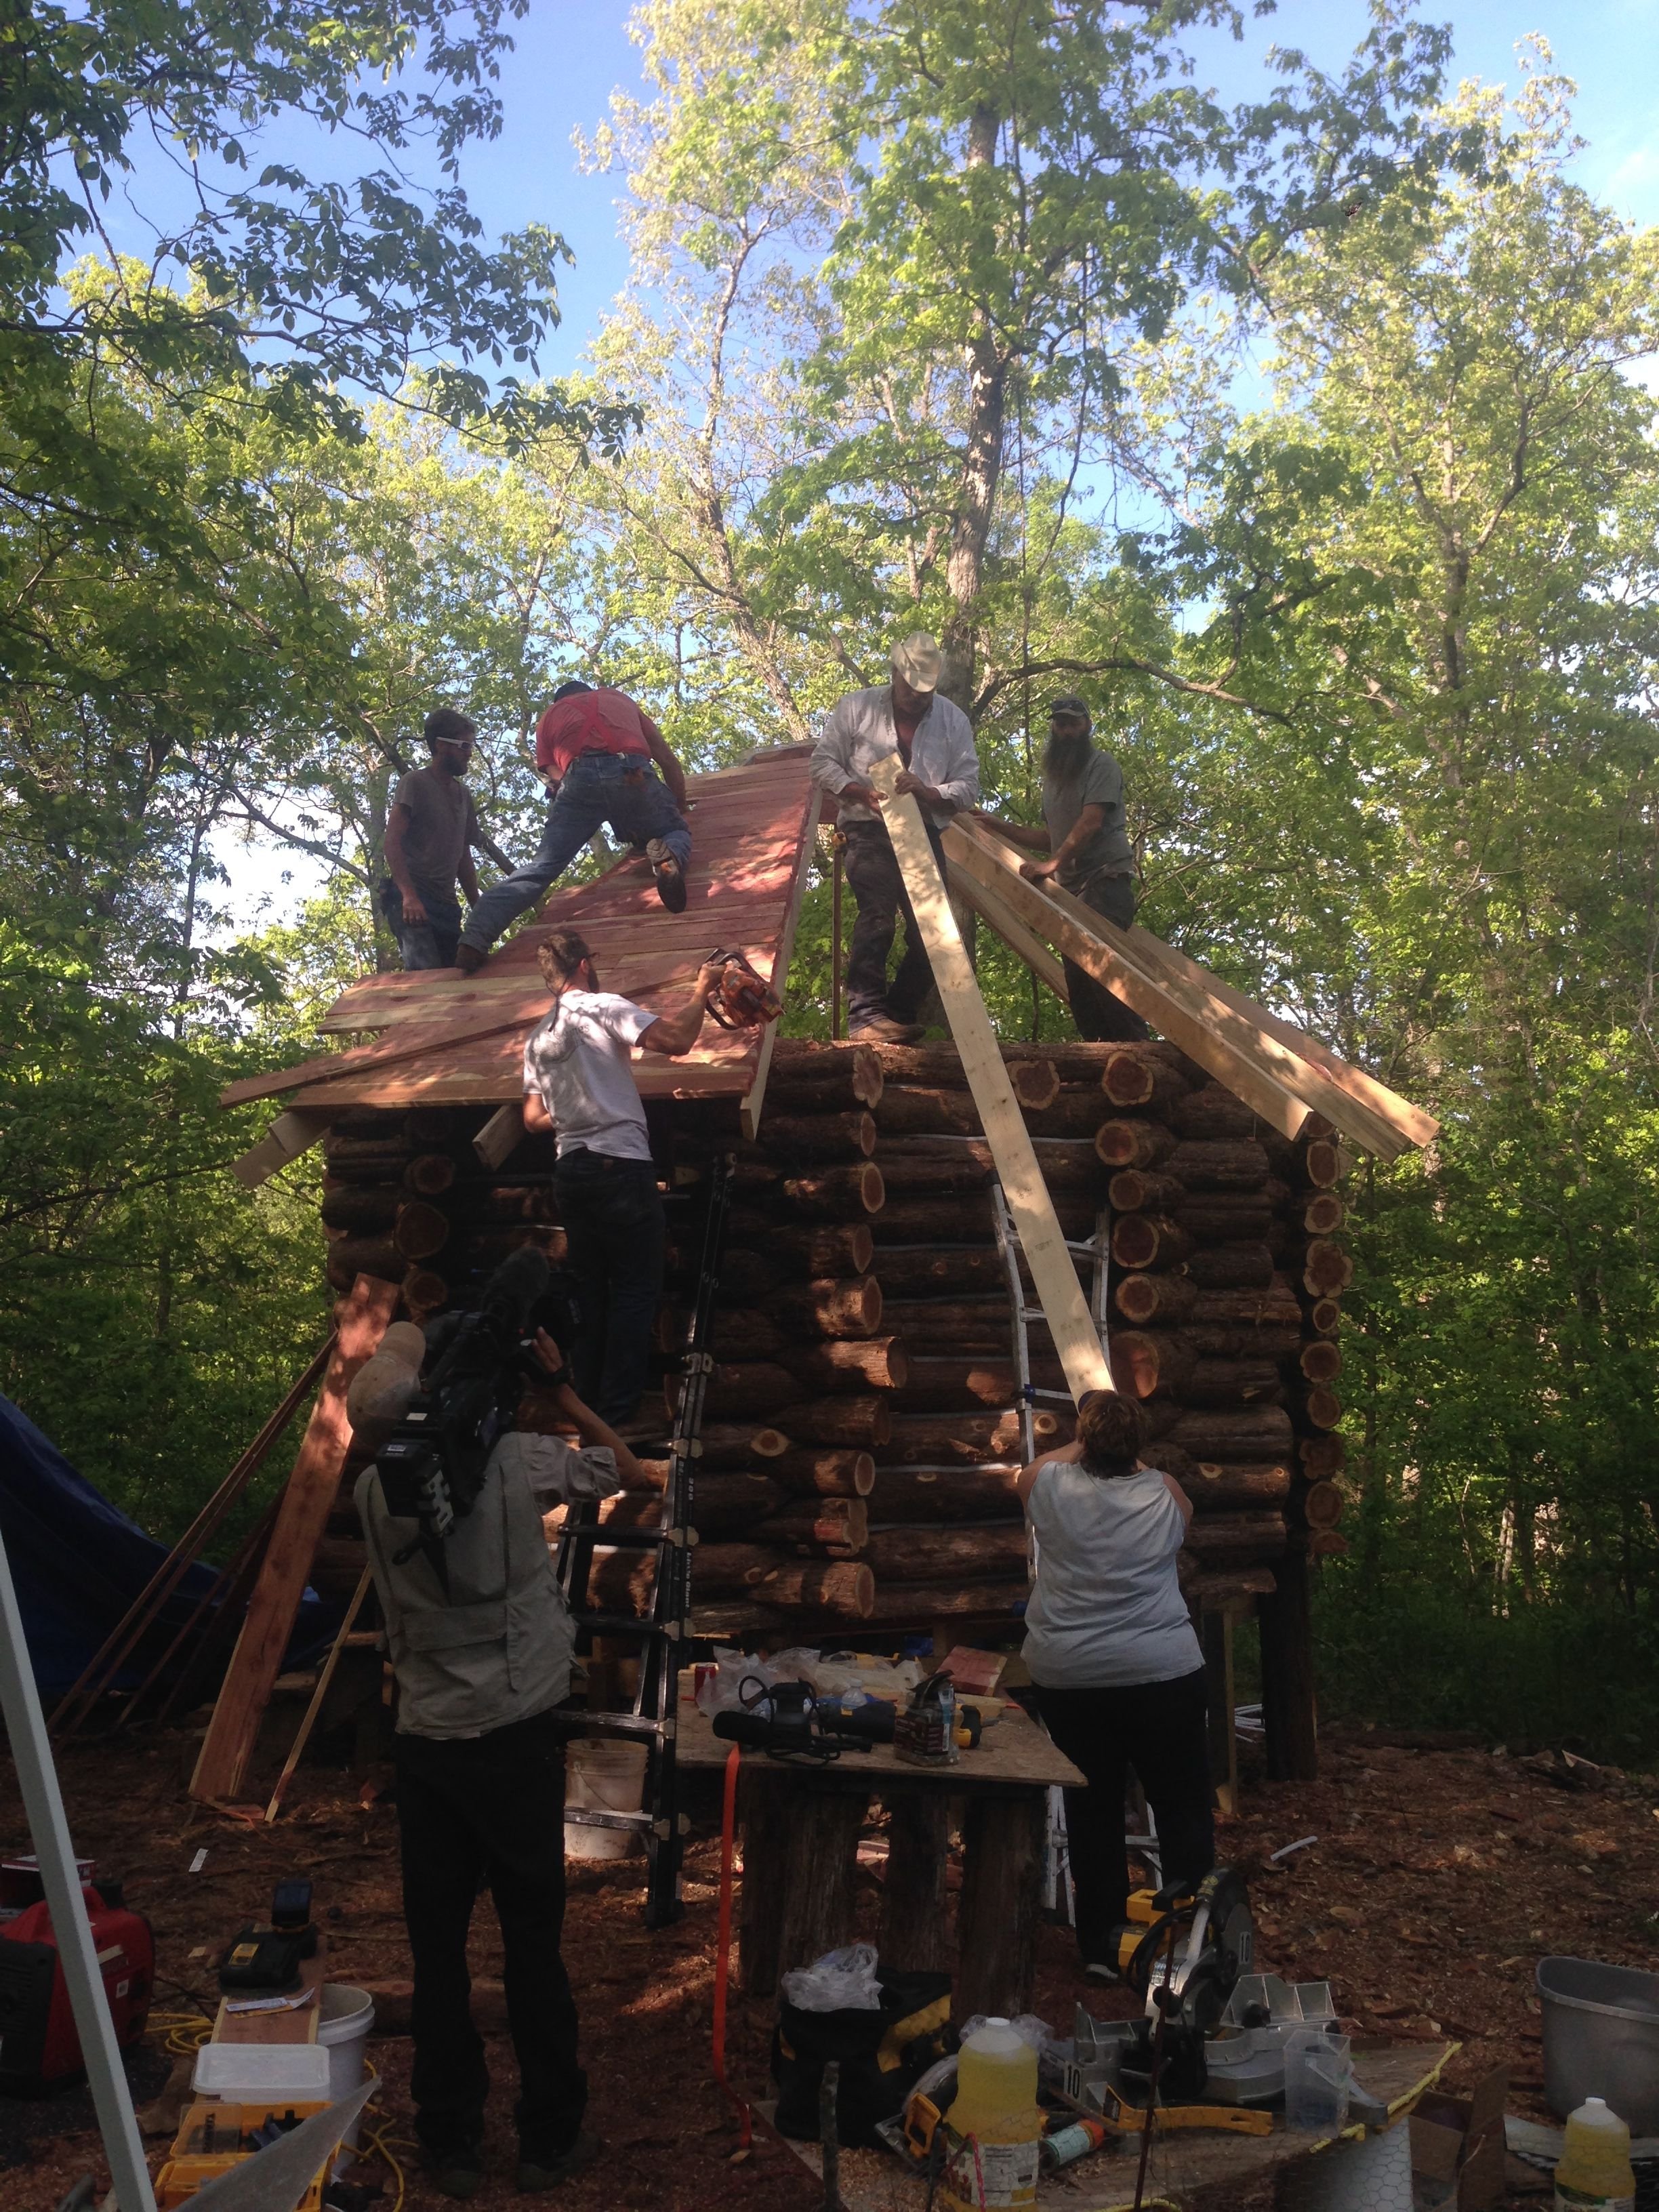
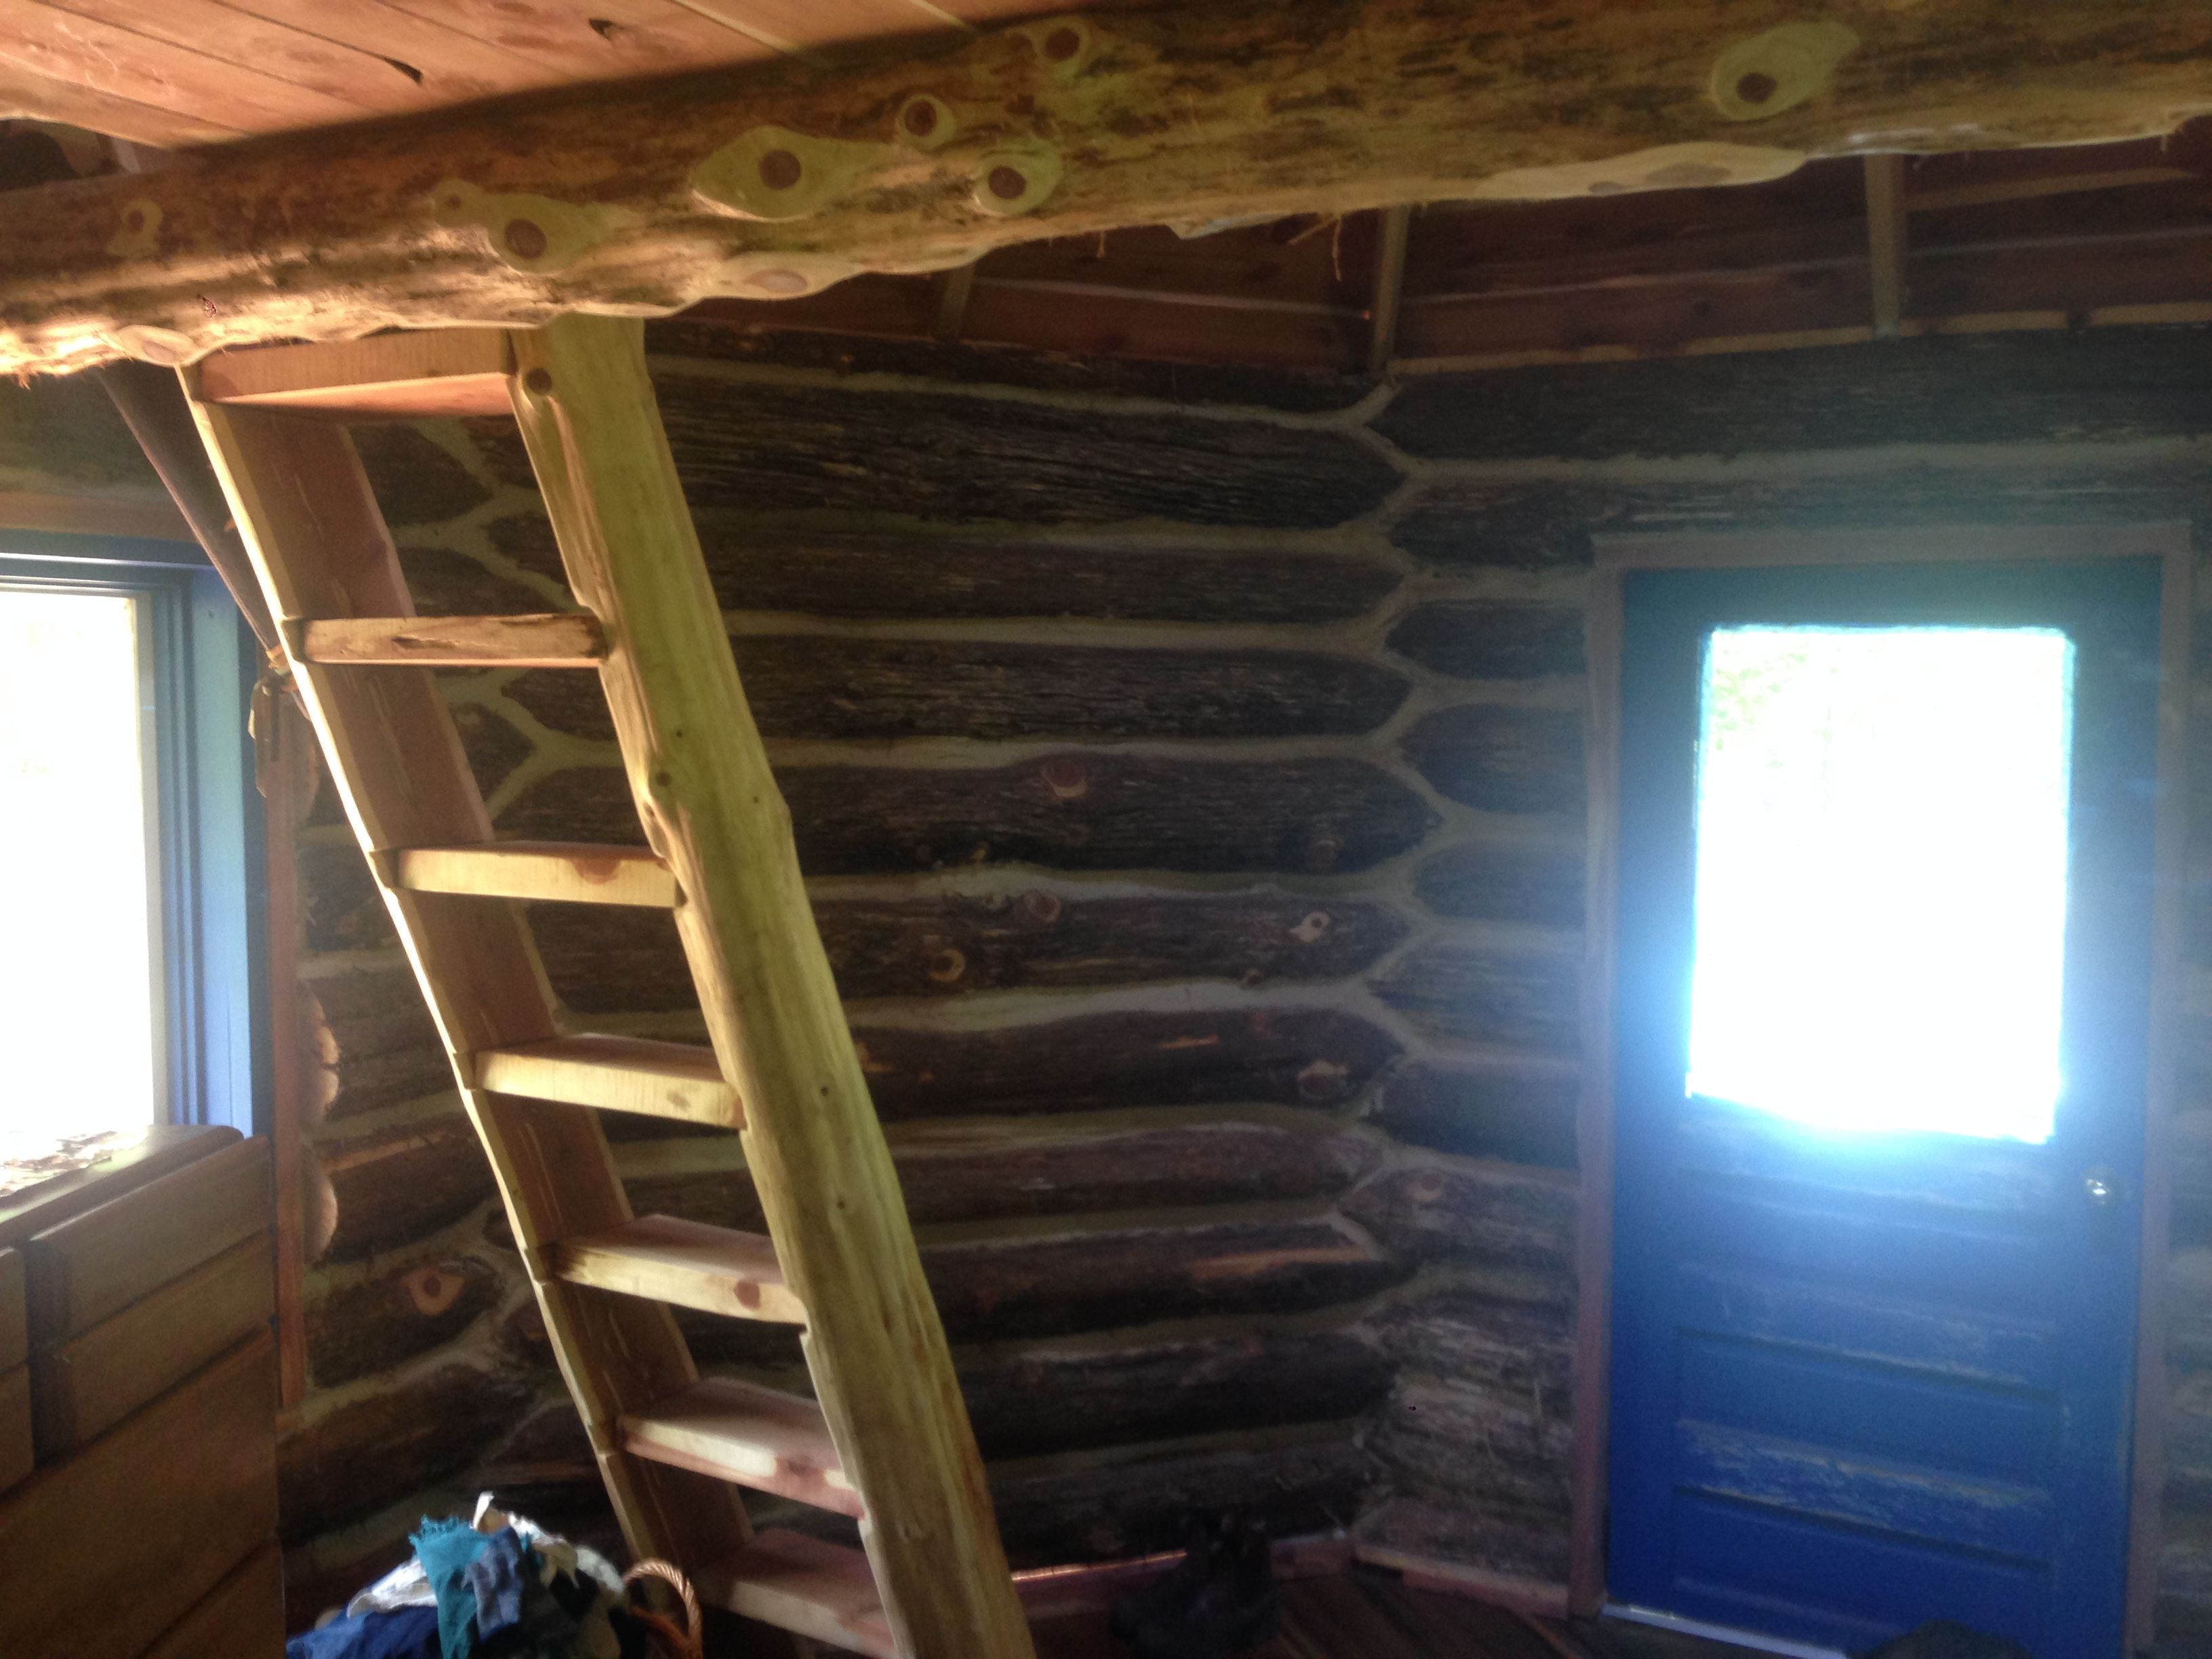
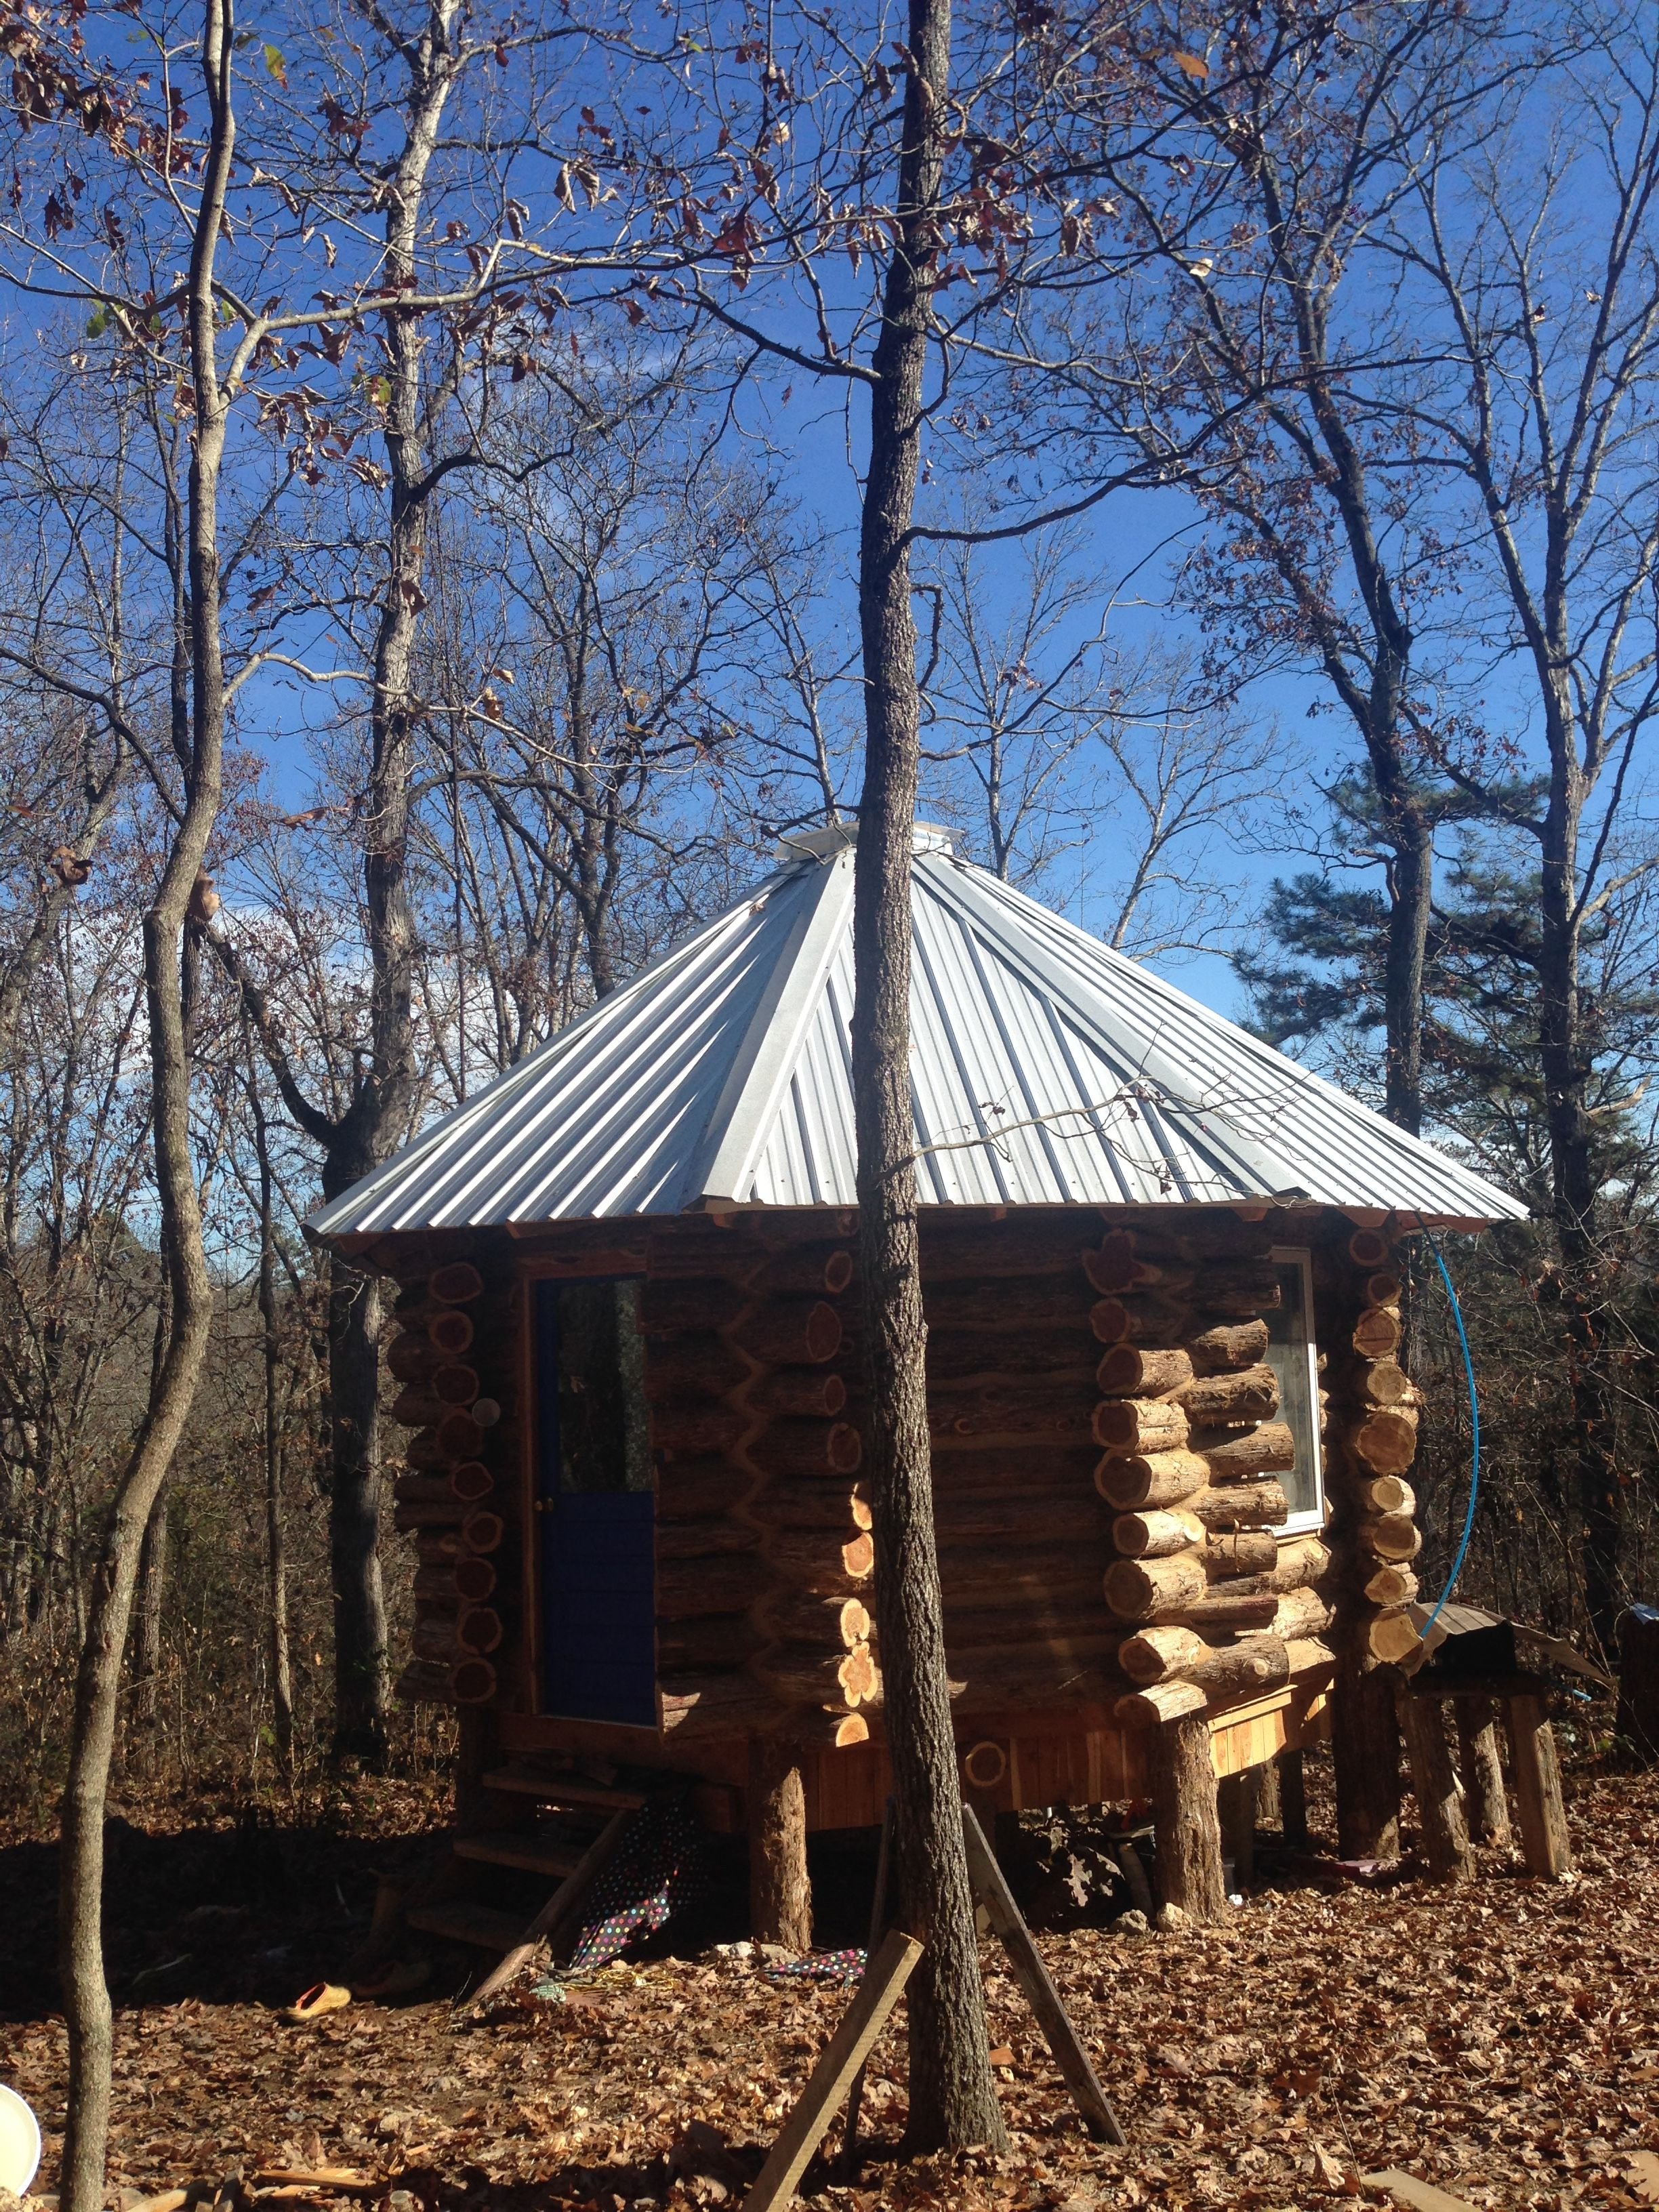
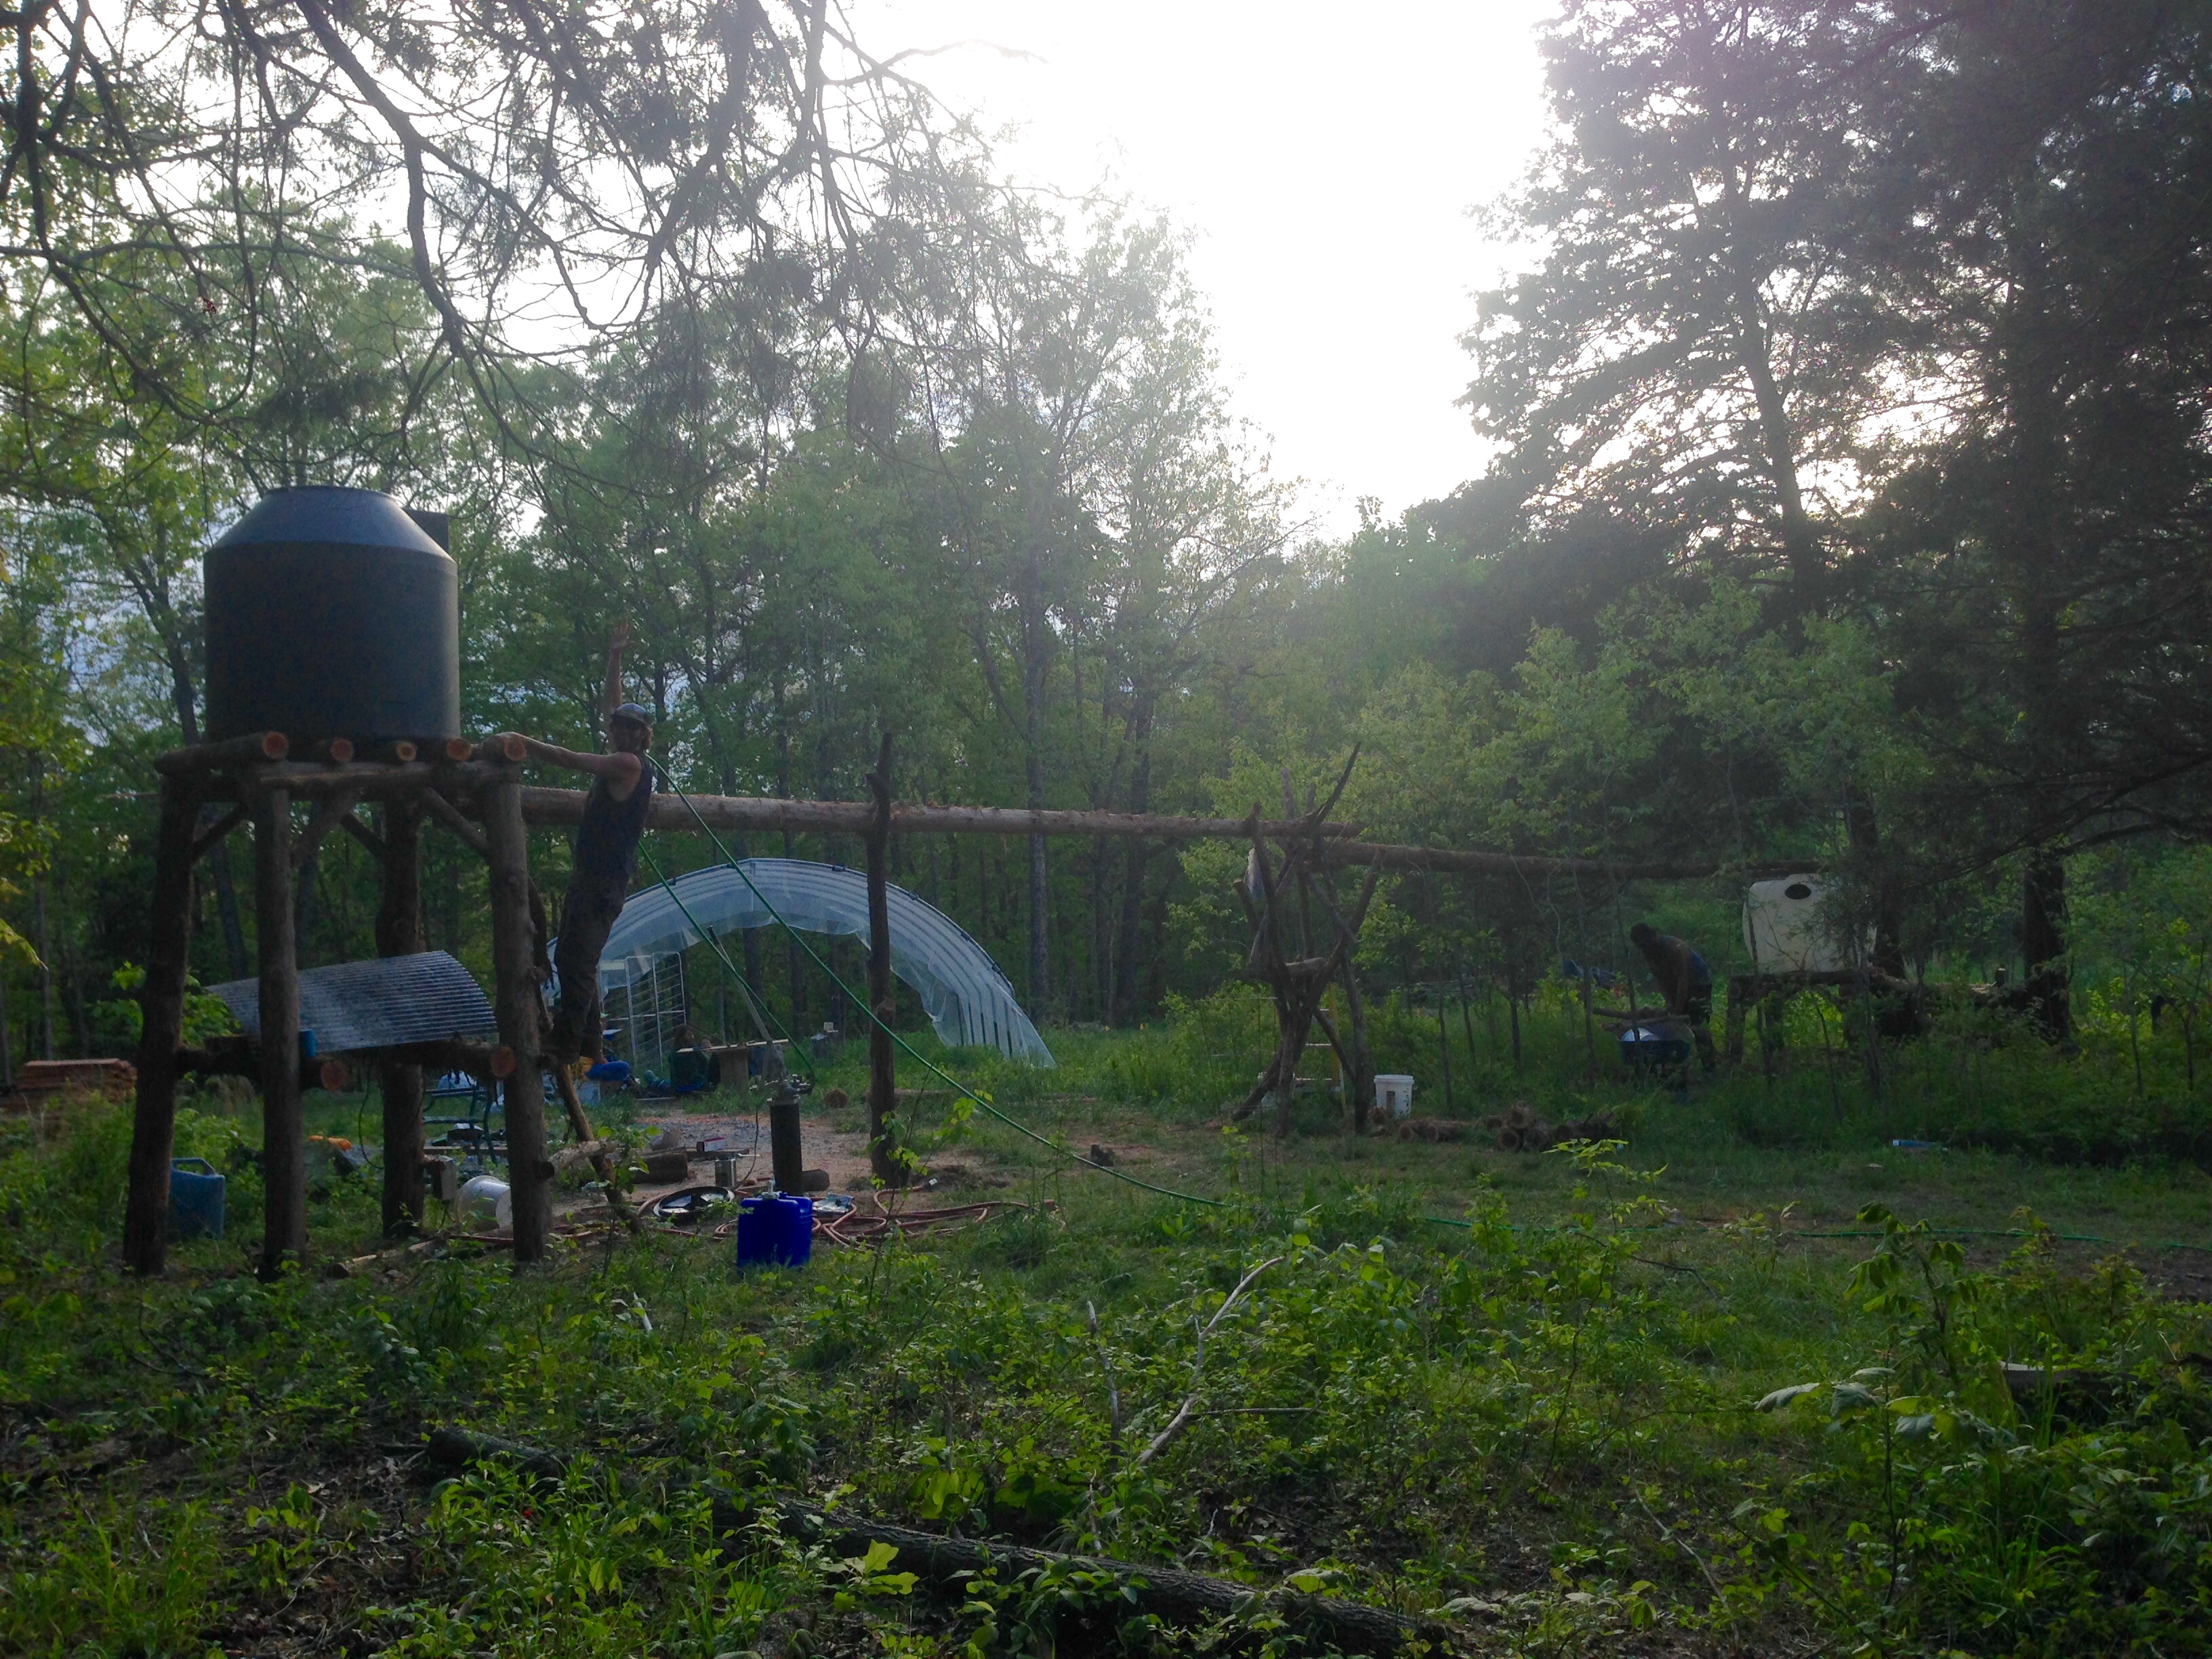
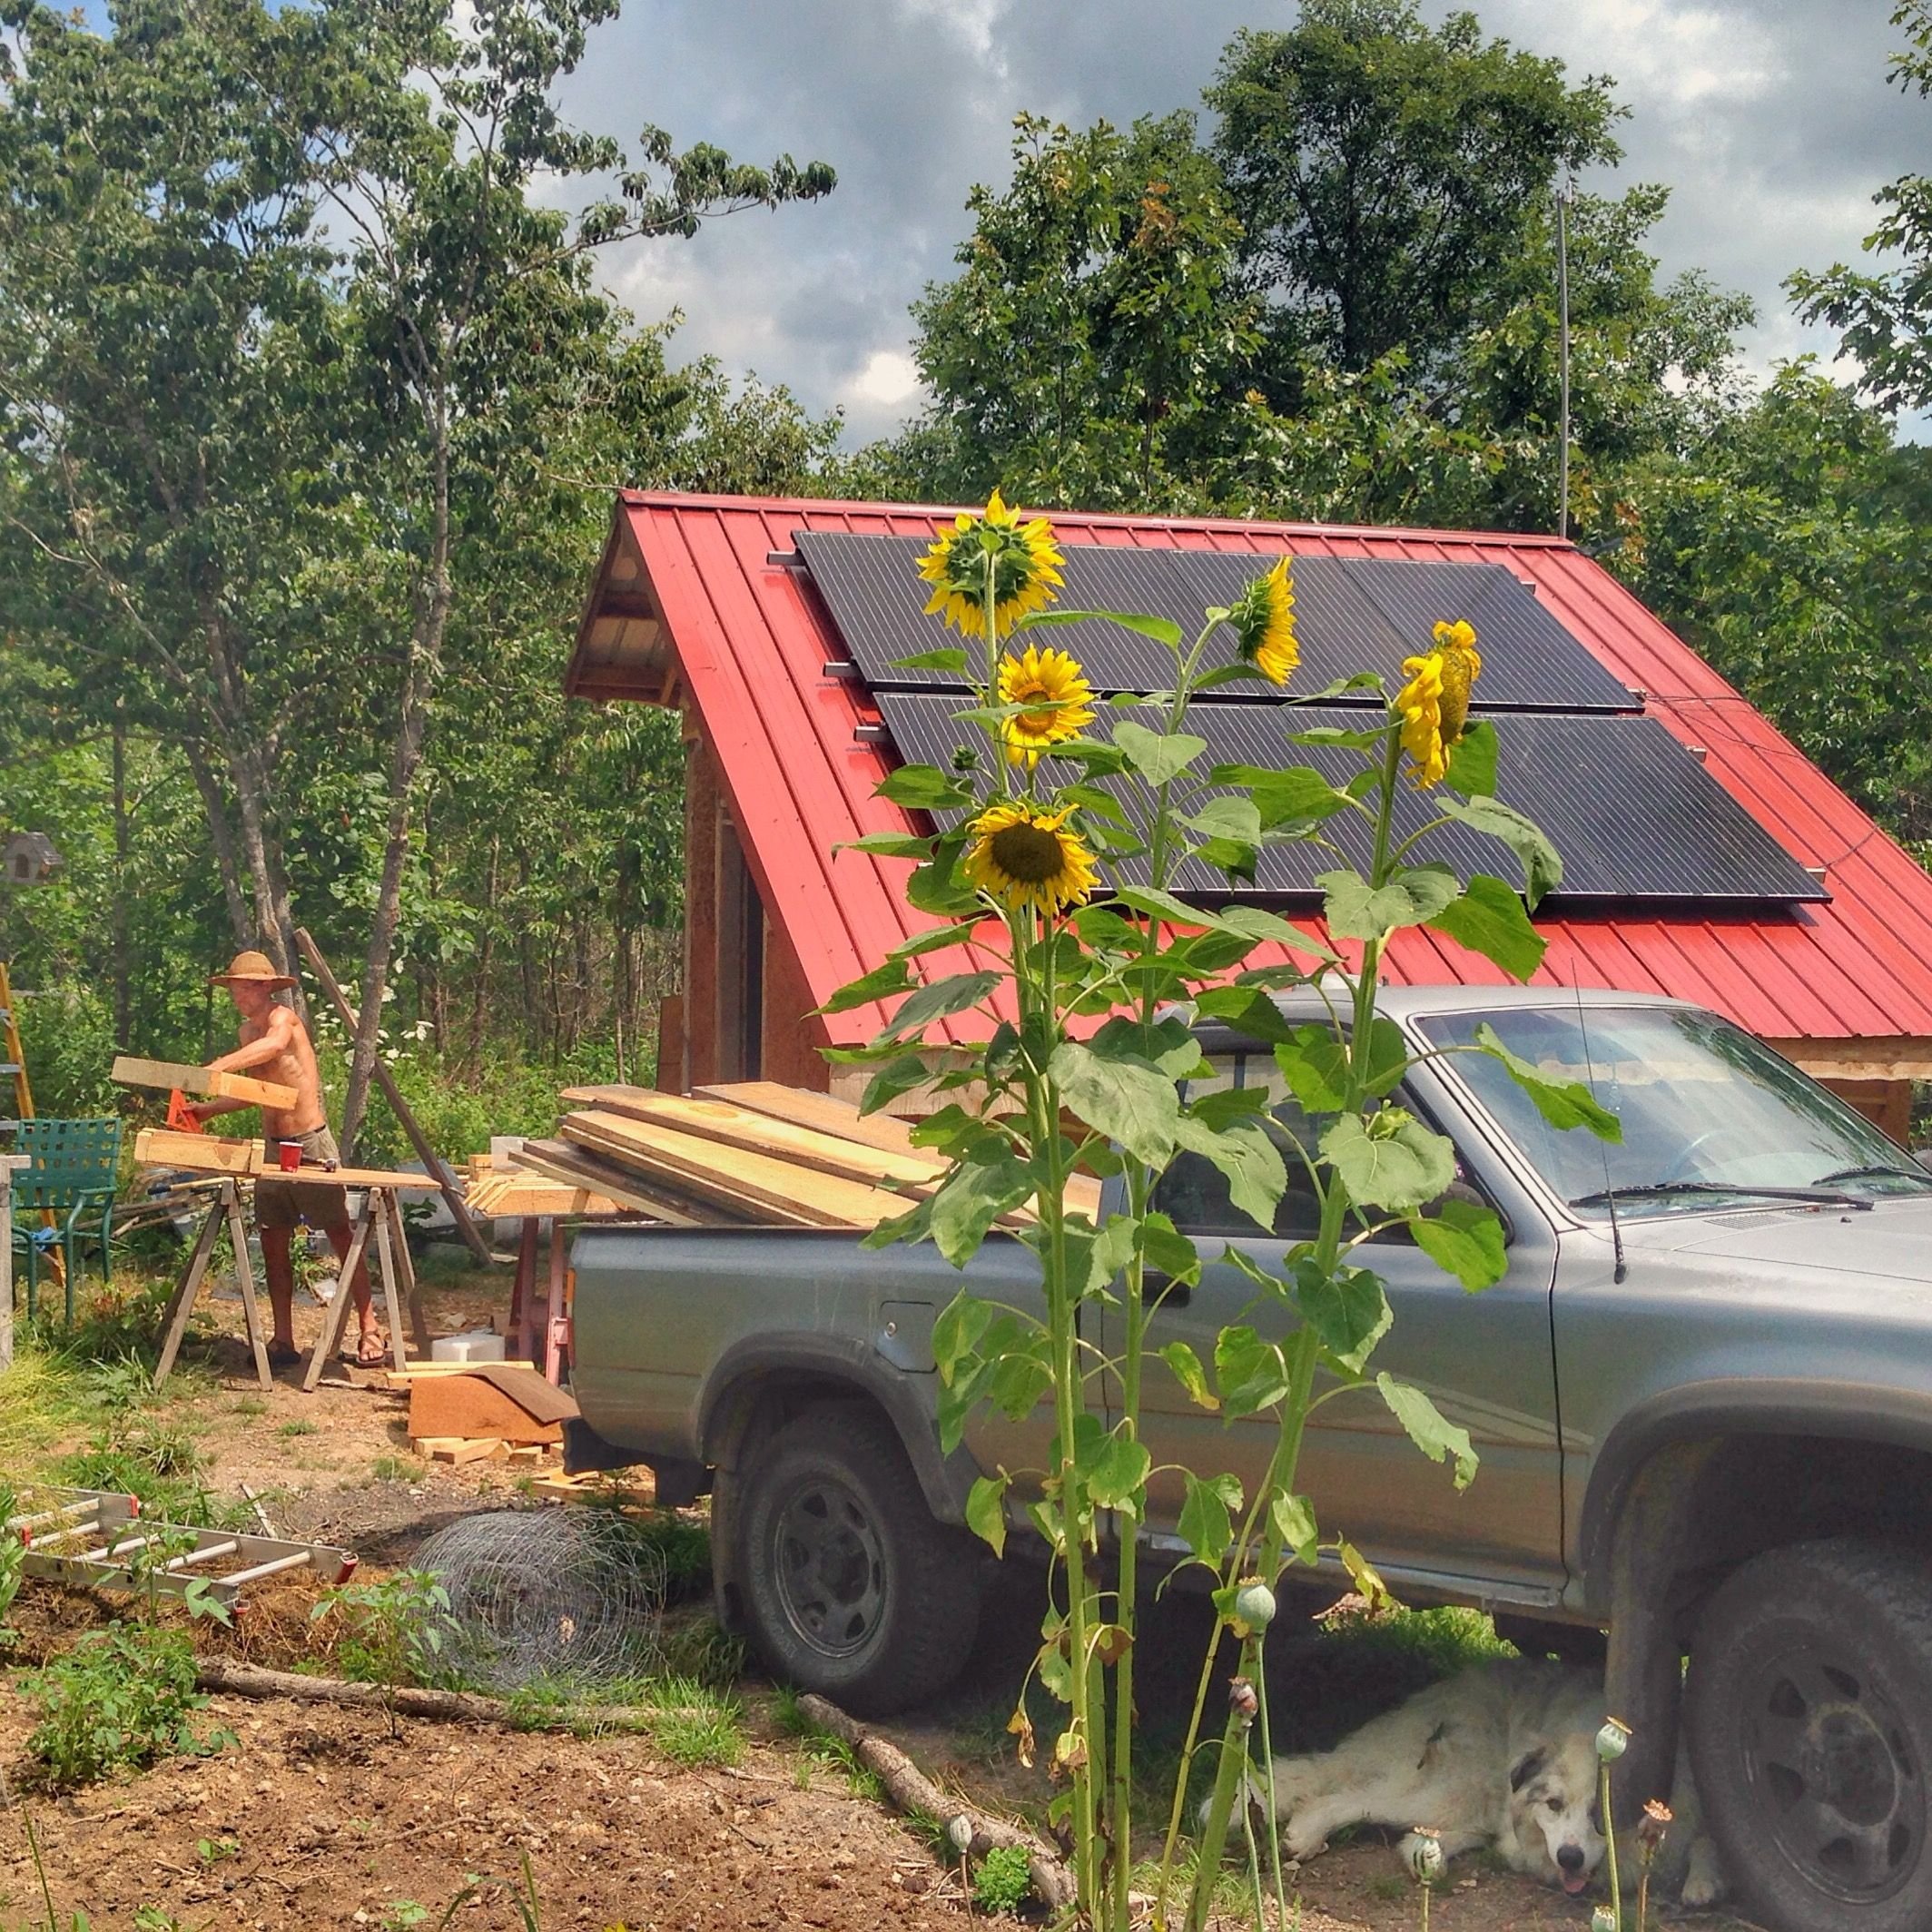

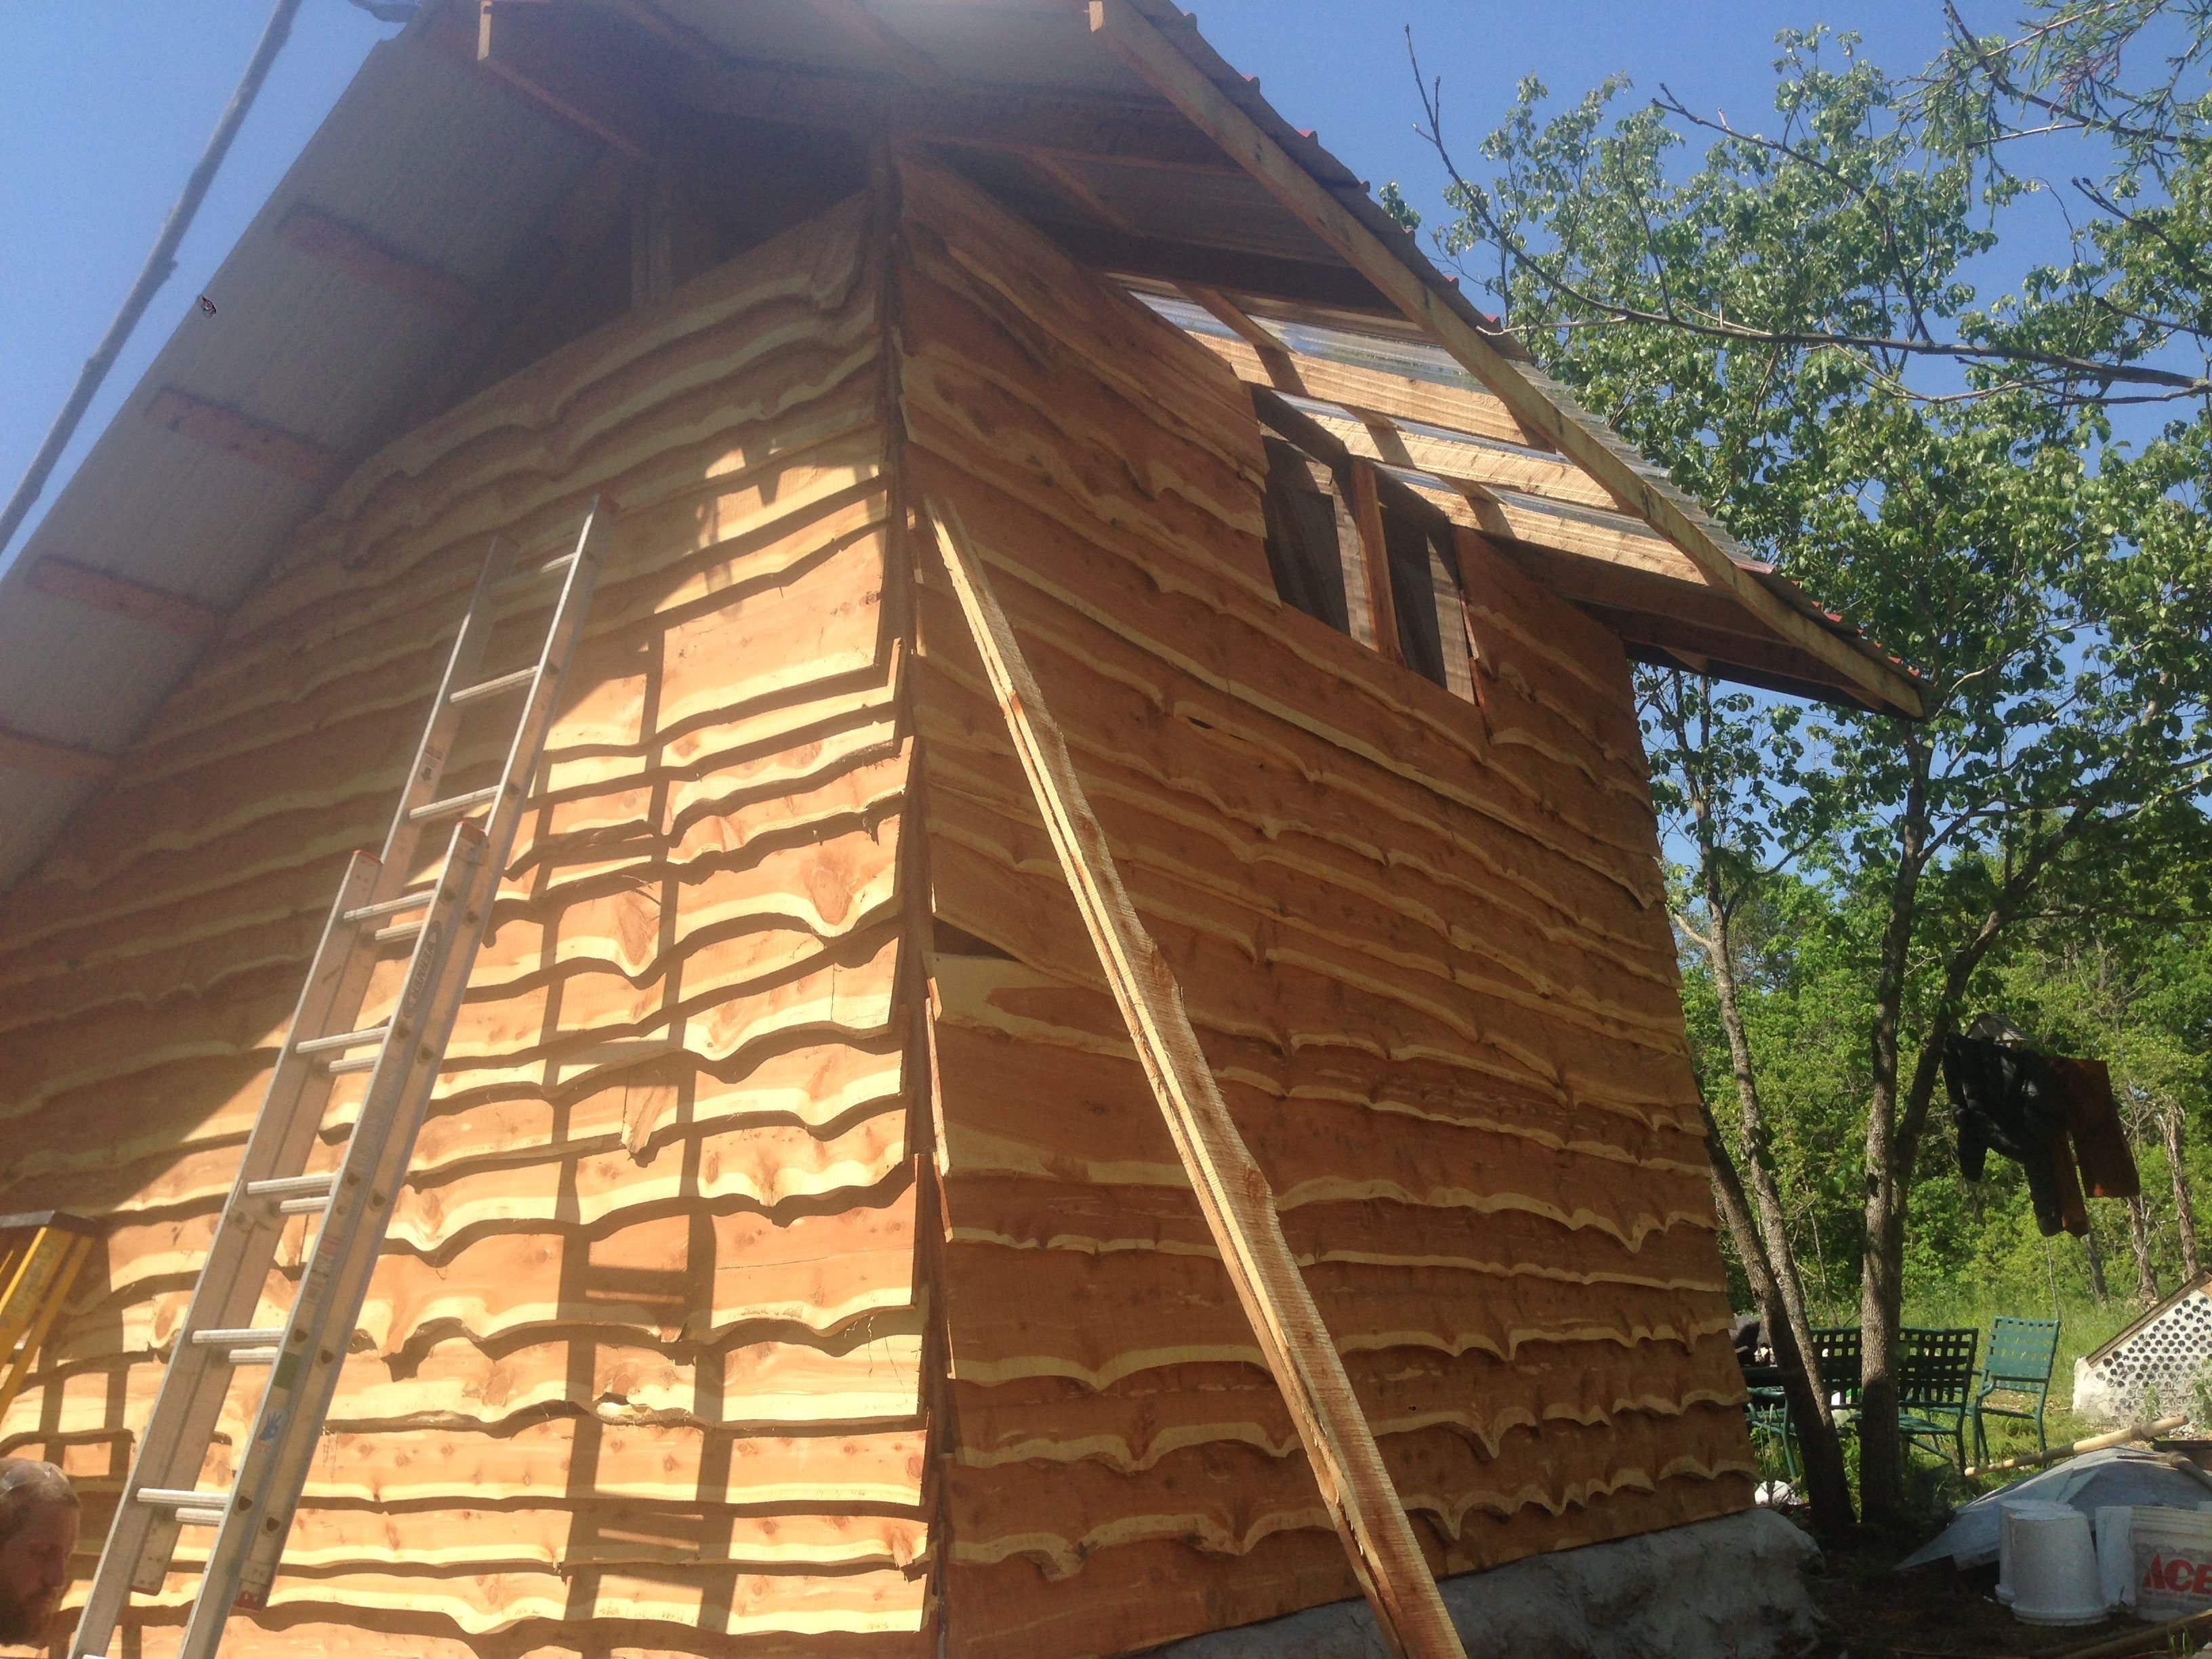
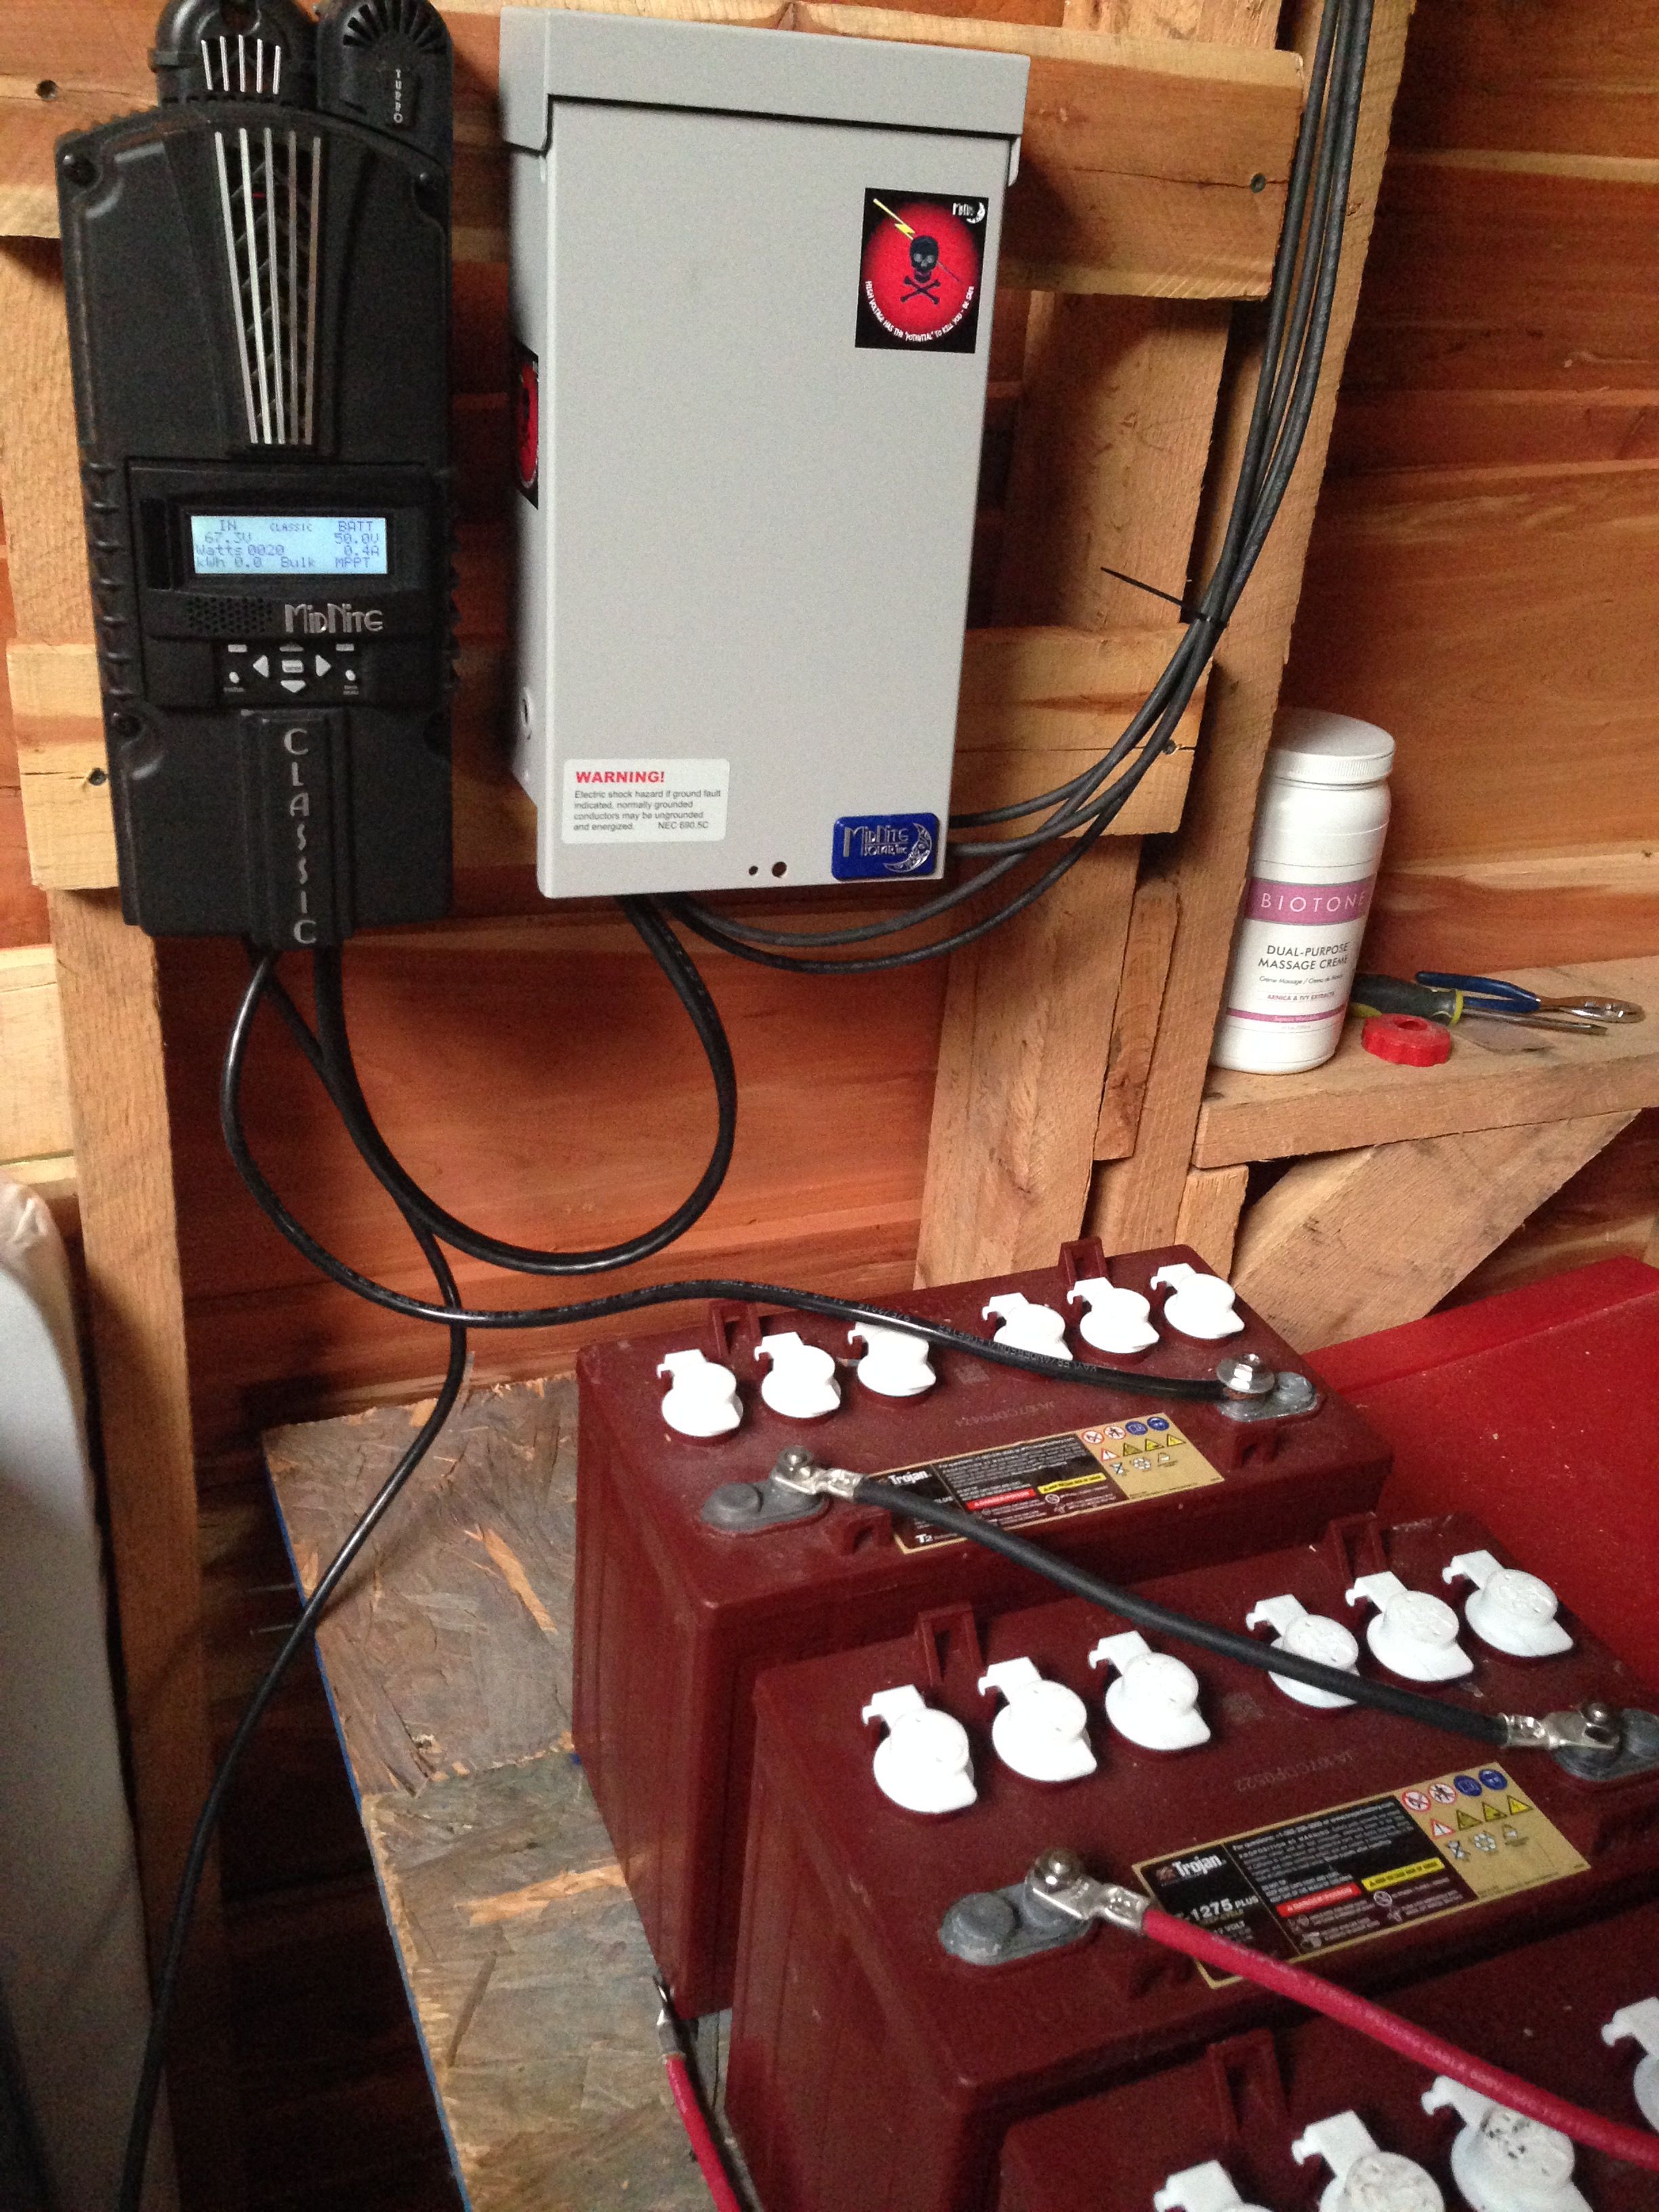


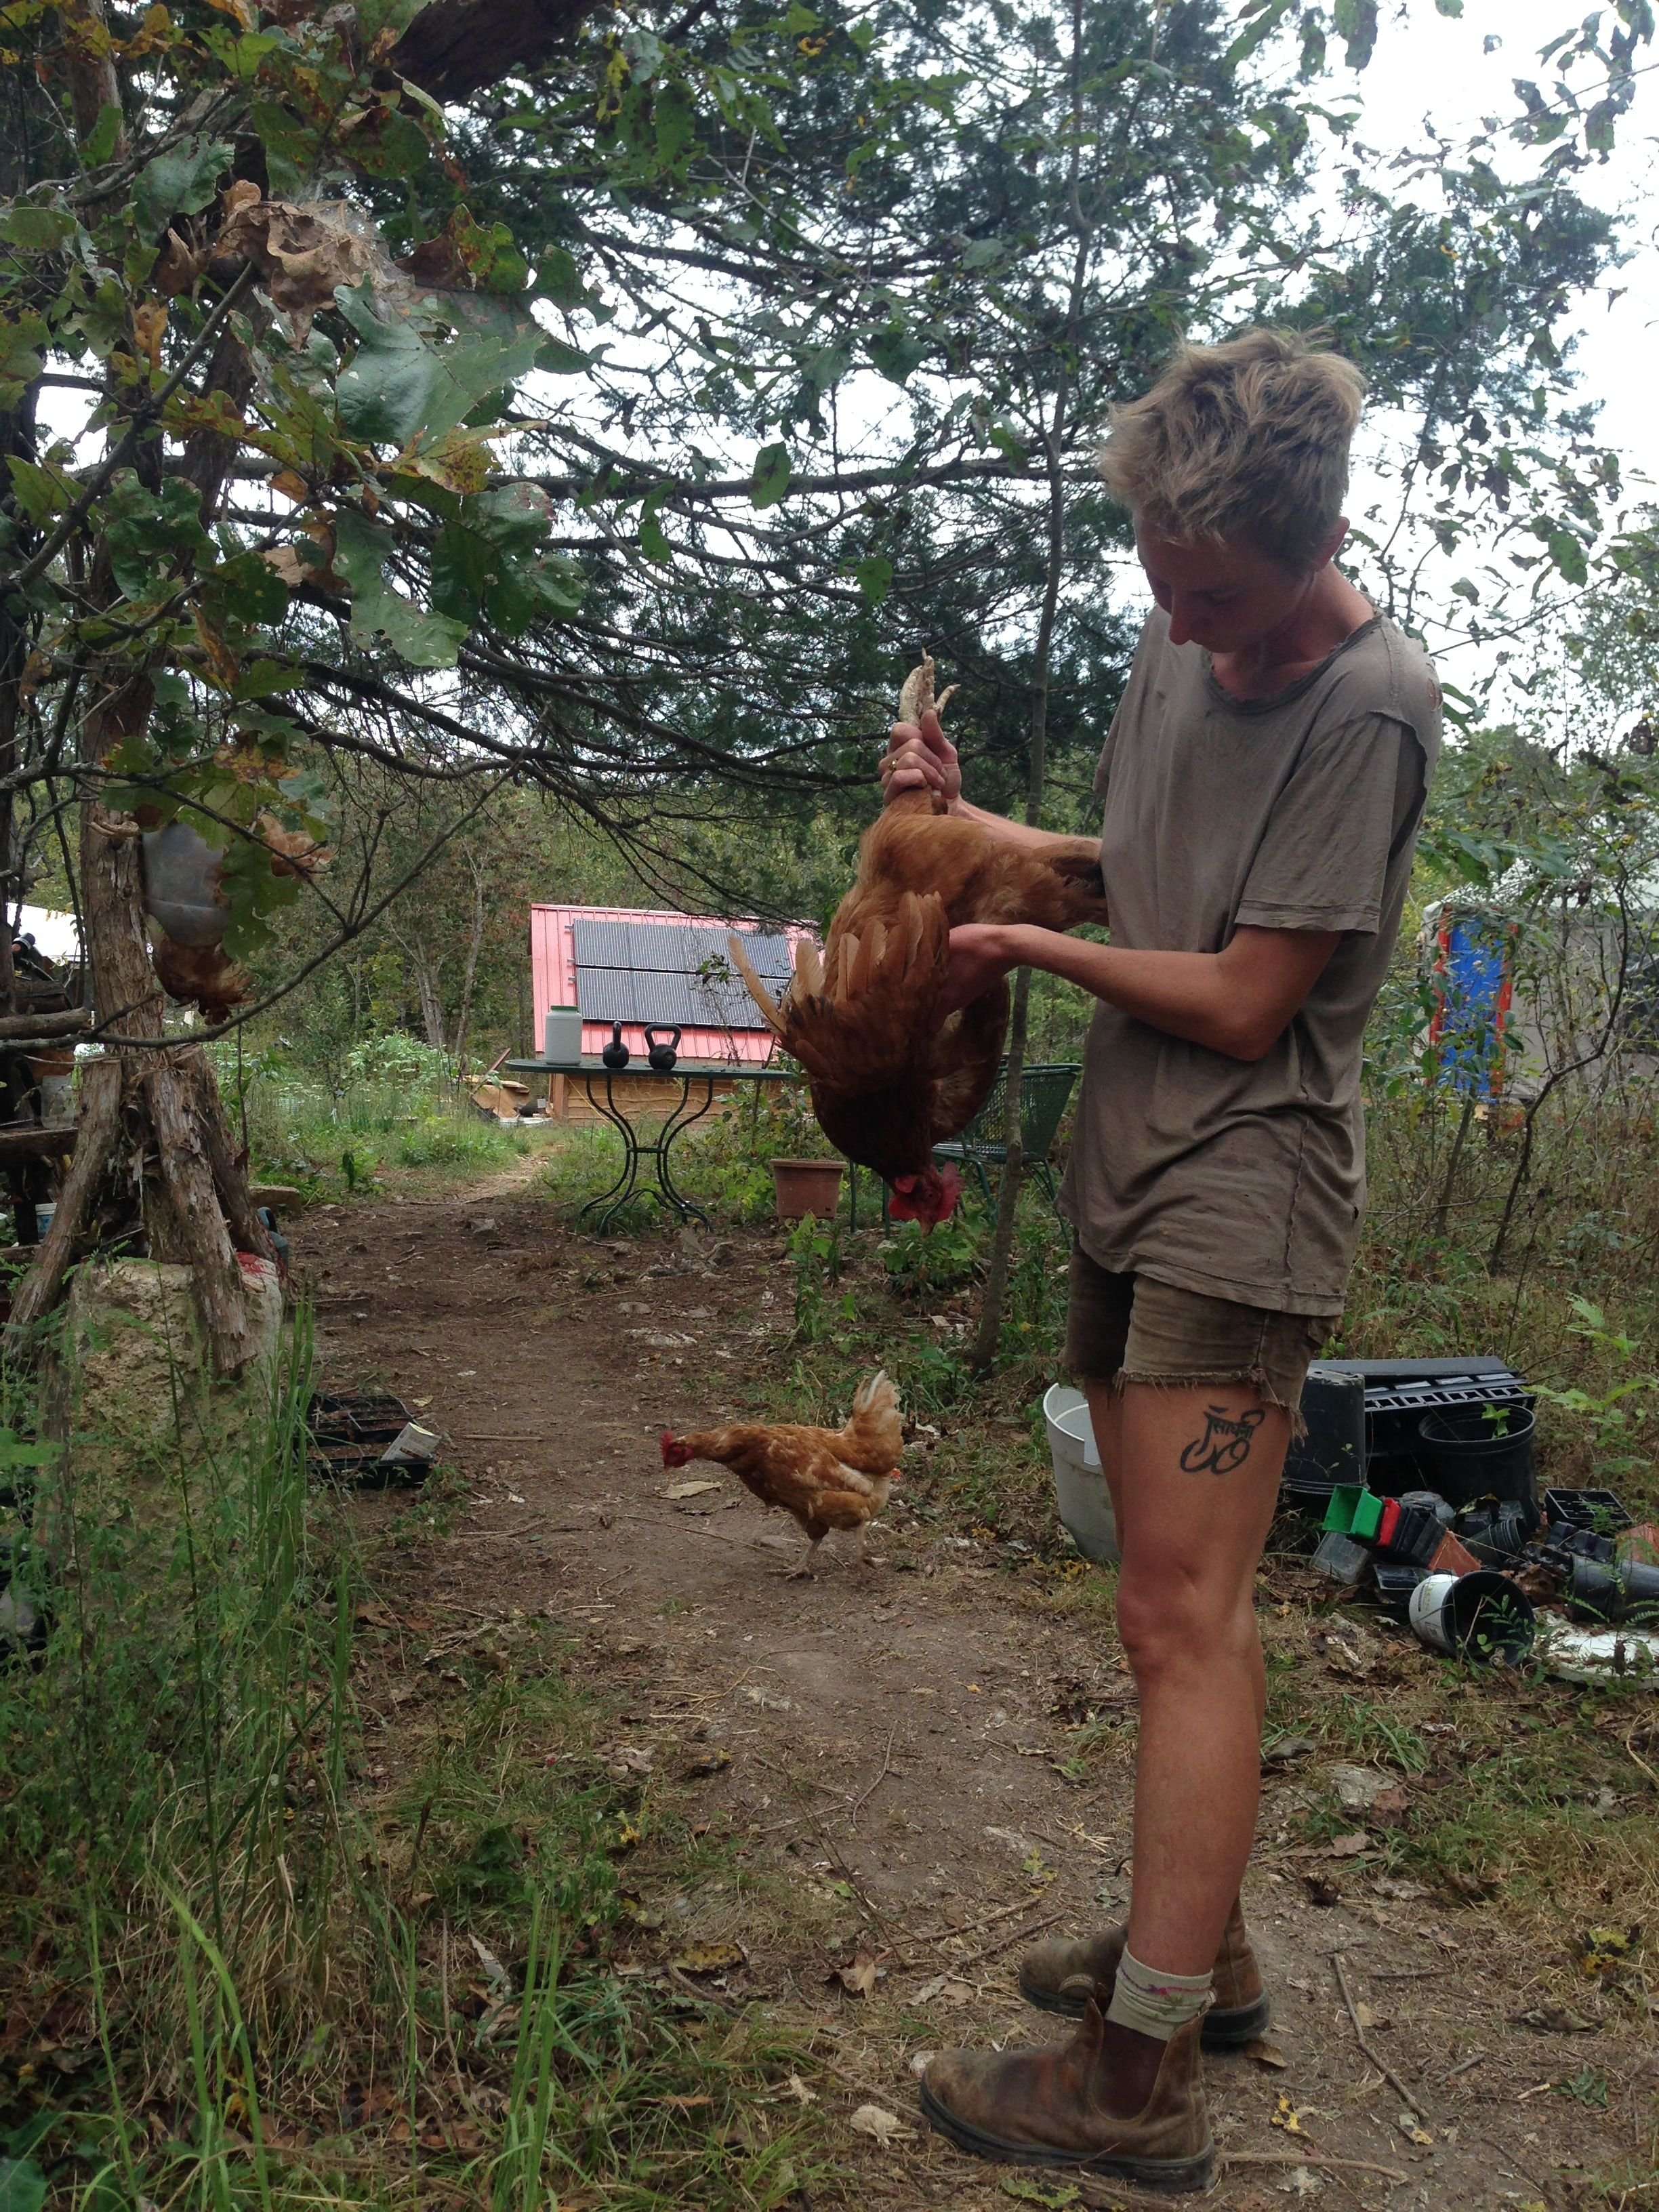

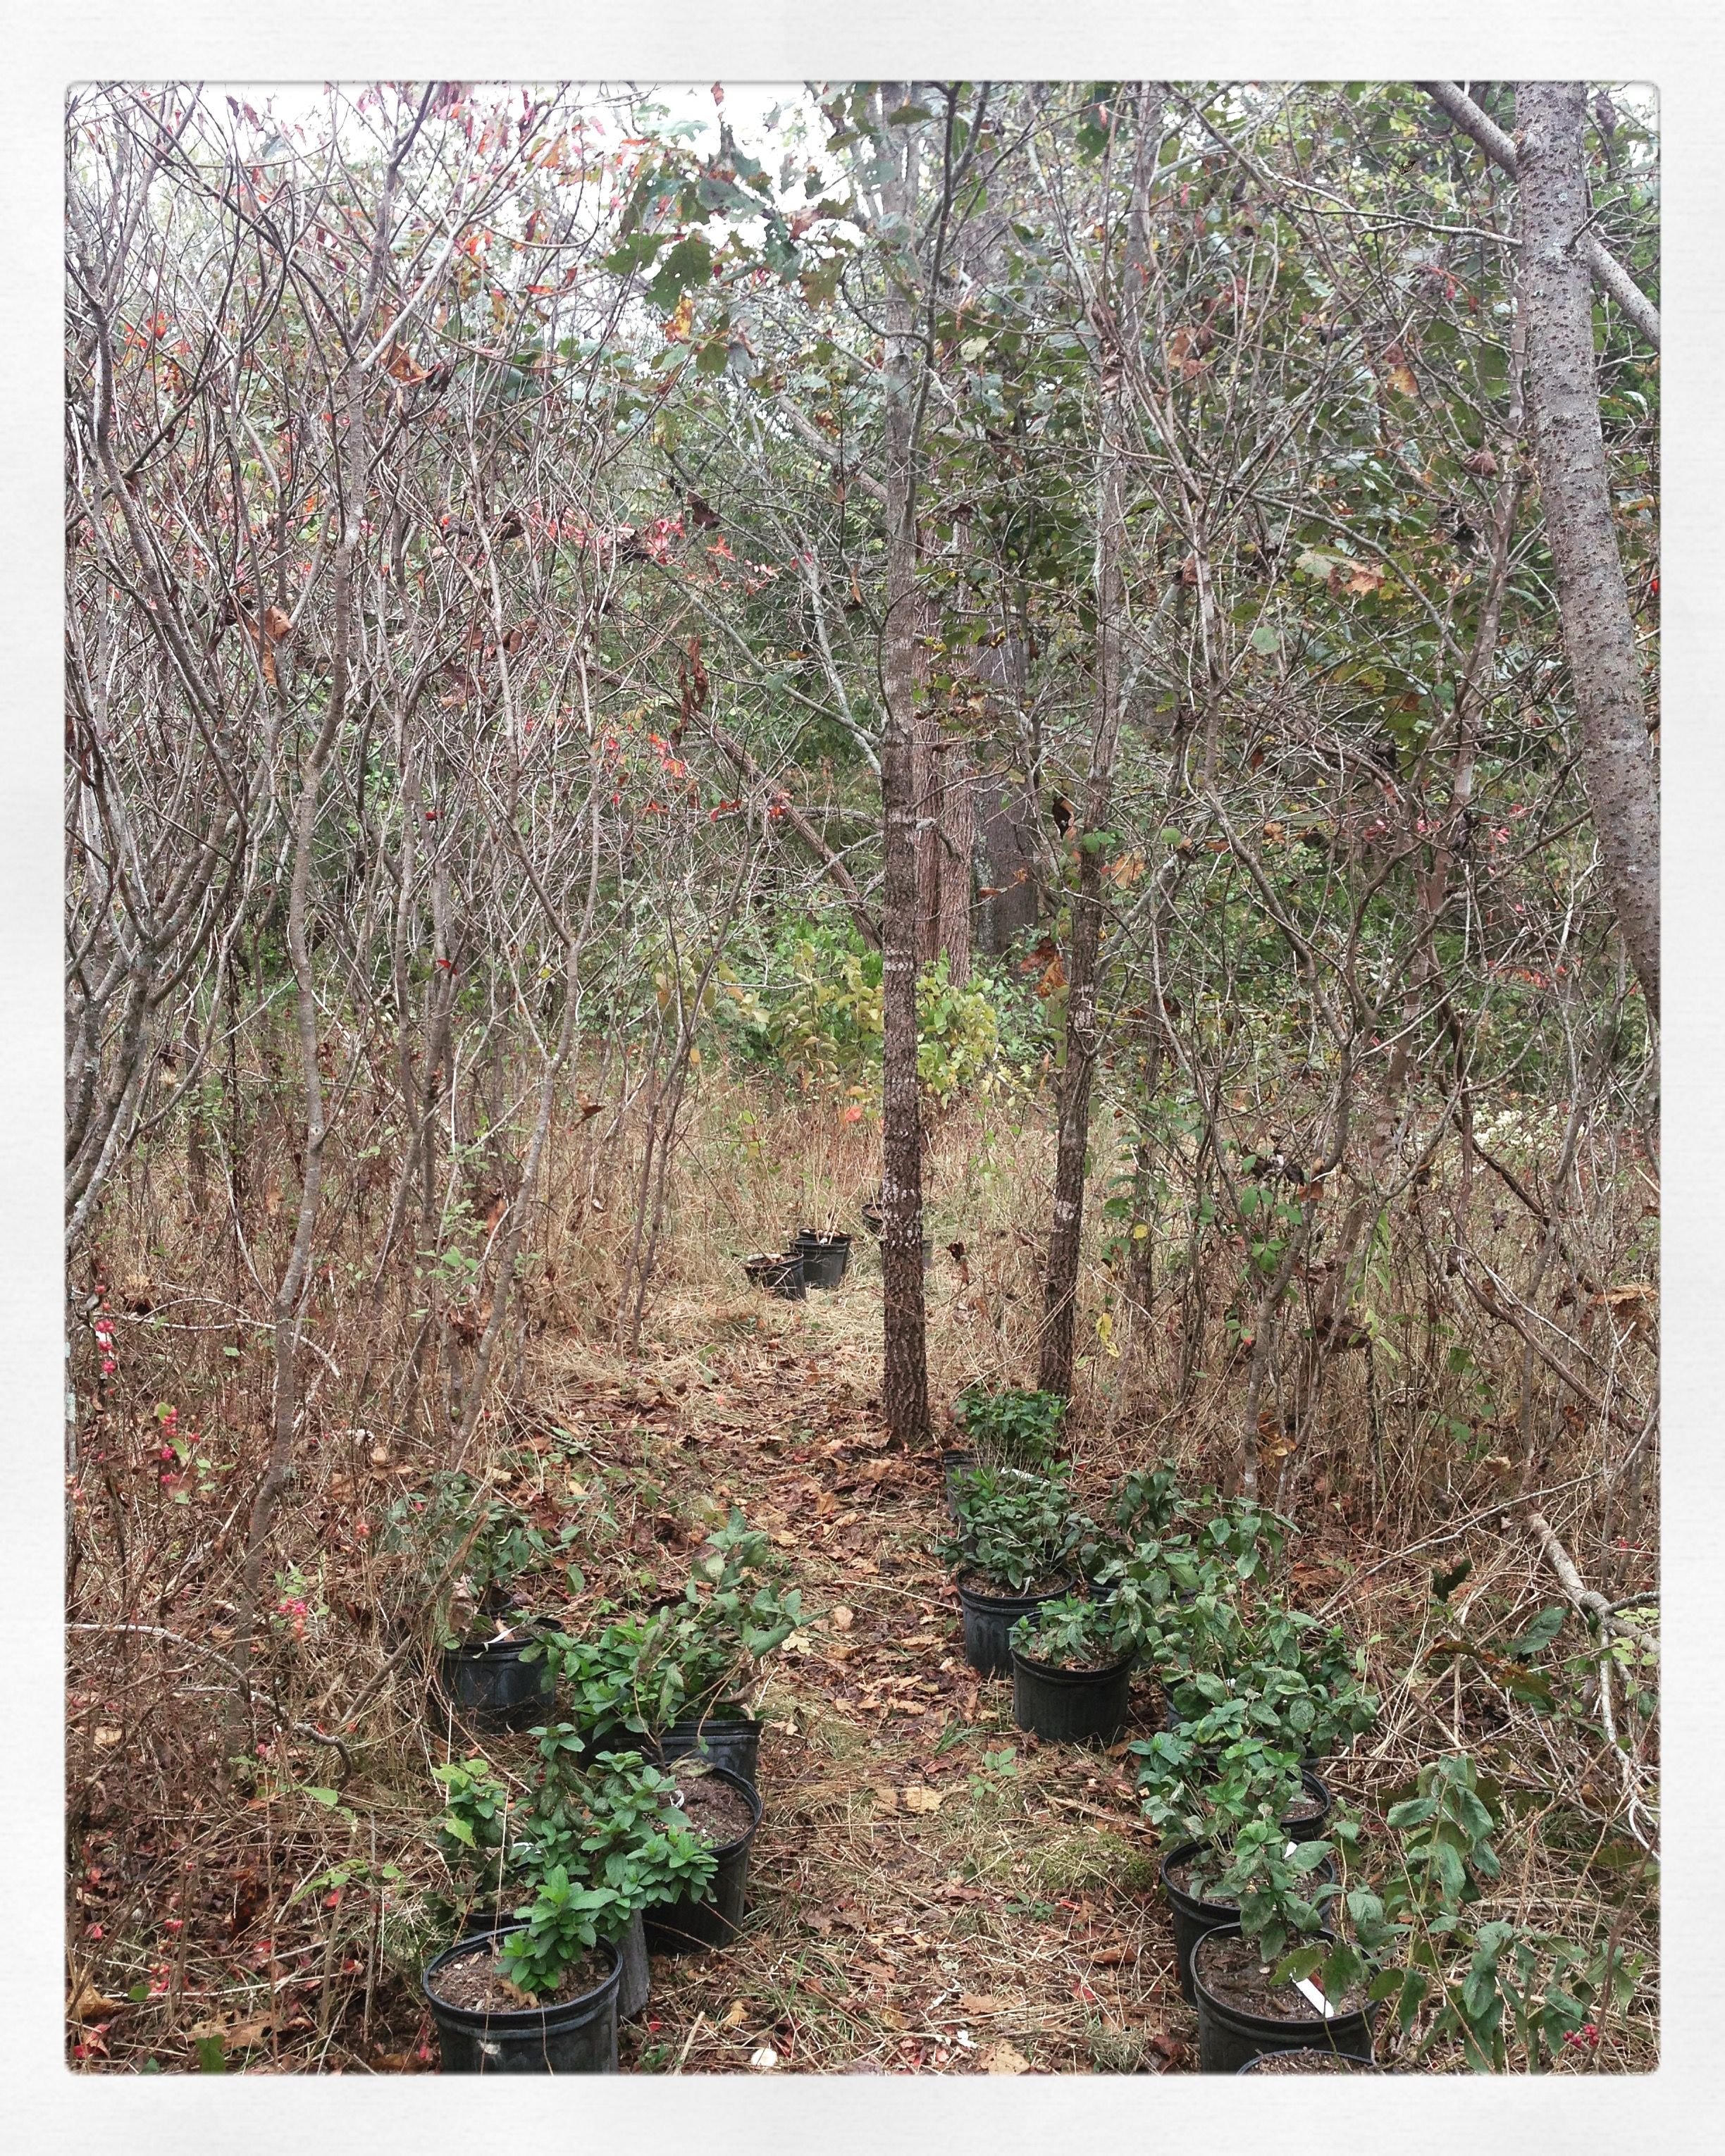


